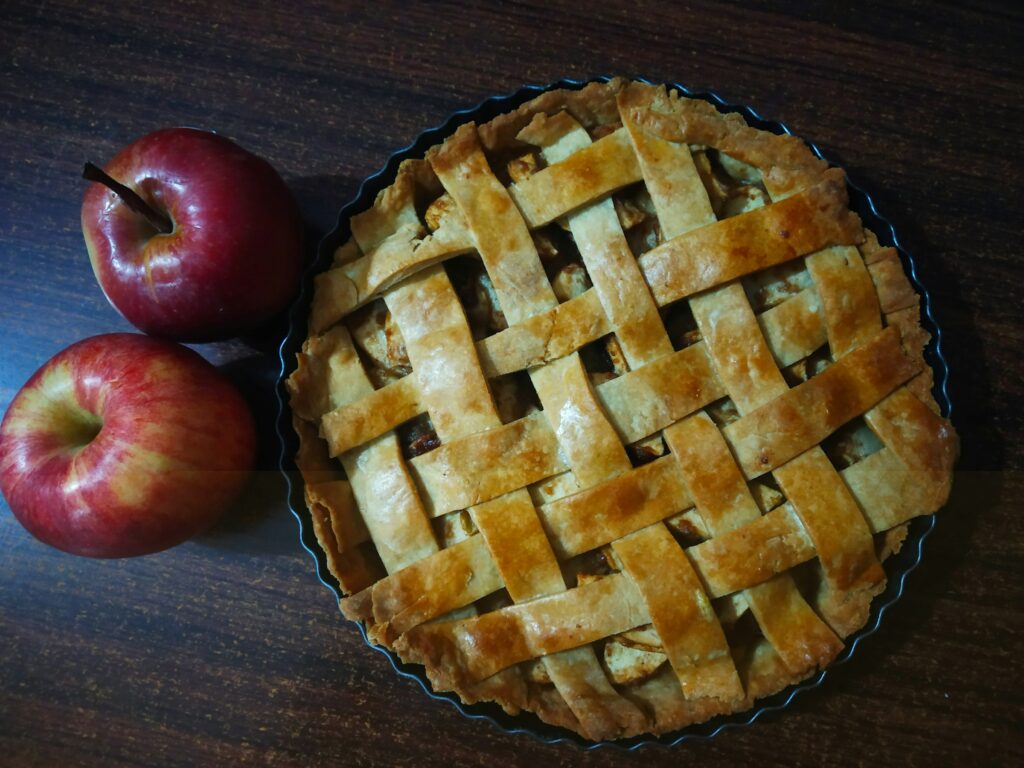
Nothing beats homemade apple pie. The smell alone makes your kitchen feel warm and welcoming, and that first slice with its flaky crust and soft, spiced apples is pure comfort.
This recipe works because it keeps things simple. You’ll learn how to make a buttery, flaky crust that holds its shape and a perfectly balanced filling that’s sweet, lightly tart, and never watery.
I’ll guide you step by step, so you can bake with confidence. By the end, you’ll have a classic apple pie you’ll be proud to serve — whether it’s for a family dinner or a special occasion.
Why You’ll Love This Apple Pie Recipe
Buttery, Flaky Homemade Crust
A good apple pie starts with a great crust. This one is buttery, tender, and flaky without being difficult to make.
The key is keeping your butter cold and handling the dough gently. That’s what creates those beautiful layers.
You don’t need special tools or advanced skills. Just simple ingredients, a light touch, and a little chill time. The result is a crust that holds the filling well and slices cleanly, without turning tough or crumbly.
Once you make it from scratch, you’ll taste the difference immediately.
Perfect Sweet-Tart Apple Filling
The filling strikes the right balance between sweet and tart. Using a mix of apples gives you both flavor and structure, so the slices stay soft but not mushy.
Warm spices like cinnamon and nutmeg add depth without overpowering the apples. A small amount of lemon juice brightens the flavor and keeps the filling from tasting flat.
The thickener ensures your pie sets properly, so you won’t end up with a watery slice.
Every bite is soft, gently spiced, and full of real apple flavor.
Easy-to-Follow Steps
This recipe breaks everything down into clear, manageable steps. You’ll know exactly when to chill the dough, how thick to slice the apples, and how to tell when the pie is fully baked.
There’s no guessing. Each step builds on the last, so you can move through the process with confidence. Even if it’s your first time baking a pie, you’ll feel in control from start to finish.
Simple instructions make all the difference.
Make-Ahead and Freezer-Friendly
Apple pie is perfect for planning ahead. You can prepare the dough in advance and keep it chilled until you’re ready to bake. You can also assemble the whole pie and refrigerate it before baking.
It freezes well too, either baked or unbaked. That means you can have a homemade dessert ready whenever you need it. Just bake or reheat, and it tastes just as comforting as the day you made it.
Having that flexibility makes this recipe even more practical for busy days.
Ingredients
For the Pie Crust (Double Crust – Top & Bottom)
- 2 ½ cups (315g) all-purpose flour
- 1 teaspoon salt
- 1 tablespoon granulated sugar (optional, for slight sweetness)
- 1 cup (226g) cold unsalted butter, cut into small cubes
- 6–8 tablespoons ice water, added gradually
For the Apple Filling
- 6–7 medium apples (about 2½ pounds / 1.1kg total) – a mix of Granny Smith and Honeycrisp, peeled and sliced
- ¾ cup (150g) granulated sugar
- ¼ cup (50g) brown sugar, packed
- 1 tablespoon fresh lemon juice
- 1½ teaspoons ground cinnamon
- ¼ teaspoon ground nutmeg
- 2 tablespoons cornstarch (or 3 tablespoons all-purpose flour)
- 1 teaspoon vanilla extract
- ¼ teaspoon salt
Optional
- 1 large egg + 1 tablespoon milk (for egg wash)
- 1–2 teaspoons coarse sugar for sprinkling on top
Best Apples for Apple Pie
Choosing the right apples makes a big difference in both flavor and texture.
Granny Smith apples work especially well because they are firm, slightly tart, and hold their shape while baking, which keeps your filling from turning into applesauce.
Their bright flavor also balances the sugar and spices, so the pie never tastes overly sweet. For the best results, I recommend mixing sweet and tart varieties.
Combining Granny Smith with a naturally sweet apple like Honeycrisp creates depth and balance, giving you a filling that tastes layered instead of one-note.
The sweet apples add natural sugars and softness, while the tart apples keep structure and freshness.
Try to avoid apples that are too soft or watery, such as Red Delicious, because they break down quickly in the oven and release too much liquid, which can lead to a mushy texture and soggy crust.
When you use firm, flavorful apples and mix them wisely, your pie will slice cleanly and taste bright, rich, and perfectly balanced in every bite.
How to Make Apple Pie (Step-by-Step)
Step 1: Make the Pie Dough
Start by combining the dry ingredients in a large bowl. Whisk together the flour, salt, and sugar so everything is evenly distributed. This helps create a balanced crust from the beginning.
Next, cut in the cold butter. Use a pastry cutter or your fingertips to work the butter into the flour until the mixture looks like coarse crumbs with small pea-sized pieces of butter still visible.
Those small butter pieces are what create flaky layers as the pie bakes. Work quickly so the butter stays cold.
Add the ice water one tablespoon at a time. Gently mix after each addition just until the dough starts to come together. Stop as soon as it forms a shaggy dough. Overmixing can make the crust tough.
Divide the dough into two discs, wrap them tightly, and chill for at least one hour. This resting time relaxes the gluten and firms up the butter, which makes rolling easier and improves the final texture.
Step 2: Prepare the Apple Filling
Peel, core, and slice the apples into even pieces about ¼-inch thick. Keeping the slices uniform helps them cook evenly, so you won’t have some pieces too firm and others too soft.
Place the apples in a large bowl and mix them with the granulated sugar, brown sugar, cinnamon, nutmeg, lemon juice, vanilla, and salt.
Toss well so every slice is coated. This ensures balanced flavor in every bite.
Sprinkle in the cornstarch (or flour) and mix again. The thickener is important because it absorbs excess juices as the apples bake.
This step helps prevent a watery filling and keeps your slices neat when serving.
Step 3: Assemble the Pie
Roll out one chilled dough disc on a lightly floured surface until it’s about 12 inches wide.
Carefully transfer it to a 9-inch pie dish and press it gently into the corners without stretching it. Stretching can cause shrinking during baking.
Pour the apple filling into the crust and spread it evenly. Slightly mound the apples in the center, as they will settle while baking.
Roll out the second disc for the top. You can place it whole over the filling or cut it into strips for a lattice design. Trim any excess dough, leaving about an inch overhang.
Fold the edges under themselves, then crimp with your fingers or a fork to seal. Cut a few small slits in the top crust if it’s fully covered. This allows steam to escape.
Step 4: Bake
Preheat your oven to 200°C (400°F). Place the pie on the lower-middle rack and bake for 45–55 minutes. If the edges brown too quickly, loosely cover them with foil.
You’ll know the pie is done when the crust is deep golden brown, and you see thick bubbles coming through the vents or lattice. The bubbling tells you the filling has thickened properly.
Let the pie cool for at least 2–3 hours before slicing. This step is important. Cooling allows the filling to set fully, which gives you clean slices instead of a runny center. Patience here truly pays off.
Pro Tips for the Perfect Apple Pie
Keep Butter Cold
Cold butter is the secret to a flaky crust. When small pieces of butter stay solid in the dough, they melt in the oven and create steam, which forms those tender layers.
If the butter softens too much before baking, the crust can turn dense instead of light. Work quickly, avoid warm hands when possible, and chill the dough whenever it starts to feel soft.
If your kitchen is warm, even popping the shaped pie into the fridge for 15–20 minutes before baking can make a noticeable difference.
Don’t Overwork the Dough
Mix the dough just until it comes together. Overmixing develops too much gluten, which leads to a tough crust instead of a tender one.
When rolling it out, use gentle pressure and turn the dough often to prevent sticking. If cracks appear, press them together lightly instead of kneading.
The less you handle it, the better the texture will be after baking.
Prevent a Soggy Bottom Crust
A soggy bottom usually happens when the filling releases too much moisture or the crust doesn’t bake long enough. Using the right amount of thickener helps control excess juices.
Baking the pie on the lower oven rack allows the bottom crust to cook more thoroughly. You can also place the pie on a preheated baking sheet to give the base an extra boost of heat.
Look for bubbling filling and a deep golden crust before removing it from the oven. Pale crust often means it needs more time.
Let It Cool Fully Before Slicing
It’s tempting to cut into the pie right away, but cooling is essential. As the pie rests, the filling thickens and sets. This gives you clean slices instead of a runny center.
Let it cool for at least two to three hours at room temperature. The wait may feel long, but it ensures your hard work pays off when you serve that first perfect slice.
Variations
Dutch Apple Pie (Crumb Topping)
If you prefer a crunchy topping instead of a top crust, Dutch apple pie is a great option.
Instead of covering the pie with dough, you’ll sprinkle a simple crumb mixture made from flour, brown sugar, butter, and a pinch of cinnamon over the apples.
As it bakes, the topping turns golden and slightly crisp while the apples stay soft underneath.
This version adds texture and a richer flavor without changing the filling itself. It’s simple to prepare and perfect if you enjoy a buttery crumble finish.
Caramel Apple Pie
For a deeper, sweeter flavor, add caramel to your apple filling. You can drizzle about ¼ to ½ cup of thick caramel sauce over the apples before adding the top crust.
The caramel melts into the filling as it bakes, creating a richer sauce around the fruit. Keep the sugar in the filling balanced so it doesn’t become too sweet.
This version pairs especially well with vanilla ice cream and makes the pie feel a little more special without adding extra steps.
Deep Dish Apple Pie
If you love a thick layer of apples, try a deep dish version. Use a deeper pie dish and increase the filling by about 50%.
Keep the same balance of sugar, spice, and thickener so the texture stays consistent. You may need to bake the pie slightly longer to ensure the center cooks through and thickens properly.
The result is a taller pie with generous slices and plenty of tender apples in every bite.
Mini Apple Pies
Mini apple pies are perfect for individual servings. You can use a muffin tin or small tart pans to create personal-sized pies with either full crust tops or simple lattice designs.
Cut the apple slices smaller, so they fit neatly inside the smaller shells and cook evenly. Reduce the baking time, checking for golden crust and bubbling filling as your guide.
These are easy to serve, fun to share, and great for gatherings where individual portions are more practical.
Storage & Make-Ahead Tips
Apple pie stores well when handled properly, which makes it a great dessert to prepare in advance.
After baking, you can keep the pie covered at room temperature for up to 2 days, as long as your kitchen is not too warm; this keeps the crust from drying out while maintaining good texture.
For longer storage, refrigerate the pie tightly covered for up to 4–5 days, knowing the crust may soften slightly, but the flavor will stay strong.
If you want to freeze it, you can freeze the pie either baked or unbaked. Wrap it tightly in plastic wrap and then foil to prevent freezer burn, and store for up to 3 months.
Bake unbaked pies straight from frozen, adding extra baking time, or thaw baked pies overnight in the fridge before reheating.
To reheat, place slices in a 180°C (350°F) oven for 10–15 minutes to crisp the crust and warm the filling evenly; avoid microwaving if possible, as it softens the pastry.
Serving Suggestions
Apple pie is delicious on its own, but the right pairing can elevate every slice.
A scoop of vanilla ice cream is the classic choice because its cool, creamy texture melts into the warm apples and balances the spices beautifully.
If you prefer something lighter, a generous spoonful of freshly whipped cream adds softness without overpowering the flavor of the pie.
For extra richness, drizzle warm caramel sauce over the top just before serving; it enhances the sweetness and adds a smooth finish that feels indulgent but simple.
If you enjoy a sweet-and-savory contrast, try serving your pie with a thin slice of sharp cheddar cheese on the side.
The saltiness of the cheese highlights the sweetness of the apples and creates a surprisingly balanced bite.
Final Thoughts
Homemade apple pie is simpler than it looks, and once you make it yourself, you’ll see how rewarding it is. Follow the steps, take your time, and trust the process. You’ve got this.
If you try this recipe, I’d love to hear how it turned out. Leave a comment and a rating to help others bake with confidence too.
And if you’re in the mood for more apple desserts, try apple crumble or a classic apple tart next. Happy baking!
FAQs
Why is my apple pie watery?
This usually happens if there isn’t enough thickener or the pie didn’t bake long enough. Make sure the filling is bubbling before removing it from the oven, and let the pie cool fully so it can set.
Can I use store-bought pie crust?
Yes, you can. It’s a great time-saver. Just follow the same filling and baking instructions for best results.
Should I cook the apples before baking?
It’s not necessary for this recipe. Thin, even slices and proper baking time will soften the apples perfectly in the oven.
How do I prevent a soggy crust?
Use the correct amount of thickener, bake on the lower rack, and wait for a deep golden crust before removing the pie. Cooling fully also helps the bottom set properly.
Can I freeze an apple pie before baking?
Yes. Wrap it tightly and freeze for up to 3 months. Bake straight from frozen and add extra baking time until golden and bubbling.
Grandma’s Classic Apple Pie – Simple, Timeless & Irresistible
Difficulty: Intermediate8
Slices30
minutes45
minutes2
hours30
minutesA classic homemade apple pie with a flaky buttery crust and perfectly spiced apple filling that slices beautifully every time.
Ingredients
- For the Crust:
2 ½ cups (315g) all-purpose flour
1 tsp salt
1 tbsp sugar (optional)
1 cup (226g) cold unsalted butter, cubed
6–8 tbsp ice water
- For the Filling:
6–7 medium apples (about 2½ lbs), peeled and sliced
¾ cup (150g) sugar
¼ cup (50g) brown sugar
1 tbsp lemon juice
1½ tsp cinnamon
¼ tsp nutmeg
2 tbsp cornstarch
1 tsp vanilla extract
¼ tsp salt
Optional: 1 egg + 1 tbsp milk (egg wash), coarse sugar
Directions
- Mix flour, salt, and sugar. Cut in cold butter until crumbly. Add ice water gradually until the dough forms. Divide, wrap, and chill for 1 hour.
- Toss sliced apples with sugars, lemon juice, spices, cornstarch, vanilla, and salt.
- Roll out one dough disc and place it in a 9-inch pie dish. Add filling. Top with the second crust or lattice. Seal edges and cut vents.
- Brush with egg wash if using. Bake at 200°C (400°F) for 45–55 minutes until golden and bubbling.
- Cool for 2–3 hours before slicing.
Notes
- Use a mix of tart and sweet apples for the best flavor.
- Bake until the filling is bubbling to avoid a watery pie.
- Let the pie cool fully for clean slices.
- Can be frozen before baking for up to 3 months.

Hi, I’m Sorenna Blythe, the baker and writer behind Mix Whisk Bake. I share simple, reliable recipes and honest kitchen moments to help home bakers bake with confidence and joy. When I’m not testing new treats, you’ll find me sipping coffee and dreaming up my next bake.


