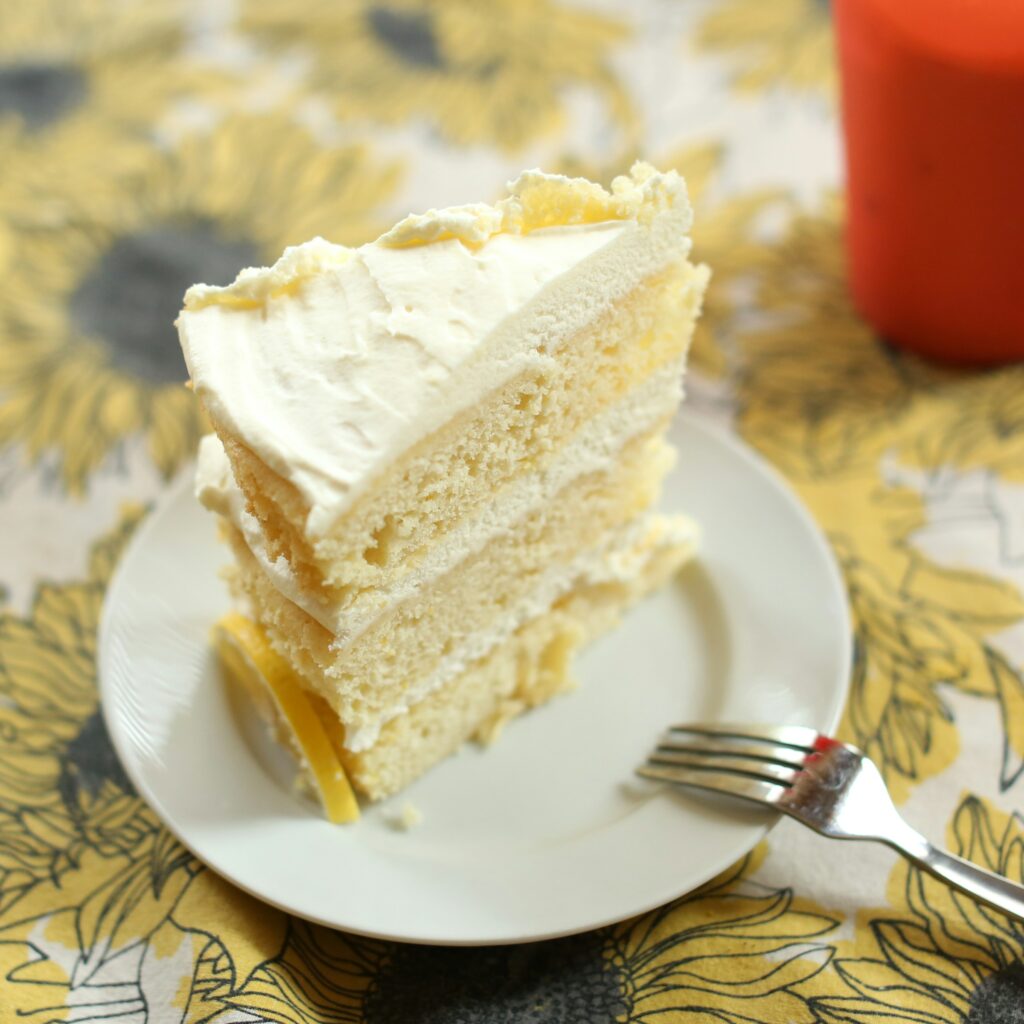
There’s something timeless about a classic vanilla cake. It’s the kind of dessert that fits in anywhere—birthday parties, Sunday lunches, or even a random Tuesday when you just need a sweet pick-me-up.
Simple? Yes. Boring? Never. When done right, a vanilla cake is soft, buttery, and full of cozy flavor.
In this step-by-step guide, I’ll walk you through exactly how to make one from scratch with no fancy tools or bakery skills required. Just real, straightforward baking you can actually enjoy!
Why Vanilla Cake Never Goes Out of Style
Vanilla cake is like the little black dress of the baking world. It’s always in style, endlessly versatile, and perfect for any occasion.
It’s a flavor nearly everyone agrees on. Not too bold, not too plain, and just a soft, sweet, comforting bite every time.
It brings back memories of childhood birthdays, school bake sales, and Sunday dinners at grandma’s.
The beauty of vanilla cake is that it plays well with others. Want to keep it simple? Just add a dusting of powdered sugar.
Feeling fancy? Layer it with rich buttercream, smooth ganache, or clouds of whipped cream. You can tint it with food coloring, swirl in jams, or stack it sky-high for a celebration.
And if you’re the kind of person who likes to mix things up, vanilla cake makes the perfect blank canvas. Add fruit, chocolate chips, or even a splash of citrus zest. The options are endless.
That’s the magic of it—reliable, customizable, and never out of place. Whether you’re baking for a crowd or just treating yourself, vanilla cake always delivers.
Ingredients You’ll Need
For the Cake
- 2 ½ cups all-purpose flour
Forms the base structure of your cake—light, but sturdy enough to hold layers. - 2 ½ tsp baking powder
Helps the cake rise and stay fluffy. - ½ tsp salt
Balances the sweetness and enhances flavor. - ¾ cup unsalted butter (room temp)
Adds richness and moisture for a tender crumb. - 1 ¾ cups granulated sugar
Sweetens the cake and helps create a soft texture. - 4 large eggs (room temp)
Bind everything together and add richness. - 1 tbsp vanilla extract
The star flavor—fragrant, warm, and essential for that classic taste. - 1 cup whole milk (room temp)
Keeps the batter smooth and the cake moist.
Optional Frosting – Basic Vanilla Buttercream
- 1 cup unsalted butter (room temp)
Creamy base for a smooth, spreadable frosting. - 3–4 cups powdered sugar
Sweetens and thickens the frosting—adjust to your taste and texture preference. - 1 tsp vanilla extract
Enhances the flavor and keeps it classic. - 2–3 tbsp milk or cream
Helps achieve the perfect consistency—add slowly to avoid thinning it too much.
Equipment Checklist
Here’s everything you’ll need to make baking smooth and mess-free:
- Two 8-inch or 9-inch round cake pans
Perfect for creating even layers that bake evenly and release cleanly. - Mixing bowls
One for dry ingredients, one for wet, and maybe an extra for frosting. - Electric hand mixer or stand mixer
Saves your arms and ensures a light, fluffy batter (and frosting too). - Measuring cups and spoons
Accuracy matters in baking—no guessing here. - Rubber spatula
Great for scraping every bit of batter and folding gently without overmixing. - Cooling rack
Allows air to circulate around the cake so it cools evenly and doesn’t get soggy. - Cake leveler (optional but helpful)
Makes stacking and frosting easier by evening out domed tops. A serrated knife works in a pinch too.
Step-by-Step Instructions
Step 1: Preheat & Prep
Start by preheating your oven to 350°F (175°C). This ensures your cakes go into a hot oven and rise properly from the get-go.
Next, grease two 8- or 9-inch cake pans with butter or nonstick spray. Then line the bottoms with parchment paper. This step saves you from the heartbreak of a stuck cake later on, trust me.
Step 2: Mix Dry Ingredients
In a medium bowl, whisk together flour, baking powder, and salt.
This might seem basic, but it’s key to even distribution. You don’t want all your baking powder hanging out in one bite and none in another.
Step 3: Cream Butter & Sugar
In a large mixing bowl, beat the butter and sugar together for about 3–4 minutes. Use a stand mixer or hand mixer if you’ve got one.
You’re looking for a pale, fluffy texture. This step traps air into the mixture, giving your cake a soft and tender crumb. It’s worth the extra minute or two.
Step 4: Add Eggs & Vanilla
Crack in the eggs one at a time, mixing well after each one. This helps them emulsify properly with the butter and sugar.
Then stir in that vanilla extract. It might seem like a small splash, but it packs the flavor that makes this cake sing.
Step 5: Alternate Mixing Dry Ingredients & Milk
Now, reduce the mixer speed and add half the flour mixture to your wet ingredients. Mix just until combined.
Pour in all the milk and mix again.
Then add the rest of the flour mixture and beat gently until everything is just blended. Don’t overmix—once it’s smooth, stop. Overbeating can make the cake tough instead of tender.
Step 6: Bake the Cakes
Divide the batter evenly between your prepared pans. Use a kitchen scale if you want perfect layers, or eyeball it and trust your gut.
Place in the oven and bake for 30–35 minutes, or until a toothpick poked into the center comes out clean.
Let the cakes cool in their pans for 10 minutes, then carefully flip them out onto a cooling rack. Let them cool completely before frosting. (Trying to frost a warm cake? Been there. It’s a melty mess.)
Step 7: Frost & Serve
Once the cakes are fully cooled, spread your favorite frosting over one layer, top with the second, and cover the whole thing in delicious buttercream (or whatever you’re craving).
Keep it rustic with swoops of frosting, or smooth it out for a sleek bakery finish. Add sprinkles, fruit, or leave it classic. It’s your cake, so have fun with it!
Then slice it up, serve, and enjoy the sweet rewards of your homemade masterpiece.
Tips for Success
Use Room Temperature Ingredients
Cold ingredients don’t mix well. Literally. When your butter, eggs, and milk are at room temperature, they blend smoothly and trap more air.
That means your cake turns out lighter, softer, and more even in texture. If you forget to take them out ahead of time (we’ve all been there), a quick warm water bath can help eggs and milk along in a pinch.
Don’t Overmix the Batter
Mixing too much is one of the biggest cake crimes out there. Once you add the flour, stir just until everything is combined.
Overmixing activates the gluten, which can lead to a dense, chewy cake, and nobody asked for a chewy vanilla sponge. Keep it gentle and brief.
Level the Cakes Before Stacking
If your cakes bake with a domed top, you’re not alone. To get that clean, bakery-style finish, use a serrated knife or a cake leveler to even out the layers before stacking.
It makes frosting easier and the final result much prettier (and way less wobbly).
Let Cakes Cool Completely Before Frosting
Tempting as it is to rush into frosting mode, it’s a trap. Frosting a warm cake leads to slippery layers and melted buttercream. Always give your cake enough time to cool on a rack.
Once it’s room temp, it’s frosting time. Your patience will pay off with a neater, more delicious final product.
Storage & Make-Ahead Tips
Once your vanilla cake is baked and cooled, storage is simple, but a few smart moves can make all the difference.
If you’re planning to enjoy it within a day or two, just keep it covered at room temperature for up to 2 days. A cake dome or an airtight container works great to keep it soft and fresh.
Got leftovers or need it to last longer? Go ahead and refrigerate the frosted cake for up to 5 days.
Just make sure it’s well covered so it doesn’t dry out or soak up fridge smells (because no one wants vanilla cake with a side of garlic).
If you’re prepping ahead for a party or want to save time, bake the layers, let them cool completely, then freeze the unfrosted cakes for up to 3 months.
Wrap each layer tightly in plastic wrap, then again in foil, or pop them into a freezer bag. When you’re ready to use them, thaw the layers at room temperature while still wrapped to prevent condensation.
It’s a total game-changer for stress-free baking days.
Flavor Variations
Add Lemon Zest for a Citrus Kick
A little lemon zest goes a long way. Just grate the outer peel of a fresh lemon (avoid the bitter white part) and mix it into your batter.
It brightens up the whole cake with a fresh, tangy edge that pairs beautifully with vanilla. Perfect for spring gatherings or when you want something a bit more refreshing.
Swap Milk with Buttermilk for Extra Tenderness
If you want a softer, slightly tangier crumb, buttermilk is your best friend. It reacts with the baking powder to create an even lighter texture.
The result? A super moist, tender cake that practically melts in your mouth. Just use the same amount of buttermilk as you would milk—no other changes needed.
Mix in Sprinkles for a Funfetti Vibe
Turn your classic cake into a party in a pan by folding in ½ cup of rainbow sprinkles right before baking.
Go for jimmies (the long kind) instead of nonpareils, which can bleed color. It’s an easy way to make birthdays or celebrations feel extra cheerful, and kids and adults both love it.
Use Almond or Coconut Extract for a Twist
Want to change the flavor without messing with the texture? Swap out half the vanilla extract with almond or coconut extract.
Almond gives a sweet, nutty note that feels bakery-fancy, while coconut brings a subtle tropical vibe. Just be careful because these extracts are strong, so a little goes a long way.
Final Words
Baking a classic vanilla cake from scratch isn’t hard, and it just takes a little patience and the right steps. The reward? A soft, buttery cake that tastes like home.
Once you’ve mastered the basics, make it your own. Add sprinkles, switch up the extract, or layer on your favorite frosting!
FAQs
Can I make this gluten-free?
Yes! Just use a 1:1 gluten-free flour blend (like Bob’s Red Mill or King Arthur). Make sure it includes xanthan gum for the best texture.
Can I bake it in a sheet pan or bundt pan?
You can. For a sheet cake, use a 9×13-inch pan and bake for about 35–40 minutes. For a bundt pan, extend the time to 45–55 minutes and grease it well.
How do I know when it’s done?
Stick a toothpick in the center; if it comes out clean or with a few crumbs, you’re golden. Also, the edges should slightly pull away from the pan, and the top will spring back when lightly pressed.
Can I use vanilla bean instead of extract?
Absolutely. Scrape out the seeds of 1 whole vanilla bean and use that instead of extract. It gives a deeper, more complex flavor and those lovely little specks that scream “made from scratch.”
How to Bake a Classic Vanilla Cake Step by Step (For Beginners)
Difficulty: Easy12
servings20
minutes35
minutes55
minutesA soft, buttery vanilla cake made from scratch that’s perfect for birthdays, celebrations, or everyday treats.
Ingredients
- For the Cake:
2 ½ cups all-purpose flour
2 ½ tsp baking powder
½ tsp salt
¾ cup unsalted butter (room temp)
1 ¾ cups granulated sugar
4 large eggs (room temp)
1 tbsp vanilla extract
1 cup whole milk (room temp)
- Optional Buttercream Frosting:
1 cup unsalted butter (room temp)
3–4 cups powdered sugar
1 tsp vanilla extract
2–3 tbsp milk or cream
Directions
- Preheat oven to 350°F (175°C). Grease and line two 8- or 9-inch round pans.
- Whisk flour, baking powder, and salt in a bowl. Set aside.
- Cream butter and sugar until light and fluffy (about 3–4 minutes).
- Beat in eggs one at a time. Stir in vanilla extract.
- Add half the flour mixture, mix. Add all milk, mix. Add the remaining flour mixture and mix just until combined.
- Divide batter evenly between pans. Bake for 30–35 minutes or until a toothpick comes out clean.
- Cool in pans for 10 minutes, then transfer to a wire rack.
- Once fully cooled, frost and decorate as desired.
Notes
- Make sure all ingredients are at room temperature for the best results.
- Don’t overmix the batter—mix just until combined.
- Cake layers can be frozen (unfrosted) for up to 3 months.
- Swap vanilla extract with almond or coconut for a flavor twist.

Hi, I’m Sorenna Blythe, the baker and writer behind Mix Whisk Bake. I share simple, reliable recipes and honest kitchen moments to help home bakers bake with confidence and joy. When I’m not testing new treats, you’ll find me sipping coffee and dreaming up my next bake.


