There’s nothing like a warm, chewy bagel fresh out of your own oven. Done right, homemade bagels can give your favorite bakery a run for its money with no fancy equipment required.
From that signature golden crust to a perfectly dense bite, bagels are one of the most satisfying bakes to master.
In this post, you’ll learn 7 key tips that make the difference between flat and fabulous. Let’s get rolling!
Tip 1: Use High-Protein Bread Flour
If you want that classic bagel chew, that satisfying resistance when you bite in, you need to start with high-protein bread flour.
Bagels aren’t meant to be soft and cakey like sandwich bread; they’re supposed to have a firm bite and structured crumb.
That structure comes from gluten, and gluten forms when flour and water meet, especially when the flour is packed with protein.
Bread flour typically contains around 12–14% protein, while all-purpose flour hangs out closer to 9–11%. That small difference makes a huge impact.
Lower-protein flours just don’t develop enough strength to create that iconic bagel density. Instead, you’ll end up with a fluffier, more bread-like result—not bad, but definitely not a proper bagel.
With bread flour, your dough can hold its shape, handle boiling, and still bake up with a shiny, tight crust. If chewy and springy is what you’re after, bread flour is non-negotiable.
Tip 2: Don’t Skip the Overnight Fermentation
If you want bakery-level flavor and texture, patience is your secret ingredient. Letting your bagels rest overnight in the fridge, known as cold fermentation, does wonders.
This slow process gives the yeast time to work its magic, building deeper flavor and a more complex aroma that quick rises just can’t match.
It also helps the gluten relax, making the dough easier to handle and shape the next day.
The result? Bagels with a smoother crust, tighter crumb, and that unmistakable depth of flavor you find in professional bakeries.
To do it, simply shape your bagels, place them on a parchment-lined tray, cover them lightly, and let them chill overnight.
The next morning, you’ll wake up to perfectly proofed bagels ready to boil and bake.
Tip 3: Nail the Dough Consistency
Bagel dough isn’t like your typical soft bread dough because it should be noticeably firmer and stiffer, almost like a firm clay that pushes back when you knead it.
This tight texture is what helps bagels hold their shape during boiling and gives them that dense, satisfying chew. If your dough feels sticky, wet, or too loose, it’s a red flag.
On the flip side, if it’s dry and cracking, you’ve gone too far. The sweet spot? A stiff but pliable dough that springs back slightly when poked.
Now, here’s the tricky part: flour isn’t always consistent. Some brands absorb more water than others, and humidity can throw things off too.
If your kitchen is damp, the dough may turn out wetter; if it’s dry, you might need a splash more water. The fix? Always add flour or water gradually near the end of mixing—just a tablespoon at a time.
Don’t chase exact measurements blindly; go by feel. Once you’ve nailed the texture a few times, your hands will know exactly when it’s right.
Tip 4: Boil Bagels Before Baking
Boiling your bagels isn’t optional because it’s the heart of what makes a bagel a bagel.
That quick bath in hot water sets the crust before it ever hits the oven, locking in the shape and giving you that signature chew. Skip this step, and you’ll end up with puffy rolls pretending to be bagels.
The trick is to boil each bagel for about 30 to 60 seconds per side. Less time means a thinner crust and softer chew; more time gives you a thicker, chewier bite. You also want to flavor the water.
A spoonful of barley malt syrup adds a subtle sweetness and helps the crust brown beautifully.
No syrup? Baking soda is your backup as it creates that classic pretzel-like finish. Just avoid skipping both. And don’t overcrowd the pot. Give each bagel space to bob and float like it’s on a lazy river.
Once boiled, they’ll look puffier, tackier, and ready to hit the oven running. This step is where the transformation happens, from doughy rounds to proper, glossy bagels with character.
Tip 5: Use the Right Shaping Technique
Shaping bagels might seem like a small detail, but it plays a big role in how they bake and look.
There are two classic methods: the rope-and-loop and the thumb-poke.
With the rope-and-loop, you roll the dough into a log, wrap it around your fingers, and seal the ends together, which is great for control, but it takes a bit of practice to seal without leaving a seam.
The thumb-poke method is quicker: you roll the dough into a ball, poke a hole through the center with your thumb, then gently stretch it into a ring.
Whichever route you take, the goal is the same—an even, symmetrical shape. If the hole is too small, it can close up while baking; too large, and you risk a lopsided ring.
Uneven shaping also leads to patchy browning, awkward puffing, and uneven texture. Consistency is key here. Try to shape each bagel roughly the same size and thickness so they boil and bake evenly.
It might feel fiddly the first time, but with a little rhythm in your hands, you’ll shape like a pro. And let’s be honest—perfectly round, shiny bagels are half the joy.
Tip 6: Bake on a Hot Surface
If you want that crisp, golden-bottomed bagel with a satisfying bite, the surface you bake on matters a lot.
A preheated baking stone or steel acts like a hot pan, giving the dough an instant burst of heat that sets the crust and helps the bagel rise evenly.
This direct contact also helps caramelize the underside, adding that bakery-style texture and color.
If you don’t have a stone or steel, don’t worry because you can still get great results by flipping a sturdy baking sheet upside down and letting it preheat in the oven.
Just place your boiled bagels on parchment paper and slide the whole thing onto the hot tray like a pizza.
Avoid placing the tray in a cold oven or skipping preheating because it’s the heat shock that gives bagels their signature crust.
Baking on a cold surface is like trying to toast bread in a lukewarm pan—it just doesn’t get the job done.
So fire it up, get that heat roaring, and give your bagels the firm foundation they need to bake like champs.
Tip 7: Don’t Overcrowd the Oven
Bagels need room to breathe, literally. If you cram too many onto one tray or crowd them together in the oven, they’ll steam instead of bake, and that gorgeous golden crust will fall flat.
Proper air circulation is what gives each bagel an even bake and consistent browning all around.
When they’re too close, heat can’t reach the sides properly, and you end up with pale, unevenly baked bagels that stick together like siblings on a road trip.
Give each one an inch or two of space, both on the tray and between racks if using multiple levels. If your oven’s on the smaller side, no shame in baking in batches.
Sure, it takes a bit longer, but the payoff is worth it because every bagel gets its moment to shine. Plus, it’s a great excuse to sneak one fresh out of the oven while the next round bakes.
Bonus: Flavor & Topping Tips
Once you’ve nailed the basics, it’s time to play. Bagels are a blank canvas for flavor, and a little creativity goes a long way.
Want a sweet twist? Knead in raisins and a dash of cinnamon before shaping. Feeling bold? Try chopped jalapeños and shredded cheddar for a spicy, cheesy kick.
You can even swirl in blueberry jam or mix in roasted garlic, but just make sure your add-ins are evenly distributed so every bite counts.
As for toppings, don’t skip the egg wash because it’s the secret to that glossy, golden finish and helps your toppings stick like glue.
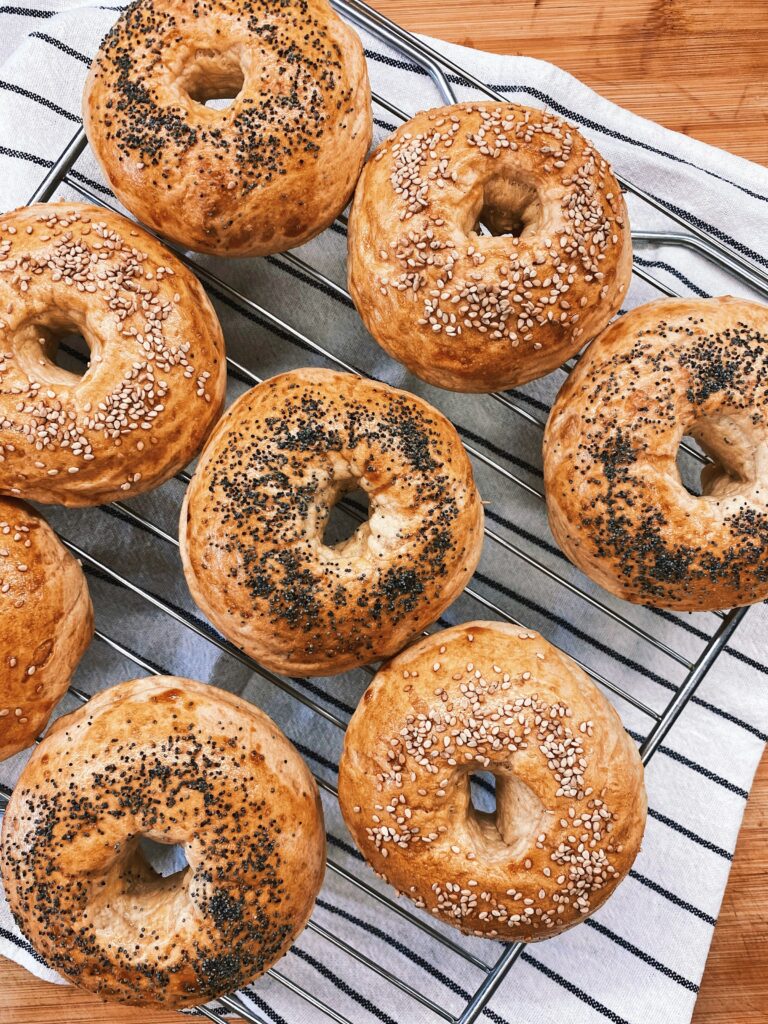
Sprinkle on sesame seeds, poppy seeds, onion flakes, or go full “everything” with a mix of all of the above. Just press them in gently before baking so they don’t fall off in the oven or during slicing.
If you’re making a batch of different flavors, label them with little dough dimples or scoring marks to tell them apart.
Bagels don’t have to be plain Janes, so go wild, have fun, and make every batch your own.
Final Words
Bagels might seem tricky at first, but like anything in the kitchen, practice makes perfect, and tastier.
The more you shape, boil, and bake, the better they’ll turn out. So grab some bread flour, clear your weekend plans, and give it a go.
Try a classic batch or mix in your own twist!
FAQs
Can I use all-purpose flour for bagels?
Yes, but the texture will be softer and less chewy. Bread flour has more protein, which gives bagels their signature bite.
If all-purpose is all you have, the bagels will still taste good, but just a bit more bread-like.
How long do homemade bagels stay fresh?
They’re best the day they’re made, but will stay fresh for up to 2 days in an airtight container at room temperature. For longer storage, slice and freeze them.
Can I freeze boiled but unbaked bagels?
Absolutely. After boiling, pat them dry, place on a tray, and freeze until solid. Then transfer to a freezer bag. Bake directly from frozen, but just add a few extra minutes to the bake time.
Why are my bagels flat?
Flat bagels usually mean overproofed dough or not enough gluten strength. Make sure your dough is firm, not too wet, and don’t let the bagels rise too long before boiling.
What’s the best way to reheat homemade bagels?
For that fresh-from-the-oven feel, slice and toast them. You can also warm whole bagels in a 350°F (175°C) oven for about 5–7 minutes.
Avoid the microwave because it softens the crust and makes it chewy in the wrong way.

Hi, I’m Sorenna Blythe, the baker and writer behind Mix Whisk Bake. I share simple, reliable recipes and honest kitchen moments to help home bakers bake with confidence and joy. When I’m not testing new treats, you’ll find me sipping coffee and dreaming up my next bake.


