There’s something timeless about a classic apple pie. It smells like home, tastes like comfort, and brings people together one slice at a time.
This from-scratch recipe walks you through every step, using simple ingredients you probably already have in your kitchen.
No store-bought shortcuts here—just buttery crust, tender spiced apples, and old-fashioned goodness.
Let’s bake a pie worth remembering.
Why You’ll Love This Homemade Apple Pie
This homemade apple pie isn’t just a dessert, but it’s an experience. You’ll love it because every bite is built from scratch with fresh, honest ingredients.
No store-bought crust, no canned filling, but just real butter, crisp apples, and cozy spices doing what they do best.
The crust bakes up golden and flaky, cradling warm, tender apples that melt in your mouth with every forkful.
It’s the kind of pie that earns you compliments at family dinners, gets passed around at potlucks until it’s gone, and makes a quiet weekend feel a little more special.
And let’s be real, nothing from the store compares to the smell of cinnamon apples bubbling away in your own oven. It’s rich, warm, and comforting, like wrapping yourself in a blanket on a chilly day.
Once you taste it, you’ll wonder why you ever settled for anything less.
Essential Ingredients
Here’s everything you’ll need to make a classic apple pie from scratch.
We’re keeping it simple, but every ingredient plays a key role in creating that perfect balance of buttery crust and sweet, spiced filling.
For the Pie Crust (Double Crust)
- 2 ½ cups all-purpose flour
The base of the crust gives it structure and helps keep it tender. - 1 cup (2 sticks) unsalted butter, chilled and cubed
Cold butter is the secret to a flaky, melt-in-your-mouth crust. - 1 tsp salt
Balances the flavor and enhances the buttery notes. - 1 tbsp sugar (optional)
Adds a touch of sweetness to the crust (especially good if you prefer a dessert-style pastry). - 6–8 tbsp ice water
Brings the dough together without melting the butter—keep it icy cold for best results.
For the Apple Filling
- 6–7 medium apples (Granny Smith + Honeycrisp blend recommended)
The star of the show—Granny Smith adds tartness, Honeycrisp brings sweetness and a juicy bite. - ¾ cup granulated sugar
Sweetens the filling and helps draw out the natural apple juices. - ¼ cup light brown sugar
Adds a rich, caramel-like depth and extra moisture. - 2 tbsp all-purpose flour
Thickens the filling so it’s not too runny once baked. - 1 tsp cinnamon
A must for warm, classic apple pie flavor. - ¼ tsp nutmeg
Adds a subtle, earthy spice that rounds out the sweetness. - 1 tbsp lemon juice
Brightens the filling and prevents the apples from browning. - 1 tsp vanilla extract
Adds a comforting aroma and enhances the apple flavor. - 2 tbsp unsalted butter (for dotting)
Melted into the filling during baking for a richer, smoother texture.
For Assembly
- 1 egg (for egg wash)
Brushed on the crust for that golden, glossy finish. - 1 tbsp milk or water
Thins out the egg wash so it spreads easily. - Coarse sugar for sprinkling (optional)
Adds sparkle and a little crunch to the finished crust.
Recommended Equipment
Having the right tools on hand makes the whole pie-making process smoother and way more enjoyable. Here’s what you’ll need to bake your apple pie like a pro:
- 9-inch pie dish
The perfect size for a double-crust pie—deep enough to hold all that juicy apple filling without overflowing. - Mixing bowls
You’ll need a few—one for the crust, one for the filling, and maybe a spare for your egg wash. - Pastry blender or food processor
Helps cut cold butter into the flour quickly and evenly for that flaky crust texture. - Rolling pin
Essential for rolling out the dough into smooth, even circles that fit your pie plate just right. - Apple peeler/corer/slicer
Speeds up prep time big time, especially helpful when dealing with 6 or more apples. - Pastry brush
Used to apply egg wash to the crust for that beautiful golden finish. - Knife or pie crust cutter (for lattice)
Lets you cut clean strips for a classic lattice top—or get creative with shapes and patterns.
Step-by-Step Instructions
Let’s break this process down into simple steps. Take your time, trust the process, and enjoy the aroma along the way.
1. Make the Pie Dough
Start by combining the flour, salt, and sugar in a large mixing bowl. Stir to blend. Add the cold, cubed butter next. Use a pastry blender or your fingertips to cut the butter into the flour.
You want pea-sized bits because this is what gives you that flaky, layered crust. Then, add ice water a tablespoon at a time, gently mixing until the dough just comes together.
It should hold its shape but not be sticky. Divide the dough in half, shape into flat discs, wrap tightly, and chill for at least 1 hour.
This resting time helps relax the gluten and keeps the butter cold, which is key to a tender crust.
2. Prepare the Apple Filling
While the dough chills, prep your apples. Peel, core, and thinly slice them. Aim for even slices so they cook uniformly.
Toss the slices with both sugars, flour, cinnamon, nutmeg, lemon juice, and vanilla in a large bowl. Mix until evenly coated.
Let it sit for about 15–30 minutes if you have time, because this draws out some of the juice and gives the filling a richer flavor.
If you prefer extra-soft apples, you can sauté the mixture for a few minutes in a pan, but it’s not required.
3. Roll Out the Dough
Once the dough is chilled and firm, lightly flour your surface and roll out one disc to about 12 inches wide. Carefully transfer it to your 9-inch pie dish and gently press it into the bottom and sides.
Don’t stretch the dough—just let it settle naturally. Pour in your apple filling and spread it out evenly. Dot the top with small pieces of butter.
This melts into the apples as they bake and adds a smooth richness to the filling.
4. Add the Top Crust
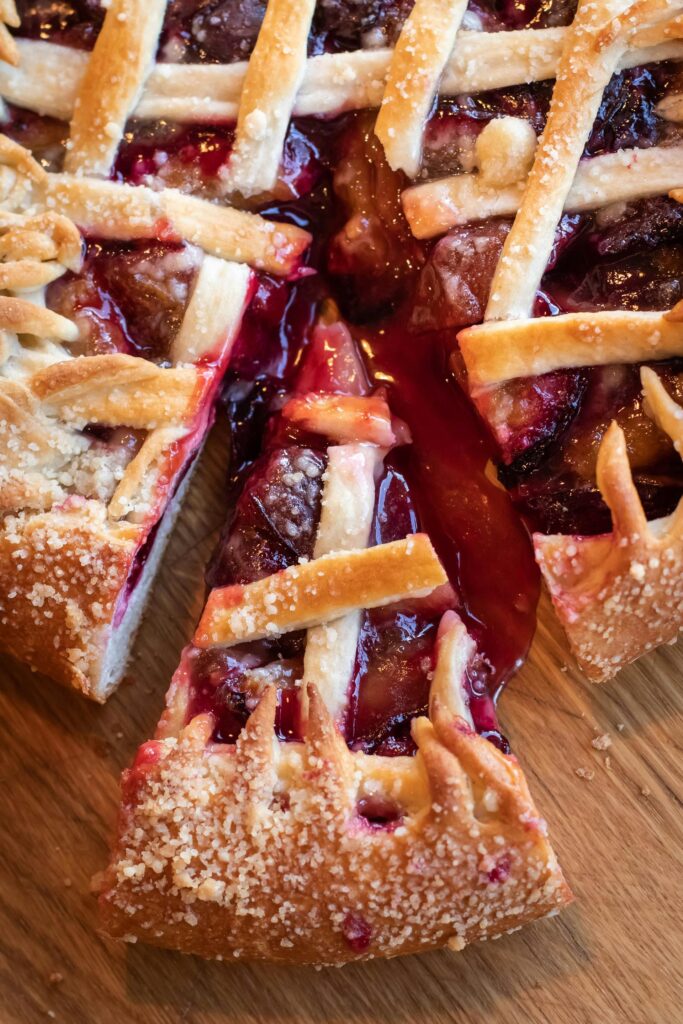
Roll out the second dough disc to the same size. You can place it on whole or cut it into strips to make a lattice. Either way, lay it over the apples and trim any excess.
Pinch the edges to seal—crimp with a fork or your fingers for a decorative finish. If using a solid top crust, cut a few small slits in the center to let steam escape.
Brush the surface with your egg wash (egg mixed with milk or water), and if you’d like a little sparkle, sprinkle coarse sugar on top.
5. Bake
Place your pie on a baking sheet to catch any drips, then bake at 400°F (200°C) for 20 minutes. After that, reduce the heat to 375°F (190°C) and bake for another 30–40 minutes.
Keep an eye on the crust because if it’s browning too quickly, loosely tent it with foil. You’ll know it’s ready when the crust is golden and the filling is bubbling through the slits or lattice.
Let the pie cool for at least 2 hours before slicing. This gives the filling time to set, so you don’t end up with a soupy mess.
Apple Pie Baking Tips
Want that perfect bakery-style pie? These simple tips can make all the difference.
Use a Mix of Tart and Sweet Apples for Depth
Don’t settle for just one apple variety. Mixing tart apples like Granny Smith with sweeter ones like Honeycrisp or Fuji gives your filling more flavor, balance, and texture.
The tart ones hold their shape and offer a slight bite, while the sweet ones break down and add that syrupy richness. It’s like a little flavor dance in every forkful.
Chill Crust Dough for Flakiness
Warm dough = tough crust. Cold dough = flaky, tender layers.
Always chill your dough for at least an hour before rolling it out, and if it starts to warm up while you’re working, pop it back in the fridge for a few minutes.
Keeping the butter cold helps it melt during baking, creating steam that forms delicate, flaky layers. No shortcuts here because it’s science and flavor working together.
Bake on a Sheet Pan to Catch Drips
Apple pies like to bubble over when they bake, especially when the filling is juicy (which is a good thing!).
To save yourself a burned-sugar cleanup at the bottom of your oven, place your pie dish on a rimmed baking sheet.
It catches any sticky overflow and makes it easier to take the pie in and out of the oven without accidents.
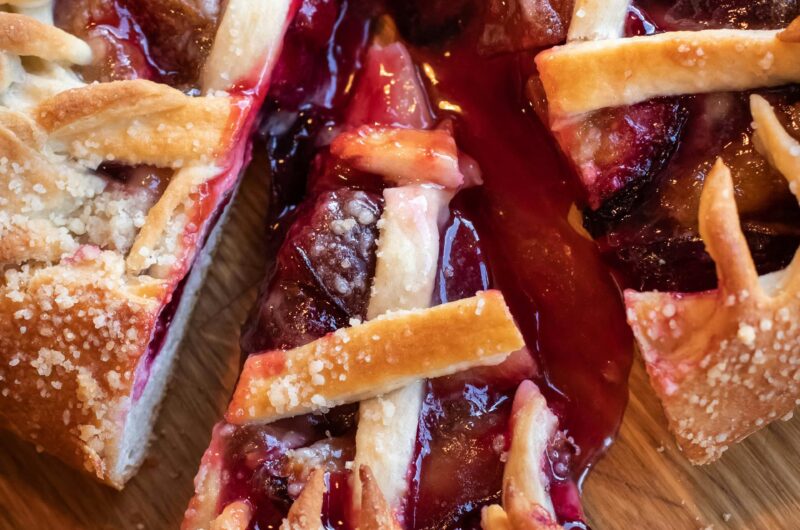
Let Pie Cool Fully for Clean Slices
It’s tempting to dig in while it’s hot and gooey, but try to resist. If you cut the pie too soon, the filling will spill everywhere and won’t hold its shape.
Give it at least 2 hours to cool at room temperature. The filling thickens as it cools, giving you neat, picture-worthy slices that don’t fall apart.
Bonus: it tastes even better once it’s had time to settle.
Optional: Brush Crust with Apricot Jam for a Glossy Finish
Want your pie to shine like it came from a bakery window? Warm a bit of apricot jam and lightly brush it over the top crust right after baking.
It adds a beautiful golden gloss and a subtle fruity note without overpowering the apple flavor. It’s not essential, but it’s a sweet little extra if you’re feeling fancy.
Common Variations
Apple pie is a classic, but that doesn’t mean you can’t play around with it.
One tasty twist is adding caramel to the filling. Just drizzle in a bit of store-bought or homemade caramel sauce before sealing the crust. It gives the pie a rich, buttery sweetness that’s hard to resist.
If you’re not into top crusts, swap it out for a crumb or streusel topping made with flour, butter, and brown sugar. It adds a sweet, crunchy texture that’s more like a crumble and still just as comforting.
Feeling fancy or short on time? Use puff pastry instead of pie dough. It puffs up golden and crisp in the oven and gives your pie a slightly lighter, flakier finish.
You can also bulk up the filling with extras like raisins, cranberries, or chopped pecans for added texture and flavor—each brings its own personality to the party.
And if you’re baking for someone with dietary restrictions, it’s easy to make it dairy-free or vegan.
Just use plant-based butter or coconut oil for the crust and skip the egg wash because brushing with a little almond milk works just as well.
Storage & Reheating Tips
Once your pie has cooled and you’ve snuck a slice (or two), it’s time to think about storage.
At room temperature, your apple pie will stay fresh for up to 2 days if it’s covered tightly with foil or plastic wrap.
If you need to keep it longer, pop it in the fridge for up to 5 days, but just know the crust may soften a bit, but the flavor holds strong.
When it comes to reheating, skip the microwave if you can. Instead, warm individual slices in the oven at 325°F for about 10–15 minutes.
This keeps the crust crisp and brings the filling back to life without making it soggy. And yes, you can freeze the whole pie once it’s baked.
Let it cool completely, wrap it tightly in plastic and foil, then freeze for up to 3 months. To serve, reheat it straight from frozen at 350°F for about 30–40 minutes—no thawing needed.
Final Words
There’s something special about baking a pie from scratch. It’s messy, a little rustic, and absolutely worth it. If you’ve never done it before, this weekend’s the perfect time to try.
You don’t need fancy tools, but just good apples, cold butter, and a bit of patience.
And when that golden pie comes out of the oven, you’ll feel like a rockstar!
FAQs
What are the best apples for apple pie?
A blend of Granny Smith and Honeycrisp offers the perfect balance of tart and sweet.
Can I make the crust ahead of time?
Yes, up to 3 days in the fridge or freeze for 3 months.
Why is my pie soggy on the bottom?
Try blind baking the crust or baking on a hot sheet pan.
Can I freeze apple pie?
Absolutely. Freeze baked or unbaked—wrap tightly and label.
Do I need to peel the apples?
Yes, for a tender bite and classic texture.
How to Bake a Classic Apple Pie from Scratch (Step-by-Step)
Difficulty: Moderate8
servings30
minutes1
hour1
hour30
minutesA homemade double-crust apple pie with tender spiced apples and a buttery, flaky crust—perfect for holidays or cozy weekends.
Ingredients
- For the Pie Crust:
2 ½ cups all-purpose flour
1 cup (2 sticks) unsalted butter, chilled and cubed
1 tsp salt
1 tbsp sugar (optional)
6–8 tbsp ice water
- For the Filling:
6–7 medium apples (Granny Smith + Honeycrisp recommended)
¾ cup granulated sugar
¼ cup light brown sugar
2 tbsp all-purpose flour
1 tsp cinnamon
¼ tsp nutmeg
1 tbsp lemon juice
1 tsp vanilla extract
2 tbsp unsalted butter (for dotting)
- For Assembly:
1 egg
1 tbsp milk or water
Coarse sugar (optional)
Directions
- Make the Dough: Mix flour, salt, and sugar. Cut in butter until crumbly. Add ice water until the dough comes together. Divide, shape into discs, and chill for 1 hour.
- Prep the Filling: Peel, core, and slice apples. Toss with sugars, spices, flour, lemon juice, and vanilla. Let sit for 15–30 minutes.
- Assemble the Pie: Roll one dough disc and place it in a 9-inch pie dish. Fill with apple mixture. Dot with butter. Roll the second disc and add the top crust. Crimp edges. Cut slits or make a lattice.
- Finish and Bake: Brush with egg wash, sprinkle sugar if using. Bake at 400°F (200°C) for 20 minutes, then reduce to 375°F (190°C) and bake 30–40 minutes more. Tent with foil if crust browns too fast.
- Cool: Let the pie cool at least 2 hours before slicing.
Notes
- Mix tart and sweet apples for a balanced flavor.
- Freeze fully baked pie for up to 3 months. Reheat at 350°F straight from frozen.
- For a glossy finish, brush baked crust with warm apricot jam.

Hi, I’m Sorenna Blythe, the baker and writer behind Mix Whisk Bake. I share simple, reliable recipes and honest kitchen moments to help home bakers bake with confidence and joy. When I’m not testing new treats, you’ll find me sipping coffee and dreaming up my next bake.


