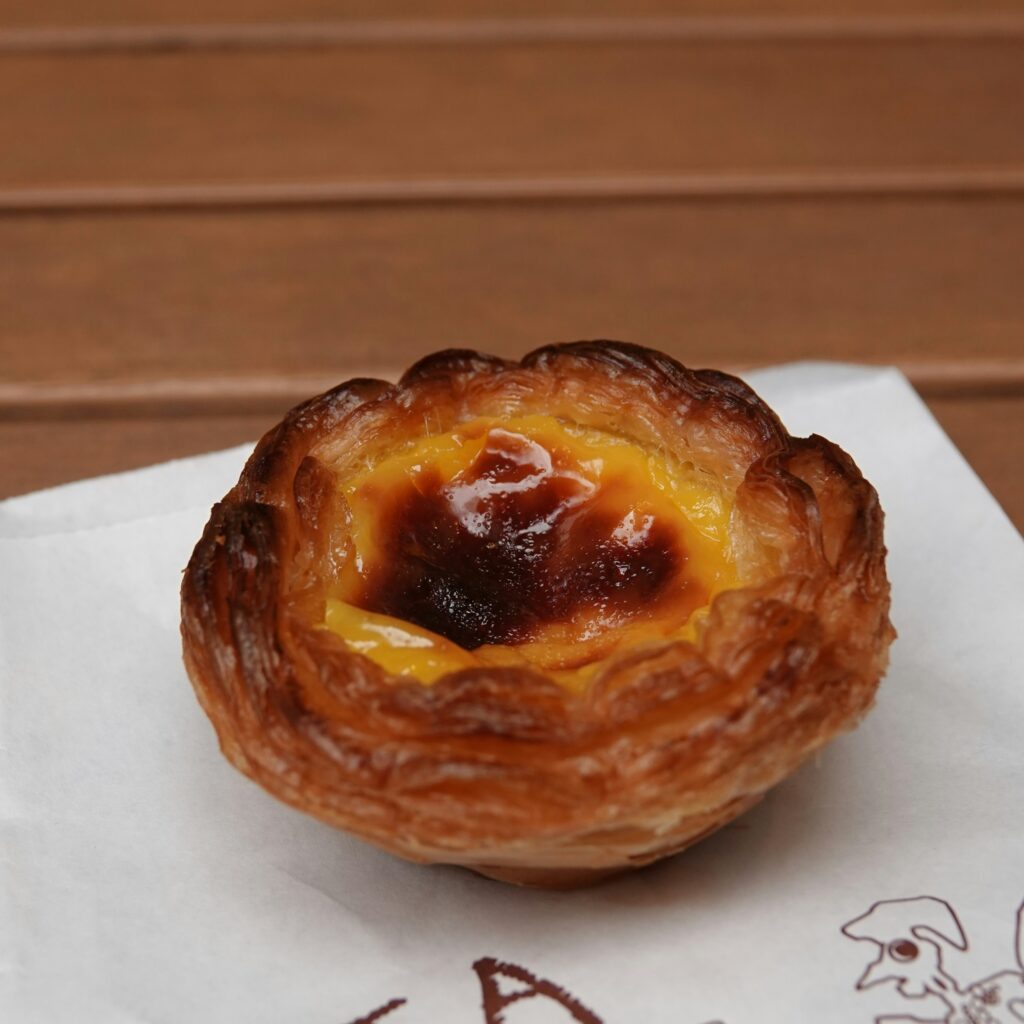
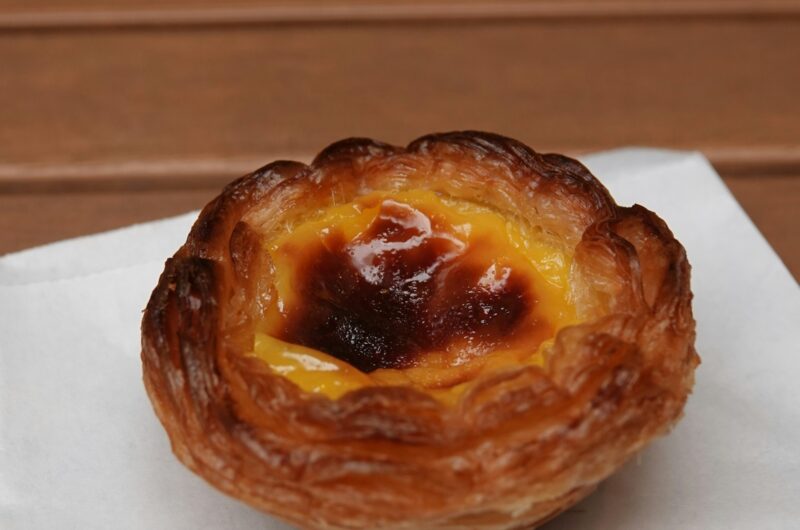
There’s something special about biting into a warm egg tart. The crust is flaky and buttery, and the center is smooth, creamy custard that melts in your mouth.
You’ve probably seen them in bakery windows or enjoyed them at dim sum restaurants. They look delicate, but they’re easier to make at home than you might think.
This homemade version tastes even better because it’s fresh from your oven, made with simple ingredients you already know and trust.
No shortcuts on flavor. Just crisp pastry and silky filling done right.
In this post, I’ll show you exactly how to make egg tarts step by step, with clear tips to help you get that perfect texture every time. Let’s get baking.
What Are Egg Tarts?
Egg tarts are small pastry cups filled with baked egg custard, and they have roots in both Chinese and Portuguese baking traditions.
The version most people know today was shaped by Portuguese custard tarts, especially the famous Pastel de Nata, which were introduced to southern China through trade and travel.
Over time, bakeries in Hong Kong adapted the recipe to suit local tastes, creating what we now call Hong Kong–style egg tarts.
The Hong Kong version usually has a shortcrust or cookie-like pastry shell and a smooth, pale yellow custard that is lightly sweet and very silky.
Portuguese-style egg tarts, on the other hand, often use flaky puff pastry and are baked at a higher temperature so the tops develop golden brown, slightly caramelized spots.
The texture is the key difference: Hong Kong–style is delicate, soft, and custardy with a clean finish, while Portuguese-style is a bit richer, creamier, and slightly firmer with a toasted surface.
Both share the same heart—eggs, sugar, and milk—but the crust, bake time, and finish give each one its own character.
Why You’ll Love This Recipe
Buttery, Flaky Crust
The crust is tender, lightly crisp, and rich without feeling heavy. When baked properly, it holds its shape while still breaking apart easily with each bite.
Chilling the dough and using cold butter creates thin layers that give you that gentle flake.
You get structure and softness at the same time, which keeps the custard from leaking and makes every tart feel bakery-quality.
Smooth, Creamy Custard
The filling is soft, silky, and just firm enough to set cleanly. It’s made from simple ingredients, but the method makes all the difference.
Dissolving the sugar fully and straining the mixture removes bubbles and gives you that smooth finish.
When baked correctly, the center should have a slight jiggle. That’s your sign it will be creamy once cooled.
Simple Pantry Ingredients
You don’t need anything fancy to make these. Eggs, milk, sugar, butter, and flour do the job beautifully.
Each ingredient has a clear purpose: eggs provide structure, milk adds creaminess, sugar balances flavor, and butter builds richness in the crust.
Because the ingredient list is short, quality matters. Use fresh eggs and good butter for the best results.
Beginner-Friendly
This recipe may look impressive, but the steps are straightforward. If you can mix, roll, whisk, and pour, you can make egg tarts.
I guide you through chilling the dough, shaping the shells, and baking to the right doneness so you feel confident at every stage.
There are no complicated techniques—just careful timing and attention.
Perfect for Tea Time or Dessert
Egg tarts are small, neat, and easy to serve. They pair beautifully with tea or coffee, and they’re light enough to enjoy after a meal without feeling too full.
You can serve them warm for extra comfort or chilled for a firmer texture. Either way, they bring a simple kind of joy to the table that feels both special and familiar.
Ingredients You’ll Need
For the Tart Crust
- 1 ½ cups (190g) all-purpose flour
- ½ cup (115g) unsalted butter, cold and cubed
- ¼ cup (30g) powdered sugar
- 1 large egg yolk
- 2–3 tablespoons cold water (add gradually)
- ¼ teaspoon salt
For the Egg Custard Filling
- 3 large eggs, room temperature
- ½ cup (100g) granulated sugar
- 1 cup (240ml) whole milk (or evaporated milk for a richer texture)
- 1 teaspoon vanilla extract
- ⅛ teaspoon salt
Equipment Needed
- Mixing bowls – Use one for the dough and one for the custard. Medium-sized bowls give you enough space to mix without spilling.
- Whisk – Essential for blending the custard smoothly and evenly. A whisk helps dissolve the sugar and prevents streaks of egg in the mixture.
- Muffin tin or tart molds (12-count) – These shape your egg tarts and support the crust as it bakes. A standard muffin tin works perfectly if you don’t have individual tart molds.
- Rolling pin – Needed to roll the dough evenly so the crust bakes at the same rate throughout. Aim for a thin, even thickness for the best texture.
- Fine sieve (strainer) – This step is important. Straining the custard removes bubbles and any bits of cooked egg, giving you a smooth, silky filling with a clean finish.
Step-by-Step Instructions
Step 1: Make the Tart Dough
Start by combining the flour, powdered sugar, and salt in a mixing bowl. Stir them together evenly so the sweetness and seasoning are well distributed.
Add the cold, cubed butter. Use your fingertips or a pastry cutter to rub the butter into the flour until the mixture looks like fine crumbs with small pea-sized pieces.
Those small bits of butter are what create a tender, flaky crust once baked. Work gently and quickly so the butter stays cold.
Next, mix in the egg yolk. Add 2 tablespoons of cold water and gently bring the dough together.
If it feels dry, add the remaining tablespoon a little at a time. Stop as soon as the dough forms. Do not overwork it, or the crust can become tough.
Shape the dough into a flat disc, wrap it tightly, and chill it in the fridge for at least 30 minutes.
This step relaxes the gluten and firms up the butter, which helps the crust hold its shape in the oven.
Step 2: Shape the Tart Shells
Lightly flour your surface and roll the chilled dough to about ⅛ inch (3mm) thick. Try to keep the thickness even so all the tarts bake at the same rate.
Use a round cutter slightly larger than your muffin cups to cut circles. If needed, gather and reroll scraps once, but avoid overworking the dough.
Press each circle gently into the muffin tin or tart molds. Make sure the dough fits snugly against the sides and bottom without stretching it. Trim any excess at the top for a neat finish.
Place the filled tin back in the fridge for another 15–20 minutes. This second chill helps prevent shrinking and keeps the edges defined during baking.
Step 3: Prepare the Custard
Warm the milk slightly until it is just hot to the touch, not boiling. Add the sugar and stir until fully dissolved. This ensures a smooth custard without graininess.
In a separate bowl, lightly beat the eggs. Do not whip too much air into them. Slowly pour the warm milk mixture into the eggs while stirring gently. Add the vanilla and salt, mixing just until combined.
Strain the custard through a fine sieve into a clean bowl or measuring cup.
This removes bubbles and any bits of cooked egg, giving you a silky, smooth filling. Don’t skip this step—it makes a noticeable difference in texture.
Step 4: Fill and Bake
Preheat your oven to 350°F (175°C). Carefully pour the custard into each chilled tart shell, filling them about ¾ full. Leaving a little space prevents spills and allows the custard to set evenly.
Place the tin on the middle rack and bake for 20–25 minutes. The edges should look set, and the center should have a slight jiggle when gently shaken.
That small movement means the custard will finish setting as it cools.
Remove the tarts from the oven and let them cool in the tin for several minutes before transferring them to a rack.
They can be enjoyed warm or at room temperature, depending on your preference.
Tips for Perfect Egg Tarts
Strain Custard for Ultra-Smooth Texture
Always strain your custard mixture before pouring it into the tart shells. This removes air bubbles, foam, and any small bits of egg that didn’t fully blend.
Even if your mixture looks smooth, straining makes a visible difference in the final texture.
The result is a clean, glossy surface and a custard that feels silky when you bite into it. It only takes a minute, but it’s one of the most important steps for bakery-style results.
Don’t Overbake (Prevents Cracks)
Egg custard continues to cook from residual heat after it comes out of the oven. If you bake until the center looks completely firm, it’s already overdone.
Look for set edges and a gentle jiggle in the middle. That slight wobble means the texture will finish perfectly as it cools.
Overbaking causes cracks, a rubbery texture, and a dull surface. Pull them out at the right time, and you’ll get a soft, creamy center every time.
Chill Dough Properly for Flakiness
Cold dough equals better structure. When the butter stays cold before baking, it melts in the oven and creates light layers in the crust.
If the dough is too warm, the butter blends into the flour, and you lose that delicate texture. Chill the dough after mixing and again after shaping the shells.
These short resting periods prevent shrinking and help the edges stay neat and defined.
Use Room Temperature Eggs
Room temperature eggs blend more smoothly with warm milk. This helps create a uniform custard without streaks or curdling.
Cold eggs can cause the mixture to thicken unevenly, especially if the milk is warm. Take your eggs out of the fridge about 20–30 minutes before baking.
It’s a small step, but it improves both texture and consistency.
Variations
Portuguese-Style Caramelized Tops
If you enjoy a slightly deeper flavor with a toasted finish, you can bake your tarts at a higher temperature to create caramelized spots on top.
This method is inspired by the classic Portuguese custard tart. To achieve this look, increase the oven temperature to about 425°F (220°C) for the final few minutes of baking.
Keep a close eye on them. The tops should develop golden brown patches without burning. The higher heat creates light blistering and a subtle caramel taste while keeping the inside creamy.
Puff Pastry Shortcut Version
Short on time? You can use store-bought puff pastry instead of making the crust from scratch. Roll it out slightly thinner, cut circles, and press them into your muffin tin.
Because puff pastry rises more, avoid overfilling the shells. This version creates a flakier, layered crust with a crisp bite.
It’s a great option when you want quicker prep while still enjoying a bakery-style finish.
Coconut Egg Tarts
For a gentle twist in flavor, add 2–3 tablespoons of finely shredded coconut to the custard mixture. The coconut blends into the filling and adds a mild sweetness and soft texture.
You can also sprinkle a small amount on top before baking for a lightly toasted finish.
The base recipe stays the same, but this small addition brings warmth and depth without overpowering the custard.
Mini Bite-Sized Versions
If you’re serving a crowd or want smaller portions, use a mini muffin tin instead of a standard one. Roll the dough slightly thinner and cut smaller circles to fit.
Reduce the baking time by several minutes, checking early to prevent overbaking. These mini tarts are easy to serve and perfect for gatherings.
They keep the same creamy texture and flaky crust, just in a more shareable size.
Storage & Reheating
Once your egg tarts have cooled completely, place them in an airtight container and store them in the refrigerator for up to 3 days; keeping them sealed prevents the custard from absorbing fridge odors and helps the crust stay as firm as possible.
If stacking, separate layers with parchment paper so the tops stay smooth and intact.
When you’re ready to enjoy them again, skip the microwave if you can, as it softens the crust and can make the custard rubbery.
Instead, reheat the tarts in a preheated oven at 325°F (160°C) for about 5–8 minutes, just until warmed through; this gently heats the filling while helping the pastry regain some crispness.
If you prefer them chilled, you can also enjoy them straight from the fridge for a firmer texture.
Yes, you can freeze egg tarts, but do so carefully: wrap each tart tightly in plastic wrap, place them in a freezer-safe container, and freeze for up to 1 month; thaw overnight in the fridge before reheating in the oven to refresh the crust.
While freezing may slightly affect the texture of the custard, proper wrapping and gentle reheating will keep them very close to freshly baked.
Final Thoughts
Egg tarts may look delicate, but they’re completely doable in your own kitchen. Follow the steps, take your time, and trust the process—you’ll be proud of the result.
Serve them slightly warm with a cup of tea or coffee, and enjoy that flaky crust and creamy center you made from scratch.
If you try this recipe, I’d love to hear how it turned out. Leave a comment, share your tips, or rate the recipe to help other readers bake with confidence.
FAQs
Why did my custard crack?
It was likely overbaked or baked at too high a temperature. Remove the tarts when the center still has a slight jiggle, as they will continue setting while cooling.
Why is my tart crust soggy?
This can happen if the custard is too thin, the shells weren’t chilled before baking, or the tarts sat too long after filling. Always chill the shells and bake immediately after filling.
Can I make egg tarts ahead of time?
Yes. You can bake them a day in advance and store them in the fridge. Reheat briefly in the oven to refresh the texture before serving.
Can I use store-bought pastry?
Absolutely. Puff pastry works well and saves time. Just roll it slightly thinner and avoid overfilling the shells.
How do I know when they’re done?
The edges should be set, and the center should wobble slightly when gently shaken. If it doesn’t move at all, it may be overbaked.
Egg Tarts Recipe (Bakery-Style & Easy to Make at Home)
Difficulty: Easy12
Egg Tarts50
minutes20
minutes1
hour20
minutesFlaky, buttery tart shells filled with smooth, creamy egg custard and baked until just set. A simple homemade version of the classic bakery favorite.
Ingredients
- For the crust:
1 ½ cups (190g) all-purpose flour
½ cup (115g) unsalted butter, cold and cubed
¼ cup (30g) powdered sugar
1 large egg yolk
2–3 tablespoons cold water
¼ teaspoon salt
- For the custard:
3 large eggs (room temperature)
½ cup (100g) granulated sugar
1 cup (240ml) whole milk (or evaporated milk)
1 teaspoon vanilla extract
⅛ teaspoon salt
Directions
- Make the dough: Mix flour, powdered sugar, and salt. Cut in cold butter until crumbly. Add egg yolk and cold water, mixing just until a dough forms. Wrap and chill 30 minutes.
- Shape shells: Roll dough to ⅛ inch thick. Cut circles and press into a 12-cup muffin tin. Chill 15–20 minutes.
- Prepare custard: Warm milk and dissolve sugar. Lightly beat eggs, then slowly mix in warm milk, vanilla, and salt. Strain through a sieve.
- Fill and bake: Preheat oven to 350°F (175°C). Fill shells ¾ full. Bake 20–25 minutes until edges are set and the center slightly jiggles. Cool before removing.
Notes
- Do not overbake; the custard continues to set as it cools.
- Always strain the custard for a smooth texture.
- Reheat in the oven at 325°F (160°C) for best results.
- Best enjoyed the same day but can be refrigerated for up to 3 days.

Hi, I’m Sorenna Blythe, the baker and writer behind Mix Whisk Bake. I share simple, reliable recipes and honest kitchen moments to help home bakers bake with confidence and joy. When I’m not testing new treats, you’ll find me sipping coffee and dreaming up my next bake.


