Starting your baking journey? You don’t need a fancy kitchen or years of experience, but just the right tools and a little curiosity.
The truth is, baking feels a lot less overwhelming when you’re equipped for the job. No more guessing measurements or wrestling sticky dough with the wrong spatula.
In this guide, we’ll walk through the essential tools every beginner baker should have—nothing complicated, just the basics that make a big difference.
Let’s set you up for sweet, stress-free success.
Measuring Tools: Accuracy is Key
A. Dry Measuring Cups
Dry measuring cups are the unsung heroes of flour, sugar, cocoa powder, and other solid ingredients. They come in nested sets (usually ¼ cup up to 1 cup), allowing you to scoop and level each amount accurately.
Here’s the trick: always level off the top with a straight edge like the back of a butter knife. This removes excess and ensures you’re not packing in too much.
A heaping cup of flour can throw off your entire recipe. Think of it like building a house: one crooked brick, and the whole thing can lean.
Avoid using these for liquids because they’re not designed for that. You’ll end up spilling or misjudging. Stick to dry goods only, and you’re golden.
B. Liquid Measuring Cup
This one’s easy to spot. It usually has a spout, clear markings on the side, and is made of glass or sturdy plastic.
It’s perfect for anything pourable like water, milk, oil, buttermilk, or even brewed coffee for mocha cupcakes.
To measure properly, place it on a flat surface and check the level at eye height. Don’t try to hold it in the air because it’s too easy to misread.
Accuracy here ensures your batter isn’t too wet or too dry, which can make or break your final bake.
One good-quality liquid measuring cup (1 or 2 cups in size) is all most beginners need.
C. Measuring Spoons
Tiny but mighty. Measuring spoons are essential for ingredients used in small amounts—baking powder, salt, vanilla extract, cinnamon, and so on.
They typically come in a set: ¼ teaspoon, ½ teaspoon, 1 teaspoon, and 1 tablespoon.
Use the correct spoon and don’t eyeball it, especially with baking soda or powder. A little too much can cause overflow, bitterness, or a collapsed cake.
And always level dry ingredients like you would with dry measuring cups.
Pro tip: have two sets if you bake often. That way, you’re not constantly washing one mid-recipe.
D. Kitchen Scale (Optional but Helpful)
While not strictly necessary for beginners, a digital kitchen scale is a game-changer.
It gives you gram-perfect measurements, which are more accurate than cups, especially for flour, which can vary wildly depending on how it’s scooped.
Scales are also great when working with international recipes that use metric units. No converting or guessing—just place the bowl on the scale, zero it out, and add what you need.
Even better? Fewer dishes. You can measure everything into one bowl and avoid dirtying a dozen cups.
Mixing Tools: Get That Perfect Texture
A. Mixing Bowls
A good set of mixing bowls is like your baking command center. You’ll use them for everything—combining dry ingredients, creaming butter and sugar, beating eggs, or even tossing dough.
Go for a set that nests together. It saves space and gives you multiple sizes to work with, which is great when a recipe needs separate wet and dry mixing.
Materials? Glass, stainless steel, or BPA-free plastic all work. Glass is microwave-safe and non-reactive, metal is lightweight and durable, and plastic is budget-friendly and won’t shatter if dropped.
B. Whisks
If your goal is smooth batters and fluffy eggs, a whisk is your new best friend. It’s designed to incorporate air and break up lumps, which is especially helpful in cakes, pancakes, or meringues.
A balloon whisk (the classic rounded kind) is the most versatile. Use it to whisk together dry ingredients, beat eggs, or mix up simple batters.
For heavier jobs, it’s not ideal—that’s where spoons or mixers step in—but for quick blending, nothing beats a whisk.
C. Spatulas and Scrapers
Silicone spatulas are one of the most underrated tools in the kitchen. They bend and flex, letting you scrape every last bit of batter from the bowl. That means less waste and fewer sticky dishes later.
They’re also heat-resistant, so they can stir melted chocolate or fold warm mixtures without melting themselves.
Flat-edge ones are great for folding delicate batters (like whipped cream into mousse), while curved ones are better for scraping bowls clean.
If you only buy one tool from this list, make it a silicone spatula. You’ll use it constantly.
D. Wooden Spoon
Sometimes, old-school just works. A sturdy wooden spoon is perfect for mixing thicker doughs like cookie dough, quick bread batters, or stiff brownie mixes.
It won’t bend or break under pressure, and it’s surprisingly comfortable to use.
Unlike metal, it doesn’t scrape your bowls. And unlike plastic, it won’t warp with heat. Just wash it by hand and let it dry completely because wood doesn’t like long soaks.
Baking Basics: Your Oven’s Best Friends
A. Baking Sheets (Rimmed)
A good rimmed baking sheet is a total workhorse. It’s perfect for cookies, scones, roasted nuts, even sheet cakes. The rim keeps things from sliding off, and the flat surface ensures even baking.
Start with at least two standard half-sheet pans. That way, you can rotate trays mid-bake or prep one batch while the other’s in the oven.
Look for heavy-duty aluminum or steel because they heat evenly and don’t warp under high temperatures.
Avoid nonstick coatings early on. They can scratch easily, and parchment paper or silicone mats will do the trick for easy cleanup anyway.
B. Muffin Pan
This isn’t just for cupcakes.
A standard 12-cup muffin pan opens the door to all kinds of bakes like blueberry muffins, egg bites, mini cheesecakes, cornbread, and even freezer-friendly breakfast quiches.
Look for one with a nonstick surface, but still grease it lightly or use liners. That makes popping them out easier and avoids stuck-on batter disasters.
Pro tip: You can also use it to portion cookie dough or freeze mini portions of leftover batter. It’s surprisingly versatile.
C. Cake Pans
If you plan to make birthday cakes, classic sponges, or even brownies, you’ll need a solid set of round cake pans.
The 8-inch or 9-inch size is most common, and having two of the same size is ideal for making stacked or layered cakes.
Stick to metal pans with straight sides for even layers. Avoid glass or dark-colored pans, as they tend to brown the edges faster.
Line the bottom with parchment, and you’ll save yourself a lot of pan-prying drama.
D. Loaf Pan
A loaf pan is essential for quick breads like banana bread, zucchini bread, lemon loaves, pound cakes, and even some savory bakes. The standard size is 9×5 inches.
Metal loaf pans give a golden crust and are beginner-friendly. Just remember to grease well or line with parchment for clean removal.
One loaf pan can go a long way, but once you’re hooked, you might find yourself wanting a second.
E. Cooling Rack
Don’t skip this one because it’s more important than it looks.
A wire cooling rack lets air circulate around your cookies, muffins, or cakes. That helps them cool evenly and keeps bottoms from going soggy.
Without a rack, your baked goods sit on a hot pan and continue cooking after they come out. That can lead to overdone edges or sunken centers. Not good.
Look for a sturdy rack with a tight grid. It’ll also come in handy for glazing doughnuts, decorating cookies, or even crisping up bacon.
Rolling and Shaping Tools
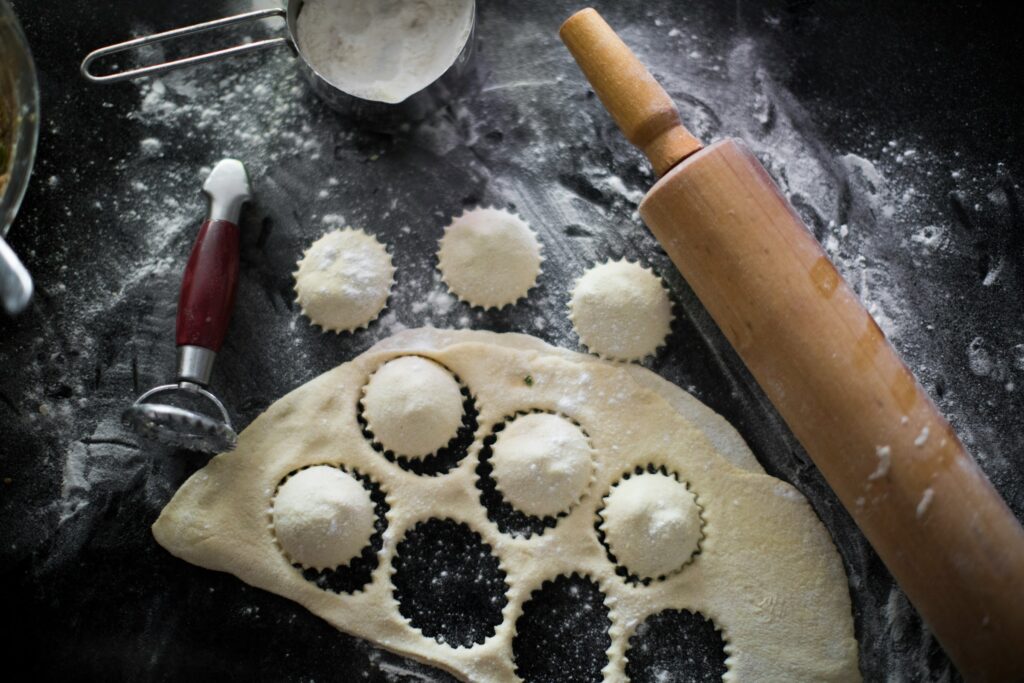
A. Rolling Pin
Whether you’re making sugar cookies, cinnamon rolls, or a buttery pie crust, a rolling pin is a must. It flattens dough evenly, giving you a smooth, uniform surface.
No more lumpy, uneven patches or crusts that bake wonky.
There are two main types:
- Traditional rolling pins have handles and a thick central barrel. These are great for beginners—they feel sturdy and give you solid control.
- French-style rolling pins are one solid tapered piece, lighter, and easier to maneuver in all directions. Bakers love them for delicate doughs and precise work.
Either type works. Just pick one that feels good in your hands.
Bonus tip: Chill it in the fridge before rolling the pastry because it keeps your dough cooler and flakier.
B. Pastry Brush
A pastry brush might seem like a small thing, but it makes a big difference in the final look and texture of your bake.
Use it to brush:
- Egg wash on pie crusts for that shiny, golden finish.
- Melted butter over warm bread or scones.
- Glaze or syrup over cakes to keep them moist.
Silicone brushes are easy to clean and dishwasher-safe, while natural bristle brushes hold more liquid and apply more smoothly, but need more care.
Without one, you’re left trying to drizzle or dab with a spoon, and that gets messy fast.
C. Cookie Scoops / Ice Cream Scoops
Uniform cookies aren’t just pretty, but they bake more evenly.
That’s where a cookie scoop comes in handy. It’s basically a spring-loaded scoop (like an ice cream scoop) that helps portion dough quickly and consistently.
Use them for:
- Cookie dough (small, medium, or large).
- Muffin batter (less drips and spills).
- Truffles, cake pops, and even mini meatballs if you’re feeling savory.
They save time and keep your hands clean. Plus, no more guesswork because your cookies will all be the same size, which means no half-burned, half-raw trays ever again.
Specialty Tools Worth Adding Over Time
A. Hand Mixer or Stand Mixer
Mixing by hand builds character, but let’s be real, it also builds sore arms. A hand mixer is an affordable, compact tool that does the hard work for you.
Use it for whipping cream, creaming butter and sugar, beating eggs, and mixing heavy batters. It’s faster, smoother, and less messy than trying to do it all by hand with a whisk.
If you’re baking often (or dreaming of bread doughs, meringues, or multi-layered cakes), a stand mixer is a splurge worth considering.
It can knead, whip, and mix without you lifting a finger. Some even come with attachments for pasta, ice cream, or grinding meat.
But don’t worry, you don’t need one right away. Plenty of bakers start with a simple hand mixer and make magic just fine.
B. Parchment Paper or Silicone Baking Mats
There are few things more annoying than a perfect cookie that won’t come off the tray.
Enter: parchment paper and silicone baking mats. They’re your insurance policy against stuck-on bottoms, scorched cookies, and tough cleanup.
Parchment is disposable, non-stick, and super handy for lining cake pans or rolling dough. You can cut it to fit anything.
Silicone mats (like Silpats) are reusable and eco-friendly. They provide an even baking surface and help cookies spread just right. Plus, they last for years if you take care of them.
Either option saves you time and stress. Once you try them, it’s hard to go back.
C. Sifter or Fine-Mesh Sieve
Ever had lumps of cocoa powder ruin your batter? Or flour that clumps in your cake? A sifter or fine-mesh sieve solves that in seconds.
Use it to:
- Aerate flour for lighter bakes.
- Sift dry ingredients together evenly.
- Dust powdered sugar on top of brownies or cakes without clumps.
A mesh sieve is more versatile because you can also use it to strain sauces or rinse berries. A crank-style sifter feels nostalgic and works quickly, but it’s more of a one-trick pony.
Organization & Prep Tools
A. Timer
You might think you’ll remember to check the oven in 12 minutes, but let’s be honest, distractions happen. One quick scroll on your phone and suddenly your cookies are toast (literally).
A timer is your built-in kitchen safety net. Whether it’s a standalone timer, your phone’s clock app, or your oven’s built-in version, just set it. That beep can save your bake.
Pro tip: For recipes with multiple steps (like “bake for 10, then rotate and bake 5 more”), set separate timers. Your future self will thank you.
B. Oven Thermometer
Here’s the deal: most ovens lie. Yours might say it’s preheated to 350°F, but it could actually be 375°F… or worse, 310°F. That’s a big deal when you’re baking.
An oven thermometer sits inside the oven and tells you the real temperature. It’s cheap, easy to use, and one of the best tools you can get for consistent results.
Without it, you’re basically guessing. And in baking, guessing leads to burnt bottoms, raw centers, or sunken cakes. Don’t let your oven’s mood swings mess with your cookies.
C. Storage Containers
Fresh ingredients = better bakes. But leaving your flour in a ripped paper bag or your sugar in an open box? That’s just asking for clumps, bugs, or funky smells.
Invest in airtight storage containers. Clear ones are great, so you can see what’s inside. Label them if you’re fancy or just lazy like the rest of us and want to avoid pouring salt into a cake.
Use them for:
- Flour, sugar, and cocoa powder
- Baking soda and baking powder
- Chocolate chips, nuts, or shredded coconut
You’ll bake faster when everything’s easy to find, and your ingredients will stay fresher, longer.
Budget Tips for Beginners
Let’s be honest, baking tools can add up fast. But you don’t need to spend a fortune to get started. Here’s how to keep your setup affordable without sacrificing quality.
Start with the Essentials
When you’re just starting out, focus on the basics. You don’t need a stand mixer, cake turntable, and six different piping tips on day one. Start small.
Get a good set of measuring cups, mixing bowls, a spatula, and a baking sheet or two.
Buy what your first few recipes actually require. As you bake more, you’ll naturally figure out what’s worth adding next. One tool at a time. No rush.
Buy Quality—Slowly
Cheap tools can be tempting, but they often don’t last. A flimsy spatula that melts or a pan that warps in the oven? That’s money down the drain.
When you do buy, aim for durable, long-lasting pieces, even if it means buying one at a time.
Think of it like building your dream kitchen, one smart purchase at a time. Quality doesn’t always mean expensive, but it does mean reliable.
Hunt for Sales and Secondhand Gems
Kitchen tools go on sale more often than you’d think, especially around holidays or back-to-school season.
Check big box stores, online shops, and even clearance aisles. You might score a solid muffin tin or mixer at a sweet discount.
Also, don’t overlook secondhand stores. Thrift shops, garage sales, and even Facebook Marketplace can surprise you. Just inspect everything carefully, especially pans, and give them a good wash.
Sometimes, a “gently used” tool is just a barely-used one with a much better price tag.
Borrow Before You Buy
Not sure if you need that springform pan or dough hook? Ask a friend, neighbor, or family member if you can borrow one first. Try the tool. Test the recipe. Then decide if it’s something you’ll actually use again.
It saves you money and prevents your kitchen drawers from turning into a cluttered graveyard of one-time gadgets.
Final Thoughts
You don’t need a fully stocked kitchen to start baking, but you just need a few reliable tools and a little curiosity.
Start with the basics, learn as you go, and build your toolkit over time. Every great baker began somewhere, usually with one bowl, one spatula, and a whole lot of trial and error.
FAQs
Do I need a stand mixer to start baking?
Nope! A simple hand mixer or even just a whisk and some elbow grease can get the job done for most beginner recipes. A stand mixer is great, but it’s a luxury, not a must-have.
What’s the best brand for beginner baking tools?
There’s no one-size-fits-all. Look for trusted, budget-friendly brands like OXO, Wilton, Nordic Ware, or Pyrex. Focus on durability and ease of use rather than fancy features or big price tags.
Can I bake without parchment paper or a cooling rack?
Yes, but they definitely make life easier. In a pinch, you can grease pans well or use foil.
And for cooling, you can use an upside-down muffin tin or even a clean oven rack, but just don’t leave baked goods on hot pans too long.
Are silicone tools better than wooden or metal?
Silicone is flexible, heat-resistant, and easy to clean, which is perfect for spatulas and baking mats.
But wooden spoons and metal whisks still have their place. It’s not about one being better; it’s about having the right tool for the task.
What’s the easiest tool to upgrade first?
Start with a good-quality spatula or baking sheet. You’ll use them constantly, and the difference between a cheap one and a reliable one is huge. It’s a small investment with big returns.

Hi, I’m Sorenna Blythe, the baker and writer behind Mix Whisk Bake. I share simple, reliable recipes and honest kitchen moments to help home bakers bake with confidence and joy. When I’m not testing new treats, you’ll find me sipping coffee and dreaming up my next bake.


