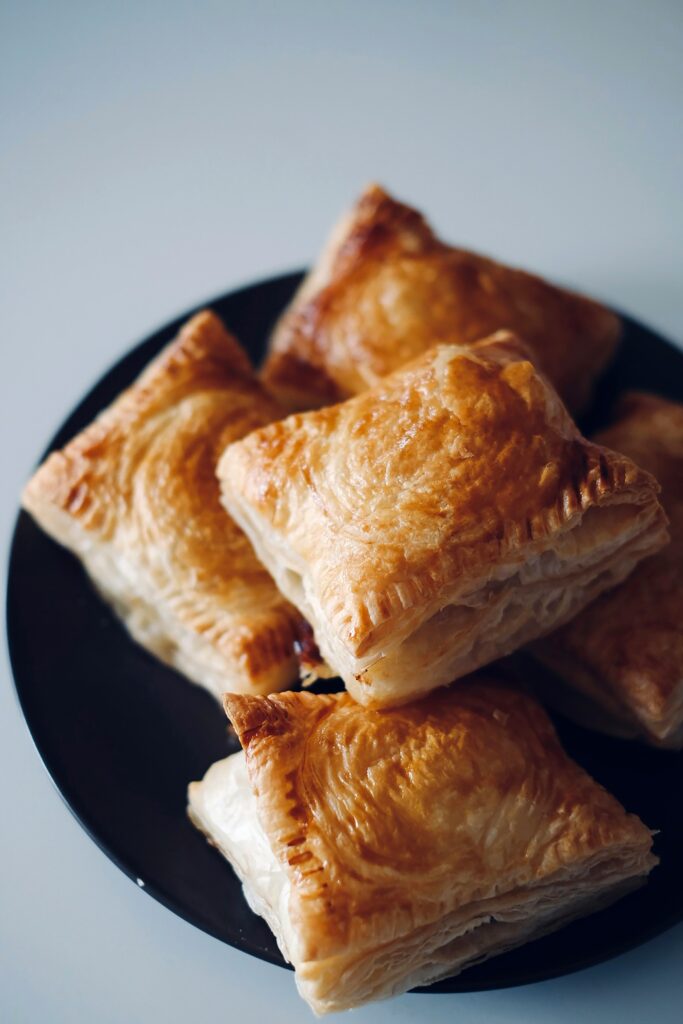
Homemade puff pastry might sound like a “bakery-only” project, but it’s far more doable than most people think. At its core, it’s just dough and butter taking turns in a delicious little dance.
And here’s the fun part: once you try it, you’ll quickly realize why homemade always wins. The flavor is richer. The layers rise higher.
And every bite feels like it was crafted with purpose, not pulled from a box.
If you’re new to puff pastry, don’t worry. With a few simple steps and a bit of patience, you can create those beautiful, flaky layers right in your own kitchen.
Think buttery lift, golden crunch, and endless ways to use it—sweet, savory, or somewhere in between. Let’s make something magical.
What Makes Puff Pastry Flaky?
Lamination is the heart of puff pastry because it’s the repeated folding and rolling that sandwiches thin sheets of butter between layers of dough, so they separate into hundreds of crisp, flaky strata when baked.
Think of it like making a stack of paper: every fold multiplies the layers, and that multiplication is what gives you lift and that delicate snap.
Cold ingredients matter because butter must stay solid until it hits the hot oven; if the butter softens or melts into the dough, the layers blend, and you lose height and flakiness.
Work quickly, chill between turns, and keep your hands and surface cool so the butter stays in neat sheets.
Finally, steam does the heavy lifting.
When the oven heat turns the tiny pockets of water in the butter and dough into steam, the trapped vapor puffs those layer gaps open and separates the pastry into airy, golden tiers.
Follow the lamination, respect the cold, and let steam do its job — that’s the simple science behind the beautiful, flaky lift.
Ingredients You’ll Need
- Butter (European-style preferred): Higher butterfat means richer flavor and cleaner layers, making your pastry lift like a champ.
- Flour: All-purpose works great and gives the dough enough strength to stretch without tearing.
- Salt: A small amount wakes up the flavor and balances the richness of the butter.
- Water (ice-cold): Cold water keeps the dough firm and prevents the butter from melting during mixing.
- Optional: Lemon juice or vinegar: A tiny splash relaxes the gluten, making the dough easier to roll and less likely to fight back.
Equipment Checklist
- Rolling pin: Your main tool for creating even layers and keeping the dough smooth during each fold.
- Bench scraper: Helps lift, turn, and cleanly move the dough without stretching or tearing it.
- Pastry brush: Useful for dusting off excess flour so your layers stay clean and well-defined.
- Cling wrap: Keeps the dough tightly wrapped during chilling, preventing it from drying out.
- Baking sheet: Provides a flat, sturdy surface for chilling and later baking your pastry.
- Parchment paper: Stops sticking, encourages even browning, and makes cleanup a whole lot easier.
Step-by-Step: How to Make Puff Pastry from Scratch
1. Prepare the Dough (Detrempe)
Mix the flour and salt in a large bowl so the salt spreads evenly. Add tiny amounts of ice-cold water and stir with a fork or your fingers until the dough just comes together, but don’t drown it.
You want a shaggy, slightly sticky mass, not a smooth ball; that’s the goal. Turn the dough onto a lightly floured surface and press it together quickly into a rough rectangle.
Wrap it tight in cling wrap and chill for at least 30 minutes. Resting calms the gluten and makes the dough easy to roll without bouncing back.
2. Prepare the Butter Block (Beurrage)
Take cold butter and bash it into a uniform slab between two sheets of parchment or plastic. Use a rolling pin or the flat of a knife to shape it into a neat square, the same height as your dough’s center.
Chill it until it’s cold but still slightly pliable — firm enough to hold shape, soft enough not to shatter when you fold. Think of it as sculpting a butter brick for the lamination house you’re about to build.
3. Encase the Butter
Roll the rested dough into a rectangle large enough to wrap the butter with a margin. Place the butter block in the center, slightly offset if your fold style needs it.
Fold the dough edges over the butter like closing a letter, sealing the butter completely inside. Press seams lightly so no butter peeks out.
Chill the package for 20–30 minutes so the butter and dough relax and marry a bit before rolling.
5.4 First Roll & Fold (Turn 1)
Lightly dust your work surface and roll the dough block into a long rectangle, using even pressure and quick, confident strokes. Aim for an even thickness so layers form consistently.
Fold the top third down and the bottom third up (a letter fold) so you have three layers stacked. That’s one “turn.”
Wrap and chill the dough for 20–30 minutes to firm up the butter and prevent smearing on the next roll. Short rests keep everything cooperative.
5. Repeat Turns
Repeat the roll-and-fold process 4 to 6 times total, depending on how many layers you want. More turns create more lift but demand more chill time.
After each turn, rotate the dough 90° before rolling to encourage even expansion in the oven. Always chill between turns; patience is the unsung hero of great puff.
If the butter softens or becomes streaky, pop the dough in the fridge or freezer for a quick firm-up before continuing.
Tips for preventing butter leakage
Work cold and fast; flour the surface sparingly (too much flour ruins layer adhesion); if butter squeezes out, scrape it off and chill the dough before proceeding; keep edges sealed and avoid overworking the dough; finally, if you see small patches of butter, treat them early because a short chill fixes most problems.
Tips for Perfect Puff Pastry
Keep everything cold
Cold is your best friend here. Cold butter stays in sheets and creates clean layers; warm butter melts into the dough and ruins the lift.
Chill your ingredients, your workspace if possible, and your hands between turns. If in doubt, pop the dough or butter in the fridge for 10–20 minutes; better safe than sorry.
Work quickly
Speed matters, but don’t panic. Move with purpose so the butter doesn’t soften. Roll with confident, even strokes and fold without dawdling.
Quick work keeps the butter intact and the dough cooperative. Think “fast hands, calm head.”
Don’t over-flour the dough
A dusting of flour prevents sticking. A snowstorm of flour kills layer adhesion. Use just enough to stop sticking and brush off excess with a pastry brush.
Too much flour makes the dough tough and blunt, which is not the flaky, silvery lift you want.
What to do if butter breaks through
If you see butter seeping or patches of yellow, act early. Scrape away excess butter with a bench scraper, reshape the dough, and chill immediately.
If the leak is small, a short firm-up in the freezer fixes it. If it’s major, rewrap and start the current turn again after chilling.
Chill time between each turn
Resting between turns lets gluten relax and butter re-firm. Aim for 20–30 minutes for fridge rests, or 10–15 minutes in the freezer when you’re pressed for time.
Don’t skip these rests because they’re the quiet workhorses of flaky pastry. Consistent chill cycles equal consistent layers.
Common Mistakes & How to Avoid Them
The dough is getting too warm
Warm dough and melted butter are a one-way ticket to flat, greasy pastry. If the dough feels soft or the butter looks streaky, stop and chill — fridge for 20–30 minutes or freezer for 10–15.
Work in short bursts, keep your hands cool, and avoid overexposure to warm kitchens or sunlight.
If things still go awry, reshape, wrap, and chill until firm before continuing; salvaging with a cold rest often does the trick.
Under-rolling or over-rolling
Under-rolling gives uneven layers and weak lift; over-rolling squashes the layers and makes the pastry tight.
Aim for steady, even strokes with light pressure; roll until the rectangle reaches the suggested size, but don’t muscle it thin. Rotate the dough as you roll for even thickness.
If one side is thinner, patch it with a small strip of dough and chill. Better to fix this now than bake a lopsided sheet.
Uneven butter distribution
Lumpy or thin butter patches cause streaks, leaks, or poor rise. Make a uniform butter block and place it centered (or slightly offset for a book fold). When encasing, seal edges well and press seams gently.
If you spot butter pockets while rolling, stop, fold, and chill or press the butter into a single, even layer with the rolling pin before the next turn. Consistent butter equals consistent lift.
Too many or too few turns
Too few turns = few layers; too many = butter breakdown and tough dough. For most home bakers, 4–6 turns hit the sweet spot. Keep a turns log on your counter if you forget.
If you accidentally overwork the dough, chill it longer between turns and treat it gently thereafter, because sometimes the damage can be minimized.
Conversely, if you’re short on time, fewer turns still produce nice pastry; just temper expectations and bake with care.
How to Use Your Puff Pastry
Savory ideas: cheese twists, tarts, pies
Roll your sheet into strips, sprinkle with grated cheese and herbs, twist and bake for crunchy cheese twists because they’re party gold.
For tarts, dock the center, leave a small border, add savory fillings (caramelized onions, goat cheese, roasted veg), and bake until the edges are puffed and deep golden.
Mini hand pies and pot pies are perfect for using scraps: fill, crimp, egg-wash, and bake; vents matter — steam needs a way out.
Keep fillings fairly dry or precook wet ingredients so the pastry doesn’t go soggy. Short bake at high heat gives the best lift and crispness.
Sweet ideas: palmiers, turnovers, mille-feuille
Make palmiers by rolling a sugar-sprinkled sheet tightly from both sides, slicing and baking until caramelized.
For turnovers, cut triangles, spoon in fruit or chocolate, fold, seal, and egg-wash; a sprinkle of coarse sugar finishes them off nicely.
If you’re feeling fancy, assemble a mille-feuille with thin baked layers and pastry cream, but chill thoroughly before slicing to keep neat layers.
Sweet bakes benefit from a light dusting of sugar before baking or a quick glaze after for shine and extra flavor.
Storage: refrigerating, freezing, thawing
Refrigerate shaped or unbaked puff pastry for up to 48 hours, wrapped tightly so it doesn’t dry out.
Freeze for long-term storage: lay pieces flat on a tray until firm, then stack with parchment and store in an airtight bag for up to 3 months.
Thaw in the fridge overnight — never rush thawing at room temperature, or the butter will soften and ruin your layers.
When ready to bake, give chilled dough 10–15 minutes at room temperature if it’s too stiff to roll, but bake while still cold for the best lift.
Final Words
Making puff pastry at home might feel like climbing a tall mountain, but once you take the first step, you realize the path is smoother than it looks.
And the payoff? Golden flakes that crackle, rise, and taste better than anything store-bought.
Keep practicing. Each batch teaches you something new, and every turn brings you closer to those dream-worthy layers. So roll up your sleeves and give it a try!
FAQs
Can I use salted butter?
Yes, but adjust the added salt in the dough to avoid an overly salty pastry. Salted butter also varies by brand, so the flavor may be slightly stronger, but it still works well.
How long does homemade puff pastry last?
Unbaked puff pastry keeps in the fridge for up to 2 days when wrapped tightly.
In the freezer, it lasts up to 3 months. Baked pastry is best eaten the same day, but can be stored in an airtight container for 1–2 days.
Why didn’t my pastry rise?
Usually, the butter melted into the dough, or the layers weren’t rolled evenly.
Warm dough, overworked dough, or skipping chill times are common culprits. Start cold, work quickly, and rest between turns for dependable lift.
Can the dough be made ahead?
Absolutely. You can prepare the dough and keep it chilled for 24–48 hours, or freeze it right after your final turn. Thaw in the fridge, then roll, shape, and bake when you’re ready.
How to Make Flaky Puff Pastry at Home
Difficulty: Intermediate1
sheet45
minutes25
minutes4
hoursA simple, buttery puff pastry made from scratch using classic lamination for crisp, flaky layers.
Ingredients
2 cups all-purpose flour
1 tsp salt
¾ cup cold water (add as needed)
1 cup cold unsalted butter (European-style preferred)
Optional: 1 tsp lemon juice or vinegar
Directions
- Make the Dough: Mix flour and salt in a bowl. Add cold water (and lemon juice, if using) until a rough dough forms. Shape into a rectangle, wrap, and chill for 30 minutes.
- Prepare Butter Block: Flatten cold butter between parchment into a 5-inch square. Chill until firm but pliable.
- Encase the Butter: Roll the dough into a rectangle large enough to wrap the butter. Place the butter in the center and fold the dough over it. Seal edges and chill 20 minutes.
- First Turn: Roll into a long rectangle. Fold the top third down and the bottom third up. Wrap and chill 20–30 minutes.
- Repeat Turns: Complete 4–6 total turns, chilling between each. Stop and chill anytime the dough softens.
- Use or Store: Roll to desired thickness. Bake at 200°C (400°F) for 20–25 minutes until golden and puffed.
Notes
- Keep dough and butter cold at all times for the best rise.
- If butter breaks through, patch with dough and chill before continuing.
- Dough can be refrigerated for 2 days or frozen for up to 3 months.

Hi, I’m Sorenna Blythe, the baker and writer behind Mix Whisk Bake. I share simple, reliable recipes and honest kitchen moments to help home bakers bake with confidence and joy. When I’m not testing new treats, you’ll find me sipping coffee and dreaming up my next bake.


