Ever bitten into a gluten-free cookie and thought, “Yep… tastes like dust”? You’re not alone.
But these cookies? They’re the real deal—soft, chewy, rich, and full of flavor. No chalky textures. No weird aftertaste. And no need for hard-to-pronounce flours or complicated swaps!
Why Go Gluten-Free?
What Even Is Gluten?
Gluten is a protein found in wheat, barley, and rye. It’s what gives bread its stretch, pizza its chew, and cookies their structure. But for some people, gluten can wreak havoc.
Those with celiac disease or gluten sensitivity experience bloating, fatigue, or worse when they eat it.
For others, avoiding gluten is simply a lifestyle choice and one that often comes with the goal of feeling lighter, less inflamed, or more energized.
Health Reasons vs. Lifestyle Preference
Not everyone who eats gluten-free has to. Many do it because it helps with digestion, focus, or skin clarity. Some go gluten-free temporarily to reset their diet.
And of course, there are those baking for friends or family members who are gluten-sensitive or celiac. Whether it’s by necessity or curiosity, gluten-free baking is more popular than ever.
But let’s be real, whether you’re GF by force or by choice, nobody wants a cookie that tastes like it came from a science lab.
Why Gluten-Free Cookies Can Be Tricky
Here’s the catch: gluten is a workhorse in traditional baking. It holds everything together and helps cookies rise just right. Without it, your dough can be crumbly, dry, or oddly gummy.
Texture is usually where gluten-free cookies fall flat. Literally. They can spread too much or not at all. And don’t get us started on the sandpaper mouthfeel some GF recipes leave behind.
That’s why it takes a bit of know-how and the right ingredients to make gluten-free cookies that actually taste good.
But Good News: They Can Taste Even Better
When done right, gluten-free cookies are every bit as delicious, sometimes even better, than the wheat-based kind. Almond flour adds a rich, nutty flavor. Oats bring heartiness and chew.
Coconut flour lends subtle sweetness. And best of all? These ingredients aren’t just fillers, but they shine in their own way.
Essential Ingredients for Gluten-Free Cookie Success
Gluten-free cookies can taste just as rich, chewy, and satisfying as traditional ones, if you stock the right ingredients.
Here’s a breakdown of must-haves to keep in your GF baking pantry, plus a few tips to keep your cookies safe for those with sensitivities.
Key Pantry Staples
- Almond Flour
Soft and finely ground, almond flour adds a naturally nutty flavor and moist texture. Great for chewy cookies and pairs well with chocolate, berries, and citrus. - Oat Flour (Certified Gluten-Free)
Offers a mild, slightly sweet flavor and helps bind cookies together. Always use certified GF oats to avoid hidden gluten contamination. - Gluten-Free 1:1 Baking Flour
This is your all-in-one hero. It mimics all-purpose flour and often contains a blend of rice flour, potato starch, and xanthan gum. Perfect for beginners. - Coconut Flour
Absorbs a lot of moisture, so use it in small amounts. Adds light sweetness and works well in no-bake cookies or recipes that use lots of eggs. - Xanthan Gum (Optional)
A pinch goes a long way. It helps give gluten-free dough elasticity and structure, which is especially helpful in recipes using custom flour blends. - Gluten-Free Chocolate Chips, Nut Butters, and Vanilla Extract
Always check the labels. Even basic ingredients can hide gluten or be processed in shared facilities. Stick to trusted GF brands when baking for someone with celiac.
Tips for Avoiding Cross-Contamination
- Use separate utensils and bowls if you also bake with regular flour.
- Clean surfaces thoroughly before you start prepping gluten-free dough.
- Store your gluten-free ingredients separately in clearly labeled containers.
- Avoid wooden spoons or cutting boards that may hold onto traces of wheat from past bakes.
- Double-check labels—“wheat-free” doesn’t always mean gluten-free.
Equipment Checklist
You don’t need a fancy kitchen setup to bake amazing gluten-free cookies. But having the right tools can make the process smoother, quicker, and a whole lot more enjoyable.
Here’s what you’ll want on hand:
- Mixing Bowls
A few sizes come in handy—one for wet ingredients, one for dry, and one for combining everything. Stainless steel or glass is ideal for easy cleanup. - Measuring Cups and Spoons
Precision matters in gluten-free baking. Always level dry ingredients and use proper liquid measuring cups for wet ones. - Hand Mixer or Stand Mixer
Creaming butter and sugar is easier (and fluffier) with a little help. Either option works—choose what fits your kitchen and budget. - Parchment Paper or Silicone Baking Mat
Prevents cookies from sticking and helps with even browning. Also makes cleanup a breeze. Win-win. - Cookie Scoop
Keeps all your cookies the same size, which means they bake evenly. Plus, it makes portioning dough fast and fuss-free. - Cooling Rack
Don’t skip this step. Cooling cookies on a rack prevents soggy bottoms and keeps that perfect edge crisp.
7 Amazing Gluten-Free Cookie Recipes
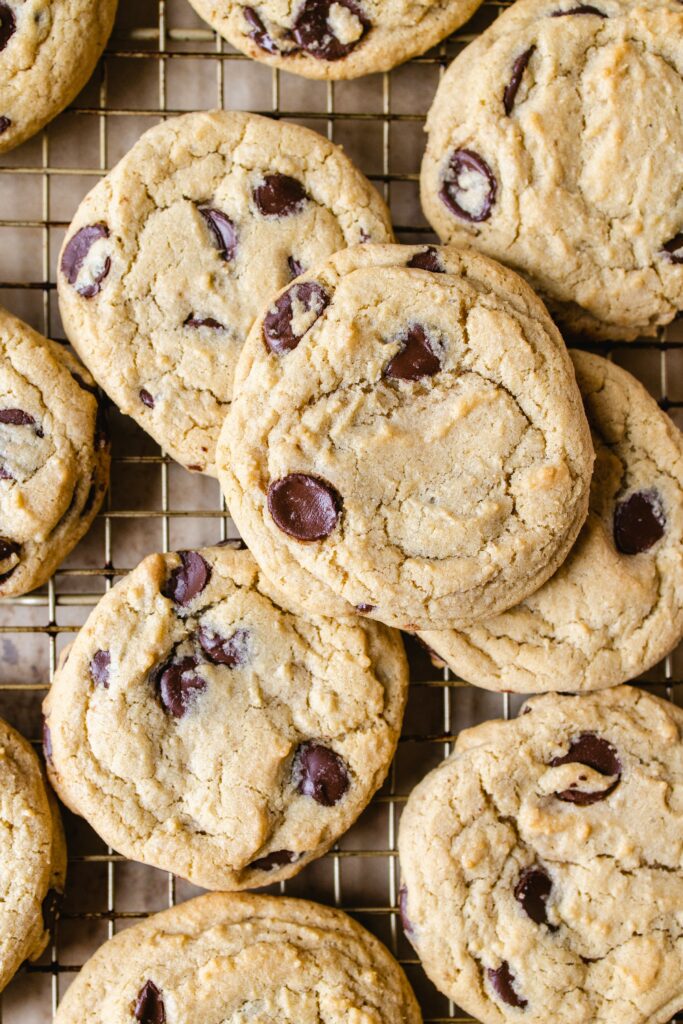
1. Chewy Almond Flour Chocolate Chip Cookies
Nutty, rich, and gooey with crispy edges—these are everything you want in a classic chocolate chip cookie.
Ingredients:
- 2 cups almond flour
- ½ tsp baking soda
- ¼ tsp salt
- ¼ cup coconut oil (melted) or butter
- ¼ cup maple syrup
- 1 tsp vanilla extract
- ½ cup gluten-free chocolate chips
Instructions:
- Preheat oven to 350°F (175°C). Line a baking sheet with parchment paper.
- In a bowl, mix almond flour, baking soda, and salt.
- Add melted coconut oil, maple syrup, and vanilla. Stir until combined.
- Fold in chocolate chips.
- Scoop dough onto the baking sheet. Flatten slightly.
- Bake 10–12 minutes or until edges are golden.
- Let cool 5 minutes on the tray before transferring to a rack.
2. Oatmeal Raisin Cookies (with Coconut Sugar)
Soft, chewy, and full of warm spices and sweet raisins—comfort in cookie form.
Ingredients:
- 1 ½ cups certified GF rolled oats
- ¾ cup oat flour
- ½ tsp baking soda
- 1 tsp cinnamon
- ¼ tsp salt
- ½ cup coconut sugar
- ⅓ cup coconut oil or butter
- 1 egg
- 1 tsp vanilla extract
- ½ cup raisins
Instructions:
- Preheat oven to 350°F (175°C). Line a baking sheet.
- Mix oats, oat flour, baking soda, cinnamon, and salt.
- In another bowl, beat sugar, oil, egg, and vanilla.
- Combine wet and dry. Stir in raisins.
- Scoop onto a tray and flatten slightly.
- Bake 10–12 minutes. Cool on a rack.
3. Flourless Peanut Butter Cookies
Just 4 ingredients. These cookies are chewy, sweet, salty, and utterly addictive.
Ingredients:
- 1 cup natural peanut butter
- ¾ cup coconut sugar or brown sugar
- 1 egg
- ½ tsp vanilla extract (optional)
Instructions:
- Preheat oven to 350°F (175°C). Line a baking sheet.
- Stir all ingredients together in a bowl.
- Scoop and roll into balls. Flatten slightly with a fork.
- Bake 8–10 minutes. Let cool completely—they firm up as they sit.
4. Coconut Macaroons (Dipped in Chocolate)
Golden on the outside, chewy in the middle, and finished with rich chocolate.
Ingredients:
- 2 ½ cups shredded unsweetened coconut
- ⅔ cup sweetened condensed milk (or coconut condensed milk)
- 1 tsp vanilla extract
- ⅛ tsp salt
- ½ cup dark chocolate (for dipping)
Instructions:
- Preheat oven to 325°F (165°C). Line a baking tray.
- Mix coconut, condensed milk, vanilla, and salt.
- Scoop into mounds. Place on tray.
- Bake 20–22 minutes until edges are golden.
- Cool completely. Dip bottoms in melted chocolate and let set.
5. Gluten-Free Snickerdoodles
Soft, buttery, and coated in cinnamon sugar—these are cozy in every bite.
Ingredients:
- 1 ½ cups GF 1:1 flour blend
- ½ tsp baking soda
- ¼ tsp cream of tartar
- ¼ tsp salt
- ½ cup butter (softened)
- ½ cup granulated sugar
- 1 egg
- ½ tsp vanilla extract
- 2 tbsp sugar + 1 tsp cinnamon (for rolling)
Instructions:
- Preheat oven to 350°F (175°C).
- Cream butter and sugar. Add egg and vanilla.
- Mix in dry ingredients until combined.
- Roll dough into balls, then roll in cinnamon sugar.
- Bake 10–12 minutes. Let cool slightly before transferring.
6. Double Chocolate Hazelnut Cookies
Fudgy, rich, and full of chocolate with a crunchy hazelnut twist.
Ingredients:
- 1 cup GF 1:1 flour blend
- ⅓ cup cocoa powder
- ½ tsp baking soda
- ¼ tsp salt
- ½ cup butter (softened)
- ½ cup coconut sugar or brown sugar
- 1 egg
- ½ tsp vanilla extract
- ½ cup chocolate chips
- ½ cup chopped hazelnuts
Instructions:
- Preheat oven to 350°F (175°C).
- Cream butter and sugar. Add egg and vanilla.
- Mix in flour, cocoa, baking soda, and salt.
- Stir in chocolate chips and hazelnuts.
- Scoop onto tray. Bake 10–11 minutes. Let cool before eating.
7. Lemon Almond Shortbread Cookies
Bright, buttery, and crumbly with a pop of citrus and almond depth.
Ingredients:
- 1 ¾ cups almond flour
- ¼ cup coconut flour
- ⅓ cup maple syrup
- ⅓ cup coconut oil or butter (melted)
- Zest of 1 lemon
- ½ tsp vanilla extract
- Pinch of salt
Instructions:
- Preheat oven to 325°F (165°C).
- Mix all ingredients in a bowl until a soft dough forms.
- Roll into a log, chill 15–20 minutes, then slice into rounds.
- Bake 12–15 minutes or until edges are lightly golden.
- Cool completely before handling because they’re delicate!
Tips for Perfect Gluten-Free Cookies Every Time
Baking gluten-free cookies isn’t rocket science, but it does come with its own set of quirks. A few small tweaks can make the difference between dry crumbles and chewy perfection.
Here’s how to nail it every single time.
Don’t Skip Chilling the Dough
Gluten-free dough is often softer and stickier than traditional cookie dough.
That’s because it lacks the structure that gluten provides. Chilling the dough for just 30 minutes in the fridge helps it firm up.
This prevents overspreading and makes the cookies easier to shape.
Bonus: the flavors get a chance to deepen while it rests.
Weigh Your Ingredients
Measuring cups are fine in a pinch, but if you want consistent results, weighing is your best friend. Gluten-free flours vary in texture and weight, and even a little too much can dry out your dough.
Use a kitchen scale when you can. It takes the guesswork out and gives you bakery-level precision with minimal effort.
Let Cookies Cool Completely Before Moving
Gluten-free cookies can seem underbaked when they’re hot out of the oven. But give them 5–10 minutes to cool on the tray and they’ll firm up beautifully.
Move them too soon, and you risk breaking or smushing them. Patience here pays off.
Don’t Overbake
Gluten-free flours tend to brown faster than regular wheat flour. What looks like “just golden” might actually be overdone in a few minutes. Keep a close eye in those last 2–3 minutes of baking.
The edges should be lightly golden, and the centers should still look slightly soft when you pull them out. They’ll continue baking on the tray.
Store with a Slice of Apple or Bread
Want to keep your cookies soft for days? Pop a slice of fresh apple or gluten-free bread in the container with them. It helps maintain moisture and prevents that dreaded dry crumble.
Just be sure to replace the slice every day or two, especially with apples, because they can get a little funky if forgotten.
Storage and Freezing Tips
Keeping gluten-free cookies fresh comes down to a few smart storage moves. First, always use airtight containers—glass with locking lids or BPA-free plastic work best.
They keep moisture in and air out, which is key since gluten-free cookies dry out faster than their wheat-based cousins.
As for where to stash them, room temperature is usually fine for 3 to 4 days, especially if your kitchen stays cool.
The fridge can extend their life by a couple more days, but it may firm them up a bit, so let them come to room temp before serving.
Now, if you’re freezing dough (and you should—it’s a lifesaver), you’ve got two solid options: scoop the dough into balls and freeze them on a tray, then store in a zip-top bag, or roll the dough into a log, wrap it tightly, and slice off what you need later.
Either way, label with the date and bake straight from frozen, but just add an extra 1–2 minutes. Baked gluten-free cookies also freeze well.
Let them cool fully, place in layers with parchment between, and freeze in an airtight container for up to 2 months.
A quick reheat in the oven or a short zap in the microwave brings them back to life. Simple tricks, big payoff.
Final Thoughts
Gluten-free or not, a good cookie is a good cookie, and these recipes prove it. Try one this weekend and see for yourself. You might even fool a few gluten lovers along the way.
Baking without gluten doesn’t mean baking without joy. It means getting creative, having fun, and still ending up with something sweet and satisfying!
FAQ’s
Can I make these cookies dairy-free too?
Absolutely. Most of these recipes work great with plant-based butter or coconut oil.
Just keep in mind that swapping butter for oil may slightly change the texture, and oil tends to make cookies softer and more tender.
What if I don’t have xanthan gum?
Many of these recipes don’t even need it!
But if you’re working with a custom GF flour blend that doesn’t include xanthan or guar gum, adding a pinch (about ¼ tsp per cup of flour) can help with structure.
In a pinch, chia or flaxseed meal mixed with water can offer a similar binding effect.
Are oats gluten-free?
Oats themselves don’t contain gluten, but they’re often processed in facilities that handle wheat.
Always look for oats labeled certified gluten-free to avoid cross-contamination, especially if baking for someone with celiac disease.
Can I freeze gluten-free cookie dough?
Yes, and you should! Scoop the dough into balls and freeze on a tray, then transfer to a freezer-safe bag. Or shape into a log and wrap tightly.
Label with the date, and bake straight from frozen, but just add an extra minute or two.
Why did my cookies turn out dry?
It’s usually one of three things: too much flour (especially if you didn’t weigh it), overbaking, or not enough fat or moisture in the dough.
Gluten-free flours can be extra thirsty, so don’t skip chilling the dough or measuring carefully. A splash of milk or an extra spoon of nut butter can help bring the dough back to life.

Hi, I’m Sorenna Blythe, the baker and writer behind Mix Whisk Bake. I share simple, reliable recipes and honest kitchen moments to help home bakers bake with confidence and joy. When I’m not testing new treats, you’ll find me sipping coffee and dreaming up my next bake.


