
There’s something deeply satisfying about baking your own sourdough bread. It’s rustic, flavorful, and full of character, just like grandma used to make, but with your own twist.
No fancy gadgets, no yeast packets, but just flour, water, salt, and time.
Why sourdough? For starters, it’s easier to digest, naturally fermented, and tastes way better than store-bought bread. Plus, nothing beats the smell of a fresh loaf crackling as it cools on your counter.
In this beginner-friendly guide, you’ll learn everything from tools and ingredients to each step of the process—no jargon, no stress.
Ready to turn your kitchen into a mini bakery? Let’s get that dough rolling!
What Is Sourdough Bread?
Sourdough bread is made using natural fermentation, rather than store-bought yeast. That means no packets, no shortcuts, but just wild yeast and friendly bacteria working together over time.
Unlike commercial yeast, which acts fast and predictably, sourdough relies on a living culture made from flour and water, often called a starter.
This starter captures wild yeast from the air and nurtures lactic acid bacteria already present in the flour. Together, they break down the dough slowly, developing flavor and structure along the way.
The wild yeast makes the bread rise, while the bacteria add that signature tang and improve digestibility. It’s a slower, more hands-on process, but the payoff is huge.
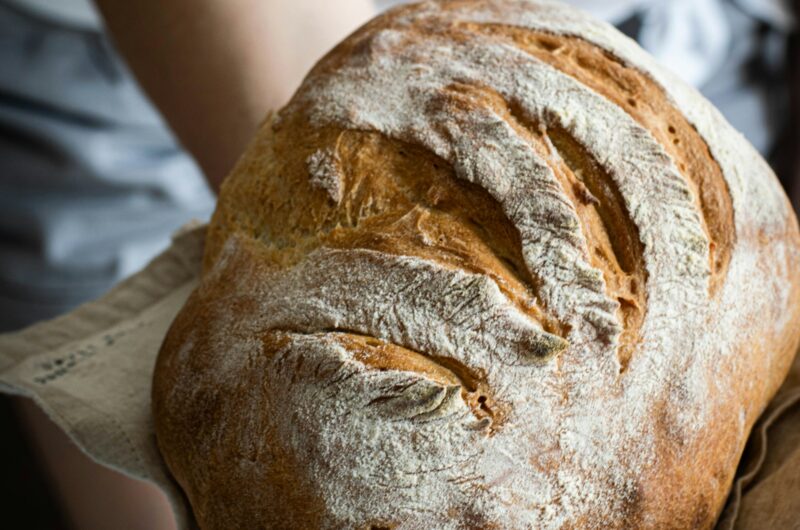
The result? A loaf with a deeply flavorful, slightly sour taste, a chewy, golden-brown crust, and a soft, airy interior full of those picture-perfect holes, also called an open crumb.
It’s not just bread; it’s a small science experiment that smells like heaven and tastes like comfort.
Tools & Equipment You’ll Need
Here’s a breakdown of the essential gear that makes sourdough baking smoother, more consistent, and a lot more enjoyable:
- Mixing Bowl
A large, sturdy bowl is your dough’s first home. Go for something non-reactive like glass, stainless steel, or ceramic. - Digital Kitchen Scale
Accuracy is everything in sourdough baking. A scale ensures you’re measuring by weight, not guesswork, because a cup of flour isn’t always a cup of flour. - Dough Scraper or Bench Knife
Great for lifting, folding, dividing, or cleaning sticky dough off your counter. It saves your hands and keeps things tidy. - Proofing Basket (Banneton) or Bowl with Towel
Helps your dough hold its shape while it rises. A banneton gives that classic swirl imprint, but a bowl lined with a floured towel works too. - Dutch Oven or Baking Stone
Traps steam during baking to create that crispy, blistered crust. A Dutch oven is beginner-friendly and super effective. - Lame or Sharp Razor Blade for Scoring
Scoring lets steam escape and gives the loaf its final look. A lame (pronounced “lahm”) gives you control and clean cuts. - Optional: Thermometer
Use an instant-read thermometer to check your dough or final bread temperature, especially helpful for consistency and learning. - Optional: Flour Sifter
Helps you evenly dust surfaces or baskets with flour and breaks up clumps in your flour for smoother dough.
Ingredients Breakdown
Here’s what goes into a classic sourdough loaf—just five humble ingredients, each playing a key role in flavor, structure, and fermentation:
- Bread Flour (or All-Purpose)
Bread flour is ideal because it’s high in protein, which helps create that chewy texture and strong gluten structure. All-purpose flour works too, especially for beginners, because it’s more forgiving and still produces a great loaf. - Whole Wheat Flour (Optional for Depth of Flavor)
Adding some whole wheat flour brings a nutty, earthy taste and boosts nutrition. It also feeds your sourdough starter well, thanks to its natural enzymes and higher mineral content. Use it in small amounts to start, as too much can make the dough dense. - Water (Filtered Is Best)
Water hydrates the flour and activates the fermentation process. Filtered or dechlorinated water is best, as chlorine in tap water can mess with your wild yeast and bacteria. Room temperature water usually works great unless your recipe says otherwise. - Salt
Essential for flavor and for controlling the fermentation pace. It strengthens the gluten network and keeps your loaf from tasting flat. Don’t skip it because your bread won’t be the same. - Sourdough Starter
This is your natural leavening agent—a mix of flour and water that’s been fermented over several days to grow wild yeast and beneficial bacteria. It replaces commercial yeast and gives your bread its rise, flavor, and character. If you don’t have one yet, you can either ask a baking friend or make your own from scratch with a simple starter guide.
Step-by-Step Sourdough Bread Process
Baking sourdough isn’t hard, but it just takes patience, timing, and practice. Here’s a clear breakdown of each step so you’re never left guessing.
1. Mixing the Dough
Start by combining your flour and water. This is called the autolyse stage. You’ll mix just those two ingredients (no salt or starter yet) and let them rest for about 30 to 60 minutes.
Why? It gives the flour time to fully hydrate and kickstarts gluten development, meaning less kneading later.
Once the autolyse is done, add your sourdough starter and salt. Work them into the dough using your hands or a dough hook.
At this stage, the dough might feel sticky and rough, but that’s totally normal. It’ll get smoother as you go.
2. Bulk Fermentation
This is when the magic happens. Your dough now begins its first long rise, called bulk fermentation, which can last anywhere from 4 to 6 hours, depending on room temperature and starter strength.
During this time, you’ll perform stretch and folds about every 30 to 45 minutes. To do this, wet your hand, grab one side of the dough, stretch it up gently, and fold it over to the other side.
Rotate the bowl and repeat on all sides. This builds strength and structure without the need for kneading.
Keep the dough covered and at a warm, stable temperature, ideally between 70–78°F (21–25°C). Cooler rooms will slow fermentation, while warmer ones will speed it up.
3. Shaping the Dough
Once bulk fermentation is done, it’s time to shape. Lightly dust your counter with flour (just enough to prevent sticking, not so much that the dough can’t grip the surface).
Gently turn the dough out and pre-shape it into a loose round. Let it rest for 15–20 minutes.
After the bench rest, do a final shaping to tighten the surface of the dough.
Use gentle tension as you fold and roll it into your desired shape—round or oval. This step is key to holding a strong shape through baking.
4. Final Proof
Now it’s time to let the shaped dough rise again—this is called the final proof. You can go two ways:
- Same-day proof at room temperature for 1–2 hours, or
- Cold proof overnight in the fridge for up to 12–16 hours.
Overnight proofing slows fermentation and gives your bread a deeper flavor and better crust development. It also makes the dough easier to handle and score.
To check if your dough is ready, gently press a floured finger into the surface. If it springs back slowly and leaves a slight dent, it’s good to go.
If it snaps back quickly, it needs more time. If it doesn’t spring back at all, it may be overproofed.
5. Scoring and Baking
Scoring is more than just decorative because it helps control where the dough expands in the oven. Use a lame or sharp razor blade to make a clean, confident slash across the top.
A deep score helps the loaf rise fully and prevents random bursting.
Bake in a preheated Dutch oven at around 475°F (245°C). The Dutch oven traps steam during the first 20 minutes, which helps the crust stay soft and allows for maximum oven spring.
After 20 minutes, remove the lid and continue baking for another 20–25 minutes until the crust turns deep golden brown.
Let it cool completely before slicing. Seriously, don’t rush this part. Cutting too early will make the crumb gummy. Let the bread sing as it cools (yes, it crackles), and then enjoy every bite you earned.
Common Beginner Mistakes (and How to Fix Them)
Sourdough is a learning process, and mistakes are part of the ride. The good news? Every flop teaches you something. Here’s how to spot common issues and what you can do next time.
Dense Loaf
A dense loaf usually means your dough didn’t ferment long enough, or it lacked strength. If your bread feels heavy or compact, your starter might not have been active enough when you mixed the dough.
Always make sure your starter is bubbly, doubled in size, and passes the float test. Also, don’t skip stretch and folds because these help build the internal structure needed for an airy crumb.
Flat or Spreading Dough
If your dough turns into a pancake on the counter, it likely didn’t develop enough gluten or was over-hydrated. Weak gluten means it can’t hold its shape.
Try using slightly less water if you’re just starting out. Stick with bread flour for more strength, and make sure you’re doing proper shaping to build surface tension.
And remember: if your dough feels like it’s running away from you, chill it before shaping because it’s easier to work with when cold.
Underproofed or Overproofed Issues
Underproofed dough hasn’t risen enough, but it bakes up tight and may burst oddly in the oven. Overproofed dough has gone too far, losing its strength and puff.
It often feels loose and sticky, and can collapse when scored. The key is watching your dough, not the clock. Use the poke test: gently press the dough with a floured finger.
If it springs back quickly, it needs more time. If it doesn’t come back at all, it’s likely overproofed. Aim for a slow, springy return with a slight dent.
Gummy Interior
If your bread looks done on the outside but feels wet and sticky inside, it’s either underbaked or sliced too soon. Always let the sourdough cool completely for at least an hour before cutting.
The steam inside needs time to settle. Also, make sure your oven is hot enough, and consider baking a bit longer uncovered to dry out the interior.
A thermometer can help too: your loaf is fully baked when the internal temp hits about 205°F (96°C).
Crust Too Hard or Too Soft
A rock-hard crust can come from overbaking or not enough steam during the first half of baking.
Use a Dutch oven to trap steam, and if it’s still too tough, try reducing your bake time slightly or wrapping the cooled loaf in a clean towel to soften the crust overnight.
On the flip side, a soft, pale crust means not enough heat or no steam. Crank up the oven and don’t skip the preheat because your crust needs that blast of high heat to brown and crisp up properly.
Tips for Success
Success with sourdough doesn’t come from perfection, but it comes from patience, curiosity, and repetition.
The more you bake, the more you’ll understand how dough behaves in your kitchen, with your starter, and in your hands. Here are a few down-to-earth tips to help make each bake better than the last.
Be Patient – Sourdough Is Slow But Worth It
This isn’t fast food. Sourdough takes time because it relies on natural fermentation. Don’t rush the process. The long rises are where flavor and texture are built.
If your dough looks like it’s dragging its feet, give it more time or adjust your room temperature.
Practice Makes Better: Each Bake Is a Learning Moment
Every loaf teaches you something. Maybe the crust is too hard, or the crumb is too tight, or it spreads too much. Take notes. Each bake is less about chasing perfection and more about building instincts.
It’s okay to make “ugly” bread because your taste buds won’t judge.
Keep a Sourdough Baking Journal
Write things down. Note what flour you used, how long each step took, what the dough felt like, what the weather was like, and how the loaf turned out.
Over time, you’ll spot patterns that help you adjust and improve. You don’t need anything fancy; a sticky notebook or a phone app will do.
Join Online Sourdough Communities for Support
You’re not alone on this journey. There are thousands of sourdough bakers, from total newbies to crusty pros, sharing tips, photos, and fails online.
Whether it’s a Facebook group, subreddit, or Instagram tag, these communities are goldmines for feedback and encouragement.
Ask questions, share your wins, post your flops because everyone starts somewhere, and sourdough folks are some of the friendliest in the food world.
Storage & Slicing Tips
Once you’ve pulled your sourdough from the oven, the work isn’t quite done because how you store and slice it can make or break the final experience.
For short-term freshness (up to 2–3 days), store your loaf at room temperature wrapped in a clean tea towel or inside a paper bag to keep the crust crisp and the crumb from drying out.
Avoid plastic because it traps moisture and makes the crust rubbery. If you won’t finish the loaf in time, slice it up and freeze individual pieces in a zip-top bag with parchment between slices.
That way, you can toast a slice straight from frozen whenever you want. As for slicing, resist the urge to cut it while it’s warm.
Seriously, let the bread cool for at least an hour, or you’ll end up with a gummy mess inside. Use a serrated bread knife and gentle sawing motions, and don’t press down like you’re cutting firewood.
A cooled, rested loaf slices cleanly, holds its shape, and rewards your patience with the perfect bite.
Final Words
Sourdough might seem intimidating at first, but it’s really just flour, water, salt, and a little patience. The process is simple, the results are magical, and every loaf teaches you something new.
Don’t worry if your first try isn’t bakery-perfect. Just keep baking, keep learning, and trust the dough. When you finally pull that golden, crackly loaf from the oven, you’ll know it was worth it!
FAQs
Can I make sourdough without a Dutch oven?
Yes, you can. While a Dutch oven helps trap steam for a crisp crust, you can bake on a preheated baking stone or sheet with a tray of hot water in the oven to create steam.
It won’t be exactly the same, but it still works well.
How long does sourdough take from start to finish?
It depends on your schedule and proofing method. A typical loaf takes about 24 hours from mixing to baking if you include an overnight cold proof.
If you do everything in one day, plan for 8–10 hours. Most of that time is hands-off.
What’s the best flour to use for beginners?
Bread flour is your best friend when starting out. It has more protein, which helps build strong gluten and gives you a better rise. All-purpose can work too, but it’s a bit softer and less forgiving.
Can I freeze sourdough bread?
Absolutely. Once cooled, slice the loaf and freeze the slices in a sealed bag with parchment between each one. That way, you can grab a slice anytime and toast it straight from the freezer.
What’s the difference between sourdough discard and starter?
Your starter is the active culture you feed regularly, and it’s what makes your bread rise. Discard is the portion you remove before feeding.
It’s not strong enough to rise bread on its own, but it’s great for pancakes, waffles, crackers, and other recipes that don’t need a big rise.
Beginner’s Guide to Baking Sourdough Bread
Difficulty: Moderate1
loaf30
minutes45
minutes20
hoursA simple, naturally leavened sourdough bread with a crisp crust, chewy crumb, and rich flavor—perfect for first-time bakers.
Ingredients
500g bread flour
350g water (filtered, room temp)
100g active sourdough starter
10g salt
Directions
- Autolyse: Mix flour and water until no dry spots remain. Cover and rest 45 minutes.
- Add Starter & Salt: Add sourdough starter and salt. Mix well until fully combined.
- Bulk Fermentation: Cover and rest 4–6 hours, doing 4 sets of stretch and folds every 30–45 minutes.
- Shape: Turn the dough onto a floured surface. Pre-shape and rest for 20 minutes. Shape tightly into a round or oval.
- Final Proof: Place in floured proofing basket. Cover and refrigerate overnight (or proof 1–2 hours at room temp).
- Score & Bake: Preheat oven and Dutch oven to 475°F (245°C). Score dough, transfer to Dutch oven, cover, and bake 20 minutes. Uncover and bake 20–25 minutes more until golden brown.
- Cool: Let cool completely before slicing—at least 1 hour.
Notes
- Use a kitchen scale for best results.
- Your starter should be active, bubbly, and pass the float test.
- For extra flavor, extend the cold proof up to 16 hours.
- Store sliced and freeze extras to avoid waste.

Hi, I’m Sorenna Blythe, the baker and writer behind Mix Whisk Bake. I share simple, reliable recipes and honest kitchen moments to help home bakers bake with confidence and joy. When I’m not testing new treats, you’ll find me sipping coffee and dreaming up my next bake.


