There’s something magical about the smell of garlic bread baking in your kitchen. Warm, buttery, garlicky. It’s the kind of comfort that wraps around you like a hug.
What if I told you it’s surprisingly easy to make from scratch? No boxed mixes. No frozen shortcuts. Just simple dough, real garlic, and a little love.
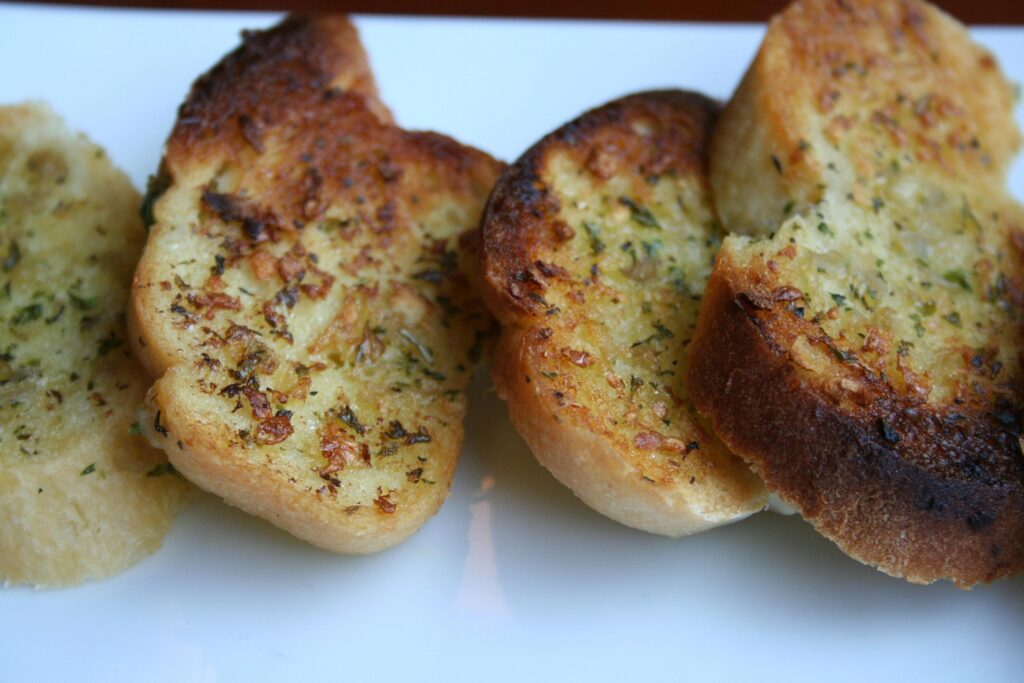
Crispy on the edges, soft in the middle, and loaded with flavor—this recipe checks all the right boxes.
Ready to ditch the store-bought stuff? Let’s bake the kind of garlic bread that disappears before it even hits the plate!
Why Make Garlic Bread from Scratch?
You Control Every Ingredient
Store-bought garlic bread often comes with a long list of preservatives, artificial flavors, and more sodium than you bargained for. When you bake it yourself, you’re in the driver’s seat.
You choose the flour, the butter, the garlic—nothing sneaky hiding in the fine print. Want to go organic? Prefer olive oil instead of butter? Go for it. No mystery ingredients. Just real food made your way.
Customize the Flavors to Suit Your Taste
Homemade garlic bread is like a blank canvas. Want a kick of heat? Toss in some red pepper flakes. Craving something cheesy? Pile on mozzarella or sprinkle parmesan over the top.
You can play around with fresh herbs like parsley, oregano, or even basil. Like it extra garlicky? Add more cloves. Making it for kids? Keep it mild and buttery. You’re the chef, so make it yours.
The Texture is Miles Better
Frozen garlic bread can’t hold a candle to the real deal. The crust is often soggy, the middle bland, and the butter barely melts evenly.
When you make it from scratch, you get golden, crispy edges and a soft, pillowy center every time.
The butter seeps into the bread while baking, creating layers of flavor that no pre-packaged loaf can match.
It’s Surprisingly Budget-Friendly
Bakery garlic bread might look simple, but it often comes with a fancy price tag. Especially if it’s “artisan” or loaded with cheese.
Homemade, on the other hand, costs just a fraction, especially if you already have basic ingredients on hand. Flour, yeast, garlic, butter… all pantry staples.
For the price of one store-bought loaf, you can make two (or three!) at home, and they’ll taste ten times better.
Ingredients You’ll Need
For the Bread Dough:
- 2 ½ cups all-purpose flour
The base of your bread provides structure and chewiness. - 1 tsp salt
Enhances flavor and helps balance the richness of the butter. - 1 tsp sugar
Feeds the yeast and helps your dough rise evenly. - 2 ¼ tsp active dry yeast
Makes the bread rise—equivalent to one standard yeast packet. - ¾ cup warm water (110°F)
Activates the yeast; not too hot or it’ll kill it. - 1 tbsp olive oil
Adds moisture and a hint of richness to the dough.
For the Garlic Butter:
- 4 tbsp unsalted butter, softened
The creamy base that carries all the garlicky goodness. - 3–4 garlic cloves, minced
The star of the show—fresh garlic gives bold, punchy flavor. - 2 tbsp fresh parsley or 1 tbsp dried
Adds color, freshness, and a herby note. - ¼ tsp salt
Balances the butter and lifts the flavor of the garlic. - Optional: 2 tbsp grated parmesan or mozzarella
For an extra savory, cheesy kick that is totally worth it.
Equipment Checklist
Here’s what you’ll need to make garlic bread from scratch without breaking a sweat:
- Mixing bowls
For combining your dough ingredients and letting the dough rise. - Whisk and spatula
The whisk helps mix the wet ingredients and activate yeast, while the spatula is great for stirring and scraping. - Measuring cups and spoons
Precision matters, especially for flour, yeast, and garlic. - Baking sheet or loaf pan
Use a baking sheet for flat, rustic-style bread or a loaf pan for a taller, pull-apart version. - Pastry brush
Essential for spreading that garlicky butter evenly over your dough (and for adding more after baking). - Oven
The heart of it all—preheated and ready to transform your dough into golden, crispy magic.
Step-by-Step Instructions
Follow these steps and you’ll be pulling fresh, golden garlic bread out of your oven in no time.
1. Make the Dough
Start by waking up your yeast. In a mixing bowl, combine the warm water (about 110°F) with the sugar and active dry yeast.
Let it sit for about 5–10 minutes until it looks foamy on top. That’s the yeast saying, “I’m alive and ready!”
Next, add in the flour, salt, and olive oil. Stir everything together until a shaggy dough forms.
Now it’s time to knead. You can do this by hand on a floured surface for 8–10 minutes, or use a stand mixer with a dough hook for about 5.
You’re looking for a smooth, elastic dough that bounces back when pressed.
Place the dough in a lightly oiled bowl, cover it with a kitchen towel, and let it rise in a warm spot for about an hour, or until it’s doubled in size.
Go make a cup of tea or clean your countertop. The dough’s doing the hard work now.
2. Prepare the Garlic Butter
While the dough is rising, make the good stuff: the garlic butter. In a small bowl, combine the softened butter, minced garlic, parsley, and salt. Stir it until everything’s well mixed.
Want a cheesy version? This is where you stir in some grated Parmesan or mozzarella.
Let the butter sit while the dough rises. This helps the garlic and herbs infuse the butter with loads of flavor. Bonus: your kitchen will already start to smell amazing.
3. Shape the Bread
Once your dough has risen, punch it down gently to release the air. Then transfer it to a floured surface and shape it how you’d like.
For a classic garlic bread loaf, roll it into a log. Prefer a more rustic style? Flatten it into an oval or rectangle.
If you’re going for pull-apart garlic bread, you can cut shallow slits across the top and stuff some of that garlic butter inside each pocket. Even better, tuck in some cheese while you’re at it.
Finally, spread a generous layer of garlic butter over the top. Don’t hold back.
4. Final Rise
Let your shaped bread rest for 20–30 minutes, loosely covered with a towel. This second rise helps give the bread a lighter, airier texture once it bakes.
Use this time to preheat your oven to 375°F (190°C). Almost there!
5. Bake
Place your bread on a lined baking sheet or in a greased loaf pan and pop it into the oven.
Bake for 20–25 minutes, or until the top is golden brown and your kitchen smells like an Italian restaurant in the best way possible.
You’ll know it’s done when the crust is crisp and tapping the bottom of the loaf gives a hollow sound.
6. Optional Finishing Touches
Fresh out of the oven, brush the bread with a final coat of garlic butter for that glossy, buttery finish.
Feeling fancy? Sprinkle on fresh herbs like parsley or thyme. A pinch of flaky salt takes it over the top.
Let it cool slightly, then slice and serve warm. You’ve officially made garlic bread from scratch, and it beats anything in the frozen aisle by a mile.
Flavor Variations
Once you’ve nailed the basic garlic bread, it’s hard to resist getting a little creative. Here are a few delicious twists you can try.
Cheesy Garlic Bread
This one’s a crowd favorite for a reason. Once your dough is shaped, sprinkle a generous handful of shredded mozzarella, cheddar, or both right on top.
For extra indulgence, stuff a little cheese inside the dough before baking—especially in pull-apart styles. It melts into gooey pockets that stretch with every bite. Cheese pulls = happiness.
Spicy Garlic Bread
Want to turn up the heat? Add ½ to 1 teaspoon of crushed red pepper flakes to your garlic butter. It adds a subtle kick without overpowering the garlic.
You can also experiment with a dash of cayenne or chili oil if you’re feeling bold.
Herbed Garlic Bread
For a more aromatic, garden-fresh twist, mix in chopped fresh herbs like rosemary, thyme, or oregano into your garlic butter. Even dried Italian seasoning works great in a pinch.
These herbs add depth and an earthy note that pairs beautifully with soups, stews, or pasta dishes.
Pull-Apart Garlic Bread
This one’s as fun to eat as it is to make. Slice your shaped dough into sections or criss-cross cuts before baking, but don’t separate them.
Slather garlic butter between each slice and top with cheese or herbs. When it comes out of the oven, everyone can grab a chunk, no knife needed. It’s a guaranteed hit at dinner parties or movie nights.
Serving Ideas
Garlic bread is one of those rare sides that fit into almost any meal without stealing the spotlight, but it absolutely could.
Pair it with pasta dishes like spaghetti, lasagna, or fettuccine Alfredo, and you’ve got a match made in carb heaven. The bread soaks up leftover sauce like a sponge with no drop left behind.
Want to get creative? Use it as a pizza base: slice your baked garlic bread in half, add marinara and cheese, and broil until bubbly—it’s quick, fun, and surprisingly delicious.
For comfort food nights, serve it alongside soups or stews—tomato soup, minestrone, or beef stew all love a good bread buddy. It adds texture, richness, and that cozy “homemade” vibe.
Hosting a get-together? Cut your garlic bread into small squares or sticks and serve it as party appetizers or on snack boards with dips like marinara, spinach-artichoke, or cheesy fondue.
Storage and Reheating Tips
Got leftovers? Lucky you. To keep your garlic bread fresh, store it in an airtight container or wrap it tightly in foil. It’ll stay good at room temperature for up to 2 days.
If you need a little more time, pop it in the fridge for up to 5 days, but know the texture might get a bit firmer.
For long-term garlic bliss, freeze it for up to a month, but just wrap it in foil first, then tuck it into a freezer bag to prevent freezer burn.
When it’s time to bring it back to life, skip the microwave (unless you love soggy bread), and reheat it in the oven at 350°F (175°C) for 5 to 8 minutes until warm and crisp again.
Even better? Toss a slice or two into the air fryer for 3 to 4 minutes. It’ll come out with golden edges and a soft center that tastes just-baked.
Trust me, day-old garlic bread doesn’t have to taste like it’s been sitting on the bench.
Final Words
Baking garlic bread from scratch is simpler than it sounds and way more rewarding. You get full control, unbeatable flavor, and that warm, buttery aroma filling your kitchen.
Don’t be afraid to mix things up—throw in some cheese, herbs, or a spicy twist. Make it yours!
FAQs
Can I use store-bought dough?
Absolutely. If you’re short on time, pre-made pizza or bread dough works great.
Just roll it out, add your garlic butter, and bake as usual. Homemade gives you full control, but store-bought is a solid shortcut.
What if I don’t have fresh garlic?
You can use garlic powder—start with ½ teaspoon and adjust to taste. It won’t have the same bold kick as fresh, but it still does the job in a pinch.
Can I make it vegan?
Yes! Just swap the butter for a plant-based alternative and make sure your dough ingredients are dairy-free. Olive oil also works great in the garlic spread for a rich, savory vibe.
How do I keep it crispy on the outside but soft inside?
Don’t skip the second rise because it helps create that soft interior. Bake at the right temp (375°F) and avoid overloading it with butter before baking.
You can always brush on more afterward for flavor without sogginess.
Can I use a sourdough base?
Totally. If you have an active sourdough starter, use your favorite basic sourdough recipe, then add the garlic butter before and after baking. It’ll give your bread a tangy twist that pairs beautifully with garlic.

How to Bake Garlic Bread from Scratch In A Few Easy Steps
Difficulty: Easy6
servings15
minutes25
minutes1
hour40
minutesCrispy on the outside, soft on the inside—this homemade garlic bread is brushed with rich garlic butter and baked to golden perfection. Simple, comforting, and packed with flavor.
Ingredients
- For the Bread Dough:
2 ½ cups all-purpose flour
1 tsp salt
1 tsp sugar
2 ¼ tsp active dry yeast
¾ cup warm water (110°F)
1 tbsp olive oil
- For the Garlic Butter:
4 tbsp unsalted butter, softened
3–4 garlic cloves, minced
2 tbsp fresh parsley or 1 tbsp dried
¼ tsp salt
Optional: 2 tbsp grated parmesan or mozzarella
Directions
- Activate Yeast: In a bowl, mix warm water, sugar, and yeast. Let it sit for 5–10 minutes until foamy.
- Make Dough: Add flour, salt, and olive oil. Mix, then knead until smooth (about 10 minutes by hand or 5 with a mixer).
- First Rise: Cover and let rise for 1 hour or until doubled in size.
- Prepare Garlic Butter: Combine softened butter, garlic, parsley, and salt. Stir in cheese if using.
- Shape Bread: Punch down dough, shape into a loaf or oval, and spread garlic butter on top.
- Final Rise: Let rest 20–30 minutes.
- Bake: Bake at 375°F (190°C) for 20–25 minutes or until golden brown.
- Finish: Brush with more garlic butter right after baking for extra flavor.
Notes
- For extra crunch, bake directly on a hot baking sheet.
- To make it vegan, replace butter with olive oil or vegan spread.
- Freeze leftovers for up to a month and reheat at 350°F for 5–8 minutes.

Hi, I’m Sorenna Blythe, the baker and writer behind Mix Whisk Bake. I share simple, reliable recipes and honest kitchen moments to help home bakers bake with confidence and joy. When I’m not testing new treats, you’ll find me sipping coffee and dreaming up my next bake.


