Store-bought bread used to be my go-to until I flipped the package and couldn’t pronounce half the ingredients.
That’s when I tried baking my own whole wheat bread. It was simpler than I expected, smelled amazing, and tasted even better. No preservatives, no mystery oils, but just real, hearty goodness.
Whole wheat bread is naturally high in fiber, rich in flavor, and surprisingly easy to make at home. Whether you’re baking for your health, your wallet, or just for fun, this recipe checks all the boxes.
Let’s break it down step by step. You’ll be slicing into your own fresh loaf in no time.
Why Bake Whole Wheat Bread at Home?
Health Benefits: More Fiber, Fewer Additives
Whole wheat bread isn’t just brown bread, but it’s bread that still contains the bran and germ of the wheat grain, which means it’s packed with fiber, iron, B vitamins, and antioxidants.
A slice of homemade whole wheat bread can give you around 2.5–3g of fiber, compared to 1g or less in most processed white bread.
When you bake it yourself, you skip the long list of additives found in many store-bought loaves, like dough conditioners, stabilizers, preservatives, and added sugars.
Your ingredient list becomes short and clean: flour, water, yeast, oil, salt, and honey. That’s it.
It’s the kind of bread you feel good about feeding to your family. No hidden junk. Just wholesome ingredients you can pronounce.
Cost Savings: Let’s Talk Dough (The Money Kind)
Buying a decent loaf of whole wheat bread at the store can cost you $3.50 to $5, especially if you go for the organic or artisan varieties. And if you’re eating it regularly, that adds up fast.
Now let’s break down a homemade loaf:
| Ingredient | Amount Used | Estimated Cost |
|---|---|---|
| Whole wheat flour | 3 cups | $0.75 |
| Active dry yeast | 2¼ teaspoons | $0.20 |
| Honey or maple syrup | 2 tablespoons | $0.25 |
| Olive oil or butter | 2 tablespoons | $0.30 |
| Salt | 1½ teaspoons | $0.05 |
| Water | 1¼ cups | practically free |
| Total (per loaf) | $1.55 |
That’s less than half the price of store-bought, and you get better quality and flavor.
If you bake one loaf a week, you’re saving $100–$150 a year, and that’s just bread.
Customizable: Make It Just the Way You Like It
One of the best perks of baking your own bread? You’re the boss of the dough.
Want it a little sweeter? Add an extra tablespoon of honey. Prefer it nuttier? Toss in ¼ cup of sunflower or flax seeds.
Want a softer crumb? Try adding 1 tablespoon of milk powder or vital wheat gluten for more chew.
Don’t eat dairy? Use olive oil instead of butter. Watching sugar? Swap honey for mashed banana or leave it out entirely.
The loaf becomes yours, tailored to your preferences, dietary needs, or family favorites.
No brand at the grocery store can offer that kind of control.
Satisfaction Factor: It Just Feels Good
There’s something deeply satisfying about baking bread.
The moment you knead that warm, springy dough, you’re doing more than just prepping food—you’re slowing down, being present, creating something with your hands.
The smell of a freshly baked whole wheat loaf filling your kitchen? Unbeatable.
Then there’s the first slice—still warm, slathered with butter or jam. It’s not just bread anymore. It’s comfort. It’s pride. It’s the kind of thing that makes you pause and think, “I made this.”
Ingredients You’ll Need
Here’s your simple lineup of pantry staples.
- Whole wheat flour – 3 cups
The heart of this recipe. Use 100% whole wheat flour for a rich, nutty flavor and wholesome texture. - Warm water – 1¼ cups
Helps activate the yeast and bring the dough together. Make sure it’s warm (around 105–110°F / 40–43°C), not hot, because you don’t want to kill the yeast. - Active dry yeast – 2¼ teaspoons (one packet)
This little powerhouse gives your bread its rise. Always check that your yeast is fresh for the best results. - Honey or maple syrup – 2 tablespoons
Adds a touch of sweetness and feeds the yeast naturally. Either option works beautifully, so go with what you have on hand. - Olive oil or melted butter – 2 tablespoons
Keeps the crumb soft and adds richness. Olive oil brings a lighter flavor; butter makes it extra cozy. - Salt – 1½ teaspoons
Enhances the flavor and keeps the yeast in check. Skipping it leads to bland bread, so don’t do that to yourself. - Optional add-ins: flax seeds, oats, sunflower seeds, or herbs – about 2–3 tablespoons total
Perfect for boosting texture, nutrition, and flavor. Think of these as your bread’s personality — rustic, nutty, or aromatic, depending on what you choose.
Equipment Checklist
You don’t need a bakery setup to make amazing whole wheat bread. Just a few basic tools you likely already have in your kitchen. Here’s what you’ll need:
- Mixing bowls
You’ll want at least one large bowl for mixing and rising the dough. Bonus points if it’s clear so you can watch the magic happen. - Measuring cups and spoons
Accuracy matters in baking. Dry and liquid measuring tools help keep your flour, water, and salt levels just right. - Loaf pan (8½ x 4½ inch or 9 x 5 inch)
Gives your bread its classic shape and supports the rise during baking. Grease it well or use parchment for easy removal. - Dough scraper or spatula
Handy for mixing, folding, and transferring sticky dough. A bench scraper also makes cleanup easier. - Stand mixer (optional)
Saves your arms some effort during kneading. A dough hook attachment does the job in about 6–7 minutes. - Kitchen towel or plastic wrap
Use to cover the dough during rising so it doesn’t dry out. A clean towel feels traditional, but plastic wrap traps moisture more effectively. - Oven thermometer (optional but helpful)
Not all ovens run true to temperature. This tool ensures your bread bakes at the right heat for the perfect rise and crust.
Step-by-Step Instructions
Ready to turn your dough into a warm, homemade loaf? Follow these steps closely and you’ll be slicing into soft, hearty bread before you know it.
1. Activate the Yeast
In a small bowl or measuring cup, combine:
- 1¼ cups warm water (around 105–110°F / 40–43°C)
- 2¼ teaspoons active dry yeast
- 2 tablespoons honey or maple syrup
Give it a quick stir and let it sit for 5 to 10 minutes. You’re looking for a bubbly, foamy surface.
If nothing happens, your yeast might have expired, or the water was too hot, so start over with fresh yeast. This step wakes the yeast up and gets it ready to help your bread rise.
2. Combine Dry Ingredients
In a large mixing bowl, whisk together:
- 3 cups whole wheat flour
- 1½ teaspoons salt
This ensures even salt distribution and breaks up any flour clumps. Salt strengthens the dough and helps control the yeast, so don’t skip or reduce it.
3. Mix the Dough
Pour your activated yeast mixture into the dry ingredients.
Add:
- 2 tablespoons olive oil or melted butter
Use a wooden spoon or spatula to stir until the mixture forms a rough, sticky dough. It won’t look pretty at this stage, but don’t worry, it’s not supposed to.
4. Knead the Dough
Turn the dough out onto a floured surface or keep it in the bowl if you prefer less mess. Knead by hand for 8–10 minutes, or use a stand mixer with a dough hook for 6–7 minutes on medium speed.
You’re looking for a smooth, elastic texture. It should feel slightly tacky but not overly sticky. If it’s clinging to your hands like glue, add a tablespoon of flour at a time, sparingly.
A good test? Press the dough with a clean finger. If it springs back, it’s ready to rise.
5. First Rise
Lightly grease a clean bowl with oil. Place the dough inside and turn it over once so it’s coated all around. Cover the bowl with a kitchen towel or plastic wrap.
Let it sit somewhere warm and draft-free for 1 to 1½ hours, or until it’s doubled in size. You should be able to poke it gently and see the indentation remain.
Tip: The inside of your (turned-off) oven with the light on makes a cozy rising spot.
6. Shape and Second Rise
Once the dough has doubled, punch it down gently to release the air. Turn it out onto a lightly floured surface and shape it into a loaf by rolling or folding it tightly into a log.
Grease a 9 x 5-inch loaf pan, then place the shaped dough inside. Cover it loosely and let it rise again for 30 to 45 minutes, or until the top has puffed up slightly above the rim of the pan.
This second rise helps give your bread a soft, airy crumb.
7. Bake
Preheat your oven to 375°F (190°C) while the dough finishes rising.
Once ready, place the loaf on the center rack and bake for 30 to 35 minutes. The top should be golden brown, and the loaf should sound hollow when tapped on the bottom.
For precision, check that the internal temperature hits 190–200°F (88–93°C) with an instant-read thermometer.
8. Cool and Slice
Remove the loaf from the pan and place it on a wire rack to cool completely, at least 1 hour.
As tempting as it is to slice into it right away, don’t. Cutting too soon traps steam and makes the bread gummy.
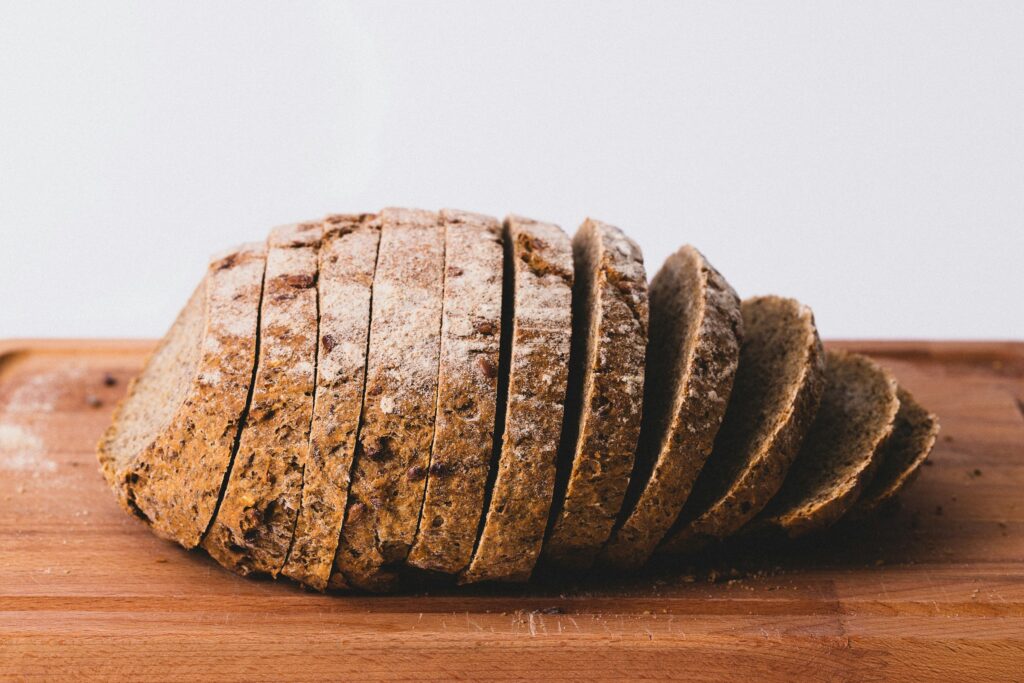
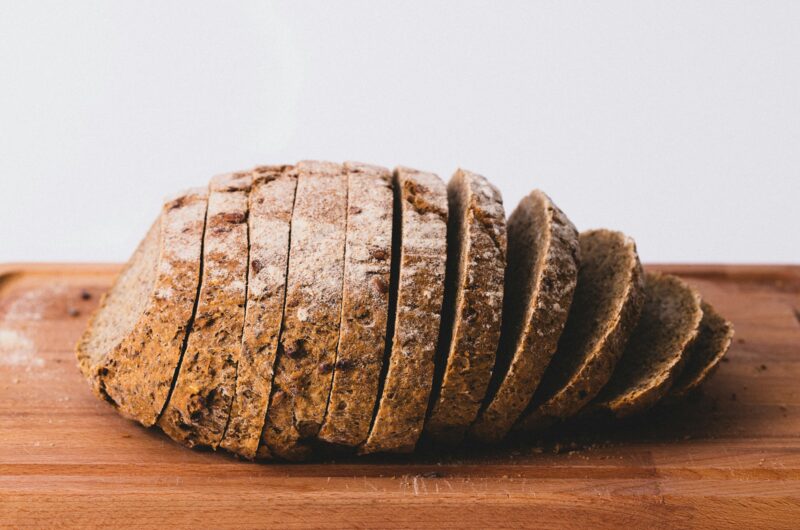
Once cooled, grab a serrated knife and slice away. Store extras in an airtight bag or freeze for later.
Tips for the Best Whole Wheat Bread
Even though this recipe is simple, a few smart tips can take your loaf from good to “Whoa, did you really bake this?!”
Add Vital Wheat Gluten for a Lighter Texture
Whole wheat flour is naturally heavier than white flour. That’s because it contains the bran and germ, which are great for nutrition, and not so great for fluffiness.
To help your dough rise higher and create a softer crumb, you can add 1 tablespoon of vital wheat gluten per cup of whole wheat flour (so, 3 tablespoons total for this recipe).
It strengthens the dough and traps more air, giving your bread that nice, bakery-style lift.
No vital wheat gluten? No problem. Your bread will still be hearty and delicious and just a bit denser. Still totally worth it.
Don’t Skip the Second Rise
It might feel tempting to rush things and toss the dough in the oven after the first rise.
The second rise (also called proofing) lets the dough relax and expand in its final shape. This leads to better volume, a more even crumb, and that satisfying dome shape on top.
If you bake too early, the loaf can turn out squat and tight. Give it that extra 30–45 minutes. It’s worth the wait.
Use a Thermometer — Trust, Don’t Guess
Looks can be deceiving when it comes to bread. It may look done on the outside, but still be doughy inside. That’s where a food thermometer saves the day.
Insert it into the center of the loaf after baking. When it reads 190–200°F (88–93°C), your bread is done.
No thermometer? Tap the bottom of the loaf, and if it sounds hollow, you’re probably good. But honestly, a cheap thermometer is one of the best baking investments you’ll ever make.
Variations to Try
Once you’ve nailed the basic loaf, it’s time to play.
One of the best things about homemade bread is that it’s a blank canvas. You can dress it up sweet or savory, hearty or rustic, depending on your mood (or what’s in your pantry).
Here are a few easy and delicious ways to make your whole wheat bread your own.
Seeded Loaf: For a Nutty Crunch
Want a loaf that looks like it came straight from a farmers’ market? Add seeds. Lots of them.
Try mixing in 2 to 3 tablespoons of any combination of:
- Chia seeds – tiny but mighty, they add fiber and omega-3s.
- Flax seeds – great for texture and a mild, earthy taste.
- Sunflower seeds – soft crunch and slightly sweet.
- Sesame seeds – nutty and aromatic, especially good on top.
- Pumpkin seeds (pepitas) – chewy and satisfying.
You can mix the seeds into the dough before the first rise, or sprinkle them on top before baking (just brush the top of the dough with a little water or egg wash so they stick).
It’s a small change that adds big flavor and crunch.
Sweet Version: Warm, Cozy, and Comforting
Looking for something more snackable or breakfast-ready? Go sweet.
Stir in ½ to ¾ cup of raisins or dried cranberries during the dough mixing stage.
Then, add 1½ teaspoons of ground cinnamon to your dry ingredients for that cozy, spiced aroma. You can even swirl in a little brown sugar for an extra treat.
Toast a slice, slather it with butter, and your kitchen just became a bakery.
Savory Twist: Bold Flavors, Big Personality
This is where things get fun. Want to impress your friends at brunch? Add savory flavors right into your dough.
Mix in:
- 1 teaspoon garlic powder
- 1–2 teaspoons dried herbs like rosemary, thyme, or oregano
- ½ cup shredded cheese (cheddar, Parmesan, or mozzarella works great)
The cheese melts into the crumb and adds salty pockets of flavor. The herbs make your kitchen smell incredible. It’s basically focaccia’s heartier cousin.
Pair it with soup, use it for grilled cheese, or just tear off a chunk and dip it in olive oil.
Storage Tips
To keep your homemade whole wheat bread fresh and delicious, storage is key.
For short-term use, let the loaf cool completely, then wrap it tightly in a clean kitchen towel, plastic wrap, or aluminum foil and store it at room temperature for up to 3–4 days.
Avoid the fridge because it dries out bread faster than you can say “stale sandwich.” If you’re not going to finish the loaf in a few days, freezing is your best bet.
Slice the cooled bread first (trust me, it’s way easier now than later), then place the slices in a ziplock freezer bag, squeeze out the air, and store them in the freezer for up to 3 months.
When you need a slice, just pop it in the toaster or let it thaw at room temp—no need to re-bake. This method keeps the texture soft and the flavor spot-on, even weeks later.
Common Mistakes to Avoid
Using Water That’s Too Hot
This one catches a lot of beginners off guard. If your water feels really warm to the touch, it’s probably too hot for the yeast. Yeast is a living organism, and just like us, it doesn’t like being scalded.
Water that’s over 115°F (46°C) can kill it, leaving you with dough that won’t rise and a very flat loaf.
Stick to warm water, around 105–110°F (40–43°C). If you don’t have a thermometer, use the wrist test: it should feel warm but never hot.
Not Kneading Enough
Kneading isn’t just for show, but it builds the gluten structure that gives your bread that chewy, bouncy texture.
If you under-knead, the dough can’t trap enough air, and you’ll end up with a dense, squat loaf that feels more like a brick than bread.
Aim for 8–10 minutes by hand or 6–7 minutes with a stand mixer. The dough should feel smooth, elastic, and slightly tacky, but not sticky like glue.
A good knead gives your bread strength and structure.
Cutting Too Early Before Cooling
It’s hard, I know. The smell of fresh bread is basically edible happiness. But resist the urge to slice into it right away.
Cutting while it’s still hot traps steam inside the loaf, which makes the texture gummy and undercooked in the middle.
Let it cool on a wire rack for at least 1 hour. This rest time allows the crumb to set properly and makes for cleaner, neater slices.
Final Words
Whole wheat bread might seem tricky at first, but once you get the hang of it, it’s as easy as pie—well, easier, honestly.
With a little practice and a few pantry staples, you’ll be baking loaves that beat anything on a store shelf.
Don’t be afraid to mix things up. Toss in seeds, swirl in cinnamon, or go bold with herbs and cheese.
Your kitchen, your rules. Got questions or want to share your loaf? Drop a comment, I’d love to hear how your bread turns out!
FAQs
Can I make this bread without sugar?
Yes, you can leave out the honey or maple syrup. Just know that the sugar helps feed the yeast and adds a touch of flavor. Without it, your bread may rise a bit slower and taste more savory.
If you’re avoiding sugar for dietary reasons, it’s totally fine, but just be patient during the rise.
Can I use instant yeast instead of active dry?
Absolutely. Instant yeast works just as well and doesn’t need to be proofed first.
Just mix it directly into the dry ingredients. Use the same amount, 2¼ teaspoons, and your rise time may even be a little shorter.
Why is my bread too dense?
Dense bread usually means one of three things: under-kneading, weak yeast, or not enough rise time.
Make sure your yeast is fresh, knead the dough until it’s smooth and elastic, and give it plenty of time to rise. Cold kitchens can slow the process, so try a warmer spot if needed.
How can I make it softer?
For a softer loaf, try adding 1 tablespoon of vital wheat gluten per cup of flour or a bit of milk or milk powder to enrich the dough.
Don’t overbake; pull it out when it hits 190–200°F (88–93°C) inside. And always let it cool completely to lock in moisture.
Can I make this gluten-free?
Not with this exact recipe. Whole wheat flour contains gluten, which gives the bread its structure. Gluten-free bread needs a completely different flour mix and hydration ratio.
If you’re looking for a gluten-free version, you’ll need a recipe designed specifically for that.
How to Bake Whole Wheat Bread at Home (Step-by-Step Guide)
Difficulty: Easy1
loaf15
minutes35
minutes2
hours30
minutesA simple, hearty whole wheat bread made with basic pantry ingredients—perfect for sandwiches, toast, or snacking.
Ingredients
3 cups whole wheat flour
1¼ cups warm water (105–110°F)
2¼ tsp active dry yeast (1 packet)
2 tbsp honey or maple syrup
2 tbsp olive oil or melted butter
1½ tsp salt
Optional: 2–3 tbsp flax, sunflower, sesame, or chia seeds
Directions
- In a bowl, mix warm water, honey, and yeast. Let it sit 5–10 minutes until foamy.
- In a large bowl, whisk flour and salt. Add yeast mixture and oil. Mix until a sticky dough forms.
- Knead for 8–10 minutes by hand or 6–7 minutes with a mixer until smooth and elastic.
- Place dough in an oiled bowl, cover, and let rise for 1–1½ hours or until doubled.
- Punch down, shape into a loaf, and place in a greased 9×5-inch loaf pan. Let it rise again for 30–45 minutes.
- Bake at 375°F (190°C) for 30–35 minutes, until golden brown and hollow-sounding.
- Cool completely on a wire rack before slicing.
Notes
- Add vital wheat gluten (1 tbsp per cup of flour) for a softer loaf.
- For variety, mix in seeds, dried fruit, cinnamon, or herbs.
- Freeze sliced bread in zip-top bags for up to 3 months.

Hi, I’m Sorenna Blythe, the baker and writer behind Mix Whisk Bake. I share simple, reliable recipes and honest kitchen moments to help home bakers bake with confidence and joy. When I’m not testing new treats, you’ll find me sipping coffee and dreaming up my next bake.


