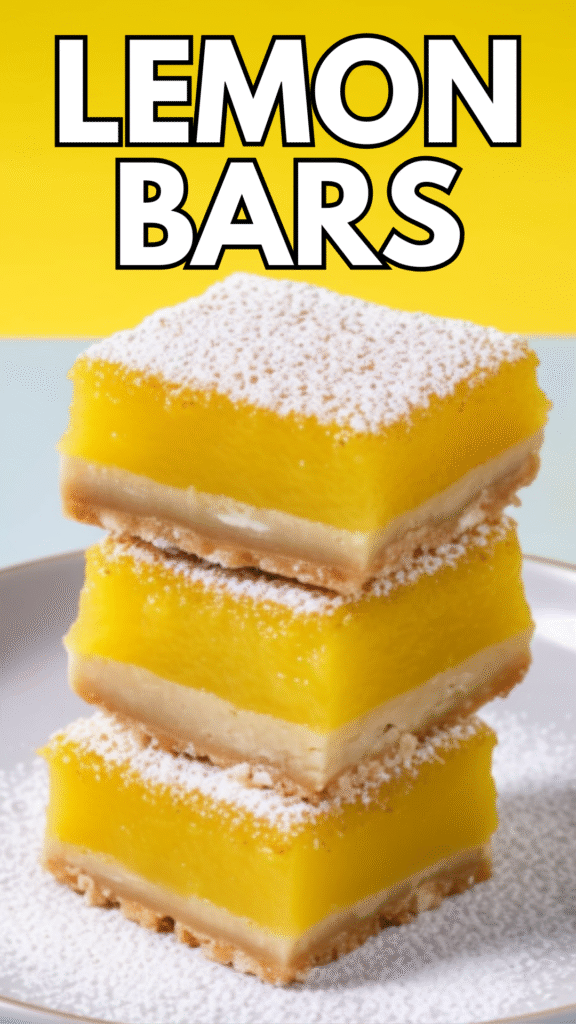
Bright, zesty, and perfectly sweet, these lemon bars are the kind of dessert everyone reaches for first.
They have a buttery crust, a smooth citrus filling, and just the right balance of tang and sweetness in every bite.
They’re easy enough for a weekday treat and special enough for holidays, parties, and bake sales.
You don’t need fancy tools or complicated steps. Just simple ingredients and a few smart techniques.
In this post, I’ll show you exactly how to make lemon bars from scratch, plus helpful tips to avoid common mistakes.
You’ll also find easy variations and storage advice so your bars turn out perfect every time. Let’s get started.
Why You’ll Love This Lemon Bars Recipe
Perfect Balance of Sweet and Tart
A good lemon bar should wake up your taste buds without making you pucker. This recipe gives you that sweet and tangy balance that feels fresh, not sharp.
The sugar softens the citrus, while the lemon juice keeps every bite bright and lively.
Using fresh lemon juice makes a real difference. It brings a clean flavor that doesn’t taste flat or artificial. The result is a filling that feels light, smooth, and full of real lemon taste.
Buttery Shortbread Crust
The base is just as important as the filling. This crust is rich, tender, and slightly crisp around the edges. It holds the filling without turning soggy.
You press it firmly into the pan and pre-bake it before adding the lemon layer. That simple step keeps the crust sturdy and gives it that classic shortbread texture.
Each bite has a soft top and a firm, buttery bottom that melts in your mouth.
Simple Pantry Ingredients
You don’t need anything fancy here. Most of the ingredients are likely already in your kitchen: flour, sugar, butter, eggs, and fresh lemons.
This makes the recipe easy to prepare without a special trip to the store. Simple ingredients also mean simple flavors. Every component has a purpose, and nothing feels unnecessary.
Great for Parties, Holidays, or Afternoon Treats
Lemon bars look beautiful once sliced and dusted with powdered sugar. They stack neatly, travel well, and are easy to serve. That makes them perfect for gatherings.
They’re light enough after a heavy meal and sweet enough to feel like a proper dessert. I often make them when I want something impressive but low effort. They always disappear quickly.
Beginner-Friendly
If you can mix and whisk, you can make these lemon bars. The steps are straightforward and forgiving. There’s no complicated technique involved.
You’ll pre-bake the crust, whisk the filling, pour it over, and bake again. That’s it. With a few helpful tips, you’ll feel confident from start to finish.
Ingredients Overview
For the Shortbread Crust
- 1 cup (226g) unsalted butter, melted
- ½ cup (100g) granulated sugar
- 2 cups (250g) all-purpose flour
- ¼ teaspoon salt
The butter creates a rich, tender base. Sugar adds light sweetness, while flour gives structure.
A small amount of salt balances the flavor and prevents the crust from tasting flat.
For the Lemon Filling
- 1 cup (240ml) fresh lemon juice (about 4–5 large lemons)
- 1 tablespoon finely grated lemon zest
- 4 large eggs, room temperature
- 1½ cups (300g) granulated sugar
- ¼ cup (30g) all-purpose flour
- ½ teaspoon baking powder (optional)
Fresh lemon juice gives the filling its bright, clean flavor. Zest adds extra citrus depth. Eggs create structure and a smooth texture, while sugar balances the tartness.
Flour helps the filling set properly. Baking powder is optional, but it can give the filling a slightly thicker, more cake-like finish.
Measure everything before you start baking. Having your ingredients ready makes the process smooth and stress-free.
How to Make Lemon Bars (Step-by-Step)
Follow each step in order. The process is simple, but doing it correctly makes a big difference in texture and flavor.
Step 1: Prepare the Crust
Mix the Ingredients
Start by preheating your oven to 350°F (175°C). Lightly grease a 9×13-inch baking pan and line it with parchment paper, leaving some overhang for easy removal later.
In a large bowl, combine the melted butter and sugar. Stir until smooth.
Add the flour and salt, then mix just until a soft dough forms. Do not overmix. The dough should look slightly crumbly but hold together when pressed.
Press Into the Pan
Transfer the dough to your prepared pan. Use your hands or the back of a measuring cup to press it into an even layer.
Press firmly into the corners to avoid thin spots. An even crust helps the bars bake uniformly.
Pre-Bake
Place the pan in the oven and bake for 18–22 minutes, or until the edges are lightly golden. The center should look set but not browned.
Pre-baking is important. It creates a firm base that won’t turn soggy once you add the filling.
Step 2: Make the Lemon Filling
While the crust bakes, prepare the filling.
Whisk the Eggs and Sugar
In a clean bowl, whisk the eggs and sugar together until fully combined and slightly pale. Whisk gently but thoroughly. You want everything smooth without whipping in too much air.
Add Lemon Juice and Zest
Pour in the fresh lemon juice and add the lemon zest. Stir until evenly combined. The mixture will look thin, which is normal.
Stir in the Dry Ingredients
Add the flour and baking powder (if using). Whisk until no lumps remain. Make sure the flour is fully incorporated so the filling sets evenly while baking.
Step 3: Bake
Pour Filling Over Warm Crust
Once the crust comes out of the oven, reduce the oven temperature to 325°F (165°C). Carefully pour the lemon filling over the warm crust. The crust should still be hot. This helps the layers bond together.
Pour slowly to avoid disturbing the base.
Bake Until Set
Return the pan to the oven and bake for 20–25 minutes. The center should be set and no longer jiggle when you gently shake the pan. The top should not brown.
Do not overbake. Overbaking can cause cracks and a rubbery texture.
Step 4: Cool & Slice
Let Cool Completely
Remove the pan from the oven and place it on a wire rack. Let the bars cool at room temperature for about 1 hour. This allows the filling to finish setting.
Chill for Clean Cuts
Transfer the pan to the refrigerator and chill for at least 1–2 hours. Chilling makes slicing much easier and gives you neat, sharp edges.
Dust with Powdered Sugar
Once fully chilled, lift the bars out using the parchment paper. Use a sharp knife to cut into squares, wiping the blade clean between cuts for tidy slices.
Lightly dust the tops with powdered sugar just before serving. This final touch adds sweetness and gives the bars their classic look.
Tips for Perfect Lemon Bars
Small details make a big difference with lemon bars. Follow these tips to get the best texture, clean slices, and bright flavor every time.
Use Fresh Lemon Juice (Not Bottled)
Fresh lemon juice gives your bars a clean, natural flavor. Bottled juice can taste flat or slightly bitter, which affects the final result.
Roll your lemons on the counter before cutting them. This helps release more juice. Also, don’t skip the zest. The zest holds natural oils that boost the lemon flavor without adding extra liquid.
Don’t Overbake
Overbaking is one of the most common mistakes. It can make the filling rubbery and cause cracks on the surface.
The center should look set but still slightly soft when you gently shake the pan. It will continue to firm up as it cools. Take it out as soon as it stops jiggling in the middle.
Line the Pan with Parchment Paper
Parchment paper makes removal easy and stress-free. Leave some overhang on the sides so you can lift the entire slab out once it’s chilled.
This step also helps prevent sticking and keeps the crust intact. Clean edges start with easy removal.
Chill Before Slicing
Cooling at room temperature is important, but chilling is what truly sets the bars. A cold filling is firmer and easier to cut.
Place the pan in the refrigerator for at least 1–2 hours. If you have time, chill longer. Patience here leads to neat, professional-looking squares.
Use a Sharp Knife for Clean Edges
A sharp knife gives smooth cuts instead of dragging through the filling. Wipe the blade clean between slices for the best results.
For extra neat edges, run the knife under warm water, dry it, then slice. Repeat as needed. This simple step makes your lemon bars look bakery-quality with very little effort.
Variations to Try
Once you’ve mastered the classic version, it’s easy to adjust this recipe to match your taste or dietary needs.
These variations keep the base method the same, so you don’t have to relearn the process.
Extra Tangy Lemon Bars
If you prefer a stronger citrus flavor, slightly reduce the sugar in the filling by about 2–3 tablespoons.
You can also add an extra teaspoon of lemon zest for more brightness without thinning the mixture.
Taste matters here. A small reduction goes a long way. The goal is bold and fresh, not sour or sharp.
Lemon Coconut Bars
For a subtle tropical twist, add ½ cup sweetened shredded coconut to the crust mixture before pressing it into the pan. This adds texture and a mild sweetness.
You can also sprinkle a few tablespoons of coconut on top of the filling during the last 5 minutes of baking. It will lightly toast and add a gentle crunch.
Raspberry Lemon Bars
Raspberry pairs beautifully with lemon. Before pouring the filling over the crust, scatter ½ cup fresh or frozen raspberries evenly across the crust.
The berries will soften as they bake and create small pockets of fruity flavor. If using frozen raspberries, do not thaw them first. This prevents excess moisture.
Gluten-Free Option
To make these gluten-free, replace the all-purpose flour in both the crust and filling with a 1:1 gluten-free baking flour blend that contains xanthan gum.
Press the crust firmly and bake until lightly golden, just as you would normally. The texture will remain tender and stable if the flour blend is balanced correctly.
Dairy-Free Option
To make the recipe dairy-free, substitute the butter in the crust with plant-based butter designed for baking. Choose one that comes in stick form rather than spreadable tubs.
Keep the measurements the same. The crust should still hold together and bake evenly. The flavor will remain rich and satisfying.
How to Store Lemon Bars
Lemon bars store well when handled properly, and how you store them depends on how soon you plan to serve them.
If you’re enjoying them the same day, you can keep them at room temperature for up to 6–8 hours in an airtight container, placed in a cool spot away from direct sunlight.
This keeps the crust from softening too quickly while maintaining the texture of the filling.
For longer storage, place the bars in a single layer in an airtight container and refrigerate them for up to 4–5 days; chilling helps the filling stay firm and fresh, and the flavor actually becomes slightly more pronounced after a day.
If stacking is necessary, place parchment paper between layers to prevent sticking.
For freezing, first chill the bars completely, then slice and wrap each piece tightly in plastic wrap before placing them in a freezer-safe container or bag; this prevents freezer burn and keeps the texture intact.
Freeze for up to 3 months. When ready to enjoy, thaw overnight in the refrigerator or at room temperature for about an hour, and dust with fresh powdered sugar just before serving for the best presentation.
Serving Suggestions
Lemon bars are easy to serve, but a few small touches can make them feel extra special.
Pair them with hot tea or freshly brewed coffee to balance their bright citrus flavor with something warm and smooth; the contrast makes each bite taste even better.
For a softer finish, add a small swirl of lightly sweetened whipped cream on top just before serving, which adds creaminess without overpowering the lemon.
If you want a simple but beautiful presentation, garnish each square with a thin lemon slice or a light sprinkle of fresh zest to highlight the flavor and add color.
For gatherings, arrange the bars on a dessert platter alongside brownies, cookies, or fruit for variety; their vibrant yellow filling stands out and adds freshness to richer treats.
However you serve them, slice them evenly and dust with powdered sugar right before presenting for the cleanest look and best texture.
Final Thoughts
These lemon bars are simple, bright, and reliably delicious. The buttery crust and smooth, tangy filling create a dessert that feels both classic and fresh.
With clear steps and helpful tips, you can make them confidently at home.
If you try this recipe, leave a comment and rating to share how it turned out. Your feedback helps others and makes the baking community stronger.
I’d also love to see your results, so feel free to share a photo and show off your beautiful lemon bars!
FAQs
Why are my lemon bars runny?
They may be underbaked or not fully cooled. The center should be set before removing from the oven, and the bars must chill completely to firm up properly.
Can I make lemon bars ahead of time?
Yes. They’re actually better the next day. Bake, cool, and refrigerate them overnight for clean slices and deeper flavor.
Can I freeze lemon bars?
Yes. Wrap each chilled bar tightly and freeze for up to 3 months. Thaw in the refrigerator, then dust with fresh powdered sugar before serving.
Why did my crust turn soggy?
The crust may not have been pre-baked long enough. Always bake it until lightly golden before adding the filling.
Can I double the recipe?
Yes, but use a larger pan or bake in two separate pans. Avoid overfilling one pan, as it can affect baking time and texture.
Lemon Bars Recipe – Sweet, Tangy & Easy to Make
Difficulty: Easy16
Bars15
minutes45
minutes1
hourClassic lemon bars with a buttery shortbread crust and a smooth, bright lemon filling. Perfectly sweet, tangy, and easy to make.
Ingredients
- For the Crust:
1 cup (226g) unsalted butter, melted
½ cup (100g) granulated sugar
2 cups (250g) all-purpose flour
¼ teaspoon salt
- For the Filling:
1 cup (240ml) fresh lemon juice
1 tablespoon lemon zest
4 large eggs
1½ cups (300g) granulated sugar
¼ cup (30g) all-purpose flour
½ teaspoon baking powder (optional)
Powdered sugar, for dusting
Directions
- Preheat oven to 350°F (175°C). Line a 9×13-inch pan with parchment paper.
- Mix melted butter and sugar. Stir in flour and salt until a soft dough forms.
- Press evenly into the pan and bake 18–22 minutes until lightly golden.
- Whisk eggs and sugar. Add lemon juice and zest. Stir in flour and baking powder.
- Reduce oven to 325°F (165°C). Pour filling over warm crust.
- Bake 20–25 minutes until the center is set.
- Cool completely, then chill for at least 1–2 hours. Dust with powdered sugar and slice.
Notes
- Use fresh lemon juice for the best flavor.
- Do not overbake; the center should be set but not browned.
- Chill before slicing for clean edges.
- Store in the refrigerator up to 5 days or freeze up to 3 months.

Hi, I’m Sorenna Blythe, the baker and writer behind Mix Whisk Bake. I share simple, reliable recipes and honest kitchen moments to help home bakers bake with confidence and joy. When I’m not testing new treats, you’ll find me sipping coffee and dreaming up my next bake.


