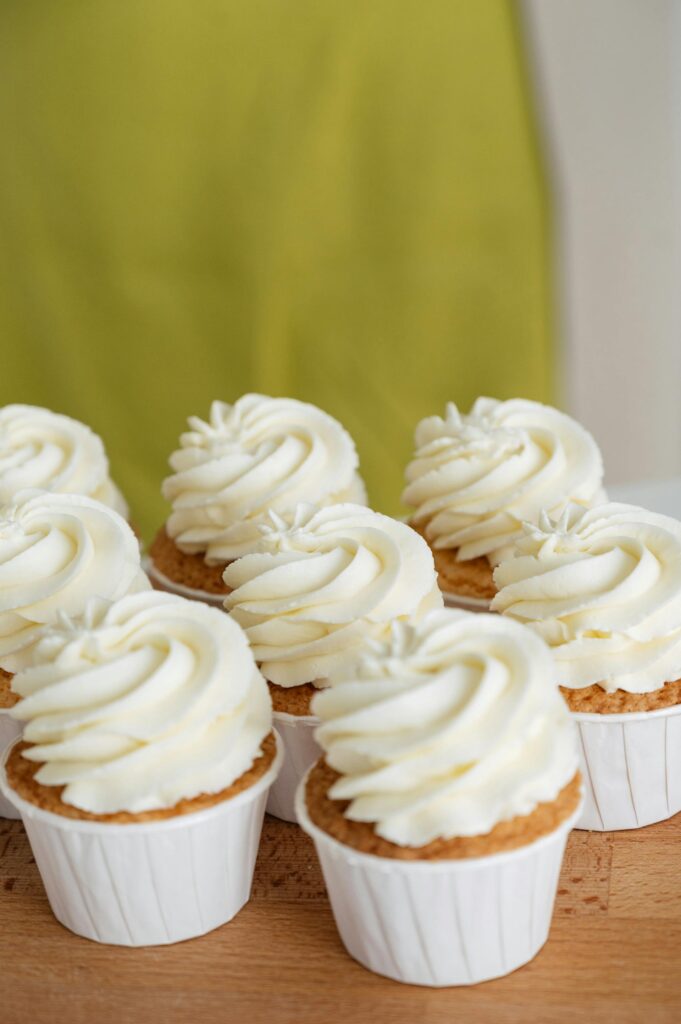
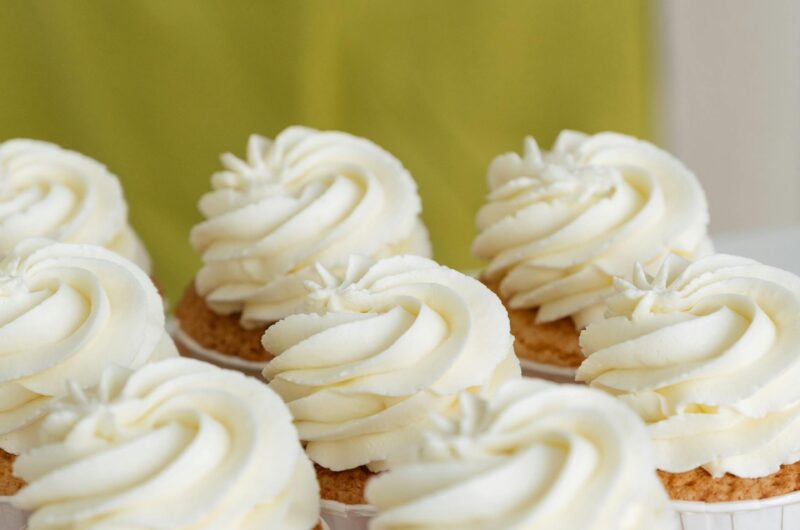
There’s nothing like swirling soft, creamy buttercream on a fresh cupcake.
It’s rich, fluffy, and tastes way better than the store-bought stuff because you control the flavor, texture, and sweetness.
In this post, I’ll show you exactly how to make perfect buttercream at home, step by step. No fancy tools. No pastry degree needed.
Just a few simple ingredients, a little mixing, and some helpful tips to make it foolproof.
Even if you’ve never made frosting before, don’t worry, you’ve got this!
Types of Buttercream (Quick Overview)
Before diving into the recipe, let’s talk buttercream basics. Not all frostings are created equal, and the type you choose can totally change the flavor, texture, and effort involved.
Here’s a quick rundown of the most popular types.
American Buttercream
This is the go-to for most home bakers. It’s sweet, buttery, and super easy to make—just butter, powdered sugar, vanilla, and a bit of milk or cream.
It’s also the most forgiving, which makes it perfect for beginners. Want to pipe roses or slather it thick on a cake? American buttercream’s got your back. The downside? It can be a little too sweet for some.
Swiss Meringue Buttercream
Silky, smooth, and lightly sweet. This one starts with gently heating egg whites and sugar over a double boiler, then whipping them into a glossy meringue before adding butter.
It’s more stable in warm weather and tastes less sugary than American buttercream. But it does take a little extra effort and patience.
Italian Meringue Buttercream
Now we’re entering pastry chef territory. This one uses hot sugar syrup poured into whipped egg whites, then beaten with butter until smooth.
It’s glossy, firm, and very stable, which is great for tall cakes or outdoor events. It’s also the most technical of the bunch, so it’s not beginner-friendly unless you’re up for a challenge.
French Buttercream
Rich, creamy, and almost custard-like. Made with egg yolks and hot sugar syrup, it has a deeper flavor and a yellow hue thanks to the yolks.
It’s indulgent and smooth, but can be trickier to get right and doesn’t hold up well in heat.
German (Ermine) Buttercream
Also called flour buttercream, this one starts with a roux made of flour and milk. Once cooled, it’s whipped with butter and sugar to create a smooth, airy texture.
It’s not too sweet and has a lighter feel. It’s also great for those who want something different but not too fussy.
Which One Are We Making?
For this post, we’re keeping it simple and sticking with American Buttercream. It’s the quickest to whip up, requires no eggs or thermometers, and tastes amazing when done right.
If you can handle a hand mixer and a bit of powdered sugar mess, you’re golden.
Ingredients You’ll Need
Here’s what you’ll need to make smooth, creamy American buttercream at home. Keep your ingredients at room temperature for the best texture.
- Unsalted butter (softened) – 1 cup (225g)
The base of your frosting. Soft, but not melted, butter whips up light and fluffy. - Powdered sugar (aka icing sugar) – 3–4 cups (360–480g)
Adds sweetness and structure. Sift if you want extra smooth frosting. - Heavy cream or milk – 2–4 tablespoons
Loosens the texture so it’s spreadable or pipeable. Cream makes it richer, milk works too. - Vanilla extract – 1–2 teaspoons
Adds depth and that classic bakery flavor. - Pinch of salt
Don’t skip it! It cuts through the sweetness and balances the flavors. - Optional add-ins
- Food coloring – For themed cakes or colorful cupcakes. Use gel for vibrant hues.
- Cocoa powder – For easy chocolate buttercream. Start with ½ cup unsweetened.
- Extracts – Try almond, lemon, peppermint, or even coffee for fun twists.
Equipment Checklist
You don’t need a full bakery setup to make buttercream, but just a few basic tools you probably already have in your kitchen.
- Hand mixer or stand mixer
A mixer is your best friend here. It does all the heavy whipping to get that fluffy, airy texture. - Mixing bowl (preferably deep)
A deep bowl keeps powdered sugar from flying everywhere. Trust us—less mess, more frosting. - Spatula
Great for scraping down the sides of the bowl and for folding in any extras at the end. - Measuring cups and spoons
Accuracy matters with frosting. Too much sugar or liquid can throw off the texture. - Sifter (optional)
For extra smooth buttercream, sift your powdered sugar to avoid lumps. Totally optional, but worth it for special occasions.
Step-by-Step Instructions
Ready to make frosting magic? Here’s how to turn a few simple ingredients into cloud-like buttercream you’ll want to eat straight from the bowl (no judgment).
1. Cream the Butter
Start by beating your softened unsalted butter in a mixing bowl. Use a hand mixer or stand mixer on medium speed. Let it go for 2 to 4 minutes, until the butter turns light, pale, and fluffy.
Why this matters: Well-creamed butter is the key to smooth, airy frosting. The more you beat it now, the better your final texture.
2. Add Powdered Sugar Slowly
Don’t dump it all in at once unless you enjoy sugar clouds floating through your kitchen.
Instead, add powdered sugar one cup at a time, mixing on low speed after each addition. Once it’s mostly blended in, bump up the speed to medium and keep going. Repeat until all the sugar is in.
This step builds sweetness and structure. If it looks too thick, don’t panic because you’ll loosen it up next.
3. Add Cream, Vanilla & Salt
Pour in 2 tablespoons of heavy cream or milk to start. Add your vanilla extract and a pinch of salt to balance the flavor.
Mix on low just until it comes together. Check the texture:
- Too stiff? Add more cream, 1 tablespoon at a time.
- Too soft? Chill it for a bit or add a little more sugar.
4. Whip It Good
Now’s the fun part. Crank your mixer to high speed and whip for 3 to 5 minutes. This is where the frosting becomes light, airy, and super fluffy.
You’ll know it’s ready when it looks smooth, holds peaks, and spreads like a dream. Give it a taste, and yes, quality control is part of the job.
5. Optional Add-ins
Want to switch things up? This is where you get creative:
- Cocoa powder for chocolate vibes
- Food coloring for birthdays or themed bakes
- Almond, lemon, or peppermint extract for something unexpected
Just add small amounts and taste as you go.
Pro Tips for Perfect Buttercream
Making buttercream is simple, but making great buttercream? That’s where a few small tricks can make a huge difference.
These pro tips will help you dodge the common pitfalls and whip up frosting that’s bakery-level good.
Use Room Temperature Butter (Goldilocks Style)
Not cold. Not melted. Just soft enough to leave a slight dent when you press your finger in.
Cold butter won’t whip properly, and melted butter will turn your frosting into a sad, soupy mess. Room temp is the sweet spot.
Sift That Sugar
Lumpy powdered sugar is a fast way to ruin an otherwise smooth batch.
Sifting it before mixing gives you a silkier texture, especially if you’re after that ultra-smooth, Instagram-worthy swirl. Is it an extra step? Yes. Is it worth it? Absolutely.
Adjust the Texture to Fit the Job
Here’s the deal:
- More sugar = thicker frosting (great for piping or cake borders)
- More cream = softer frosting (perfect for spreading on cupcakes)
There’s no one-size-fits-all. Make it work for what you need.
Stiffer is Better for Piping
If you’re using a piping bag to decorate, aim for a firmer consistency.
You want the frosting to hold its shape and not melt into a blob. Test it with a quick swirl. If it flattens out, stir in a little extra powdered sugar.
Frosting Too Runny? Quick Fixes
It happens. Maybe your kitchen’s too warm or you added too much liquid.
- Pop the bowl in the fridge for 15–20 minutes and re-whip.
- Or add more powdered sugar, a spoonful at a time, until it thickens up.
Too Sweet? Balance It Out
American buttercream is known for being sweet, but you can tone it down.
- A tiny splash of lemon juice cuts through the sugar without making it taste citrusy.
- Or add an extra pinch of salt to bring things back into balance.
Flavor Variations
Buttercream is like a blank canvas because it’s sweet, creamy, and totally customizable. Once you’ve nailed the base recipe, it’s easy to get creative with flavors.
Chocolate Buttercream
Chocolate lovers, this one’s for you. Add ½ cup of unsweetened cocoa powder to your buttercream for a rich, fudgy flavor. Mix it in after the sugar.
Want it even deeper? Melt 2–4 oz of dark or semi-sweet chocolate, let it cool slightly, and blend it in at the end.
This version is perfect for chocolate cakes, brownies, or spoon-to-mouth situations. No judgment.
Strawberry Buttercream
Skip the artificial syrups because real flavor is where it’s at. Use freeze-dried strawberry powder (about ⅓ to ½ cup) for a naturally pink, fruity frosting that actually tastes like strawberries.
Blitz freeze-dried strawberries in a blender until powdered, then mix it in after the sugar.
Bonus: It smells like strawberry candy and looks like spring in a bowl.
Coffee Buttercream
This one’s a mood. Dissolve 1 to 2 teaspoons of instant coffee or espresso powder in your cream before adding it to the buttercream. Stir well so there are no granules.
It adds a cozy, café-style kick that pairs perfectly with chocolate cake or vanilla cupcakes. You could even throw in a dash of cinnamon for a mocha twist.
Lemon or Orange Buttercream
Want something fresh and zesty? Add a citrusy spin. Grate in some lemon or orange zest and mix in ½ to 1 teaspoon of citrus extract (or fresh juice, if you’re going for a subtle flavor).
This variation is light, bright, and cuts through the sweetness beautifully. Ideal for summer cakes or tea party bakes.
How to Color Buttercream (Without Mess)
Coloring buttercream can be fun until it turns your kitchen into a rainbow crime scene. The trick is choosing the right type of color and using it smartly.
Always go for gel or powder food coloring instead of liquid. Gels are concentrated, so you get bold, vibrant shades without thinning out your frosting.
Powders work well too, especially for intense colors like black or red.
If you’re going for multi-color frosting (like for piping flowers, rainbows, or unicorn cupcakes), divide your batch into separate bowls first.
Add different colors to each bowl and mix thoroughly until the shade is just right. And here’s the golden rule: mix your colors before you load up the piping bag.
Don’t try swirling in dye after because it won’t blend properly and might ruin the texture. Clean, simple, and way less messy. Want a pastel? Start small.
Going bold? Let the color deepen for a few minutes because most shades intensify as they sit.
Storage and Make-Ahead Tips
Buttercream is surprisingly low-maintenance when it comes to storing, so just treat it right and it’ll stay fluffy and delicious for days.
At room temperature, it can sit out safely for up to 2 days as long as it’s covered and your kitchen isn’t sweltering.
For longer storage, pop it in an airtight container and stash it in the fridge for up to a week.
Just know it’ll firm up quite a bit, so you’ll need to bring it back to room temp and re-whip it before using—it comes back to life with a little mixing.
Got leftovers or prepping in advance? Buttercream freezes like a champ for up to 3 months. Wrap it tight, then thaw it overnight in the fridge and give it a good whip to restore that dreamy texture.
This makes it perfect for parties, weddings, or big cupcake batches because you can make it days (or weeks!) ahead, saving your sanity when the oven’s working overtime.
Common Mistakes to Avoid
Even the best buttercream can go sideways if you miss a few simple details. Here’s what to watch out for so your frosting turns out smooth, fluffy, and delicious every single time.
Using Cold Butter
This is a fast track to lumpy frosting. Cold butter doesn’t blend well because it stays chunky and refuses to whip up light and airy. Always start with room temperature butter.
Not melted, not cold. Just soft enough to leave a fingerprint when pressed.
Overmixing After Adding Sugar
Once you’ve mixed in all your powdered sugar, don’t keep the mixer running forever. Overmixing at this stage can create air bubbles, which lead to a weird, spongy texture and holes in your piped swirls.
Mix just until everything is smooth and fluffy, then stop.
Not Tasting as You Go
Buttercream is sweet by nature, but balance is key. If you’re adding flavor extracts like almond, lemon, or peppermint, taste between additions.
A little goes a long way. Without checking the flavor, it’s easy to go overboard and end up with overpowering results.
Skipping the Salt
This one’s easy to forget, but trust me, it matters. Without a pinch of salt, buttercream can taste flat or cloyingly sweet.
Just a tiny bit helps round out the flavor and keeps things from heading into sugar overload territory.
Final Words
Buttercream doesn’t have to be intimidating. With the right technique and a little practice, you’ll be whipping up bakery-worthy frosting in no time.
Play around with flavors, colors, and textures until you find your sweet spot. The best part? You get to taste-test along the way!
FAQs
Can I make it vegan?
Yes! Swap the butter for a good-quality vegan butter (look for one with a high fat content), and use plant-based milk like oat or almond.
Just note: texture and flavor may vary slightly depending on the brand.
How do I fix grainy buttercream?
Graininess usually means your powdered sugar wasn’t fully dissolved or sifted. To fix it, add a splash of warm milk or cream and beat it for a few extra minutes.
If that doesn’t help, let it sit for 10–15 minutes, then re-whip.
Can I use salted butter?
You can, but be mindful of the salt level. If you go this route, skip the added pinch of salt in the recipe, or your frosting might taste too savory. Unsalted butter gives you more control.
Can I use this for cake decorating and piping?
Absolutely. This buttercream is great for spreading, piping, and decorating.
For sharp edges or detailed piping, just make sure the frosting is on the firmer side—add less cream or chill it briefly before using.
How to Make Perfect Buttercream Frosting (Beginner Guide)
Difficulty: Easy12-16
cupcakes10
minutes10
minutesA rich, fluffy buttercream made with simple ingredients—perfect for cakes, cupcakes, and piping.
Ingredients
1 cup (225g) unsalted butter, softened
3–4 cups (360–480g) powdered sugar, sifted
2–4 tbsp heavy cream or milk
1–2 tsp vanilla extract
Pinch of salt
Optional: food coloring, cocoa powder, or flavor extracts
Directions
- In a large bowl, beat softened butter on medium speed for 2–4 minutes until pale and fluffy.
- Gradually add powdered sugar, 1 cup at a time, mixing on low after each addition.
- Add vanilla, salt, and 2 tbsp cream. Mix until smooth.
- Adjust texture: more cream for softer, more sugar for thicker.
- Beat on high for 3–5 minutes until light and airy.
- Fold in any optional add-ins like cocoa or food coloring.
Notes
- For piping, keep the frosting slightly thick.
- Too sweet? Add a pinch more salt or a drop of lemon juice.
- Store at room temp (2 days), in fridge (1 week), or freeze (3 months). Re-whip before using.

Hi, I’m Sorenna Blythe, the baker and writer behind Mix Whisk Bake. I share simple, reliable recipes and honest kitchen moments to help home bakers bake with confidence and joy. When I’m not testing new treats, you’ll find me sipping coffee and dreaming up my next bake.


