
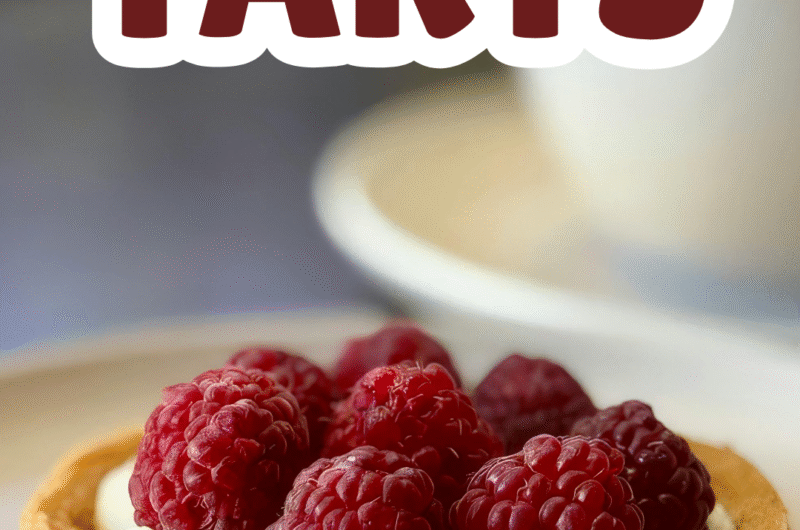
Mini raspberry tarts are the kind of dessert that instantly feels special. They have a crisp, buttery shell and a bright, sweet-tart raspberry filling that bursts with flavor in every bite.
They’re perfect for tea parties, holiday tables, birthdays, or anytime you want a dessert that looks elegant without being complicated.
Their small size makes them easy to serve and even easier to enjoy.
You can use fresh raspberries when they’re in season or frozen ones when they’re not. Both work beautifully with the right method.
In this recipe, I’ll guide you step by step to make tender tart shells, a smooth raspberry filling, and perfectly assembled mini tarts that look impressive but are simple to create.
Why You’ll Love This Recipe
Bite-Sized and Easy to Serve
These mini raspberry tarts are perfectly portioned, which makes serving simple and stress-free.
There’s no slicing, no messy plating, and no guesswork. Just place them on a tray, and they’re ready to enjoy.
Their small size also makes them great for gatherings. Guests can pick one up easily, and you won’t need extra utensils. They look neat, elegant, and inviting on any dessert table.
Buttery, Crisp Tart Shells
The tart shells are tender yet crisp, with a rich buttery flavor that balances the fruity filling. When baked properly, they hold their shape and stay sturdy without being hard.
Keeping the dough chilled and baking it until lightly golden makes all the difference.
The result is a shell that melts in your mouth but still gives that satisfying crunch. It’s a simple technique, but it creates bakery-style results at home.
Sweet-Tart Raspberry Flavor
Raspberries bring a natural balance of sweetness and brightness. The filling isn’t overly sugary, so the fresh fruit flavor truly stands out.
Cooking the berries gently with sugar and lemon juice enhances their taste without overpowering it. Each bite delivers a smooth, slightly tangy filling that pairs beautifully with the buttery crust.
Simple Ingredients
You don’t need anything fancy for this recipe. Most of the ingredients are pantry staples like flour, butter, sugar, and eggs.
The raspberry filling uses basic ingredients as well. Fresh or frozen berries both work, so you can make these any time of year.
It’s a straightforward recipe that doesn’t rely on complicated steps or hard-to-find items.
Make-Ahead Friendly
These mini tarts are easy to prepare in stages. You can bake the shells ahead of time and store them until you’re ready to fill them.
The filling can also be made in advance and chilled. When it’s time to serve, simply assemble and garnish.
This makes them perfect for busy days, holidays, or when you want to plan ahead with confidence.
Ingredients
For the Tart Shells
- 1½ cups (190g) all-purpose flour
- ½ cup (115g) unsalted butter, softened
- ½ cup (60g) powdered sugar
- 1 large egg yolk
- 1 teaspoon vanilla extract
- ¼ teaspoon salt
For the Raspberry Filling
- 2 cups (250g) fresh raspberries (or frozen, not thawed)
- ⅓ cup (65g) granulated sugar
- 1 tablespoon fresh lemon juice
- 1 tablespoon cornstarch
- 2 tablespoons water (to mix with cornstarch)
Optional Toppings
- 1–2 tablespoons powdered sugar, for dusting
- ½ cup whipped cream
- ¼ cup melted white chocolate, for drizzling
- Fresh mint leaves, for garnish
Kitchen Tools You’ll Need
- Mini muffin tin or mini tart pans – Used to shape and bake the tart shells. A mini muffin tin works perfectly if you don’t have tart pans.
- Mixing bowls – One for the dough and one for the filling. Medium-sized bowls are ideal for easy mixing.
- Hand mixer or stand mixer – Helps cream the butter and sugar smoothly. You can mix by hand, but a mixer saves time and ensures a light texture.
- Rolling pin – For rolling out the dough evenly before pressing it into the pans.
- Small saucepan – Needed to cook and thicken the raspberry filling gently over medium heat.
- Cooling rack – Allows the tart shells to cool evenly and prevents soggy bottoms before filling.
Step-by-Step Instructions
Step 1: Make the Tart Dough
Start by creaming the softened butter and powdered sugar together in a mixing bowl. Beat until the mixture looks light and smooth. This step creates a tender texture, so don’t rush it.
Add the egg yolk and vanilla extract. Mix just until combined. The dough should look soft and slightly creamy at this stage.
In a separate bowl, stir together the flour and salt. Gradually add the dry ingredients to the butter mixture.
Mix on low speed or by hand until a soft dough forms. Stop mixing as soon as it comes together to avoid a tough crust.
Shape the dough into a flat disc, wrap it in plastic wrap, and chill for at least 30 minutes. Chilling firms up the butter and makes the dough easier to roll.
Step 2: Shape and Bake the Tart Shells
Lightly flour your surface and roll out the chilled dough to about ⅛-inch thickness. Work gently and keep the dough even.
Cut small circles and press them into your mini tart pans or muffin tin. Press the dough into the corners without stretching it. Trim any excess from the edges.
Use a fork to lightly prick the bottoms. This prevents the crust from puffing up while baking.
Bake in a preheated oven at 180°C (350°F) for 12–15 minutes, or until the edges turn lightly golden. Keep an eye on them during the last few minutes.
Remove from the oven and let the shells cool completely on a cooling rack. Filling them while warm can cause sogginess, so patience here pays off.
Step 3: Prepare the Raspberry Filling
Place the raspberries, sugar, and lemon juice in a small saucepan over medium heat. Stir gently as the berries begin to release their juices.
In a small bowl, mix the cornstarch with water to create a smooth slurry. This helps thicken the filling without lumps.
Pour the slurry into the simmering raspberry mixture and stir continuously. Let it cook for a few minutes until the filling thickens and looks glossy. It should coat the back of a spoon.
Remove from the heat and allow it to cool slightly. The filling will continue to thicken as it cools.
Step 4: Assemble the Mini Tarts
Spoon the raspberry filling into the cooled tart shells. Fill each one just to the top without overflowing.
If desired, add a dusting of powdered sugar, a swirl of whipped cream, or a drizzle of white chocolate. Keep the toppings simple so the raspberry flavor shines.
Chill the assembled tarts for about 20–30 minutes before serving. This helps the filling set fully and makes them easier to handle. Then serve and enjoy the beautiful results of your work.
Tips for Perfect Mini Raspberry Tarts
Keep Dough Cold for a Flaky Crust
Cold dough is the key to a tender, crisp shell. When the butter stays cold, it creates light layers as it bakes. If the dough becomes too soft while rolling, place it back in the fridge for 10–15 minutes.
Work quickly and avoid overhandling it. Warm hands can soften the butter faster than you think. A chilled dough is easier to shape and helps prevent shrinking in the oven.
Don’t Overfill the Shells
It can be tempting to add extra filling, but too much can cause spills or soggy bottoms. Fill each shell just to the top, not above it.
A level surface also makes the tarts look neat and polished. If you plan to add whipped cream or other toppings, leaving a little space gives you better control and balance.
Let the Filling Cool Before Assembling
Warm filling can soften the crust too quickly. For best results, allow the raspberry mixture to cool until it is no longer hot but still easy to spoon.
As it cools, it thickens further. This makes it easier to portion and helps it stay in place inside the shells. Taking this small extra step keeps the texture just right.
Use Fresh Berries for Best Texture
Fresh raspberries hold their shape better and often have a brighter flavor. They also give the filling a slightly thicker consistency.
Frozen berries work well too, especially when fresh ones are out of season. Just cook them a little longer if needed to reduce extra moisture.
Either way, choosing good-quality berries will always improve the final result.
Variations
Lemon Raspberry Tarts
If you enjoy a brighter citrus flavor, add 1–2 teaspoons of fresh lemon zest to the raspberry filling while it cooks. The zest deepens the flavor without making it sour.
You can also mix a little lemon zest into the tart dough for a subtle citrus base. This small change makes the tarts taste fresh and vibrant, especially in warmer months.
Chocolate Raspberry Tarts
Chocolate and raspberry are a classic pairing. For this version, spread a thin layer of chocolate ganache into the cooled tart shells before adding the raspberry filling.
To make the ganache, heat ¼ cup heavy cream and pour it over ½ cup chopped dark chocolate. Stir until smooth, then let it cool slightly before using.
The chocolate adds richness and balances the tartness of the berries beautifully.
No-Bake Version with Cookie Crust
For a quicker option, skip the baked pastry and use a cookie crust instead. Crush 1½ cups of digestive biscuits or graham crackers and mix with 5 tablespoons melted butter.
Press the mixture firmly into mini muffin tins lined with paper liners. Chill until firm, then fill with the prepared raspberry mixture. This version saves time and still delivers great texture.
Custard-Filled Raspberry Tarts
For a softer and creamier dessert, add a layer of vanilla custard beneath the raspberry topping. Spoon or pipe the custard into the baked shells first, then add the raspberry filling on top.
The custard makes the tarts richer and slightly more indulgent. It also creates a beautiful layered look when sliced or bitten into.
This variation works well for special occasions when you want something extra elegant.
Storage & Make-Ahead Tips
How to Store at Room Temperature
If you plan to serve the tarts the same day, you can keep them at room temperature for up to 6–8 hours. Place them in an airtight container and store them in a cool, dry spot away from direct sunlight.
This works best if your kitchen is not too warm. If the weather is hot, refrigeration is the safer option to protect the filling and maintain texture.
Refrigeration Instructions
For longer storage, refrigerate the assembled tarts in a single layer inside an airtight container. They will stay fresh for up to 3 days.
Keep in mind that the crust may soften slightly over time as it absorbs moisture from the filling. For the best texture, you can store the shells and filling separately and assemble them closer to serving.
Freezing Tart Shells
The baked tart shells freeze very well. Let them cool completely, then place them in an airtight container with parchment paper between layers. Freeze for up to 2 months.
When ready to use, thaw them at room temperature. Freezing the shells ahead of time is a simple way to spread out your prep work.
Best Way to Re-Crisp Shells
If the shells lose some crispness, you can refresh them in the oven. Place the empty shells on a baking tray and warm them at 160°C (320°F) for about 5–7 minutes.
Let them cool completely before adding the filling. This step helps restore their texture and keeps your mini raspberry tarts tasting freshly baked.
Final Thoughts
Mini raspberry tarts are simple to make, yet they look truly special. If you follow the steps and tips above, you’ll end up with crisp shells and a bright, flavorful filling every time.
Serve them with tea, coffee, or as part of a dessert table for birthdays and holidays. They also pair beautifully with a scoop of vanilla ice cream for something extra.
If you try this recipe, I’d love to hear how it turned out for you. Leave a comment and share your experience or any twists you added.
And if you enjoyed these, be sure to check out my strawberry tarts, lemon curd tarts, or a classic mixed berry tart next.
FAQs
Can I use frozen raspberries?
Yes. Use them straight from frozen and cook slightly longer to reduce extra moisture.
Why are my tart shells soggy?
This usually happens if the filling is too warm or too wet. Let the shells cool completely and allow the filling to thicken before assembling.
Can I make these ahead of time?
Yes. Bake the shells and prepare the filling in advance, then assemble closer to serving for the best texture.
How do I prevent the crust from shrinking?
Chill the dough before baking and avoid stretching it when pressing it into the pans. Docking the base with a fork also helps.
Can I use store-bought pastry?
Yes. Pre-made shortcrust pastry works well and saves time. Just bake the shells before adding the filling.
Irresistible Mini Raspberry Tarts – Buttery, Sweet & Delicious
Difficulty: Easy12
Mini Tarts20
minutes15
minutes35
minutesButtery mini tart shells filled with a smooth, sweet-tart raspberry filling. These bite-sized treats are elegant, simple to make, and perfect for any occasion.
Ingredients
- For the Tart Shells:
1½ cups (190g) all-purpose flour
½ cup (115g) unsalted butter, softened
½ cup (60g) powdered sugar
1 large egg yolk
1 teaspoon vanilla extract
¼ teaspoon salt
- For the Raspberry Filling:
2 cups (250g) raspberries (fresh or frozen)
⅓ cup (65g) granulated sugar
1 tablespoon lemon juice
1 tablespoon cornstarch
2 tablespoons water
Directions
- Cream butter and powdered sugar until light. Mix in egg yolk and vanilla.
- Add flour and salt. Mix until a soft dough forms. Chill for 30 minutes.
- Roll out dough, press into mini tart pans, and prick bases with a fork.
- Bake at 180°C (350°F) for 12–15 minutes until lightly golden. Cool completely.
- In a saucepan, cook raspberries, sugar, and lemon juice. Stir in the cornstarch mixed with water. Simmer until thick. Cool slightly.
- Spoon filling into cooled tart shells. Chill 20–30 minutes before serving.
Notes
- Do not overfill the shells to prevent sogginess.
- For the best texture, assemble shortly before serving.
- Tart shells can be made ahead and frozen for up to 2 months.

Hi, I’m Sorenna Blythe, the baker and writer behind Mix Whisk Bake. I share simple, reliable recipes and honest kitchen moments to help home bakers bake with confidence and joy. When I’m not testing new treats, you’ll find me sipping coffee and dreaming up my next bake.


