
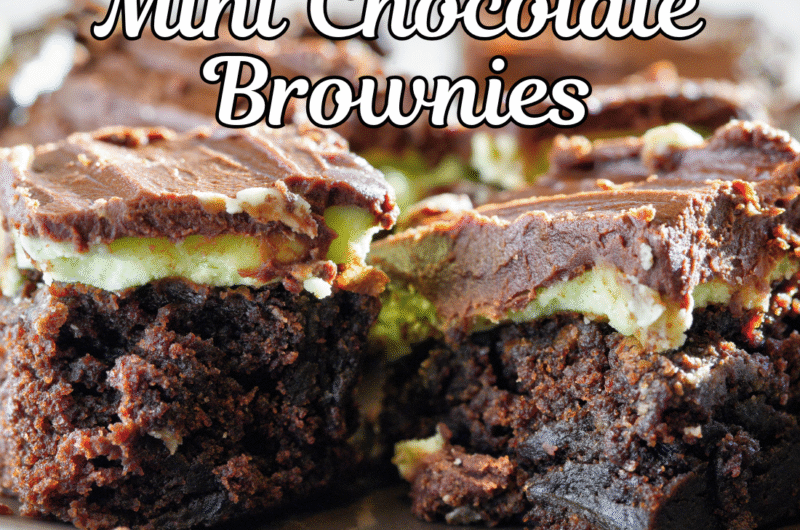
Mint chocolate brownies are the kind of treat that makes you pause mid-bite and say, “Okay… wow.”
They’re rich, fudgy, and packed with a cool mint layer that feels like a breath of fresh air wrapped in chocolate. It’s the best of both worlds—comforting and refreshing all at once.
These brownies taste bakery-perfect but come together with simple steps and everyday ingredients. No fancy tools. No complicated techniques. Just pure, chocolate-mint magic.
They’re a crowd-pleaser during the holidays, but honestly, they shine any day you need a little dessert joy.
Why You’ll Love These Mint Chocolate Brownies
Ultra-fudgy and rich chocolate base
This brownie base is dense, not cakey — think molten hug in every bite. We keep the batter simple and chocolate-forward so the cocoa shines.
A slightly underbaked center gives that gooey, stick-to-your-fork texture everyone fights over.
Tip: If you like extra chew, toss in a handful of chopped chocolate or chips before baking.
Cool, creamy mint layer
The mint layer is smooth and light, like a soft blanket over hot chocolate. It’s made with butter and powdered sugar for a silky mouthfeel, not a sugary grit.
A touch of peppermint extract gives real mint flavor without tasting like toothpaste. An optional green tint makes them party-ready, but taste comes first.
Perfect balance of sweetness and refreshing mint
These brownies don’t shout “too sweet.” The dark chocolate depth grounds the dessert while the mint brightens each bite.
That contrast keeps your palate interested because one bite warms, the next cools. It’s dessert diplomacy: both sides win.
Great make-ahead dessert
Make them the day before, and the flavors settle into something even better. Chilling helps the mint layer firm up and makes slicing neat as a pin.
They transport well, so they’re ideal for potlucks or lunchbox treats.
Pro tip: store in an airtight container with parchment between layers.
Freezer-friendly
Want a dessert on standby? These freeze like champions. Slice first, flash-freeze on a tray, then stack with parchment in a bag.
Thaw in the fridge or at room temp — no soggy ends, just brownie bliss. Perfect for unexpected guests or late-night cravings.
Ingredients Needed
For the Brownie Layer
- Butter – Creates a rich, fudgy texture and deep flavor.
- Sugar – Sweetens the brownies and helps achieve that classic crackly top.
- Eggs – Bind the batter and add moisture for a soft, dense crumb.
- Vanilla – Enhances the chocolate and rounds out the flavor.
- Cocoa powder – Provides bold, chocolatey richness without making the batter too heavy.
- Flour – Gives the brownies structure while keeping them soft.
- Salt – Balances sweetness and sharpens the chocolate notes.
- Chocolate chips or chopped chocolate (optional) – Adds pockets of melty goodness in every bite.
For the Mint Layer
- Butter – Forms a creamy base that stays smooth when chilled.
- Powdered sugar – Sweetens and thickens the mint filling.
- Heavy cream or milk – Loosens the mixture to a spreadable consistency.
- Peppermint extract – Adds that refreshing, cool mint flavor.
- Green food coloring (optional) – Gives the mint layer a classic, bakery-style look.
For the Chocolate Ganache Topping
- Chocolate chips – Melt into a glossy, rich topping that ties everything together.
- Butter or heavy cream – Smooths and softens the ganache for a clean, shiny finish.
Equipment You’ll Need
- 8×8 or 9×9 baking pan – Either size works, but an 8×8 pan gives thicker, bakery-style brownies.
- Mixing bowls – You’ll need a few for the brownie batter, mint layer, and ganache.
- Whisk + spatula – The whisk handles the wet ingredients, while the spatula helps fold and spread each layer smoothly.
- Hand or stand mixer – Essential for beating the mint layer until it’s fluffy and creamy.
- Parchment paper – Keeps the brownies from sticking and makes lifting them out of the pan a breeze.
How to Make Mint Chocolate Brownies (Step-by-Step)
Step 1: Prepare the brownie batter
Preheat the oven to 350°F (175°C). Line your pan with parchment, leaving an overhang, as it makes lifting the brownies out a breeze.
Melt the butter slowly (microwave in short bursts or in a small saucepan) and stir in the sugar until glossy. Whisk in the eggs one at a time, then add the vanilla.
Sift or whisk together the cocoa, flour, and salt to avoid lumps. Add the dry mix to the wet and fold gently. Don’t overmix; you want a streak-free batter but not a tough one.
If using chocolate chunks or chips, fold them in at the end. Spread the batter evenly in the lined pan, smoothing the top with a spatula.
Tip
Folding preserves air and keeps the brownies fudgy. Overworking = cakey brownies. Nobody wants that.
Step 2: Bake the brownies
Bake in the preheated oven until the edges are set, but the center still jiggles slightly — usually about 20–30 minutes depending on your oven and pan.
A toothpick may come out with moist crumbs; that’s perfect. Remove the pan and set it on a wire rack. Let it cool completely to room temperature before moving on.
Tip
Cooling is non-negotiable. Add the mint layer too soon, and you’ll get a sloppy sandwich instead of clean layers.
Step 3: Make the mint layer
Beat softened butter until smooth and pale. Add powdered sugar a little at a time, scraping the bowl as you go. Stir in a splash of cream or milk to reach a spreadable consistency.
Add peppermint extract sparingly, and taste as you go so it never tastes medicinal. If you want that classic look, add a drop or two of green food coloring and mix until even.
Spread the mint mixture carefully over the cooled brownie base, using an offset spatula for a flat, even finish. Pop the pan into the fridge and chill until the mint layer is firm to the touch.
Tip
Less is more with peppermint. Start small because you can always add more.
Step 4: Add the chocolate ganache
Gently melt chocolate and cream (or butter) together until silky. Use a double boiler or short microwave bursts, stirring often. Let the ganache cool slightly so it’s pourable but not hot.
Pour it over the chilled mint layer and nudge it with a spatula to level. Return the pan to the fridge and chill until the ganache has set.
Tip
If your ganache looks grainy, warm it very gently and stir until smooth. Patience wins here.
Step 5: Slice and serve
Run a knife under hot water, dry it, then slice. Wipe the blade between cuts for neat edges. Serve chilled for clean layers or bring to room temperature for creamier bites.
Store leftovers in an airtight container in the fridge.
Final tip
For party-ready squares, cut once, then chill the whole slab again for a few minutes before making final cleanup cuts. Cleaner cuts, less drama.
Tips for Success
Don’t overbake the brownies — they should be fudgy.
Pull them from the oven when the edges are set, and the center still jiggles a bit. A toothpick with moist crumbs, not dry crumbs, is the sweet spot.
The brownies continue to cook as they cool, so err on the side of slightly underbaked for that gooey, fork-sticking texture.
Use pure peppermint extract, not generic “mint” extract.
Pure peppermint gives a clean, bright mint flavor without that medicinal bite. Start with a small amount, taste the mint filling, then add more if needed.
Too much extract can overpower the chocolate and leave an aftertaste, and nobody wants toothpaste brownies.
Chill between layers for clean, defined layers.
Let the brownie base reach room temperature before spreading the mint layer. After spreading, chill until the mint is firm to the touch before pouring ganache.
Short breaks between steps keep layers from sliding into each other and make slicing neat as a pin.
For thicker brownies, use an 8×8 pan.
Smaller pan = taller brownies. Simple math. If you prefer thinner bars, use a 9×9 pan and shave a few minutes off the bake time. Adjust baking time, not ingredients, to keep the fudgy texture consistent.
Flavor Variations
Mint Oreo version
Add a layer of crushed Oreos between the brownie and mint filling for extra crunch. The cookies soften slightly as they chill, giving you a cookies-and-cream vibe with a minty twist.
Double chocolate
Stir extra chocolate chunks into the brownie batter before baking. They melt into pockets of warm, gooey chocolate that make each bite feel decadent.
Perfect if you live by the rule: “There’s no such thing as too much chocolate.”
Andes mint topping
Sprinkle chopped Andes mints over the warm ganache. They melt just enough to stick, but still keep their creamy texture.
It adds a nostalgic, after-dinner-mint flair without any extra effort.
Gluten-free option
Swap the all-purpose flour for a 1:1 gluten-free baking blend. The brownies stay fudgy and rich, and the mint layer needs no changes.
Just check your chocolate chips and extracts to ensure they’re gluten-free, and you’re good to go.
Storage Instructions
Refrigerate up to 5 days
Keep the brownies in an airtight container to prevent the mint layer from drying out. Chilling also keeps the layers firm and the ganache shiny.
They taste even better on day two as the flavors settle, so don’t rush them.
Freeze up to 2 months
Slice the brownies before freezing so you can grab one without defrosting the whole batch.
Place the pieces on a tray to freeze individually, then store them in a freezer bag or container with parchment between layers.
They keep their shape and flavor beautifully, making them a great make-ahead dessert.
Thaw in the fridge for the best texture
A slow thaw keeps the layers clean and prevents condensation from softening the mint filling.
If you’re impatient (we’ve all been there), you can thaw them briefly at room temp, but just expect a slightly softer mint layer.
Serving Suggestions
Serve chilled for clean layers
Chilling helps the mint and ganache layers stay sharp and defined when sliced. You get that picture-perfect stack where every layer stands out.
If you prefer a softer bite, let them sit at room temperature for a few minutes before serving.
Pair with vanilla ice cream
A scoop of vanilla ice cream turns these brownies into a full dessert moment. The cold, creamy ice cream melts slightly over the warm brownie (if you reheat it), creating a dreamy mix of flavors.
Perfect for holidays, bake sales, and gifting
These brownies fit right in at St. Patrick’s Day parties, Christmas dessert tables, or any mint-themed celebration. They travel well, cut neatly, and look impressive without extra effort.
Wrap a few pieces in parchment and ribbon, and you’ve got an easy, thoughtful homemade gift.
FAQs
Why is my mint layer too soft?
Your butter may have been too warm, or you may have added too much cream. Chill the mixture longer, and it should firm up nicely.
If it still feels loose, mix in a little more powdered sugar until it holds its shape.
Why did my brownies turn out cakey instead of fudgy?
Overmixing the batter can whip in too much air, leading to a cakier texture. Too much flour or overbaking can also dry them out.
Next time, fold gently and pull them from the oven while the center is still slightly soft.
Can I make these without the ganache?
Absolutely. You can skip the ganache and still have a delicious two-layer mint brownie. Just keep the mint layer chilled so it stays firm and clean when cut.
Can I use natural cocoa powder?
Yes, natural cocoa powder works perfectly here. It gives a deep, rich chocolate flavor without overwhelming the mint.
Just make sure your cocoa isn’t packed with additives or sweeteners.
Can I double the recipe?
Yes, double everything and bake in a 9×13 pan. Add a few extra minutes to the bake time, but keep an eye on the center so it doesn’t overbake.
You’ll end up with a thicker slab of brownies perfect for sharing… or not sharing.
Fudgy Mint Chocolate Brownies (Bakery-Style Recipe!)
Difficulty: Easy12
servings25
minutes25
minutes1
hour30
minutesFudgy chocolate brownies topped with a cool, creamy mint layer and smooth chocolate ganache.
Ingredients
- Brownie Layer
½ cup (113g) unsalted butter, melted
1 cup (200g) sugar
2 large eggs
1 tsp vanilla extract
½ cup (50g) cocoa powder
¾ cup (95g) all-purpose flour
¼ tsp salt
½ cup chocolate chips or chopped chocolate (optional)
- Mint Layer
½ cup (113g) unsalted butter, softened
2 cups (240g) powdered sugar
2–3 tbsp heavy cream or milk
1 tsp peppermint extract
1–2 drops green food coloring (optional)
- Ganache
1 cup chocolate chips
2 tbsp butter or ¼ cup heavy cream
Directions
- Make the brownies: Preheat oven to 350°F (175°C). Line an 8×8 pan with parchment. Melt butter and mix with sugar. Whisk in eggs and vanilla. Add cocoa, flour, and salt; fold gently. Stir in chocolate chips if using. Spread into the pan and bake 20–25 minutes, or until edges are set. Cool completely.
- Make the mint layer: Beat butter until smooth. Add powdered sugar, cream, peppermint extract, and coloring. Spread over cooled brownies and chill until firm.
- Add the ganache: Melt chocolate with butter or cream until smooth. Pour over the mint layer and spread evenly. Chill again until set.
- Slice and serve: Use a warm knife for clean edges. Serve chilled or slightly softened.
Notes
- Don’t overbake the brownies; they should be soft and fudgy.
- Start with less peppermint extract and adjust to taste.
- For thicker brownies, use an 8×8 pan; for thinner, use a 9×9.
- These brownies freeze well for up to 2 months (slice before freezing).

Hi, I’m Sorenna Blythe, the baker and writer behind Mix Whisk Bake. I share simple, reliable recipes and honest kitchen moments to help home bakers bake with confidence and joy. When I’m not testing new treats, you’ll find me sipping coffee and dreaming up my next bake.


