Think baking bread is hard? Think again. This no-knead bread recipe proves you don’t need fancy skills, a stand mixer, or even strong arms to make something amazing.
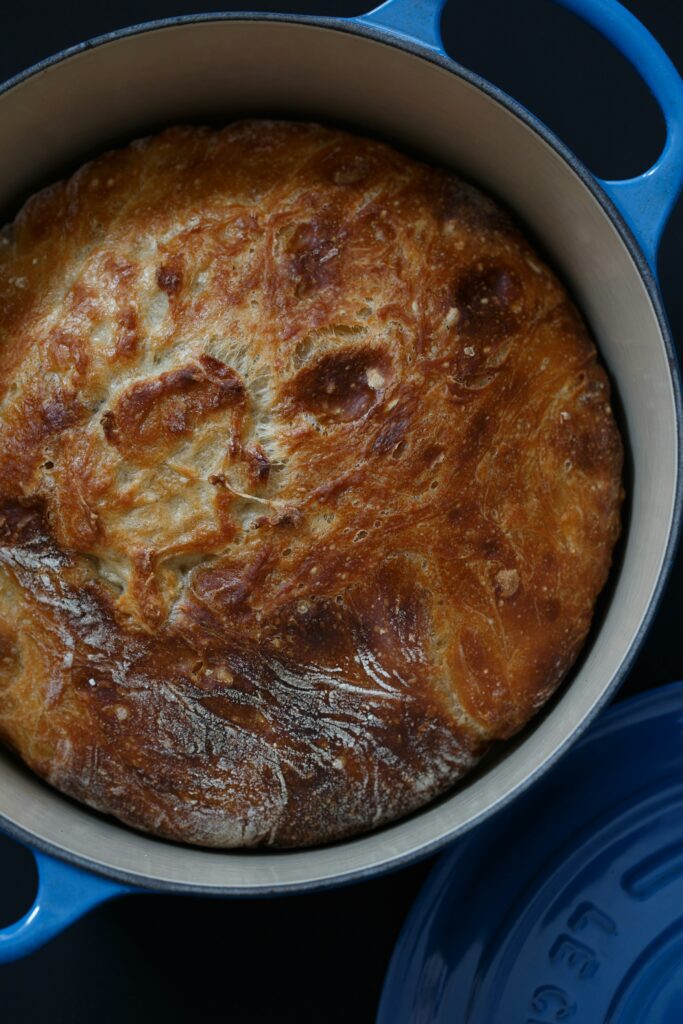
With just four simple ingredients and a bowl, you’ll end up with a crusty, golden loaf that looks straight out of a bakery. No kneading. No stress. Just mix, wait, and bake.
Why No-Knead Bread Works
No-knead bread works because time takes the wheel instead of your hands.
Instead of spending 10–15 minutes kneading to develop gluten, the dough sits and rests for 12 to 18 hours—this slow fermentation allows gluten strands to form naturally.
It’s like letting your dough stretch and grow while you binge a show or get a good night’s sleep. This long rise doesn’t just build structure; it builds flavor.
The extended rest gives the yeast time to break down the flour slowly, releasing rich, complex notes you won’t get from a quick mix-and-bake.
Compared to traditional bread, no-knead dough requires almost no physical effort. You skip the arm workout, the flour-dusted counters, and the sticky fingers.
You also get a better crust and a more open, airy crumb.
Traditional loaves can be soft but often lack that dramatic, crackling crust you get from baking no-knead dough in a hot, steamy environment (like a Dutch oven).
So if you’ve ever wanted bread that tastes like it came from a rustic bakery but takes less effort than making pancakes, this is your golden ticket.
Ingredients Needed
Here’s all you need to make your first loaf—nothing fancy, just pantry staples:
- All-purpose flour – 3 cups
The base of your bread. It gives structure, chew, and a neutral flavor that pairs well with any add-ins. - Instant yeast – ¼ tsp
A tiny amount goes a long way thanks to the long rise. No proofing needed—just mix it right in. - Salt – 1¼ tsp
Adds flavor and balances the dough. Without it, your bread will taste flat, no matter how perfect the texture. - Warm water – 1½ cups
Helps activate the yeast and brings the dough together. Aim for lukewarm, not hot—about 100°F (38°C).
Optional add-ins for flavor twists:
- Cornmeal – Great for dusting the bottom for a crisp, nonstick base.
- Chopped herbs – Rosemary, thyme, or basil add a fragrant touch.
- Minced garlic – Adds savory depth and makes your kitchen smell heavenly.
Equipment Checklist
- Mixing bowl
Big enough to hold the dough as it rises and doubles in size. Glass or plastic works fine. - Wooden spoon or spatula
For stirring everything together. No electric mixer required, just mix until combined. - Parchment paper
Makes transferring the dough easy and prevents sticking during the bake. - Dutch oven or oven-safe pot with lid
This traps steam during baking, creating that crackly artisan-style crust. Cast iron is ideal, but enamel-coated works too. - Kitchen towel or plastic wrap
Used to loosely cover the dough during its long rest. Keeps the surface from drying out.
Step-by-Step Instructions
1. Mix the Dough
In a large mixing bowl, combine the following:
- 3 cups all-purpose flour
- ¼ teaspoon instant yeast
- 1¼ teaspoons salt
- 1½ cups warm water (around 100°F or 38°C)
Use a wooden spoon or spatula to stir everything together until you have a sticky, shaggy dough.
It should look rough and messy, and that’s perfect. Don’t try to smooth it out or knead it. Just make sure there’s no dry flour at the bottom of the bowl.
2. Let it Rest (12–18 Hours)
Cover the bowl with a kitchen towel or plastic wrap and let it sit at room temperature. Aim for 12 to 18 hours; overnight works great.
During this time, the dough will slowly rise, bubble, and double in size. You’ll know it’s ready when it’s puffy and the surface is dotted with bubbles.
It might jiggle a bit when you move the bowl, and that’s exactly what you want.
3. Shape & Second Rise
Lightly flour a piece of parchment paper and your hands. Gently scrape the dough onto the paper.
Without kneading or punching it down, quickly shape it into a round ball by folding the edges toward the center.
Don’t stress about perfect form because this bread is rustic by nature. Let it rest uncovered (or loosely covered with a towel) for 30 to 60 minutes while your oven preheats.
4. Preheat the Oven & Pot
Place a Dutch oven or heavy oven-safe pot with a lid into your oven and preheat to 450°F (232°C). Let it heat for at least 30 minutes.
The hot pot will create steam and give the bread that beautiful, crispy crust.
5. Bake
Carefully remove the hot pot from the oven. Lift the parchment with the dough and place it directly into the pot—parchment and all. Cover with the lid and bake for 30 minutes.
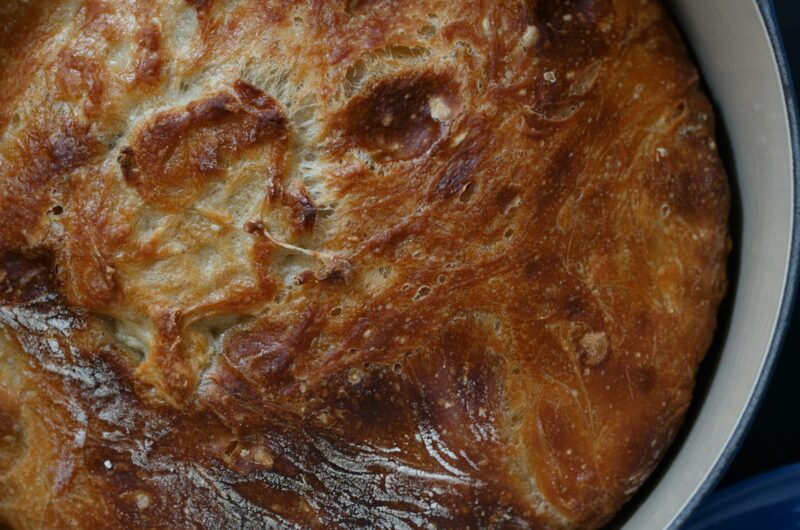
Then remove the lid and bake for another 10 to 15 minutes, or until the top is deep golden brown and the crust sounds hollow when tapped.
6. Cool
Use the parchment to lift the bread out of the pot and transfer it to a cooling rack. Let it cool for at least 30 minutes before slicing.
This step matters because cutting too soon can make the inside gummy. Trust the process. That crackly crust will still be there when you’re ready.
And that’s it, your first homemade no-knead loaf, done and dusted!
Tips for Success
Use a Digital Scale (If You Have One)
While measuring by cups works just fine, using a digital kitchen scale makes everything more precise, especially the flour.
For best results, use 375 grams of all-purpose flour, 1 gram of instant yeast, 7 grams of salt, and 355 grams of water.
This takes out the guesswork, especially if you’re baking on a humid day when flour can pack differently. It’s not mandatory, but it does help you get more consistent loaves.
If Your Home Is Cold, Try the Oven Light Trick
Bread dough loves warmth. If your kitchen feels chilly, the dough might take longer to rise or not rise much at all.
An easy fix? Pop your covered bowl into the oven (turned off!) and just leave the oven light on. That little bulb gives off enough gentle heat to create a cozy, yeast-friendly environment.
Just don’t turn the oven on by accident because we’re nurturing dough here, not roasting it early!
Don’t Stress About Shaping
Here’s the truth: this bread is meant to look rustic. You’re not going for a perfect sphere or a Pinterest-ready boule.
When you shape the dough, just gather it loosely into a round-ish form by tucking the edges under. If it flattens a bit or looks lopsided, who cares? It’ll still puff up beautifully in the oven.
Embrace the imperfections; that’s what makes it homemade and charming.
Flavor Variations
Once you’ve nailed the basic loaf, it’s time to have a little fun.Here are a few crowd-pleasers worth trying:
Rosemary & Garlic
Add 1 tablespoon chopped fresh rosemary and 2 cloves of minced garlic to the dough before the first rise.
The rosemary infuses the bread with an earthy, piney aroma, while the garlic gives little bursts of savory warmth. For even more punch, roast the garlic first to mellow and sweeten the flavor.
Cheddar & Jalapeño
Spice lovers, this one’s for you. Stir in ¾ cup shredded sharp cheddar cheese and 1 small jalapeño (seeded and finely chopped) into the dough.
The cheese melts into rich pockets, and the jalapeño adds a gentle heat that’s not overwhelming, but just enough to wake up your taste buds.
Pro tip: Reserve a little cheese to sprinkle on top right before baking.
Olive & Herb
Chop up ½ cup pitted kalamata or green olives and toss them in along with 1 teaspoon dried oregano or 1 tablespoon chopped fresh parsley.
The saltiness of the olives gives the bread a Mediterranean vibe, while the herbs round it out with a fragrant twist.
Be sure to pat the olives dry with a paper towel so they don’t add too much moisture to the dough.
Whole Wheat Blend
Want a nuttier, slightly denser loaf? Swap 1 cup of the all-purpose flour for 1 cup of whole wheat flour (so it’s 2 cups all-purpose + 1 cup whole wheat).
Don’t go full whole wheat, or your bread might turn out heavy. You may need to add 1–2 tablespoons of extra water to account for the whole wheat’s thirstier texture.
Storage Tips
Freshly baked no-knead bread tastes best the day it’s made, but it still holds up beautifully for a few days with the right storage.
Once your loaf is completely cool, store it at room temperature in a paper bag or wrapped loosely in a clean kitchen towel. This keeps the crust from going soft and helps prevent mold.
Avoid plastic bags because they trap moisture and make the crust rubbery. The bread will stay good for about 2 to 3 days like this.
If you won’t finish it in time, slice what’s left and freeze the pieces in a zip-top bag. That way, you can grab a slice whenever you want and toss it straight into the toaster.
It’s great for quick breakfasts or a warm snack. If the crust softens after storage, you can re-crisp it in the oven at 350°F (175°C) for 5 to 10 minutes.
It’ll come out warm and crunchy again, like it just came out of the oven.
Final Words
If you’ve ever thought homemade bread was out of your league, this recipe just proved otherwise. No kneading, no stress, but just real, crusty bread you made yourself.
Don’t be afraid to play around with mix-ins or flavor twists. That’s half the fun!
FAQs
Can I use active dry yeast instead of instant?
Yes, but you’ll need to activate it first. Stir ¼ teaspoon active dry yeast into the warm water with a pinch of sugar and let it sit for about 5–10 minutes until foamy.
What if I don’t have a Dutch oven?
No problem. Use any oven-safe pot with a lid, like a heavy stainless steel pot or even a deep casserole dish.
If you’re stuck, bake the bread on a baking sheet with a metal pan of hot water on the rack below to mimic steam.
Can I refrigerate the dough?
Absolutely. After the first rise, shape the dough and cover it, then pop it in the fridge for up to 8–12 hours.
Let it come back to room temp for about 30 minutes before baking. It’s a great way to fit baking into a busy day.
Why is my bread too dense?
A few common culprits: not letting the dough rise long enough, using old yeast, or adding too much flour.
The dough should look wet and bubbly after the long rest. If it’s stiff or dry, it won’t rise properly.
Can I double the recipe?
Yes, but be sure your mixing bowl and Dutch oven are large enough. You can also split the dough into two smaller loaves and bake them one at a time.
Just remember that more dough may take a bit longer to bake through.
Super Simple No-Knead Bread Recipe for Beginners
Difficulty: Easy1
loaf5
minutes45
minutes13
hoursThis beginner-friendly no-knead bread delivers a crusty, golden loaf with a soft interior—no kneading or mixer required.
Ingredients
3 cups all-purpose flour
¼ teaspoon instant yeast
1¼ teaspoons salt
1½ cups warm water (about 100°F / 38°C)
Directions
- In a large bowl, stir together flour, yeast, and salt. Add warm water and mix until a sticky, shaggy dough forms.
- Cover the bowl with a towel or plastic wrap. Let rest at room temperature for 12–18 hours until bubbly and doubled in size.
- Lightly flour a sheet of parchment paper. Turn the dough out onto it and gently shape into a ball. Rest for 30–60 minutes.
- Meanwhile, preheat your oven to 450°F (232°C) with a Dutch oven (with lid) inside for 30 minutes.
- Carefully place the dough (with parchment) into the hot pot. Cover and bake for 30 minutes. Remove lid and bake another 10–15 minutes until golden brown.
- Let cool on a wire rack for at least 30 minutes before slicing.
Notes
- For flavor variations, mix in herbs, cheese, or olives before the first rise.
- To store, keep at room temp for 2–3 days or freeze sliced for later.
- Re-crisp in the oven at 350°F for 5–10 minutes if needed.

Hi, I’m Sorenna Blythe, the baker and writer behind Mix Whisk Bake. I share simple, reliable recipes and honest kitchen moments to help home bakers bake with confidence and joy. When I’m not testing new treats, you’ll find me sipping coffee and dreaming up my next bake.


