
There’s something about the smell of cinnamon and oats that instantly feels like home. Maybe it reminds you of grandma’s cookie jar or that warm batch cooling on a Sunday afternoon.
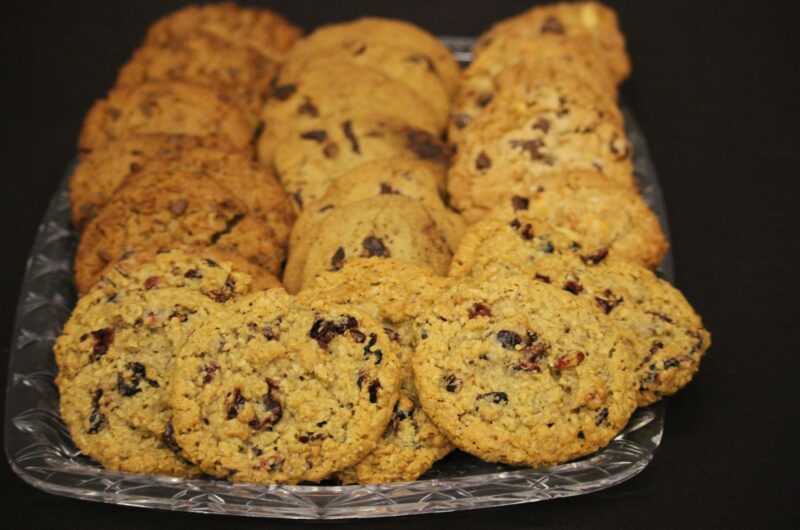
Oatmeal raisin cookies often get overshadowed by their chocolate chip cousins, but don’t be fooled. When done right, they’re soft, chewy, and packed with rich, cozy flavor.
In this post, you’ll learn how to bake oatmeal raisin cookies like a pro, from ingredient choices to expert techniques that make all the difference. Let’s turn this humble classic into your next baking triumph!
What Makes Oatmeal Raisin Cookies So Special?
A Flavor That Feels Like a Hug
Oatmeal raisin cookies aren’t flashy. They don’t melt or ooze or sparkle. But what they do have is depth. The oats bring a nutty richness. Brown sugar adds caramel notes.
Cinnamon gives warmth. And the raisins? Little bursts of sweet and chewy goodness that balance it all out.
The Texture: Soft, Chewy, and Just Crisp Enough
A great oatmeal raisin cookie has layers, literally and figuratively. The outside should have a light crisp, just enough to give you that satisfying first bite.
But the center? It should be soft, chewy, and bendy, not dry or crumbly.
That perfect texture comes down to the right combo of moisture, fat, and bake time. Too much flour, and it’s cakey. Too little, and it spreads like a pancake.
We’ll walk through how to get that sweet spot, pun fully intended!
A Sneaky Nutritional Bonus
Here’s a little secret: oatmeal raisin cookies are actually a bit more wholesome than most. Rolled oats pack fiber and protein.
Raisins offer natural sugars and iron. And they usually use less refined sugar than your average chocolate chip cookie.
We’re not saying it’s health food, but if you’re going to indulge, this cookie brings a little extra to the table. Call it a treat with benefits.
Key Ingredients & Why They Matter
Each ingredient in oatmeal raisin cookies does more than just add flavor. It shapes the final texture, structure, and overall bite. Here’s what you need to know:
- Old-Fashioned Oats
Use these, not quick oats. They’re thicker, heartier, and hold their shape during baking. Quick oats can make the cookies dense and mushy. - Raisins
Soak them in warm water (or even rum for extra flair) for 10–15 minutes before adding. This keeps them juicy instead of dry or tough in the finished cookie. - Butter (Salted vs Unsalted)
Unsalted butter is best because it gives you full control over the cookie’s saltiness. Salted butter varies by brand and can throw off flavor balance. - Brown Sugar vs White Sugar
Brown sugar adds moisture and chewiness thanks to its molasses content. A little white sugar helps crisp the edges. The right ratio = perfect texture. - Spices (Cinnamon, Nutmeg, Cardamom)
Cinnamon is non-negotiable for that cozy flavor. Nutmeg adds a subtle warmth. Cardamom? Optional, but it adds a floral twist if you’re feeling bold. - Optional Add-ins
- Walnuts add crunch and a toasty, nutty flavor.
- Shredded coconut brings chewiness and a hint of sweetness.
- Chocolate chips turn it into a chewy, chocolatey hybrid cookie. Go for it if you’re craving something extra.
Equipment Checklist
Having the right tools can make your cookie game smoother, faster, and way more consistent. Here’s what you’ll need to bake oatmeal raisin cookies like a pro:
- Mixing Bowls (Glass or Metal)
Use a large one for mixing the dough and a smaller one for combining dry ingredients. Glass and metal bowls are sturdy and don’t retain odors or stains. - Hand or Stand Mixer
A hand mixer is perfect for creaming butter and sugar. If you have a stand mixer, even better, it saves time and effort, especially with thick dough. - Cookie Scoop or Tablespoon
For even-sized cookies that bake uniformly. A scoop ensures your cookies look consistent and finish at the same time—no overbaked edges or raw centers. - Baking Sheets + Parchment Paper
Go for light-colored, rimless sheets if possible. They help prevent over-browning. Parchment paper makes cleanup easier and keeps cookies from sticking. - Wire Cooling Rack
This keeps the bottoms from turning soggy by allowing air to circulate. Cool cookies = better texture and no steam buildup.
Step-by-Step Instructions Like a Pro
Ready to bake oatmeal raisin cookies that taste like they came from a bakery? Let’s walk through the process because each step matters more than you might think. Here’s how to do it the right way:
1. Prepping the Raisins
Before you even touch the flour, soak your raisins. Toss them into a small bowl with warm water and let them sit for about 10–15 minutes.
This rehydrates them, so they stay soft and chewy when baked. Want a twist? Soak them in dark rum or apple juice for extra flavor. Drain and pat dry before adding to the dough.
2. Creaming the Butter and Sugar
Use room temperature butter—it should give slightly when pressed but not be melty. Cream it with brown and white sugar until the mixture looks fluffy and light in color.
This step creates air pockets that help with lift and texture. Don’t rush it. Let the mixer run for at least 2–3 minutes. Under-creamed butter means dense cookies.
3. Adding Eggs and Vanilla
Crack in the eggs one egg at a time, mixing well after each. Use room temperature eggs to prevent curdling and help everything blend smoothly.
Add pure vanilla extract for that rich, sweet aroma. This combo brings moisture and binds the dough together.
4. Combining Dry Ingredients
In a separate bowl, whisk together your flour, baking soda, salt, and spices. Gently fold the dry mix into the wet using low speed or a spatula.
Stop as soon as there are no visible streaks of flour. Overmixing here leads to tough, cakey cookies, and that’s not what we want.
5. Mixing in Oats and Raisins
Now stir in your old-fashioned oats and those plump raisins. You can do this by hand to avoid overworking the dough.
Make sure everything is evenly distributed, but don’t beat the dough up. Gentle wins the race.
6. Chill the Dough
This is the secret weapon. Cover and chill the dough for at least 30 minutes—an hour or more is even better.
Chilling helps the flavors develop and keeps the cookies from spreading too much. Cold dough = thicker, chewier cookies with crisp edges.
7. Scooping Uniform Cookies
Use a cookie scoop or a rounded tablespoon to portion the dough. Keeping the cookies the same size ensures they bake evenly.
If you’re going for bakery-style, aim for slightly larger scoops (about 2 tablespoons). Flatten them just a bit with your fingers.
8. Baking at the Right Temp
Bake at 175°C (350°F) for 10–12 minutes. They should look set on the edges but slightly soft in the center.
Don’t wait for them to look “done” because they’ll finish cooking as they cool. Overbaking is the easiest way to dry them out.
9. Cool and Rest for Perfect Texture
Let the cookies sit on the baking sheet for 5 minutes, then transfer them to a wire rack.
This helps them firm up without going soggy. Cooling also locks in that perfect chewy texture. It’s worth the wait, promise.
Pro Tips for Perfect Results
Want your oatmeal raisin cookies to come out just right every single time? These tips are the difference between “pretty good” and “where have these been all my life?”
Why Chilling Is Your Cookie’s Best Friend
Seriously, don’t skip the chill. When you refrigerate the dough, the fat (aka butter) firms up. That means it melts more slowly in the oven, giving you cookies that spread less and rise more.
Chilling also deepens the flavor. Think of it like marinating because your cookie dough gets time to bloom and balance.
Even just 30 minutes in the fridge can make a noticeable difference. But if you can chill it overnight? Chef’s kiss.
How to Prevent Cookies from Spreading Too Much
If your cookies always come out flat and sad, don’t panic. Here’s what might be going wrong:
- Butter too warm? That’ll melt fast and turn your dough into puddles.
- Skipped chilling? Yep, we’re bringing it up again.
- Too little flour? A dough that’s too wet won’t hold its shape.
- Baking sheet too hot? Let it cool between batches or use a fresh one.
Still unsure? Do a test bake with one cookie first. If it spreads too much, chill the dough longer or add a tablespoon of flour.
Tricks to Keep Them Soft for Days
No one likes a hard cookie unless it’s biscotti. Here’s how to keep your oatmeal raisin cookies soft and chewy even on day three:
- Store in an airtight container with a slice of white bread. The cookies steal moisture from the bread, staying soft while the bread dries out.
- Don’t overbake—even one extra minute can dry them out.
- Let them cool completely before storing. Warm cookies trap steam and make things soggy, not soft.
Swapping Raisins for Other Dried Fruits
Not a raisin fan? Totally fair. Good news, because you can switch them out without ruining the texture. Try:
- Dried cranberries for a tart pop
- Chopped dates for caramel-like chewiness
- Dried cherries for a bold, sweet-tart bite
- Golden raisins for a milder, fruitier flavor
Just keep the size similar to raisins so they blend evenly. And yes, still soak them. Dry fruit in cookies = dry cookies.
Common Mistakes to Avoid
Even experienced bakers have the occasional “why did that happen?” moment.
The good news? Most oatmeal raisin cookie mishaps come down to a few simple mistakes, and they’re easy to fix once you know what to look for.
Using Instant Oats Instead of Old-Fashioned
Instant oats might sound convenient, but they’re not built for baking. They absorb liquid too quickly and break down into mush, leaving your cookies dense and gummy instead of chewy and hearty.
Old-fashioned oats hold their shape, add texture, and give that perfect bite we all love. If you only have instant oats, save them for breakfast, not baking.
Overbaking – How to Tell When They’re Just Done
Here’s a hard truth: cookies don’t look fully baked when they actually are. The edges should be lightly golden, and the centers should still look a bit soft.
They’ll keep baking from residual heat even after you take them out. If you wait until they “look ready,” they’ll cool into dry, crumbly disappointments.
Trust the timer and your instincts. Soft and slightly underdone always beats crunchy and sad.
Skipping the Dough Chill
Skipping the chill is the fastest way to end up with flat, lifeless cookies. Warm dough spreads too quickly, losing that chewy middle and crisp edge balance.
Chilling firms the butter, lets the flavors develop, and gives the oats time to absorb moisture evenly.
Not Soaking the Raisins (Dry Raisins = Dry Cookies)
Dry raisins are the villains of the oatmeal cookie world. They soak up moisture from the dough while baking, leaving your cookies parched.
A quick soak in warm water (or something more exciting like rum or orange juice) plumps them up and locks in sweetness.
Drain and pat them dry before mixing in, and you’ll never go back to tossing them in straight from the box.
Flavor Variations to Try
Once you’ve nailed the classic oatmeal raisin cookie, it’s time to have some fun. A few small tweaks can take your cookies from comforting to unforgettable.
Oatmeal Raisin Walnut
This one’s a no-brainer if you like a little crunch. Chopped walnuts add texture and a slightly bitter, toasty contrast that balances the sweet raisins perfectly. Toast them first for even more flavor.
Start with ½ cup of chopped walnuts and fold them in with the raisins. It’s the cookie version of a cozy trail mix.
Cinnamon-Spiced Oatmeal Cookies
Love that warm, spiced flavor? Double down. Add an extra ½ teaspoon of ground cinnamon, plus a pinch of nutmeg or ground ginger for a deeper, more complex spice profile.
These are perfect for fall baking or, honestly, anytime your kitchen needs to smell amazing. Pair them with a cup of chai, and thank us later.
Oatmeal Raisin Chocolate Chip
Can’t decide between chocolate chip and oatmeal raisin? Don’t. Mix both. Use ½ cup of raisins and ½ cup of semi-sweet or dark chocolate chips.
The result is chewy, chocolatey, and still has that wholesome oat vibe. It’s like your favorite cookies had a delicious baby.
Maple Oatmeal Raisin
Want to go a little gourmet? Replace some or all of the brown sugar with pure maple syrup (about ¼ cup), and reduce other liquids slightly to balance the moisture.
The maple adds a rich, earthy sweetness that complements the oats and raisins beautifully.
Bonus: it makes the house smell like a pancake breakfast.
Storage & Freezing Tips
To keep your oatmeal raisin cookies chewy for up to a week, store them in an airtight container at room temperature with a slice of white bread inside because the cookies absorb moisture from the bread, staying soft while the bread dries out.
Avoid storing them in the fridge, which can dry them out faster than you’d think. For freezing, you’ve got two great options: freeze the dough or the baked cookies.
To freeze the dough, scoop it into individual balls, place them on a tray to freeze until solid, then transfer to a freezer bag—this way, you can bake just a few cookies at a time, straight from frozen (just add 1–2 minutes to the bake time).
If freezing baked cookies, let them cool completely first, then layer them in an airtight container with parchment between the layers to prevent sticking.
When it’s time to enjoy them, reheating is easy: a quick 5–10 seconds in the microwave brings back that just-baked softness, or pop them in a warm oven at 150°C (300°F) for about 4–5 minutes to get that crispy edge and gooey center back.
Final Thoughts
Go ahead, try the recipe and make it yours. Add a handful of walnuts, swap in cranberries, or drizzle with a little icing if you’re feeling fancy.
And if your first batch doesn’t come out perfect? Welcome to the club. Even seasoned bakers burn a tray now and then. The key is to keep baking, keep tasting, and keep having fun!
FAQs
Can I make them gluten-free?
Yes! Just swap the all-purpose flour with a 1:1 gluten-free baking blend that includes xanthan gum.
Also, make sure your oats are certified gluten-free because some brands process oats in facilities that handle wheat.
How do I make them dairy-free?
Use a plant-based butter substitute (like vegan margarine or coconut oil) and check that your chocolate chips or other add-ins are dairy-free. The rest of the ingredients are naturally dairy-free.
Can I skip the cinnamon?
You can, but the cookies will lose that warm, cozy flavor. If cinnamon’s not your thing, try using a pinch of nutmeg or leave out the spices altogether for a milder cookie.
Do I need to chill the dough?
Technically, no. But if you want thick, chewy cookies with crisp edges, chilling is key. It helps control the spread and deepens the flavor. Even 30 minutes makes a noticeable difference.
Can I use steel-cut oats?
Nope, steel-cut oats are too tough and chewy for cookie dough. Stick with old-fashioned rolled oats for the best texture. Quick oats can work in a pinch, but change the final bite.
How to Bake Oatmeal Raisin Cookies Like a Pro
Difficulty: Easy22
cookies15
minutes12
minutes45
minutesSoft, chewy oatmeal raisin cookies packed with warm spices, hearty oats, and plump raisins—perfect for everyday baking or a cozy treat.
Ingredients
1 cup (2 sticks) unsalted butter, softened
¾ cup brown sugar, packed
¼ cup granulated sugar
2 large eggs, room temperature
1½ tsp vanilla extract
1½ cups all-purpose flour
1 tsp baking soda
1 tsp ground cinnamon
½ tsp salt
3 cups old-fashioned oats
1 cup raisins (soaked and drained)
Directions
- Preheat oven to 350°F (175°C). Line baking sheets with parchment paper.
- In a small bowl, soak raisins in warm water for 10–15 minutes, then drain and pat dry.
- In a large bowl, cream butter, brown sugar, and granulated sugar until light and fluffy.
- Beat in eggs one at a time, then mix in vanilla.
- In a separate bowl, whisk flour, baking soda, cinnamon, and salt. Gradually add to wet ingredients.
- Stir in oats and raisins until just combined.
- Cover and chill the dough for at least 30 minutes.
- Scoop dough into balls (about 2 tablespoons each) and place on prepared baking sheets.
- Bake for 10–12 minutes, until edges are golden and centers are slightly soft.
- Let cookies cool on the pan for 5 minutes, then transfer to a wire rack.
Notes
- For extra chew, use dark brown sugar.
- Want a twist? Add ½ cup chopped walnuts or chocolate chips.
- Store cookies in an airtight container with a slice of bread to keep them soft.
- Dough can be frozen in scoops for quick baking later—just add 1–2 minutes to bake time.

Hi, I’m Sorenna Blythe, the baker and writer behind Mix Whisk Bake. I share simple, reliable recipes and honest kitchen moments to help home bakers bake with confidence and joy. When I’m not testing new treats, you’ll find me sipping coffee and dreaming up my next bake.


