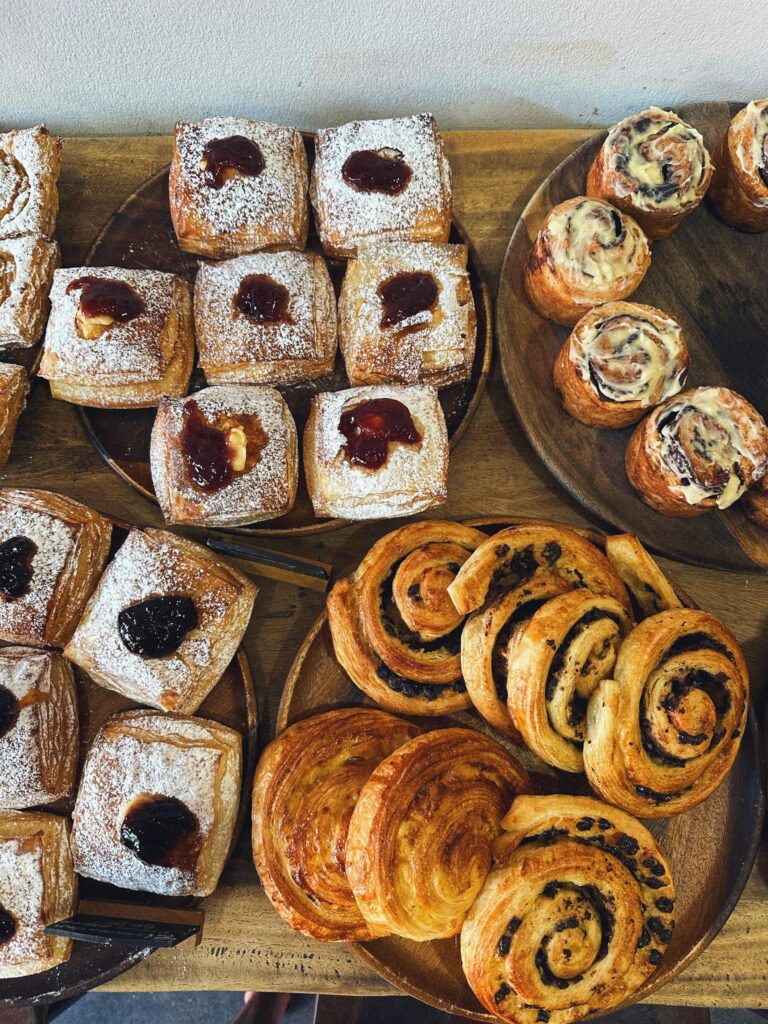
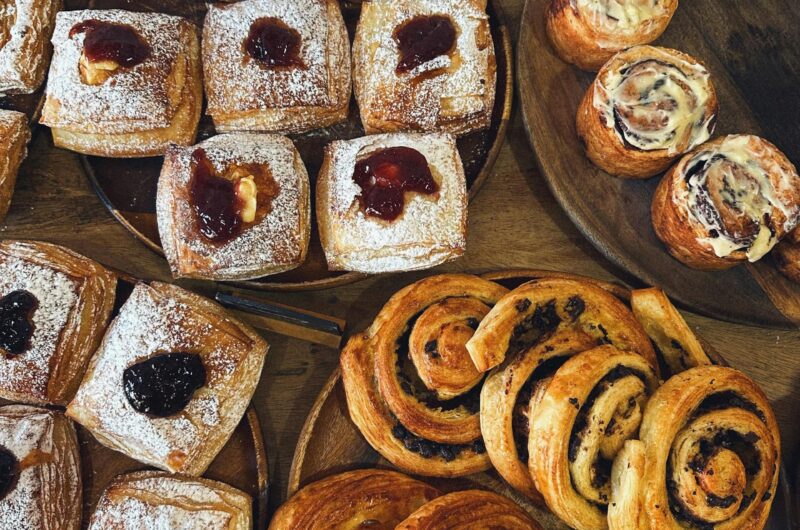
There’s something magical about a Danish pastry. One bite and you’re met with flaky layers, buttery aroma, and that soft, sweet center that feels like a warm hug on a cold morning.
It’s the kind of treat that makes you pause and think, “Okay… I need to learn how to make this.”
Good news, you absolutely can. In this step-by-step guide, you’ll learn the core skills behind perfect Danishes: mixing an enriched dough, laminating buttery layers, shaping them like a pro, proofing them just right, and finishing them to achieve a bakery-worthy appearance.
No secrets. No gatekeeping. Just clear, friendly steps.
If you’re a home baker with a little experience making bread or pastry, this is your moment.
You’ll spend about 3–4 hours total (don’t worry, most of that is chill time), and you’ll walk away with 12–16 beautifully layered pastries you’ll be proud to share… or not.
I won’t judge if they “mysteriously” disappear.
Background & Why It Works (brief)
Danish pastries may be famous worldwide, but their story starts with a happy mistake.
Legend says a baker ran out of butter and folded extra layers of dough and fat to make up for it, and that little accident created the flaky, buttery pastry we love today.
In the pastry world, “Danish” refers to enriched, laminated dough: a soft, slightly sweet base wrapped around thin sheets of butter to form delicate, airy layers.
Those layers come from lamination. When you fold dough around butter and roll it out repeatedly, the butter creates individual pockets that puff up in the oven.
Think of it like stacking dozens of tiny blankets — once heat hits, each one lifts and separates, giving you that signature flake.
To make it work, a few things matter more than anything else: temperature, butter consistency, and gluten development.
The dough needs to stay cold so the butter doesn’t melt into it. The butter should be firm but flexible — too soft, and it leaks, too hard, and it shatters.
And the dough needs enough gluten strength to stretch without tearing. Keep those three in check, and your pastries are halfway to perfection.
Ingredients — What to Use and Why
- Flour (bread vs. all-purpose):
Bread flour gives stronger gluten development, which helps the dough stretch without tearing during lamination. All-purpose flour works too, but the layers may be slightly softer. - Fat (unsalted butter, block quality):
High-quality butter with a higher fat percentage creates cleaner, more defined layers. Block-style butter stays pliable and consistent, making it easier to work with. The butter-to-dough ratio is key for flakiness — too little and you lose lift, too much and it leaks. - Liquids (milk vs. water) + eggs:
Milk adds richness and color, while water keeps the dough lighter. Eggs enrich the dough, give structure, and help with browning. Together, they create that tender-but-strong base perfect for laminating. - Yeast (instant vs. active dry):
Instant yeast can be added straight to the flour and rises more quickly. Active dry yeast needs to be dissolved first, but both work well; just adjust proofing times slightly. - Sugar & salt (amounts and functions):
Sugar adds sweetness and helps with browning. Salt balances flavor and keeps fermentation in check. Even small changes can affect texture and rise. - Optional add-ins (sour cream, vanilla, lemon zest):
These enrichments boost flavor and softness. Sour cream adds moisture and tang, vanilla brings warmth, and lemon zest brightens the dough without overpowering it. - Pro baker tips:
Always weigh ingredients for accuracy, as small differences matter in laminated dough. Keep ingredients at their proper temperatures: cold butter, cool dough, and room-temperature liquids for easy mixing and consistent layers.
Equipment & Workspace
- Mixer with dough hook (or by-hand option):
A stand mixer makes kneading the enriched dough easier and more consistent, but you can absolutely knead by hand; it just takes a bit more time and patience. - Rolling pin, bench scraper, and ruler:
These are your lamination essentials. The rolling pin spreads the dough evenly, the bench scraper keeps edges neat and helps lift dough cleanly, and the ruler ensures precise measurements for folds and shapes. - Plastic wrap, baking sheet, parchment, proofing box (or warm spot):
Plastic wrap keeps the dough from drying out during rests. A baking sheet and parchment paper are needed for shaping and baking. A proofing box or a warm, draft-free corner of your kitchen helps the dough rise evenly. - Instant-read thermometer:
This helps you check that your dough, butter, and room temperature are all in the ideal range. A few degrees can make a big difference during lamination. - Pro tip:
Keep your workspace cool, and don’t hesitate to pop the dough or butter back into the fridge whenever they start to soften. Cold dough equals cleaner layers and a lighter, flakier pastry.
Step-By-Step Method (detailed)
1. Make the enriched dough
If using active dry yeast, dissolve it in warm milk (not hot) for 5–10 minutes until foamy.
Combine flour, sugar, and salt in the bowl, then add eggs and the milk (or water) and mix until the dough comes together.
Add the softened butter in pieces and knead with a dough hook or by hand until the dough is smooth and slightly elastic.
Aim for a windowpane that’s present but a bit delicate, meaning the dough should stretch thin without tearing easily.
The finished dough should feel smooth and slightly tacky, not sticky; if it sticks badly to your fingers, knead in a spoonful of flour and test again.
2. Rest & chill the dough
Shape the dough into a flat disk or rectangle, wrap it tightly, and chill for 30–60 minutes. This rest relaxes the gluten so the dough rolls out without snapping back.
3. Prepare the butter block
Use block butter (unsalted), and pound or roll it into an even square or rectangle about ½–¾ inch thick. Place the butter between parchment and bash it with a rolling pin or press it to spread evenly.
The butter should be cold but pliable — firm enough to hold a shape, soft enough to bend slightly without crumbling.
If it’s rock-hard, let it sit for a few minutes; too soft and it will squish through the dough during lamination.
4. Lamination: encase butter & do turns
Place the chilled dough rolled slightly larger than the butter. Center the butter on the dough and fold the dough edges over like an envelope so the butter is fully encased. Press seams to seal.
For folds, you can use either the book (letter) fold or single turns:
- Book (letter) fold: roll the dough to a long rectangle, fold one short third over the middle, then fold the other short third on top (like closing a letter). This gives a tidy pack of layers.
- Single turns: roll to a rectangle, fold one third over the center, then fold the remaining third on top — similar to the letter fold but done along the long axis; often used for croissants and Danishes.
- A good rule: roll out evenly, keeping edges straight; use a ruler if you like precision. Do three single turns (or three letter/book folds) total, chilling 20–30 minutes between each turn. Chill so the butter stays firm and the dough relaxes, as this prevents leakage and keeps layers distinct.
- Visual cues of success: clean, dry edges; no visible butter streaking through the dough; smooth layers when you look at the dough’s cross-section.
5. Resting after lamination
After your final turn, wrap and chill the dough for 30–60 minutes. This final chill lets the gluten relax and the butter re-firm before shaping.
Skipping this step often leads to deformed shapes or butter squeeze-outs.
6. Shaping Danish pastries
Work on a lightly floured surface. Roll the laminated dough to your desired thickness (about ¼ inch is common). Cut shapes with a sharp cutter or knife. Basic shapes:
- Pinwheel: cut a square, make diagonal slits from each corner toward the center, fold alternating corners to the center, and press gently.
- Envelope: cut a rectangle, place filling in the center, fold corners in to make a tidy pocket.
- Twist/Spiral: cut strips, add filling lengthwise, twist or coil into a spiral.
For three popular examples, follow the step-by-step: (1) Custard envelope: place 1–2 tablespoons custard in the center, fold corners and press; (2) Almond crown: spread 1 tablespoon almond paste, pinch edges to form a ring; (3) Pinwheel: put 1 tablespoon jam, fold opposite corners to the middle. As a guideline, use about 1–2 tablespoons of filling per standard-sized Danish; too much filling will weigh the pastry down and make it soggy.
7. Proofing
Proof in a warm, humid spot around 75–85°F (24–29°C). Cover loosely so the dough doesn’t dry out. Typical proof time is 45–90 minutes, depending on dough temperature and room temperature.
They’re ready when the pastries look noticeably puffy, the layers are visible, and a gentle poke springs back slowly.
Under-proofed Danishes stay dense; over-proofed ones collapse in the oven, so aim for a happy middle ground.
8. Egg wash & scoring
Beat one egg with one tablespoon of milk or water for a glossy egg wash. Brush the pastries once, just before baking, and avoid saturating the edges.
For scoring, make shallow cuts where you want defined lifts or edges (for example, a cross on an envelope or slits on a twist).
Score lightly; deep cuts let the butter escape. The egg wash helps color and gives a bakery finish.
9. Baking
Preheat the oven to about 200°C (400°F). Bake on the middle rack until pastries are deep golden and the layers are crisp — usually 12–20 minutes, depending on size.
If they brown too fast, lower the temperature to 190°C (375°F) and extend bake time a few minutes.
Rotate the sheet once for even color. Look for an even, deep golden top and a hollow-sounding bottom when tapped lightly.
10. Finishing
Allow pastries to cool slightly before adding delicate glazes. For a simple sugar glaze, mix powdered sugar with a splash of milk to a drizzleable consistency and spoon over warm-cooled pastries.
Apricot glaze (warmed apricot jam strained and brushed on) gives shine and a hint of tang. Dust with sliced almonds or a light icing if desired.
Glaze choice: brush hot for a sticky shine (apricot glaze); drizzle cooled for a clean white icing. Serve warm for the flakiest texture.
If you must store, keep leftovers in an airtight container and reheat briefly in a low oven to revive crispness.
Troubleshooting & Common Problems
Dense or Chewy Pastry
A Danish should feel light and airy, not heavy like a forgotten gym bag.
If yours turn out dense, the dough may have been underproofed, overworked, or exposed to butter that was too warm during lamination.
Underproofing keeps the layers tight, while overworking tightens the gluten so much it refuses to rise. Warm butter blends into the dough instead of separating into clean layers.
- Quick fix: Proof longer until puffy and jiggly.
- Prevention: Keep butter cold, roll gently, and give the dough enough time to rest.
Butter Leakage
If you see little puddles of melted butter on your baking tray, that’s a sign your butter was too soft or the dough was rolled too thin or too warm.
Lamination relies on keeping butter locked in thin sheets; once it melts, it escapes and leaves the pastry dry.
- Quick fix: Chill the shaped pastries briefly before baking.
- Prevention: Stop and chill the dough whenever it feels warm. Keep your butter block firm but flexible.
No Lift
Flat Danish pastries are heartbreaking. No lift usually means weak gluten, inactive yeast, or too few turns during lamination. Without structure and gas, the pastry simply can’t rise.
- Quick fix: Check your yeast by blooming it next time.
- Prevention: Knead until the dough is smooth, give all required folds, and use fresh yeast.
Soggy Bottoms
Soggy bottoms happen when the pastry is underbaked, overfilled, or baking on a thin sheet pan that doesn’t hold heat well. Too much filling weighs down the dough and leaks moisture into the layers.
- Quick fix: Pop pastries back into the oven to crisp the bottoms.
- Prevention: Bake on a sturdy tray, avoid overloading fillings, and bake until deeply golden.
Quick Fixes & Smart Prevention
Small habits save pastries. Keep dough cold, butter colder, and your workspace cool. Let the dough rest whenever it resists rolling. Check yeast freshness every few weeks.
Use parchment and quality sheet pans. And remember the golden rule of laminated dough: if in doubt, chill it out.
Variations & Flavor Ideas
Fruit-Filled Danishes
Fruit fillings are classic because they add sweetness, color, and that lovely jammy center. Apple, berry, peach—anything that holds up well when heated works beautifully.
Use about 1–2 tablespoons per pastry so the filling enhances rather than overwhelms. If the fruit mixture is runny, thicken it slightly to avoid soggy layers.
Almond or Frangipane Danish
Almond lovers, this one’s your moment. A small spoonful of frangipane (almond cream) turns any Danish into a rich, bakery-style treat.
It’s nutty, buttery, and bakes into a soft, fragrant center that pairs perfectly with flaky layers. Add sliced almonds on top for texture and color.
Savory Danishes
If you want something beyond sweet, savory options hit the spot. Try spinach and feta for a Mediterranean twist, or ham and cheese for a cozy breakfast-style pastry.
Keep fillings on the drier side so the layers stay crisp. Savory Danishes are great for brunch spreads or lunchboxes.
Mini vs. Large + Seasonal Twists
Go mini for parties or snacking, or make big café-sized pastries for a showstopper treat. The dough behaves the same either way—just adjust baking time.
For seasonal flair, try pumpkin spice in autumn, lemon or orange zest in spring, or even cranberry filling during the holidays. A little seasonal touch keeps the recipe fresh and fun, no matter the time of year.
Storage, Reheating & Freezing
Best Practices: Freeze Unbaked vs. Baked
You can freeze Danish pastries before or after baking, and both options work well. Freezing unbaked pastries keeps the layers freshest and gives you that “just baked” magic later on.
Freezing baked pastries is quicker and more convenient, but it won’t give quite the same crispness.
If you want café-quality results on demand, freeze them unbaked. If you want grab-and-go convenience, freeze them baked.
How to Thaw & Proof Frozen Laminated Dough
For unbaked pastries, place them on a lined baking sheet and let them thaw in the fridge overnight.
Once thawed, move them to a warm, draft-free space and proof until puffy—usually 45–90 minutes depending on room temperature.
They should look airy, with visible layers, before you bake. Don’t rush this step; cold dough won’t rise well.
Reheating Baked Danishes
To revive baked pastries, warm them in a low oven at 150–170°C (300–325°F) for 5–10 minutes.
This brings back crisp edges without drying out the center. Avoid the microwave unless you enjoy chewy pastries because heat works against lamination there.
How Long Do They Keep
- Room temperature: 1–2 days in an airtight container.
- Refrigerator: Up to 4 days, though the layers will soften slightly.
- Freezer (baked or unbaked): 1–2 months for best quality.
If you want that fresh-from-the-bakery feel later, freezing unbaked pastries is your best bet. It keeps the butter layers intact and ready for lift-off when baked.
Final Words
Making Danish pastries may feel intimidating at first, but remember, every flaky layer you create is a small win. Your first batch might not look bakery-perfect, and that’s okay.
Practice is the secret ingredient here, and each try brings you one step closer to buttery, golden perfection.
If you whip up a batch, I’d love to see how they turn out. Share your photos, ask questions, or drop your favorite filling ideas in the comments. There’s always something new to learn (and taste).
FAQ’s
Can I make these ahead?
Yes. You can chill the dough overnight, freeze shaped pastries before baking, or bake them fully and reheat later. Unbaked frozen pastries give the freshest results.
Can I use margarine or block shortening?
You can, but the texture won’t be the same. Margarine and shortening have lower melting points and less flavor, so the layers won’t be as crisp or defined.
Unsalted butter gives the best lift, taste, and structure.
Can I make them with gluten-free flour?
It’s possible, but challenging. Laminated dough relies on gluten for stretch and strength. With gluten-free flour, expect fewer layers and a more biscuit-like texture.
Use a high-quality gluten-free blend with xanthan gum and keep the dough extra cold for the best outcome.
How many turns are necessary?
Three single turns (or letter folds) are ideal. Fewer turns mean fewer layers; more turns can overwork the dough and cause tearing or butter leakage. Three is the sweet spot for light, flaky pastries.
How to Make Perfect Danish Pastries, Step by Step
Difficulty: Intermediate16
Pastries1
hour20
minutes4
hoursFlaky, buttery Danish pastries made with a simple enriched dough and easy lamination steps—perfect for homemade bakery-style treats.
Ingredients
3 ½ cups (420g) bread flour
¼ cup (50g) sugar
1 tsp salt
2 ¼ tsp instant yeast (or active dry, bloomed in warm milk)
1 cup (240ml) warm milk
1 large egg
3 tbsp (40g) softened butter (for dough)
1 cup (225g) cold unsalted butter (for butter block)
Optional fillings: fruit jam, custard, almond paste, cream cheese
1 egg + 1 tbsp milk (for egg wash)
Directions
- Make the dough: Mix flour, sugar, salt, yeast, milk, and egg until combined. Add softened butter and knead until smooth and slightly tacky. Shape into a disk, wrap, and chill for 30–60 minutes.
- Prepare butter block: Beat cold butter into a ½–¾ inch thick square between parchment. Chill until firm but pliable.
- Laminate: Roll the dough slightly larger than the butter block. Encase the butter and seal. Roll into a rectangle and perform 1 fold. Chill 20 minutes. Repeat for 3 total folds, chilling between each.
- Final chill: Wrap and chill dough 30–60 minutes to relax.
- Shape pastries: Roll to ¼ inch thick. Cut into squares or strips. Shape into pinwheels, envelopes, twists, or spirals. Add 1–2 tbsp filling.
- Proof: Let pastries rise in a warm spot until puffy (45–90 minutes).
- Bake: Brush with egg wash. Bake at 400°F (200°C) for 12–20 minutes until deep golden and crisp.
- Finish: Drizzle with icing or glaze once slightly cooled.
Notes
- Keep butter and dough cold at every stage—warm butter causes leaks.
- If dough resists rolling, chill for 10 minutes.
- Freeze shaped pastries before baking for easy make-ahead mornings.
- Reheat baked Danishes at 300°F (150°C) for 5–10 minutes to restore flakiness.

Hi, I’m Sorenna Blythe, the baker and writer behind Mix Whisk Bake. I share simple, reliable recipes and honest kitchen moments to help home bakers bake with confidence and joy. When I’m not testing new treats, you’ll find me sipping coffee and dreaming up my next bake.


