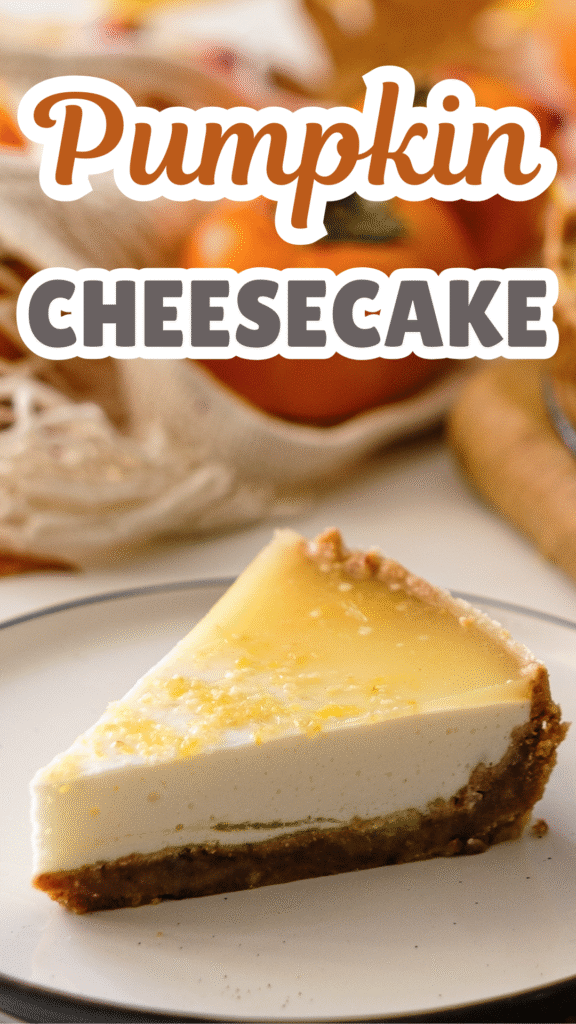
There’s something special about baking with pumpkin when the air turns cool. It fills your kitchen with warmth and instantly feels like the holidays.
If you’re planning your Thanksgiving table or just craving a cozy weekend bake, this pumpkin cheesecake deserves a spot.
In autumn, classic cheesecake feels a little plain. Pumpkin adds depth, warmth, and that gentle spice that makes every bite feel comforting and festive.
It’s richer in flavor, yet just as smooth and satisfying.
This recipe is designed to give you an ultra-creamy texture with perfectly balanced spice.
I’ll guide you through simple water bath steps to help prevent cracks, so you get a beautiful finish without stress. The method is clear, straightforward, and beginner-friendly.
If you’re new to baking, hosting a holiday dinner, or need a dessert you can make ahead with confidence, this is for you.
Let’s make a pumpkin cheesecake that looks impressive and tastes even better.
Why You’ll Love This Pumpkin Cheesecake
Smooth, Creamy Texture
Texture can make or break a cheesecake. This one is rich, velvety, and smooth from the first bite to the last.
The key is using room temperature cream cheese and mixing just until combined. That simple step creates a filling that bakes evenly and slices cleanly.
You won’t get a dry or dense result here. Instead, you’ll have a soft, creamy center that feels indulgent but not heavy.
Perfect Pumpkin Spice Flavor (Not Overpowering)
Pumpkin cheesecake should taste warm and balanced, not like a spoonful of spice. This recipe uses just enough cinnamon and pumpkin spice to highlight the pumpkin without taking over.
The flavor is gentle and cozy. It complements the tangy cream cheese instead of hiding it. Even those who don’t love overly spiced desserts will enjoy this one.
Foolproof Method to Prevent Cracks
Cracks can feel frustrating, especially after all that effort. This recipe walks you through a simple water bath method that helps the cheesecake bake evenly and stay smooth on top.
You’ll also cool it slowly in the oven, which prevents sudden temperature changes. That one step makes a big difference.
Follow the instructions, and you’ll feel confident pulling a beautiful cheesecake out of the oven.
Make-Ahead Friendly
Cheesecake actually tastes better after chilling overnight. The flavors settle, and the texture becomes even creamier.
You can bake this a day or two before your event, which makes hosting much easier. No last-minute stress. Just slice and serve.
Freezer-Friendly
If you want to plan even further ahead, this cheesecake freezes beautifully. Wrap it tightly once chilled, and freeze for up to a month.
When you’re ready to serve, thaw it in the fridge overnight. It will taste just as fresh and delicious.
Great for Thanksgiving and Christmas
Pumpkin cheesecake feels right at home on a holiday dessert table. It’s festive, comforting, and impressive without being complicated.
Serve it at Thanksgiving, bring it to a Christmas gathering, or enjoy it on a quiet fall weekend. However you share it, this dessert always feels special.
Ingredients Overview
A. For the Crust
- 1 ½ cups (150g) graham cracker crumbs (about 10–12 full crackers) or digestive biscuit crumbs
- 6 tablespoons (85g) unsalted butter, melted
- 2 tablespoons (25g) brown sugar (optional, for extra depth)
- ½ teaspoon ground cinnamon (optional, for warmth)
This combination creates a firm, buttery base that holds its shape and complements the creamy filling.
B. For the Pumpkin Cheesecake Filling
- 24 oz (680g) full-fat cream cheese, room temperature (3 standard blocks)
- 1 cup (240g) pumpkin purée (pure pumpkin, not pumpkin pie filling)
- ¾ cup (150g) granulated sugar
- ½ cup (100g) brown sugar
- 3 large eggs, room temperature
- 1 teaspoon pure vanilla extract
- 1 ½ teaspoons pumpkin spice
- ½ teaspoon ground cinnamon
- ¼ teaspoon ground nutmeg
- ½ cup (120ml) heavy cream or full-fat sour cream
- ¼ teaspoon salt
These amounts create a balanced pumpkin flavor with a smooth, stable texture that bakes evenly.
C. Optional Toppings
- 1 cup freshly whipped cream (lightly sweetened, if desired)
- ¼ cup caramel sauce (for drizzling)
- ½ cup candied pecans, chopped
- Light dusting of ground cinnamon
Add toppings just before serving for the best presentation and texture.
Equipment You’ll Need
- 9-inch springform pan
This is essential. The removable sides allow you to release the cheesecake cleanly without flipping it out. A standard 9-inch pan gives the perfect thickness for even baking. - Mixing bowls
Use one large bowl for the filling and a smaller one for the crust. Choose sturdy bowls so you can mix comfortably without spills. - Electric mixer or stand mixer
This helps create a smooth, lump-free batter. An electric hand mixer works perfectly well. Mix on low to avoid adding too much air, which can cause cracks. - Spatula
A rubber or silicone spatula is ideal for scraping down the sides of the bowl. This ensures everything blends evenly and nothing is left unmixed. - Roasting pan (for water bath)
The springform pan will sit inside this larger pan. It holds the hot water that surrounds the cheesecake while baking, helping it cook gently and evenly. - Aluminum foil
Use heavy-duty foil to wrap the outside of the springform pan. This prevents water from seeping in during the water bath and keeps the crust dry.
Step-by-Step Instructions
Follow each step in order. Take your time. Cheesecake rewards patience.
1. Prepare the Crust
Start by preheating your oven to 175°C (350°F). A fully heated oven helps the crust bake evenly from the start.
Crush the graham crackers into fine crumbs. You can use a food processor for quick results or place them in a sealed bag and crush with a rolling pin. The crumbs should be even, with no large chunks.
In a bowl, mix the crumbs with the melted butter and brown sugar (and cinnamon, if using). Stir until the texture looks like wet sand. Every crumb should be coated so the crust holds together once baked.
Press the mixture firmly into the bottom of your 9-inch springform pan. Use the bottom of a glass or measuring cup to press it down evenly. A compact crust prevents crumbling later.
Bake for 8–10 minutes, just until lightly set and fragrant. Remove from the oven and let it cool while you prepare the filling. A slightly cooled crust keeps the filling stable when poured in.
2. Make the Pumpkin Cheesecake Filling
In a large bowl, beat the room temperature cream cheese until completely smooth. This step matters. If there are lumps now, they will stay in the final cheesecake.
Add the granulated sugar and brown sugar. Mix on low speed until combined and creamy. Avoid high speed, which adds too much air.
Blend in the pumpkin purée until fully incorporated. The color should turn a soft orange and look smooth throughout.
Add the eggs one at a time, mixing gently after each addition. Stop as soon as each egg disappears into the batter. Overmixing at this stage can cause cracks.
Stir in the vanilla extract, pumpkin spice, cinnamon, nutmeg, salt, and heavy cream (or sour cream). Mix just until smooth and uniform. The batter should be thick, creamy, and pourable.
3. Prepare the Water Bath
Wrap the outside of your springform pan tightly with two to three layers of aluminum foil. Make sure the foil covers the bottom and goes up the sides. This prevents water from leaking in.
Place the wrapped pan into a large roasting pan. It should sit flat and stable.
Carefully pour hot water into the roasting pan until it reaches about halfway up the sides of the springform pan. The water bath helps the cheesecake bake gently and evenly, reducing the chance of cracks.
4. Bake the Cheesecake
Pour the filling over the cooled crust and smooth the top with a spatula. Place the roasting pan with the water bath into the oven.
Bake at 165°C (325°F) for about 55–70 minutes. Ovens vary, so start checking at the 55-minute mark.
The cheesecake is done when the edges look set, but the center still has a slight jiggle. It should wobble gently when nudged, not look liquid. The center will continue to firm up as it cools.
5. Cool Properly (Very Important!)
Once baked, turn off the oven and crack the door slightly. Let the cheesecake cool inside the oven for about 1 hour. This gradual cooling prevents sudden temperature changes that cause cracks.
After an hour, remove the cheesecake from the water bath and let it cool completely at room temperature.
Then cover and refrigerate for at least 4–6 hours, preferably overnight. Chilling allows the texture to fully set and the flavors to deepen.
When ready to serve, slice with a clean, warm knife for smooth edges. Patience here makes all the difference.
Pro Tips for the Perfect Pumpkin Cheesecake
Use Room Temperature Ingredients
Cold ingredients do not blend well. They create lumps in the batter, which can affect the final texture.
Take the cream cheese, eggs, and cream out of the fridge about 30–60 minutes before you start.
Room temperature ingredients mix more easily and create a smoother filling. This simple step helps prevent overmixing later.
Don’t Overmix After Adding Eggs
Eggs add structure, but they can also trap air if beaten too much. Too much air leads to cracks and a puffed cheesecake that sinks as it cools.
Once you add the eggs, mix on low speed and stop as soon as they are fully incorporated. The batter should look smooth, not fluffy. Gentle mixing keeps the texture dense and creamy.
Always Use Pure Pumpkin Purée
Pumpkin pie filling is already sweetened and spiced. Using it will throw off the balance of this recipe.
Choose 100% pure pumpkin purée. This gives you full control over the sweetness and spice level. It also ensures a clean, rich pumpkin flavor without being overly sweet.
Avoid Overbaking
Overbaking dries out the cheesecake and increases the chance of cracks. The center should still have a slight jiggle when you turn off the oven.
Remember, the cheesecake continues to cook from residual heat as it cools. If the center looks fully firm in the oven, it has likely baked too long. Trust the gentle wobble.
Chill Fully Before Slicing
Cheesecake needs time to set properly. Cutting too early will give you soft, messy slices.
Refrigerate for at least 4–6 hours, but overnight is even better. The texture becomes firmer and creamier, and the flavor deepens. Patience here truly pays off.
Clean Knife Between Slices
For neat slices, use a sharp knife dipped in warm water. Wipe the blade clean after every cut.
This prevents filling from dragging across the surface and keeps each slice smooth and defined. It takes an extra minute, but the presentation looks polished and professional.
Common Mistakes to Avoid
Even a simple cheesecake can go wrong if a few key steps are missed. Knowing what to avoid will help you bake with confidence and get consistent results every time.
Using Pumpkin Pie Filling Instead of Purée
Pumpkin pie filling is pre-sweetened and already mixed with spices. If you use it in this recipe, the cheesecake can turn out overly sweet and heavily spiced.
Always check the label and choose 100% pure pumpkin purée. This keeps the flavor balanced and allows the cream cheese to shine through. One small label check makes a big difference.
Skipping the Water Bath
It may seem like an extra step, but the water bath is there for a reason. Cheesecake needs gentle, even heat to bake properly.
Without it, the edges cook too quickly while the center stays underdone. This often leads to cracks and a dry texture.
The water bath creates a steady baking environment, which gives you a smoother top and creamier middle.
Opening the Oven Too Early
It’s tempting to peek. I understand. But opening the oven door early causes a sudden temperature drop.
That quick change can make the cheesecake sink or crack. Keep the door closed until the minimum baking time has passed. Trust the process and check it only when needed.
Overmixing the Batter
Beating the batter too much adds excess air. Air bubbles rise during baking and can cause cracks as the cheesecake cools.
Mix on low speed, especially after adding the eggs. Stop as soon as everything is combined. The batter should look smooth and thick, not fluffy.
Not Allowing Enough Chill Time
Cheesecake needs time to set fully. Cutting it too soon leads to soft slices that won’t hold their shape.
Let it cool gradually, then refrigerate for at least 4–6 hours, preferably overnight.
This resting time improves both texture and flavor. Waiting may feel hard, but it guarantees clean slices and a better overall result.
Variations & Flavor Ideas
Once you’ve mastered the base recipe, you can easily adjust it to suit your taste or the occasion. These variations keep the same creamy texture while adding a new twist.
Chocolate Swirl Pumpkin Cheesecake
Chocolate pairs beautifully with pumpkin. To create a swirl, melt about ½ cup of semi-sweet chocolate chips and let it cool slightly.
After pouring the pumpkin filling over the crust, spoon small amounts of melted chocolate on top.
Use a knife or skewer to gently swirl it through the batter. Do not overmix. You want visible ribbons of chocolate.
Bake as directed. The result is a cheesecake that feels richer and slightly more indulgent, perfect for chocolate lovers.
Maple Pumpkin Cheesecake
Maple adds a deeper, warm sweetness that fits perfectly with fall flavors. Replace ¼ cup of the granulated sugar with pure maple syrup.
Because maple syrup adds extra liquid, reduce the heavy cream slightly by about 1–2 tablespoons.
This keeps the texture balanced. The finished cheesecake will have a subtle maple note that feels cozy without overpowering the pumpkin.
Gingersnap Crust Instead of Graham Cracker
If you enjoy stronger spice, swap the graham crackers for crushed gingersnap cookies. Use the same amount, about 1 ½ cups of crumbs.
Gingersnaps add a bold, slightly spicy base that contrasts beautifully with the creamy filling. The crust will be firmer and more flavorful. It’s a simple switch that makes the dessert feel more festive.
No-Bake Pumpkin Cheesecake Version
If you prefer not to use the oven, you can adapt this into a no-bake version. Prepare the crust as usual, but chill it instead of baking.
For the filling, reduce the eggs completely and fold in 1 cup of whipped heavy cream after mixing the pumpkin and cream cheese mixture. Chill the cheesecake for at least 6–8 hours until firm.
The texture will be lighter and mousse-like rather than dense. It’s a great option for warm days or when oven space is limited.
Mini Pumpkin Cheesecakes
Mini cheesecakes are perfect for parties and portion control. Line a muffin tin with paper liners and press a tablespoon of crust mixture into each cup.
Fill each about ¾ full with batter. Bake at the same temperature but reduce the time to about 18–22 minutes. The centers should still have a slight jiggle.
These small portions chill faster and are easy to serve. They look impressive, but they’re simple to make.
How to Store Pumpkin Cheesecake
Proper storage keeps your pumpkin cheesecake tasting just as good days later as it did on the first slice.
After the cheesecake has fully cooled and chilled, store it in the refrigerator tightly covered with plastic wrap or in an airtight container for up to 5 days; this prevents it from absorbing fridge odors and keeps the texture smooth and creamy.
If you’d like to freeze it, first chill it completely, then wrap the whole cheesecake or individual slices tightly in plastic wrap, followed by a layer of aluminum foil to prevent freezer burn; you can freeze it for up to 1 month without losing quality.
For best results, thaw the cheesecake slowly in the refrigerator overnight rather than at room temperature, which helps maintain its structure and prevents excess moisture from forming on top.
Once thawed, keep it refrigerated and enjoy within 2–3 days for the freshest flavor and texture.
What to Serve with Pumpkin Cheesecake
Pumpkin cheesecake is rich and creamy, so pairing it with the right additions makes each bite even better.
A warm cup of coffee or a latte balances the sweetness and enhances the pumpkin spice flavors; the slight bitterness of coffee cuts through the richness and keeps the dessert from feeling too heavy.
If you want something extra indulgent, add a small scoop of vanilla ice cream on the side, letting it slowly melt into the cheesecake for a smooth, creamy contrast in both temperature and texture.
A light drizzle of salted caramel over the top adds depth and a hint of salt that highlights the warm spices without overpowering them; drizzle just before serving so it stays glossy and fresh.
For holiday gatherings, consider placing the cheesecake alongside classics like apple pie, pecan pie, or a tray of cookies to create a balanced dessert spread with different textures and flavors, allowing guests to mix and match while your pumpkin cheesecake stands out as the creamy centerpiece.
FAQs
Can I make pumpkin cheesecake without a water bath?
Yes, but the texture may be slightly less creamy, and the top is more likely to crack. If skipping the water bath, place a pan of hot water on the lower oven rack to create some moisture.
Why did my cheesecake crack?
Common causes include overmixing, overbaking, skipping the water bath, or cooling it too quickly. A slight jiggle in the center and gradual cooling help prevent cracks.
Can I make this ahead of time?
Absolutely. Pumpkin cheesecake is ideal for making 1–2 days in advance. The flavor improves after chilling overnight.
Can I freeze pumpkin cheesecake?
Yes. Wrap it tightly and freeze for up to 1 month. Thaw overnight in the refrigerator before serving.
Can I use homemade pumpkin purée?
Yes, as long as it is thick and well-drained. If it’s too watery, strain it through cheesecloth first to avoid a soft filling.
Pumpkin Cheesecake Recipe – Creamy, Spiced & Perfect for Fall
Difficulty: Easy10
Slices25
minutes1
hour7
hoursA rich, ultra-creamy pumpkin cheesecake with warm fall spices and a buttery graham cracker crust. Perfect for Thanksgiving, Christmas, or any cozy gathering.
Ingredients
- For the Crust:
1 ½ cups (150g) graham cracker crumbs
6 tablespoons (85g) unsalted butter, melted
2 tablespoons (25g) brown sugar (optional)
½ teaspoon cinnamon (optional)
- For the Filling:
24 oz (680g) full-fat cream cheese, room temperature
1 cup (240g) pumpkin purée
¾ cup (150g) granulated sugar
½ cup (100g) brown sugar
3 large eggs, room temperature
1 teaspoon vanilla extract
1 ½ teaspoons pumpkin spice
½ teaspoon cinnamon
¼ teaspoon nutmeg
½ cup (120ml) heavy cream or sour cream
¼ teaspoon salt
Directions
- Preheat oven to 175°C (350°F). Mix crust ingredients and press firmly into a 9-inch springform pan. Bake 8–10 minutes. Cool.
- Reduce oven to 165°C (325°F). Beat cream cheese until smooth. Add sugars and mix. Blend in pumpkin. Add eggs one at a time, mixing gently. Stir in remaining ingredients until smooth.
- Wrap the pan in foil. Pour filling over crust. Place in a roasting pan and add hot water halfway up the sides.
- Bake 55–70 minutes, until edges are set and center slightly jiggles.
- Turn off the oven, crack the door, and cool inside for 1 hour. Remove and cool completely. Refrigerate at least 4–6 hours or overnight before slicing.
Notes
- Use room temperature ingredients for a smooth batter.
- Do not overmix after adding eggs.
- The center should jiggle slightly when done.
- Chill overnight for the best flavor and clean slices.
- Store refrigerated up to 5 days or freeze up to 1 month.

Hi, I’m Sorenna Blythe, the baker and writer behind Mix Whisk Bake. I share simple, reliable recipes and honest kitchen moments to help home bakers bake with confidence and joy. When I’m not testing new treats, you’ll find me sipping coffee and dreaming up my next bake.


