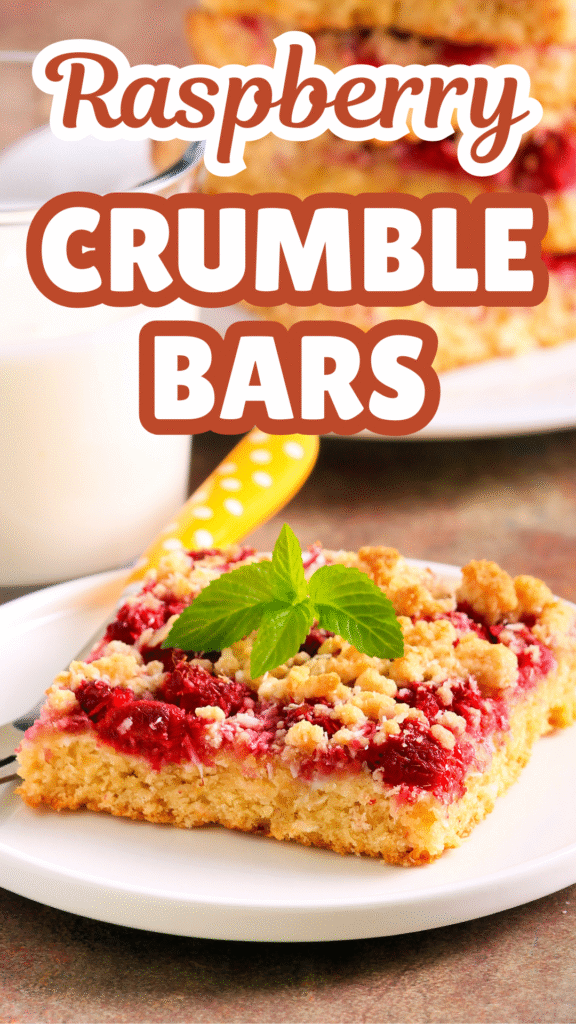
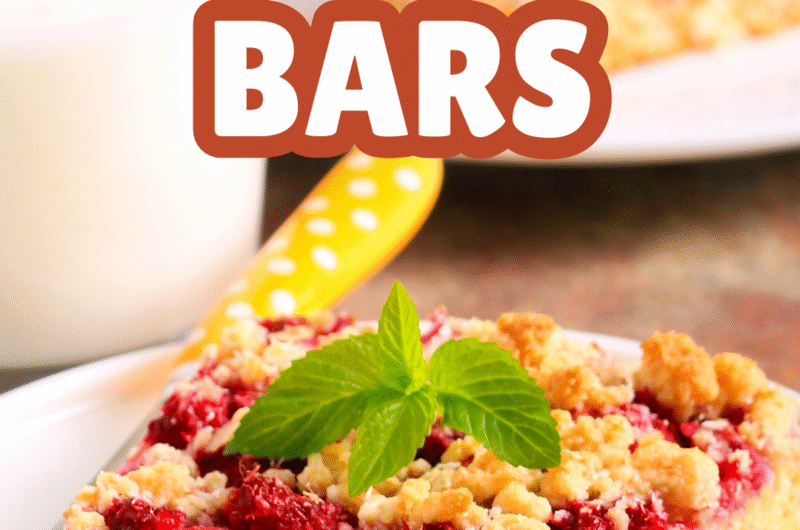
These raspberry crumble bars are the perfect mix of buttery and bright. Each bite gives you a sweet-tart raspberry filling tucked between a soft base and a golden, crumbly topping.
They look impressive, but they’re wonderfully simple to make. No complicated steps. No fancy equipment. Just basic ingredients and clear, easy instructions.
Serve them for dessert, pack them for tea time, or wrap a few as a thoughtful homemade gift.
If you’re new to baking, this recipe is a great place to start — and if you’re experienced, you’ll love how reliable and satisfying it is.
Why You’ll Love This Raspberry Crumble Bars Recipe
Simple Pantry Ingredients
You won’t need anything complicated for this recipe. Most of the ingredients are likely already in your kitchen — flour, sugar, butter, eggs, and baking powder.
The raspberry filling uses fresh or frozen berries, sugar, and a little cornstarch to thicken it.
This keeps the recipe affordable and stress-free. You can bake these bars without a special trip to the store. Simple ingredients also mean the natural raspberry flavor truly shines.
No Mixer Required
You don’t need a stand mixer or even a hand mixer. A mixing bowl and a pastry cutter, fork, or even your fingertips will do the job.
This makes the process feel relaxed and approachable. It’s perfect if you’re new to baking or just want something quick without extra cleanup. Fewer tools mean less mess and more time to enjoy the result.
Doubles as Crust and Crumble Topping
One dough does it all. You’ll press part of the mixture into the pan to form the base, then sprinkle the rest over the raspberry filling as the crumble topping.
This saves time and keeps the steps simple. You don’t have to prepare two separate mixtures, and the flavors stay perfectly balanced from bottom to top.
It’s efficient, but it still delivers that classic layered look.
Make-Ahead Friendly
These bars taste even better once they’ve cooled and set. In fact, they slice more cleanly after resting for a few hours.
You can bake them the day before serving, which makes them ideal for gatherings or busy weeks.
They also store well in the fridge and freeze beautifully. That flexibility makes this recipe dependable.
Perfect Balance of Sweet and Tart
The raspberries bring a natural tang that keeps the bars from feeling too sweet. The buttery crumble adds richness and just enough sweetness to round it out.
Every bite has contrast. Soft filling. Tender base. Light crunch on top. It’s a simple combination, but it works every time, and that’s what makes these bars so satisfying.
Ingredients You’ll Need
For the Crust & Crumble Topping
- 2 ½ cups (315 g) all-purpose flour
- ½ cup (100 g) granulated sugar
- ½ cup (100 g) light brown sugar, packed
- 1 teaspoon baking powder
- ½ teaspoon salt
- 1 cup (226 g) cold unsalted butter, cubed
- 1 large egg
- 1 teaspoon vanilla extract
For the Raspberry Filling
- 3 cups (360–400 g) fresh or frozen raspberries
- ½ cup (100 g) granulated sugar
- 2 tablespoons cornstarch
- 1 tablespoon fresh lemon juice
- 1 teaspoon lemon zest (optional, for extra brightness)
Ingredient Notes & Substitutions
Can I Use Frozen Raspberries?
Yes, frozen raspberries work very well in this recipe. You do not need to thaw them first. In fact, using them straight from the freezer helps prevent excess liquid from making the bars soggy.
If your frozen berries look extra icy, lightly rinse and pat them dry before mixing with the sugar and cornstarch.
You may add an extra ½ tablespoon of cornstarch if your berries release a lot of juice. This keeps the filling thick and sliceable.
Seedless Jam Alternative Option
If you prefer a smoother filling without seeds, you can use seedless raspberry jam. Replace the fresh raspberry mixture with about 1 to 1 ¼ cups of good-quality jam.
Spread it evenly over the crust, keeping a small border around the edges to prevent overflow.
Since jam is already sweet, taste it first. If it’s very sweet, you may reduce the sugar in the crumble slightly to keep the balance right.
Gluten-Free Flour Swap
You can make these bars gluten-free by using a 1:1 gluten-free all-purpose flour blend. Choose one that contains xanthan gum for structure.
Measure the flour carefully using the spoon-and-level method.
Gluten-free dough can be slightly softer, so chilling the mixture for 15–20 minutes before pressing it into the pan can help it hold its shape.
Adjusting Sweetness
Raspberries can vary in tartness. If your berries taste very sharp, increase the filling sugar by 1–2 tablespoons. If they are naturally sweet, you can reduce the sugar slightly.
Small adjustments make a big difference. Always taste the filling mixture before baking so you feel confident about the final flavor.
Step-by-Step Instructions
1. Prepare the Pan
Preheat your oven to 180°C (350°F). This ensures the bars bake evenly from the start.
Line a 9×13-inch (23×33 cm) baking pan with parchment paper, leaving some overhang on the sides. This makes lifting the bars out much easier later. Lightly grease the parchment to prevent sticking.
2. Make the Crumble Dough
In a large bowl, whisk together the flour, granulated sugar, brown sugar, baking powder, and salt. Mixing the dry ingredients first helps everything distribute evenly.
Add the cold, cubed butter. Use a pastry cutter, fork, or your fingertips to work the butter into the flour mixture.
Stop when it looks like coarse crumbs with small pea-sized pieces of butter. Those small bits create a tender texture.
Add the egg and vanilla extract. Mix gently until the dough starts to come together. It will look crumbly, but it should hold when pressed in your hand.
3. Press the Crust
Take about half of the crumble mixture and press it firmly into the bottom of the prepared pan. Use your hands or the back of a spoon to create an even layer.
Press it down well, especially into the corners. A firm base prevents the filling from seeping through and helps the bars hold their shape after baking.
4. Make the Raspberry Filling
Place the raspberries in a bowl. Add the sugar, cornstarch, and lemon juice (plus zest if using).
Gently toss everything together until the berries are coated. The cornstarch will thicken the juices as the bars bake, giving you a filling that sets nicely instead of running.
5. Assemble
Spread the raspberry mixture evenly over the crust. Try to distribute the berries so each slice gets plenty of filling.
Sprinkle the remaining crumble mixture over the top. Do not press it down. Let it fall naturally for a light, crumbly texture that turns golden in the oven.
6. Bake
Bake for 40–45 minutes, or until the top is lightly golden and the filling is bubbling around the edges.
The center should look set, not wet. If the top browns too quickly, loosely tent the pan with foil during the last 10 minutes.
7. Cool & Slice
This step is important. Let the bars cool completely in the pan, at least 2–3 hours.
Cooling allows the filling to firm up and makes slicing much cleaner. If you cut them too soon, they may fall apart.
Once fully cooled, lift them out using the parchment overhang and slice into even squares.
Tips for Perfect Raspberry Crumble Bars
Don’t Skip Parchment Paper
Parchment paper makes a big difference. It prevents sticking and allows you to lift the entire slab out of the pan in one piece.
Leave some overhang on the sides so you can use it as handles. This helps you remove the bars cleanly without breaking the edges. It also makes slicing easier and neater.
Chill Dough if Too Soft
If your kitchen is warm or the butter softens too quickly, the crumble mixture may feel sticky. Soft dough can spread too much in the oven and lose its crumbly texture.
If this happens, place the bowl in the fridge for 15–20 minutes. Chilled dough holds its shape better and creates a more defined crust and topping.
Avoid Overbaking
Bake just until the top is lightly golden and the filling is bubbling at the edges. The center should look set but not dry.
Overbaking can make the crust hard and dry out the raspberries. Remember that the bars will continue to firm up as they cool, so it’s better to slightly underbake than overdo it.
Let Bars Set Fully Before Cutting
This step requires patience, but it’s worth it. The filling needs time to thicken and settle after baking.
If you cut the bars while they’re still warm, they may fall apart. Let them cool completely at room temperature. For extra clean slices, you can chill them briefly in the fridge before cutting.
Variations to Try
Add White Chocolate Chips
For a sweeter twist, sprinkle ½ cup of white chocolate chips over the raspberry layer before adding the crumble topping. The chips melt into the filling and add a creamy contrast to the tart berries.
This works especially well if your raspberries are very sharp. The white chocolate softens the flavor and adds a little richness without changing the texture of the bars.
Almond Crumble Topping
If you enjoy a subtle nutty flavor, replace ¼ cup of the flour in the crumble with ¼ cup almond flour. You can also add ¼ teaspoon almond extract to the dough for extra depth.
For a bit of crunch, sprinkle a handful of sliced almonds over the top before baking. The almonds are toasted in the oven, adding both texture and aroma.
Mixed Berry Version
You can swap part of the raspberries for blueberries, blackberries, or chopped strawberries. Use a total of 3 cups of mixed berries to keep the filling balanced.
Mixed berries create a deeper flavor and a more colorful filling. If your berries are extra juicy, add an extra ½ tablespoon of cornstarch to help the filling set properly.
Oat Crumble Version
For a heartier texture, replace ½ cup of flour in the crumble with ½ cup rolled oats. The oats add chewiness and a slightly rustic feel.
Make sure to use old-fashioned rolled oats, not quick oats. They hold their shape better and give the topping more structure.
Lemon Raspberry Bars
To brighten the flavor, increase the lemon zest to 2 teaspoons and add 1 tablespoon fresh lemon juice to the crumble mixture. The extra citrus enhances the natural tartness of the raspberries.
This version tastes lighter and fresher. It’s a great choice for spring gatherings or when you want a dessert that feels vibrant and clean.
How to Store & Freeze
Once the bars have cooled completely, you can store them at room temperature in an airtight container for up to 2 days, as long as your kitchen isn’t too warm; place parchment paper between layers to prevent sticking and keep the crumble intact.
For longer freshness, store them in the refrigerator for up to 5 days in a sealed container, which helps the filling stay firm and makes the bars even easier to slice cleanly.
If you’d like to freeze them, first cut them into squares, then place them in a single layer on a baking sheet to freeze until solid; after that, transfer them to a freezer-safe container or zip-top bag with parchment between layers and freeze for up to 3 months.
To thaw, move the bars to the refrigerator overnight or let them sit at room temperature for 1–2 hours, keeping them uncovered for the last 20–30 minutes so the crumble stays crisp instead of soft.
Final Thoughts
These raspberry crumble bars are simple, reliable, and full of bright flavor. If you’re looking for a dessert that feels special without being complicated, this is a great one to try.
Serve them with a cup of tea, fresh coffee, or a scoop of vanilla ice cream for an easy upgrade!
FAQs
Can I use frozen raspberries?
Yes. Use them straight from the freezer without thawing to prevent excess moisture. Add a little extra cornstarch if they seem very juicy.
Why are my bars soggy?
This usually happens if there’s too much liquid or they were cut while still warm. Measure the cornstarch carefully and let the bars cool completely before slicing.
Can I make these ahead of time?
Yes. Bake them a day in advance and store them in an airtight container. They slice even better after resting.
How do I keep the crumble crisp?
Do not cover the bars while they are still warm. Store them loosely covered at room temperature, and avoid stacking without parchment between layers.
Can I reduce the sugar?
Yes, slightly. Reduce by 1–2 tablespoons in the filling or crust, but keep some sugar to maintain structure and balance the tart raspberries.
Raspberry Crumble Bars Recipe (Easy, Buttery & Perfectly Tart)
Difficulty: Easy16
Bars15
minutes45
minutes1
hourButtery raspberry crumble bars with a sweet-tart filling and golden crumb topping. Simple ingredients, no mixer required, and perfect for any occasion.
Ingredients
- For the Crust & Crumble:
2 ½ cups (315 g) all-purpose flour
½ cup (100 g) granulated sugar
½ cup (100 g) light brown sugar
1 teaspoon baking powder
½ teaspoon salt
1 cup (226 g) cold unsalted butter, cubed
1 large egg
1 teaspoon vanilla extract
- For the Filling:
3 cups (360–400 g) raspberries (fresh or frozen)
½ cup (100 g) granulated sugar
2 tablespoons cornstarch
1 tablespoon lemon juice
Directions
- Preheat oven to 180°C (350°F). Line a 9×13-inch pan with parchment paper.
- In a bowl, mix flour, sugars, baking powder, and salt. Cut in cold butter until crumbly.
- Stir in egg and vanilla until mixture holds when pressed.
- Press half the mixture firmly into the prepared pan.
- Toss raspberries with sugar, cornstarch, and lemon juice. Spread over the crust.
- Sprinkle the remaining crumble evenly on top.
- Bake for 40–45 minutes, until golden and bubbly.
- Cool completely before slicing into bars.
Notes
- Do not thaw frozen raspberries before using.
- Let the bars cool fully for clean slices.
- Store in an airtight container for up to 5 days or freeze for up to 3 months.

Hi, I’m Sorenna Blythe, the baker and writer behind Mix Whisk Bake. I share simple, reliable recipes and honest kitchen moments to help home bakers bake with confidence and joy. When I’m not testing new treats, you’ll find me sipping coffee and dreaming up my next bake.


