There’s nothing better than warm, buttery soft pretzels fresh from the oven.
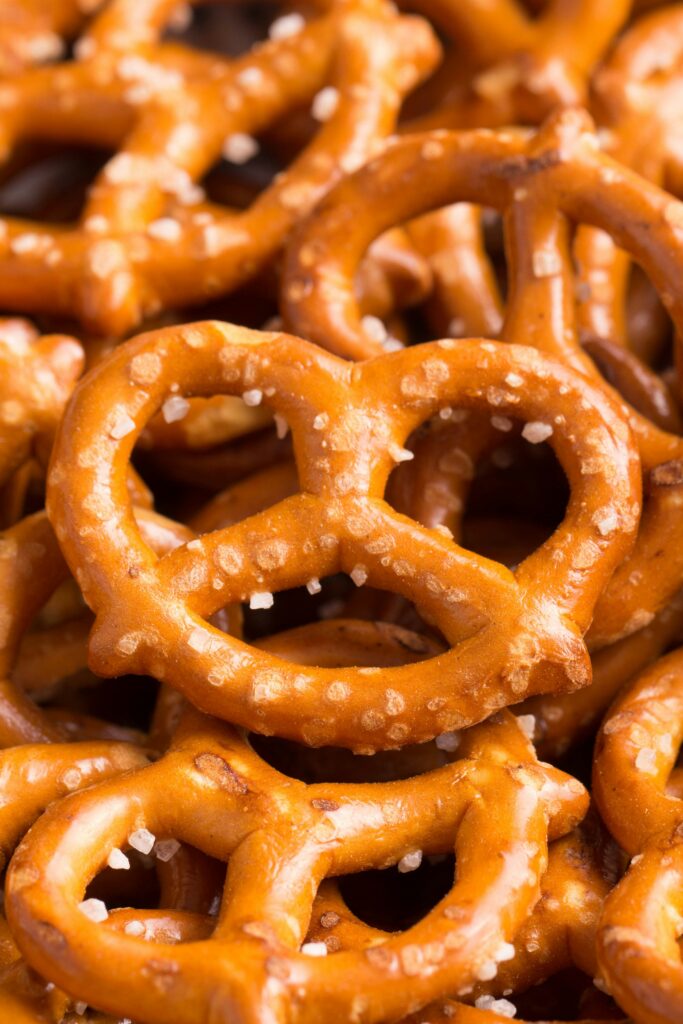
That first bite — golden brown on the outside, soft and chewy on the inside, finished with a sprinkle of coarse salt — is pure comfort.
The good news? You can make them at home with simple pantry ingredients and no special equipment.
I’ll walk you through each step so they turn out just right, even if this is your first time working with yeast.
These pretzels are perfect for game nights, after-school snacks, weekend baking, or serving warm with a rich cheese dip.
Once you try them homemade, you won’t want the store-bought version again.
Why You’ll Love This Soft Pretzels Recipe
Soft and Chewy Texture
The texture is what makes a soft pretzel truly special. These bake up tender on the inside with just the right amount of chew. They’re not dense or dry. Every bite feels soft but satisfying.
The baking soda bath helps create that classic chew, while the dough stays light and airy. Follow the steps closely, and you’ll get bakery-style results at home.
Beautiful Golden-Brown Crust
That deep golden color isn’t just for looks. It adds flavor and gives the pretzels their slightly crisp outer layer.
The quick dip in baking soda water is the key. It reacts in the oven and creates that rich brown finish. Bake them until they’re a deep golden shade — not pale — for the best taste and texture.
Easy to Shape (Even for Beginners)
Shaping pretzels may look tricky, but it’s simpler than it seems. You roll the dough into a rope, form a U-shape, twist the ends, and press them down. That’s it.
If they don’t look perfect, that’s completely fine. Homemade pretzels should have character. The more you make them, the easier it becomes.
Freezer-Friendly
These pretzels store well, which makes them practical for busy days. You can freeze them after baking and reheat when needed.
Warm them in the oven to bring back that soft center and slightly crisp outside. They taste freshly made, even days later.
Customizable (Sweet or Savory)
This dough is versatile. Sprinkle coarse salt for a classic version, or brush with butter and toss in cinnamon sugar for something sweet.
You can also add cheese, garlic, or herbs. Once you master the base recipe, you can easily change the flavor to match your mood or occasion.
Ingredients You’ll Need
For the Dough
- 1 ½ cups (360 ml) warm water (about 43°C / 110°F)
- 2 ¼ teaspoons (7 g) active dry yeast (1 standard packet)
- 1 tablespoon (12 g) granulated sugar
- 1 teaspoon (6 g) salt
- 2 tablespoons (28 g) unsalted butter, melted
- 4 cups (500 g) all-purpose flour, plus extra for dusting
For the Baking Soda Bath
- 8 cups (2 liters) water
- ⅓ cup (80 g) baking soda
For Topping
- Coarse sea salt, to taste (about 1–2 tablespoons)
- 2 tablespoons (28 g) unsalted butter, melted (for brushing after baking)
Equipment Needed
You don’t need any complicated tools to make soft pretzels at home. Simple kitchen basics will get the job done.
- Mixing bowls – One large bowl for making the dough and one for letting it rise.
- Stand mixer (optional) – Helpful for kneading, but you can easily knead the dough by hand.
- Baking sheet – A large sheet to bake the pretzels evenly.
- Parchment paper – Prevents sticking and makes cleanup easier.
- Large pot – Used to boil the water and baking soda for the pretzel bath. Make sure it’s deep enough to safely dip the pretzels.
- Slotted spoon – Makes it easy to lift the pretzels out of the baking soda bath without excess water dripping everywhere.
Step-by-Step Instructions
Follow these steps in order, and take your time. Each stage builds the texture and flavor that make soft pretzels so good.
1. Activate the Yeast
In a large mixing bowl, combine the warm water and sugar. Stir until the sugar dissolves, then sprinkle the yeast over the top.
Let the mixture sit for 5–10 minutes. It should become foamy on the surface. This tells you the yeast is active and ready to work.
If it doesn’t foam, the water may have been too hot, or the yeast may be old. It’s best to restart at this stage to ensure soft, fluffy pretzels later.
2. Make the Dough
Once the yeast is foamy, add the salt and melted butter. Stir gently to combine.
Add the flour gradually, mixing as you go. When the dough starts to pull away from the sides of the bowl, it’s ready to knead.
Knead the dough for about 5–8 minutes. You can use a stand mixer with a dough hook or knead by hand on a lightly floured surface.
The dough should feel smooth, soft, and slightly elastic. If it’s sticky, add a small amount of flour, one tablespoon at a time.
3. First Rise
Lightly grease a clean bowl and place the dough inside. Turn it once so all sides are lightly coated.
Cover the bowl with a clean towel or plastic wrap. Let it rise in a warm spot for 60–90 minutes, or until it has doubled in size.
This resting time allows the dough to develop structure and flavor. Don’t rush it. When ready, the dough should look puffy and airy.
4. Shape the Pretzels
Gently punch down the dough to release excess air. Transfer it to a clean surface.
Divide the dough into equal pieces, usually 8–10 portions, depending on the size you prefer. Roll each piece into a long rope, about 50–60 cm (20–24 inches) long.
To shape, form the rope into a U-shape. Cross the ends over each other twice, then press them down onto the bottom of the U.
If they aren’t perfect, that’s completely fine. They will still bake beautifully.
5. Baking Soda Bath (The Secret Step!)
In a large pot, bring the water to a boil. Carefully add the baking soda. It may bubble up, so add it slowly.
Reduce to a gentle boil. Dip each pretzel into the water for 20–30 seconds. This step is what gives pretzels their classic chewy texture and deep golden crust.
Use a slotted spoon to lift them out. Let excess water drip off before placing them on the lined baking sheet.
6. Bake
Arrange the dipped pretzels on a parchment-lined baking sheet, leaving space between each one.
Sprinkle coarse sea salt on top while they’re still slightly damp so it sticks well.
Bake in a preheated oven at 220°C (425°F) for 12–15 minutes. Watch for a rich golden-brown color. That deep shade means better flavor and the right texture.
7. Brush with Butter
As soon as the pretzels come out of the oven, brush them with melted butter. This keeps the crust soft and adds extra flavor.
Serve them warm for the best experience. The outside will be lightly crisp, and the inside will be soft and chewy — exactly how a homemade soft pretzel should be.
Pro Tips for Perfect Soft Pretzels
These simple tips make a big difference. Follow them closely, and your pretzels will turn out soft, chewy, and beautifully golden every time.
Don’t Skip the Baking Soda Bath
The baking soda bath is what gives pretzels their signature texture and color. It changes the surface of the dough so it bakes up chewy with a deep brown crust.
If you skip this step, the pretzels will taste more like regular bread rolls. Dip each one for the full 20–30 seconds. That short soak is what creates the classic pretzel finish.
Don’t Over-Flour the Dough
It can be tempting to keep adding flour if the dough feels slightly sticky. Try to resist that urge.
Soft pretzel dough should feel smooth and slightly tacky, not dry. Too much flour makes the pretzels dense and tough instead of soft and chewy.
If needed, add flour one tablespoon at a time until the dough is manageable but still soft.
Use Warm (Not Hot) Water for the Yeast
Water that is too hot can kill the yeast. Water that is too cold will not activate it properly.
Aim for warm water that feels like warm bath water, around 43°C (110°F).
If you don’t have a thermometer, test it with your finger. It should feel comfortably warm, not hot. This small detail helps your dough rise well and stay light.
Bake Until Deep Golden Brown
Color equals flavor when it comes to pretzels. A pale pretzel will taste softer and less developed.
Let them bake until they are a rich, deep golden brown. That extra minute or two in the oven builds flavor and improves texture. Keep an eye on them near the end so they don’t overbake.
Flavor Variations
Once you master the base dough, you can easily change the flavor. The texture stays the same. The toppings and fillings are what make each version unique.
Cinnamon Sugar Pretzels
For a sweet version, skip the coarse salt before baking. Follow all the other steps exactly the same.
After baking, brush the warm pretzels generously with melted butter. While they’re still warm, toss them in a mixture of cinnamon and sugar until fully coated.
The butter helps the coating stick and adds extra richness.
Serve them fresh. The outside will be slightly crisp, and the inside will stay soft and fluffy. These are perfect for dessert or an afternoon treat.
Cheese Stuffed Pretzels
If you love a gooey center, this version is for you. Cut mozzarella into small sticks or cubes before you begin shaping.
Flatten each piece of dough slightly, place the cheese in the center, and wrap the dough tightly around it.
Pinch the seams well so the cheese doesn’t leak out during baking. Then gently roll into a rope and shape as usual.
Bake as directed. When done, the outside will be golden and chewy, and the inside will have melted cheese in every bite.
Garlic Parmesan Pretzels
This savory version adds bold flavor without extra work. Bake the pretzels with or without salt, depending on your preference.
As soon as they come out of the oven, brush them with garlic butter. You can make this by mixing melted butter with finely minced garlic or garlic powder.
Then sprinkle grated parmesan over the top while they’re still warm so it sticks.
These are excellent served warm and pair well with marinara or a creamy dip. The garlic adds depth, and the parmesan gives a slightly salty finish that balances the soft dough perfectly.
Dipping Sauce Ideas
Classic Cheese Sauce
This is the most popular pairing for a reason. A smooth, creamy cheese sauce melts into every twist and fold of the pretzel.
You can make a simple version by melting butter, whisking in flour, adding milk, and stirring in shredded cheddar until smooth.
Keep the heat low so the sauce stays creamy. Serve it warm for the best texture. The salty pretzel and rich cheese balance each other perfectly.
Honey Mustard
Honey mustard adds a sweet and tangy contrast to the soft, salty dough. It’s simple but full of flavor.
Mix equal parts honey and mustard, then adjust to taste. Add a small squeeze of lemon juice if you want extra brightness.
This dip works especially well for parties because it’s quick to prepare and doesn’t need heating.
Spicy Mustard
If you prefer a little heat, spicy mustard is a great choice. It cuts through the richness of the dough and adds bold flavor without overpowering it.
Whole-grain mustard or Dijon both work well. Serve it straight from the jar or stir in a touch of honey to balance the spice. This option keeps things simple while still feeling special.
Chocolate Sauce (For Sweet Versions)
For cinnamon sugar pretzels, chocolate sauce is a natural match. The soft interior and sweet coating pair beautifully with warm, smooth chocolate.
You can melt chocolate with a splash of cream for an easy dip. Keep it warm but not too hot. Dip lightly so the chocolate coats the surface without soaking the pretzel.
Storage & Freezing Tips
Soft pretzels are best enjoyed warm on the day they’re made. That said, you can easily store leftovers and bring them back to life with the right method.
Store in an Airtight Container for Up to 2 Days
Once the pretzels have cooled completely, place them in an airtight container. Keep them at room temperature for up to 2 days.
Avoid refrigerating them. The fridge can dry out the dough and make the texture firm. Room temperature storage keeps them softer for longer.
Reheat in the Oven for Best Texture
To restore that fresh-baked feel, reheat pretzels in the oven instead of the microwave.
Place them on a baking sheet and warm at 180°C (350°F) for about 5–8 minutes. This helps the outside stay slightly crisp while the inside becomes soft again.
If desired, brush lightly with melted butter before reheating to refresh the flavor.
Freeze Baked Pretzels for Up to 2 Months
For longer storage, freeze the pretzels after they’ve fully cooled. Wrap each one tightly in plastic wrap or foil, then place them in a freezer-safe bag.
Label the bag with the date. They can be frozen for up to 2 months without losing quality.
Reheat Straight from Frozen at 180°C (350°F)
There’s no need to thaw first. Place frozen pretzels directly on a baking sheet and heat at 180°C (350°F) for 10–12 minutes, or until warmed through.
The oven restores the soft center and slightly crisp crust. With proper storage and reheating, your pretzels will taste freshly baked even days later.
Final Thoughts
Homemade soft pretzels are easier than they look, and the results are worth every step. Follow the method, trust the process, and you’ll have warm, golden pretzels ready to enjoy.
Serve them with a rich cheese dip for a classic pairing, or try one of the flavor variations to make them your own!
FAQs
Why do you boil pretzels in baking soda?
The baking soda bath creates the classic chewy texture and deep golden-brown crust. Skipping this step will result in a softer, bread-like roll instead of a true pretzel.
Can I make the dough ahead of time?
Yes. After kneading, cover the dough tightly and refrigerate for up to 24 hours. Let it come to room temperature before shaping.
Can I freeze the dough?
Yes. After the first rise, wrap the dough tightly and freeze for up to 2 months. Thaw overnight in the fridge, then let it sit at room temperature before shaping.
Why are my pretzels not chewy?
This usually happens if the baking soda bath was skipped or too much flour was added. Both affect the final texture.
Can I make these without yeast?
Traditional soft pretzels require yeast for their texture and flavor. You can try a baking powder version, but the result will be more like a biscuit than a classic pretzel.
Soft Pretzels Recipe – Buttery, Chewy & Bakery-Style at Home
Difficulty: Easy8
Pretzels20
minutes15
minutes1
hour45
minutesButtery, golden-brown soft pretzels with a chewy center and classic salty finish. Perfect for dipping in cheese sauce or enjoying plain and warm.
Ingredients
- For the Dough:
1 ½ cups (360 ml) warm water (43°C / 110°F)
2 ¼ teaspoons (7 g) active dry yeast (1 packet)
1 tablespoon (12 g) granulated sugar
1 teaspoon (6 g) salt
2 tablespoons (28 g) unsalted butter, melted
4 cups (500 g) all-purpose flour
- For the Baking Soda Bath:
8 cups (2 liters) water
⅓ cup (80 g) baking soda
For Topping:
Coarse sea salt
2 tablespoons (28 g) unsalted butter, melted
Directions
- In a large bowl, mix warm water and sugar. Sprinkle yeast on top and let sit 5–10 minutes until foamy.
- Add salt, melted butter, and flour. Mix and knead for 5–8 minutes until smooth and elastic.
- Place dough in a greased bowl, cover, and let rise 60–90 minutes until doubled.
- Divide the dough into 8 pieces. Roll into ropes and shape into pretzels.
- Bring water and baking soda to a boil. Dip each pretzel for 20–30 seconds, then place on a lined baking sheet.
- Sprinkle with coarse salt and bake at 220°C (425°F) for 12–15 minutes until deep golden brown.
- Brush with melted butter and serve warm.
Notes
- Do not skip the baking soda bath — it creates the chewy crust.
- Bake until deeply golden for the best flavor.
- Store at room temperature for 2 days or freeze up to 2 months.

Hi, I’m Sorenna Blythe, the baker and writer behind Mix Whisk Bake. I share simple, reliable recipes and honest kitchen moments to help home bakers bake with confidence and joy. When I’m not testing new treats, you’ll find me sipping coffee and dreaming up my next bake.


