This page may contain affiliate links. As an Amazon Associate, I earn from qualifying purchases. If you choose to make a purchase after clicking a link, I may receive a commission at no additional cost to you. My goal is to provide helpful and valuable content, and any commissions help me maintain this site and continue creating high-quality content for my readers. Thank you for your support!
There’s something special about a batch of homemade cookies filled with warm fall flavors.
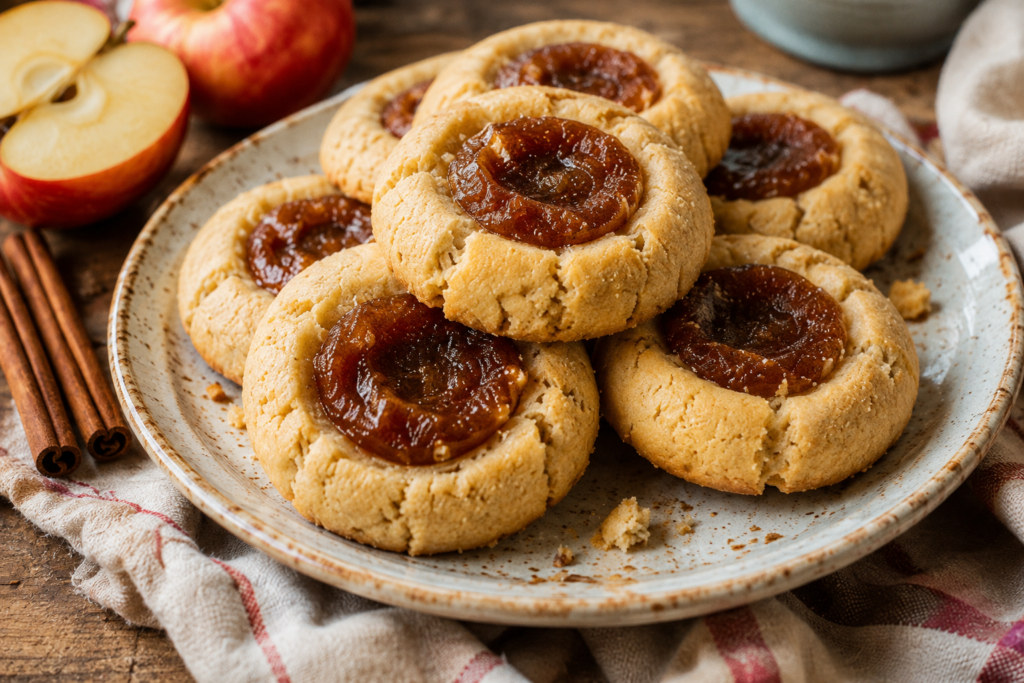
These apple butter thumbprint cookies have soft, buttery centers and a rich apple butter filling that tastes like autumn in every bite.
They’re easy to make, look beautiful on a dessert table, and are perfect for Thanksgiving, Christmas cookie trays, or a cozy afternoon of baking.
Even if this is your first time making thumbprint cookies, you’ll find each step simple and easy to follow.
In this recipe, I’ll show you how to make tender cookies that hold their shape, create the perfect thumbprint, and fill them with just the right amount of apple butter for a delicious homemade treat.
Why You’ll Love This Apple Butter Thumbprint Cookies Recipe
- Easy beginner-friendly recipe – Simple steps and basic techniques make these cookies easy to bake, even if you’re new to baking.
- Filled with sweet and spiced apple butter – Every cookie is packed with rich apple butter for warm, cozy flavor in every bite.
- Soft centers with lightly crisp edges – The perfect balance of tender, buttery cookies and delicate crispness around the edges.
- Made with pantry staples – Most of the ingredients are common baking essentials you likely already have at home.
- Perfect for gifting and holiday cookie exchanges – These festive cookies look beautiful on cookie trays and make thoughtful homemade gifts.
- Freezer-friendly – Bake them ahead of time or freeze the dough so fresh cookies are always within reach.

What Are Apple Butter Thumbprint Cookies?
Apple butter thumbprint cookies are classic buttery cookies with a small indentation pressed into the center before baking, creating the perfect space for a flavorful filling.
The name “thumbprint” comes from the simple technique of gently pressing your thumb or the back of a measuring spoon into each dough ball to form a shallow well that holds the filling while the cookies bake.
Although many thumbprint cookies are filled with jam, apple butter gives these cookies a warm fall twist that tastes richer and more comforting.
Apple butter is not the same as applesauce, even though both are made from apples.
Applesauce is lighter in color and texture because the apples are simply cooked until soft and blended, while apple butter is cooked much longer, allowing the natural sugars to caramelize and the mixture to become thick, smooth, and deeply flavored with warm spices like cinnamon, cloves, and nutmeg.
Its thick consistency makes apple butter the perfect filling because it stays neatly in the center of the cookie instead of spreading or becoming watery during baking.
The rich apple flavor also pairs beautifully with the buttery cookie, creating a balanced bite that isn’t overly sweet but still feels like a special treat.
Each cookie has a soft, tender center with lightly crisp edges, while the apple butter adds a smooth, jam-like texture that melts into every bite.
The combination of buttery dough, cozy spices, and concentrated apple flavor makes these cookies taste like your favorite fall dessert in a simple, easy-to-share cookie.
Ingredients You’ll Need
For the Cookie Dough
- 1 cup (226g) unsalted butter, softened – Gives the cookies a rich, buttery flavor and tender texture.
- ½ cup (100g) packed light brown sugar – Adds moisture and a subtle caramel-like sweetness.
- ¼ cup (50g) granulated sugar – Helps create lightly crisp edges.
- 1 large egg yolk – Adds richness and helps bind the dough.
- 2 teaspoons vanilla extract – Enhances the buttery and apple flavors.
- 2¼ cups (270g) all-purpose flour – Provides the structure for soft, sturdy cookies.
- 1 teaspoon baking powder – Helps the cookies rise slightly while staying tender.
- ¼ teaspoon salt – Balances the sweetness and boosts the overall flavor.
- 1 teaspoon ground cinnamon (optional) – Adds extra warmth and complements the apple butter.
For the Filling
- ½ cup (120g) apple butter – Use a thick apple butter so it stays neatly in the thumbprints while baking.
Optional Toppings
- 1 tablespoon cinnamon sugar – Sprinkle over the cookies for extra sweetness and spice.
- 2 tablespoons powdered sugar – Dust over cooled cookies for a simple finishing touch.
- 2 tablespoons caramel sauce – Drizzle over cooled cookies for an extra indulgent dessert.
- ¼ cup (30g) chopped pecans or walnuts – Adds a delicious crunch and nutty flavor.
- 2 tablespoons coarse sparkling sugar – Sprinkle on the dough before baking for a little sparkle and crunch.
Best Apple Butter for Thumbprint Cookies
Store-Bought vs. Homemade
Both store-bought and homemade apple butter work well in this recipe, so you can use whichever is easiest for you.
Store-bought apple butter is a great choice when you’re short on time because it’s ready to use and has a consistent texture that makes baking simple.
Homemade apple butter gives you more control over the flavor, sweetness, and spices, making it a wonderful option if you enjoy making everything from scratch.
No matter which one you choose, look for an apple butter with a smooth texture and a rich apple flavor for the best results.
Thick Apple Butter Works Best
A thick apple butter is the key to beautiful thumbprint cookies because it stays neatly in the center while the cookies bake.
If the apple butter is too thin, it can spread out of the thumbprint and make the cookies look messy.
When you scoop the filling with a spoon, it should hold its shape instead of running off quickly.
If your apple butter seems a little thin, simmer it gently in a small saucepan for a few minutes to cook off extra moisture, then let it cool completely before filling the cookies.
Favorite Brands
There are many excellent store-bought apple butters available, and the best one is often the one with simple ingredients and plenty of apple flavor.
Popular choices like Musselman’s, Stonewall Kitchen, and Dickinson’s are known for their smooth texture and rich, spiced taste that works well in baked goods.
If you’re shopping locally, don’t overlook farmers markets or small orchards, where you’ll often find homemade-style apple butter made with fresh seasonal apples.
Whatever brand you choose, give it a quick stir before using so the filling is smooth and easy to spoon into each cookie.
Can You Use Pumpkin Butter Instead?
Yes, pumpkin butter can be used if you’d like to give these cookies a different fall flavor.
Pumpkin butter has a similar thick consistency, making it an easy swap without changing the baking method.
Keep in mind that pumpkin butter has a milder pumpkin flavor with warm spices, so the finished cookies will taste different from the rich, concentrated apple flavor of traditional apple butter.
If you love cozy autumn desserts, it’s worth trying both versions to discover which one becomes your favorite.
Kitchen Tools You’ll Need
- Mixing bowls – Use separate bowls for combining the wet and dry ingredients.
- Hand or stand mixer – Creams the butter and sugars until light and fluffy for the best texture.
- Measuring cups and spoons – Helps ensure accurate measurements for consistent results.
- Baking sheets – Provides an even surface for baking the cookies.
- Parchment paper – Prevents sticking and makes cleanup quick and easy.
- Cookie scoop – Creates evenly sized cookies so they bake at the same rate.
- Wire cooling rack – Allows the cookies to cool evenly while keeping the bottoms from becoming soggy.
How to Make Apple Butter Thumbprint Cookies
Step 1: Prepare the Dough
Start by beating the softened butter, brown sugar, and granulated sugar together until the mixture is light, smooth, and fluffy, which usually takes about 2 to 3 minutes.
Mix in the egg yolk and vanilla extract until everything is fully combined and the mixture looks creamy.
In a separate bowl, whisk together the flour, baking powder, salt, and cinnamon if you’re using it, so the dry ingredients are evenly mixed.
Gradually add the dry ingredients to the butter mixture, mixing on low speed just until a soft dough forms.
Stop mixing as soon as no streaks of flour remain because overmixing can make the cookies less tender.
Step 2: Chill the Dough
Cover the bowl with plastic wrap or transfer the dough to an airtight container, then refrigerate it for at least 30 minutes.
Chilling firms up the butter, making the dough easier to handle and helping the cookies keep their shape while baking.
If you’re making the dough ahead of time, it can stay in the refrigerator for up to 2 days before baking.
Step 3: Roll into Balls
Preheat your oven to 350°F (175°C) and line baking sheets with parchment paper while the dough chills.
Use a cookie scoop or tablespoon to portion the dough into evenly sized pieces, then gently roll each one into a smooth ball between your hands.
Place the dough balls about 2 inches apart on the prepared baking sheets to give them room to spread slightly.
Step 4: Create the Thumbprints
Press your thumb or the rounded back of a measuring teaspoon into the center of each dough ball to create a shallow well.
Make the indentation deep enough to hold the filling without pressing all the way through the cookie.
If the edges crack slightly, gently press them back together with your fingertips for a smoother finish.
Step 5: Fill with Apple Butter
Spoon about 1 teaspoon of thick apple butter into the center of each cookie, filling the indentation without letting it overflow.
Try to keep the filling level with the top of the cookie so it stays neatly in place as the cookies bake.
Step 6: Bake
Bake the cookies for 10 to 12 minutes, or until the edges are lightly golden and the centers look set.
Avoid overbaking because the cookies will continue to firm up as they cool, and slightly soft centers give them their signature tender texture.
If the thumbprints puff up during baking, gently press the centers again with the back of a spoon while the cookies are still warm, being careful not to touch the hot filling.
Step 7: Cool and Enjoy
Let the cookies rest on the baking sheet for about 5 minutes so they can set before moving them.
Transfer the cookies to a wire cooling rack and allow them to cool completely before adding optional toppings like powdered sugar or a drizzle of caramel.
Serve them once cooled, or store them in an airtight container so you can enjoy their buttery texture and cozy apple flavor for several days.
Tips for Perfect Thumbprint Cookies
- Chill the dough to prevent spreading – Refrigerating the dough helps the cookies hold their shape and keeps the thumbprints from flattening.
- Don’t overfill the centers – Fill each indentation with just enough apple butter to prevent it from bubbling over during baking.
- Re-shape the thumbprints after baking if needed – If the centers puff up, gently press them back down while the cookies are still warm.
- Measure flour correctly – Spoon the flour into your measuring cup and level it off to avoid adding too much, which can make the cookies dry.
- Use room-temperature butter – Softened butter creams more easily with the sugar, creating a light and tender cookie.
- Avoid overmixing the dough – Mix only until the ingredients are combined to keep the cookies soft instead of tough.
Flavor Variations
Salted Caramel Apple Butter Thumbprints
Add a small drizzle of salted caramel over the cooled cookies for an extra layer of rich, buttery flavor that pairs beautifully with the spiced apple butter.
Sprinkle a tiny pinch of flaky sea salt on top to balance the sweetness and give each bite a delicious sweet-and-salty finish.
These cookies are especially popular for holiday dessert platters because they look elegant without requiring any extra baking steps.
Maple Apple Butter Cookies
Replace the vanilla extract with maple extract, or use half vanilla and half maple extract, to give the cookies a warm maple flavor that complements the apple butter.
You can also drizzle the cooled cookies with a simple maple glaze made from powdered sugar and pure maple syrup for an extra-special finish.
This variation is perfect if you love classic fall flavors and want a cookie that tastes like a cozy autumn afternoon.
Cream Cheese Apple Butter Thumbprints
Beat a few ounces of softened cream cheese into the butter mixture before adding the dry ingredients to create an even softer, richer cookie.
The slight tang from the cream cheese balances the sweetness of the apple butter and gives the cookies a melt-in-your-mouth texture.
This version stays wonderfully tender and is a great choice when you want a bakery-style cookie.
Cinnamon Pecan Version
Stir chopped toasted pecans into the cookie dough or sprinkle them over the apple butter before baking for added crunch.
The toasted nuts bring out the warm cinnamon and apple flavors while adding a satisfying texture to every bite.
If you enjoy nutty desserts, this simple addition makes the cookies even more flavorful.
Apple Butter & White Chocolate
Mix white chocolate chips into the dough or drizzle melted white chocolate over the cooled cookies for a creamy, sweet contrast.
The smooth white chocolate pairs beautifully with the rich apple butter and creates a dessert that’s perfect for holiday celebrations.
For the neatest finish, let the chocolate set completely before storing or serving the cookies.
Streusel-Topped Thumbprints
Sprinkle a small amount of buttery streusel over the apple butter before baking to give the cookies the flavor of a classic apple crisp.
A simple streusel made with flour, brown sugar, butter, and cinnamon bakes into a lightly crisp topping that adds wonderful texture.
This variation is a fun way to turn a simple thumbprint cookie into a cozy fall dessert that’s sure to impress family and friends.
What to Serve with Apple Butter Thumbprint Cookies
- Coffee – A hot cup of coffee balances the cookies’ sweet, spiced apple flavor perfectly.
- Chai latte – The warm spices in chai pair beautifully with the cinnamon and apple butter.
- Apple cider – Serve warm or chilled for a classic fall combination.
- Hot chocolate – Rich, creamy hot chocolate makes these cookies feel even more comforting.
- Vanilla ice cream – A scoop of vanilla ice cream adds a cool, creamy contrast to the warm spices.
- Whipped cream – A dollop of lightly sweetened whipped cream makes the cookies feel like a simple dessert.
How to Store Apple Butter Thumbprint Cookies
Room Temperature
Once the cookies have cooled completely, place them in an airtight container to keep them soft and fresh.
Store the cookies in a single layer or separate stacked layers with parchment paper to prevent the apple butter filling from sticking.
They will stay fresh at room temperature for up to 4 days when kept in a cool, dry place away from direct sunlight.
Refrigerator
If you’d like the cookies to last a little longer, store them in an airtight container in the refrigerator.
They will keep well for up to 1 week while maintaining their flavor and texture.
For the best taste, let the cookies sit at room temperature for about 15 to 20 minutes before serving so the butter softens and the filling becomes creamy again.
Freezer
These cookies freeze very well, making them a great choice for holiday baking or preparing desserts in advance.
Arrange the cooled cookies in a freezer-safe container with sheets of parchment paper between the layers to keep them from sticking together.
Freeze for up to 3 months for the best flavor and texture.
When you’re ready to enjoy them, thaw the cookies overnight in the refrigerator or let them sit at room temperature for about 30 to 60 minutes.
Make Ahead Tips
The cookie dough can be prepared up to 2 days in advance and stored tightly covered in the refrigerator until you’re ready to bake.
You can also roll the dough into balls, place them on a baking sheet, and freeze them until firm before transferring them to a freezer-safe bag for longer storage.
When baking frozen dough, simply add an extra 1 to 2 minutes to the baking time and fill the thumbprints with apple butter just before the cookies go into the oven.
Planning ahead like this makes it easy to enjoy freshly baked apple butter thumbprint cookies whenever the craving strikes.
Common Mistakes to Avoid
- Skipping the chilling step – Chilling the dough helps the cookies hold their shape and prevents them from spreading too much.
- Using runny apple butter – A thick apple butter stays neatly in the thumbprints and won’t spill over while baking.
- Overbaking – Remove the cookies when the edges are lightly golden so they stay soft and tender.
- Filling cookies before making deep enough indentations – Create a deep, even thumbprint first so the filling has enough room to stay in place.
- Overworking the dough – Mix only until the ingredients are combined to keep the cookies light and buttery instead of dense.
FAQs
Can I use applesauce instead of apple butter?
No. Applesauce is too thin and won’t hold its shape like thick apple butter, which is ideal for the filling.
Can I make the dough ahead of time?
Yes. You can refrigerate the dough for up to 2 days before shaping and baking the cookies.
Can I freeze the cookie dough?
Absolutely. Freeze the rolled dough balls for up to 3 months, then bake from frozen with an extra 1 to 2 minutes of baking time.
Why did my thumbprint cookies spread too much?
The dough may not have been chilled long enough, the butter may have been too soft, or too little flour was added.
Can I use homemade apple butter?
Yes. Homemade apple butter works wonderfully as long as it’s thick enough to stay in the thumbprints during baking.
Why did my filling bubble over?
The thumbprints were likely overfilled, or the apple butter was too thin. Use a thick apple butter and fill each cookie with about 1 teaspoon.
Can I add nuts to the dough?
Yes. Chopped pecans or walnuts add a delicious crunch and pair perfectly with the apple butter.
How do I know when the cookies are done baking?
The edges should be lightly golden while the centers are set but still soft. They will continue to firm up as they cool.
Can I make these cookies gluten-free?
Yes. Substitute the all-purpose flour with a good-quality 1:1 gluten-free baking flour for the best results.
How long do apple butter thumbprint cookies stay fresh?
Stored in an airtight container, they stay fresh for up to 4 days at room temperature or up to 1 week in the refrigerator.
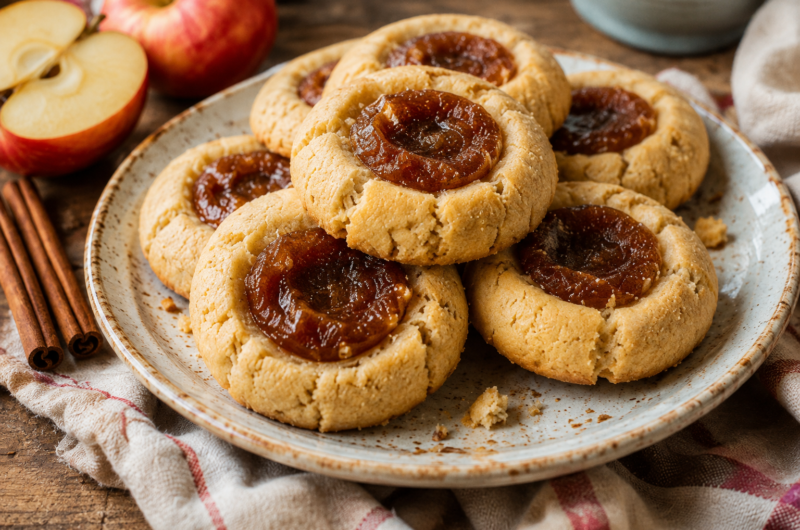
Apple Butter Thumbprint Cookies (Soft, Buttery & Easy to Make)
Difficulty: Easy24
Cookies15
minutes12
minutes57
minutesThese soft and buttery apple butter thumbprint cookies are filled with rich, spiced apple butter for the perfect fall-inspired treat. They’re simple to make, freezer-friendly, and ideal for holiday baking or sharing with family and friends.
Ingredients
Cookie Dough
1 cup (226g) unsalted butter, softened
½ cup (100g) packed light brown sugar
¼ cup (50g) granulated sugar
1 large egg yolk
2 teaspoons vanilla extract
2¼ cups (270g) all-purpose flour
1 teaspoon baking powder
¼ teaspoon salt
1 teaspoon ground cinnamon (optional)
Filling
½ cup (120g) thick apple butter
Optional Toppings
Powdered sugar
Cinnamon sugar
Caramel drizzle
Chopped pecans or walnuts
Directions
- In a large mixing bowl, beat the softened butter, brown sugar, and granulated sugar for 2–3 minutes until light and fluffy.
- Mix in the egg yolk and vanilla extract until fully combined.
- In a separate bowl, whisk together the flour, baking powder, salt, and cinnamon.
- Gradually add the dry ingredients to the wet ingredients and mix just until a soft dough forms.
- Cover the dough and refrigerate for 30 minutes.
- Preheat the oven to 350°F (175°C) and line two baking sheets with parchment paper.
- Scoop about 1 tablespoon of dough and roll into smooth balls. Arrange them about 2 inches apart on the prepared baking sheets.
- Press your thumb or the back of a measuring teaspoon into the center of each dough ball to create a deep indentation.
- Fill each indentation with about 1 teaspoon of apple butter.
- Bake for 10–12 minutes, or until the edges are lightly golden and the centers are set.
- Allow the cookies to cool on the baking sheet for 5 minutes before transferring them to a wire rack to cool completely.
- Dust with powdered sugar, drizzle with caramel, or sprinkle with chopped pecans if desired before serving.
Notes
- Chill the dough to prevent the cookies from spreading too much.
- Use a thick apple butter so the filling stays neatly in the thumbprints.
- Do not overfill the centers, as the filling may bubble over while baking.
- If the thumbprints puff up, gently press the centers again while the cookies are still warm.
- Store the cooled cookies in an airtight container for up to 4 days at room temperature, 1 week in the refrigerator, or freeze for up to 3 months.


Hi, I’m Sorenna Blythe, the baker and writer behind Mix Whisk Bake. I share simple, reliable recipes and honest kitchen moments to help home bakers bake with confidence and joy. When I’m not testing new treats, you’ll find me sipping coffee and dreaming up my next bake.