This page may contain affiliate links. As an Amazon Associate, I earn from qualifying purchases. If you choose to make a purchase after clicking a link, I may receive a commission at no additional cost to you. My goal is to provide helpful and valuable content, and any commissions help me maintain this site and continue creating high-quality content for my readers. Thank you for your support!
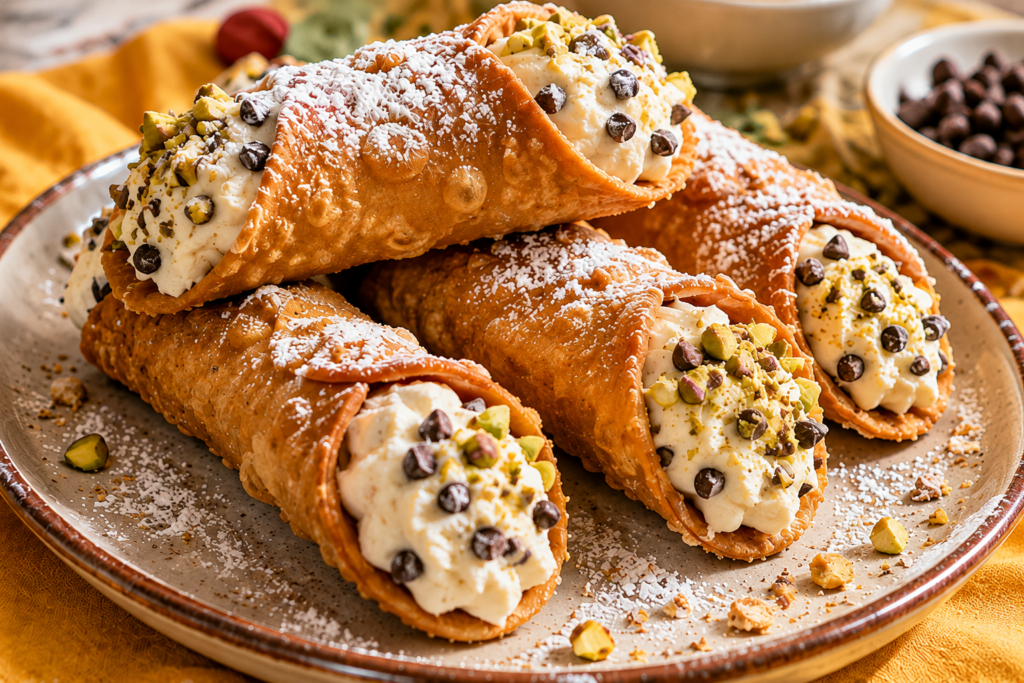
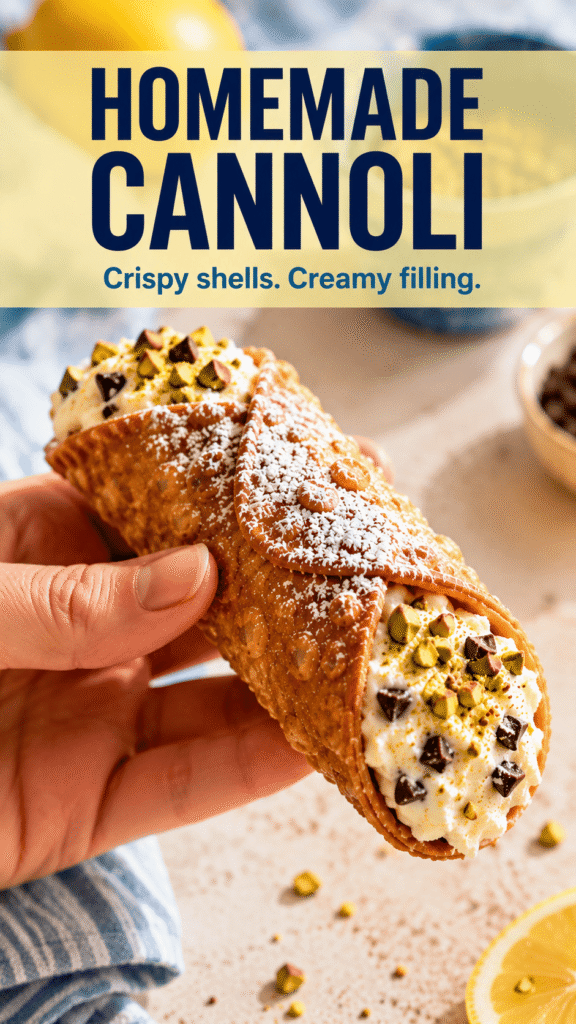
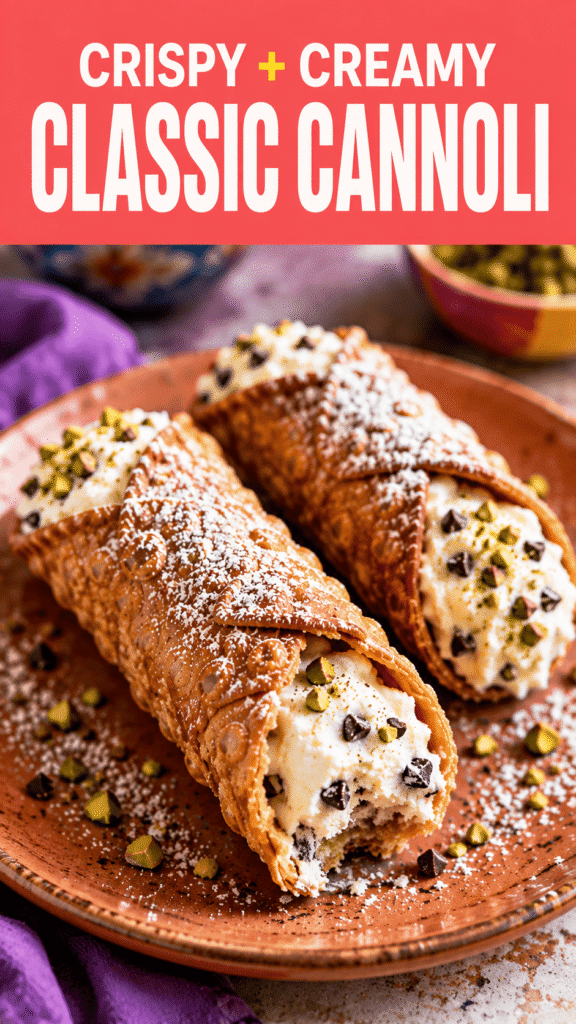
Classic Italian cannoli are the perfect mix of crisp, golden pastry and smooth, creamy ricotta filling.
This classic cannoli recipe uses simple techniques to help you make these delicious treats at home.
With a crunchy shell, sweet filling, and your favorite toppings, every bite feels extra special.
What Are Cannoli?
Cannoli are classic Italian pastries made with crisp, fried pastry shells filled with a sweet, creamy ricotta mixture.
They are especially associated with Sicily, where cannoli have long been enjoyed as a beloved traditional dessert.
The shells are made from a simple dough that is rolled thin, wrapped around metal cannoli tubes, and fried until golden and crunchy.
The traditional filling is made with sweetened ricotta cheese, often flavored with vanilla or cinnamon for a gentle sweetness and warm flavor.
What makes cannoli so enjoyable is the contrast between the crisp shell and the soft, creamy filling inside.
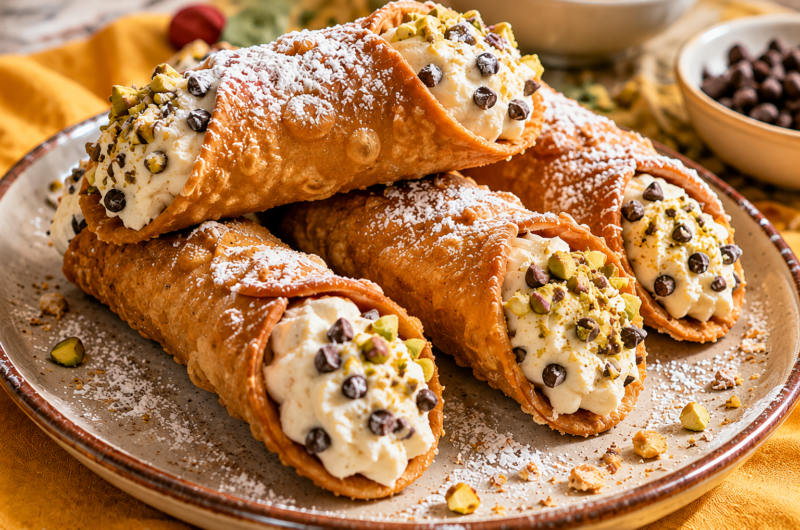
The ends are often finished with chopped pistachios, mini chocolate chips, or a light dusting of powdered sugar.
While cannoli may look fancy, they can be made at home with a little patience and a few simple techniques.
Ingredients for Classic Cannoli
For the Cannoli Shells
- 2 cups (250 g) all-purpose flour
- 2 tablespoons (25 g) granulated sugar
- 1 tablespoon (5 g) unsweetened cocoa powder
- ¼ teaspoon salt
- 2 tablespoons (28 g) unsalted butter, softened
- ½ cup (120 ml) Marsala wine
- 1 large egg
- 4 cups (960 ml) vegetable or canola oil, for frying
For the Ricotta Filling
- 15 ounces (425 g) whole-milk ricotta
- ¾ cup (90 g) powdered sugar
- 1 teaspoon vanilla extract
- ½ teaspoon ground cinnamon
- ½ cup (85 g) mini chocolate chips
For Decorating
- ¼ cup (30 g) chopped pistachios
- ¼ cup (45 g) mini chocolate chips
- 2 tablespoons powdered sugar, for dusting
- ¼ cup (40 g) finely chopped candied orange peel, optional
How to Make Classic Cannoli
1. Prepare the Cannoli Dough
In a large bowl, whisk together 2 cups (250 g) all-purpose flour, 2 tablespoons granulated sugar, 1 tablespoon unsweetened cocoa powder, and ¼ teaspoon salt until evenly combined.
Add 2 tablespoons (28 g) softened butter and work it into the flour with your fingers until the mixture looks crumbly.
Pour in ½ cup (120 ml) Marsala wine and add 1 large egg, then mix until a rough dough forms.
Turn the dough onto a lightly floured surface and knead it for about 5 minutes, or until smooth and elastic.
If the dough feels too dry, add a small splash of Marsala wine, but avoid adding too much because the dough should be firm enough to roll and shape.
2. Chill the Dough
Shape the dough into a ball, wrap it tightly in plastic wrap, and refrigerate it for at least 1 hour.
Resting gives the flour time to absorb the liquid and allows the dough to relax.
This makes it much easier to roll thin without the dough constantly shrinking back.
3. Roll and Cut the Dough
Divide the chilled dough into smaller pieces and roll each piece very thin, aiming for about 1–2 mm thick.
Cut the dough into roughly 4-inch (10 cm) circles, using a round cutter or small bowl as a guide.
Wrap each circle around a lightly greased cannoli tube, overlapping the edges slightly.
Brush one edge with a little beaten egg white and press it firmly against the dough to seal the shell.
Make sure the dough is sealed well, or the shell may open while frying.
4. Fry the Cannoli Shells
Heat about 4 cups (960 ml) vegetable or canola oil in a deep, heavy-bottomed pot to 350°F (175°C).
Carefully lower a few cannoli shells into the hot oil at a time, leaving enough room for them to cook evenly.
Fry for about 2–3 minutes, turning them gently as needed, until the shells are crisp and golden brown.
Remove the shells with tongs or a slotted spoon and place them on paper towels to drain.
Let the shells cool for a few minutes before carefully sliding them off the metal tubes.
Allow the tubes to cool slightly before wrapping them with more dough, and always handle the hot oil with care.
5. Make the Ricotta Filling
Place 15 ounces (425 g) whole-milk ricotta in a fine-mesh strainer lined with cheesecloth or paper towels and let it drain thoroughly.
For the best filling, drain the ricotta for at least 1–2 hours, or longer if it is particularly wet.
Transfer the drained ricotta to a bowl and mix it with ¾ cup (90 g) powdered sugar, 1 teaspoon vanilla extract, and ½ teaspoon ground cinnamon until smooth and creamy.
Fold in ½ cup (85 g) mini chocolate chips, keeping the mixture gentle, so it stays thick and creamy.
6. Fill the Cannoli
Transfer the ricotta filling to a piping bag fitted with a wide round tip, or use a sturdy food storage bag with the corner snipped off.
Pipe the filling into one end of each cooled cannoli shell, then fill the other end until the shell is completely packed with creamy filling.
Dip or press the filled ends into chopped pistachios or mini chocolate chips for extra texture and flavor.
Finish with a light dusting of powdered sugar just before serving.
For the crispiest shells, fill the cannoli as close to serving time as possible so the creamy ricotta does not soften the pastry.
Tips for Making Perfect Cannoli
Drain the Ricotta Well
Drain the ricotta thoroughly before making the filling, as excess liquid can make it loose and difficult to pipe.
Place the ricotta in a fine-mesh strainer lined with cheesecloth or paper towels and let it drain in the refrigerator for at least 1–2 hours.
A thick, well-drained ricotta gives you a smooth filling that holds its shape inside the crispy shells.
Roll the Dough Very Thin
Roll the cannoli dough as thin as you can without making it difficult to handle, ideally around 1–2 mm thick.
Thin dough fries into light, delicate shells with the crisp texture that makes cannoli so good.
If the dough is too thick, the shells can become heavy and may not develop the right crunch.
Seal the Shells Properly
Wrap each piece of dough tightly around the cannoli tube, making sure the edges overlap slightly.
Brush the overlapping edge with a small amount of beaten egg white before pressing it firmly into place.
A secure seal keeps the shells from opening in the hot oil and helps them maintain their classic tube shape.
Keep the Oil at the Right Temperature
Keep the frying oil at around 350°F (175°C) for the best results.
If the oil is too cool, the shells can absorb excess oil and turn greasy.
If it is too hot, the outside may brown before the dough becomes properly crisp.
Use a kitchen thermometer and fry the shells in small batches to help maintain a steady temperature.
Fill Cannoli Just Before Serving
Fill the shells as close to serving time as possible for the best texture.
The moisture from the ricotta filling will gradually soften the crispy pastry if the cannoli sit for too long.
For easy preparation, make the shells and filling ahead of time, keep them separate, and pipe the filling into the shells shortly before serving.
Classic Cannoli Variations
- Chocolate Ricotta Cannoli: Mix cocoa powder or melted chocolate into the ricotta filling for a rich chocolate flavor.
- Pistachio Cannoli: Add finely chopped pistachios to the filling and garnish the ends with extra pistachios.
- Orange-Infused Cannoli: Stir finely grated orange zest or chopped candied orange peel into the filling for a fresh citrus flavor.
- Chocolate-Dipped Cannoli Shells: Dip the cooled shells in melted chocolate and let them set before adding the filling.
- Mascarpone and Ricotta Filling: Replace part of the ricotta with mascarpone for an extra creamy, smooth filling.
How to Store Cannoli
Store unfilled cannoli shells at room temperature in an airtight container once they have cooled completely.
Keeping the shells away from moisture helps preserve their crisp, crunchy texture.
Store the ricotta filling separately in an airtight container in the refrigerator and use it within a few days for the best quality.
For the best results, fill the shells shortly before serving so they stay crisp on the outside and creamy in the center.
Once filled, moisture from the ricotta gradually soaks into the pastry, causing the shells to soften and lose their satisfying crunch.
For this reason, avoid storing fully assembled cannoli for long periods and only fill as many shells as you plan to serve.
Can You Make Cannoli Ahead of Time?
Yes, you can make cannoli ahead of time, but it is best to keep the shells and filling separate until you are ready to serve.
Prepare the cannoli shells in advance and let them cool completely before storing them in an airtight container at room temperature.
The ricotta filling can also be prepared ahead and kept covered in the refrigerator until needed.
When you are ready to serve, transfer the chilled filling to a piping bag and fill the shells just before serving.
This simple approach keeps the shells crisp while the filling stays smooth and creamy.
For the best texture, avoid filling the cannoli several hours or a day ahead, as the moisture from the filling can make the shells soft.
What to Serve With Cannoli
- Espresso: Its bold, slightly bitter flavor balances the sweet ricotta filling.
- Cappuccino: The creamy milk and rich coffee pair beautifully with crisp cannoli.
- Italian Coffee: A strong cup of Italian-style coffee makes a simple and satisfying pairing.
- Fresh Berries: Strawberries, raspberries, or blueberries add a fresh, fruity contrast.
- Dessert Wine: A sweet dessert wine complements the creamy filling and delicate pastry.
FAQs
What are cannoli made of?
Cannoli are made with thin, fried pastry shells filled with sweetened ricotta filling and often finished with chocolate chips or pistachios.
What is traditional cannoli filling made of?
Traditional filling is made with well-drained whole-milk ricotta, powdered sugar, and often vanilla, cinnamon, or chocolate chips.
What is the secret to crispy cannoli shells?
Roll the dough very thin and fry it at about 350°F (175°C) until golden and crisp.
Why are my cannoli shells not crispy?
The dough may be too thick, the oil may be too cool, or the shells may have absorbed moisture during storage.
How do you keep cannoli shells from getting soggy?
Store shells separately from the filling and pipe the filling into them shortly before serving.
Can I make cannoli shells ahead of time?
Yes, cooled shells can be made ahead and stored in an airtight container at room temperature.
Can I freeze cannoli shells?
Yes, you can freeze unfilled shells in an airtight container, then thaw them at room temperature before filling.
How long do homemade cannoli last?
Unfilled shells can stay crisp for several days, while filled cannoli are best enjoyed within a few hours.
Can I use mascarpone instead of ricotta in cannoli?
Yes, mascarpone can replace some of the ricotta to create a richer and creamier filling.
Do cannoli need to be refrigerated?
The ricotta filling should be refrigerated, but unfilled shells should be kept at room temperature to maintain their crispness.
Classic Cannoli Recipe: Crispy Shells & Creamy Ricotta Filling
Difficulty: Medium12
servings2
hours15
minutes2
hours45
minutesCrispy, golden cannoli shells filled with sweet, creamy ricotta, mini chocolate chips, and a hint of cinnamon, then finished with pistachios and powdered sugar.
Ingredients
For the Cannoli Shells
2 cups (250 g) all-purpose flour
2 tablespoons (25 g) granulated sugar
1 tablespoon (5 g) unsweetened cocoa powder
¼ teaspoon salt
2 tablespoons (28 g) unsalted butter, softened
½ cup (120 ml) Marsala wine
1 large egg
4 cups (960 ml) vegetable or canola oil, for frying
For the Ricotta Filling
15 ounces (425 g) whole-milk ricotta, thoroughly drained
¾ cup (90 g) powdered sugar
1 teaspoon vanilla extract
½ teaspoon ground cinnamon
½ cup (85 g) mini chocolate chips
For Decorating
¼ cup (30 g) chopped pistachios
¼ cup (45 g) mini chocolate chips
2 tablespoons powdered sugar
¼ cup (40 g) finely chopped candied orange peel, optional
Directions
- Drain the ricotta: Place the ricotta in a fine-mesh strainer lined with cheesecloth or paper towels and refrigerate for 1–2 hours to remove excess moisture.
- Make the dough: Whisk the flour, sugar, cocoa powder, and salt in a bowl, then work in the softened butter until crumbly.
- Add the wet ingredients: Add the Marsala wine and egg, mixing until a firm dough forms.
- Knead and chill: Knead the dough on a lightly floured surface for about 5 minutes until smooth, then wrap and refrigerate for 1 hour.
- Roll and cut: Roll the dough very thin, about 1–2 mm thick, then cut into approximately 4-inch (10 cm) circles.
- Shape the shells: Wrap each dough circle around a cannoli tube, overlapping the edges, and seal them with a little beaten egg white.
- Fry: Heat the oil to 350°F (175°C) and fry the shells in small batches for 2–3 minutes, turning gently, until golden and crisp.
- Cool: Remove the shells with tongs or a slotted spoon and drain on paper towels, then allow them to cool before carefully removing the tubes.
- Make the filling: Mix the drained ricotta with powdered sugar, vanilla, and cinnamon until smooth, then gently fold in the mini chocolate chips.
- Fill the cannoli: Transfer the filling to a piping bag and pipe it into both ends of each cooled shell.
- Decorate: Dip the filled ends into chopped pistachios or extra chocolate chips, then dust the cannoli lightly with powdered sugar.
Notes
- Drain the ricotta well: A thick filling helps prevent the shells from becoming soggy.
- Roll the dough thin: Thin shells will fry up lighter and crispier.
- Keep the oil at 350°F (175°C): This helps the shells cook evenly without becoming greasy.
- Fill just before serving: For the best crunch, pipe the filling into the shells shortly before serving.
- Make ahead: Store unfilled shells in an airtight container at room temperature and keep the filling refrigerated separately.

Hi, I’m Sorenna Blythe, the baker and writer behind Mix Whisk Bake. I share simple, reliable recipes and honest kitchen moments to help home bakers bake with confidence and joy. When I’m not testing new treats, you’ll find me sipping coffee and dreaming up my next bake.