This page may contain affiliate links. As an Amazon Associate, I earn from qualifying purchases. If you choose to make a purchase after clicking a link, I may receive a commission at no additional cost to you. My goal is to provide helpful and valuable content, and any commissions help me maintain this site and continue creating high-quality content for my readers. Thank you for your support!
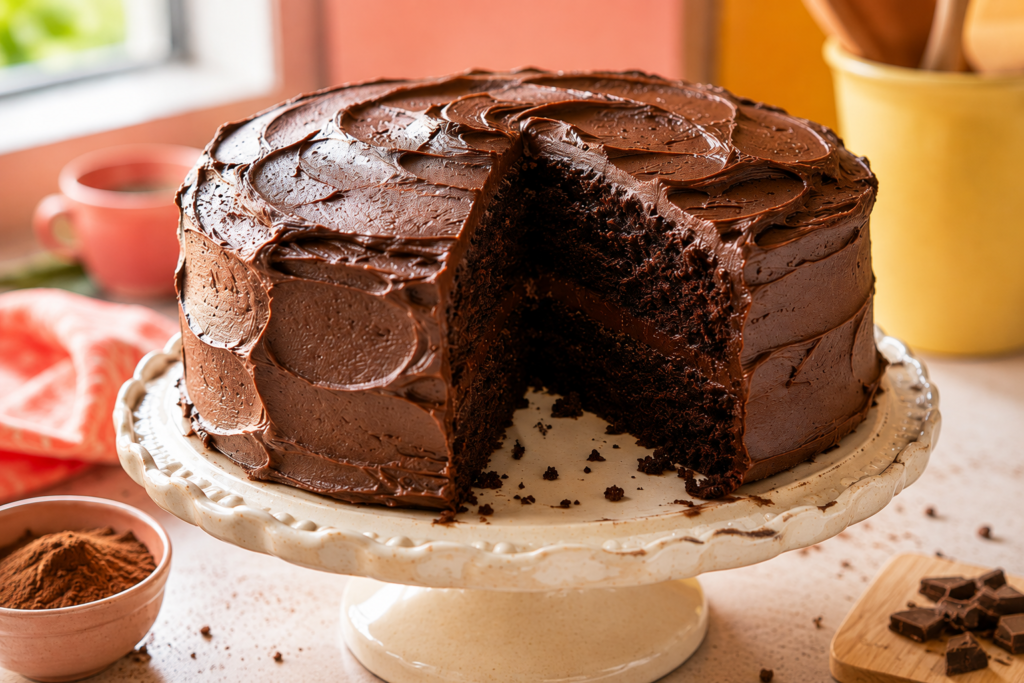
If you love rich, chocolatey desserts, this Devil’s Food Cake is hard to resist.
It’s darker, softer, and more deeply chocolatey than a regular chocolate cake, with a tender, fudgy crumb in every bite.
Made with simple ingredients, this easy recipe is perfect for birthdays, family gatherings, or a sweet treat at home.
Add your favorite chocolate frosting, fresh berries, or a scoop of vanilla ice cream, and use the simple baking tips below for a cake that turns out beautifully every time.
What Is Devil’s Food Cake?
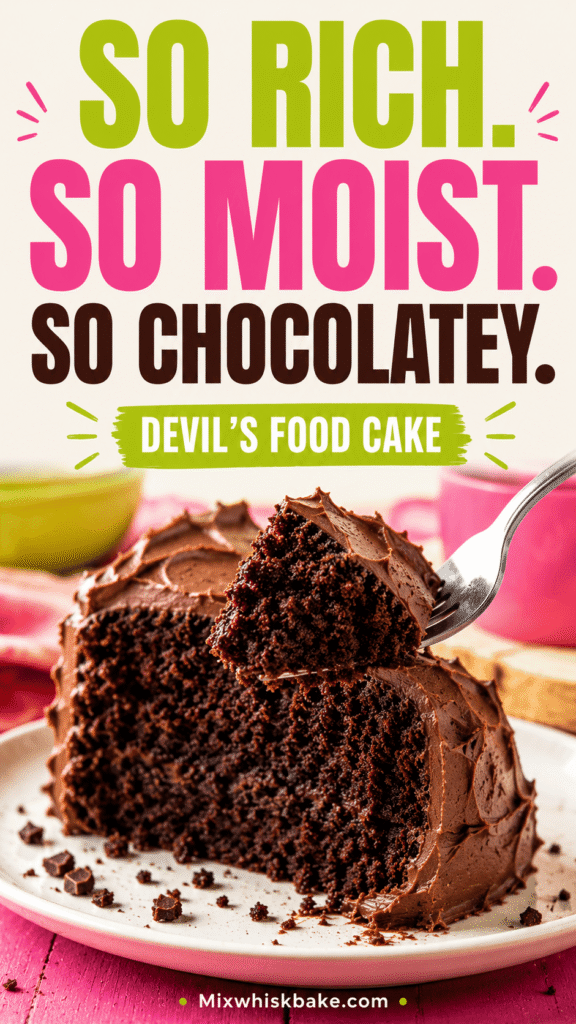
Devil’s Food Cake is a rich, moist chocolate cake known for its deep chocolate flavor, soft crumb, and dark appearance.
Its darker color comes mainly from cocoa powder, which gives the cake a more intense chocolate taste than many traditional chocolate cakes.
Hot coffee or water is often added to the batter because it helps bring out the cocoa’s flavor while also creating a smooth, moist texture.
Ingredients such as oil and buttermilk add extra moisture, helping the cake stay tender instead of becoming dry or heavy.
While Devil’s Food Cake is a type of chocolate cake, it is usually richer, darker, and softer, with a stronger chocolate flavor and a more tender crumb.
The result is an indulgent chocolate cake that uses simple ingredients without requiring complicated baking techniques.
Why You’ll Love This Recipe
- Rich, deep chocolate flavor: Cocoa powder and hot coffee create a bold, satisfying chocolate taste.
- Soft and moist texture: Buttermilk and oil help keep the cake tender and moist.
- Easy-to-find ingredients: Everything you need is simple and readily available at most grocery stores.
- Simple preparation: The batter comes together easily with a few basic mixing steps.
- Perfect for any occasion: Serve it for birthdays and celebrations or enjoy a slice as an everyday chocolate treat.
Devil’s Food Cake Ingredients
Dry Ingredients
- 2 cups (250 g) all-purpose flour
- ¾ cup (65 g) unsweetened cocoa powder
- 1½ teaspoons baking soda
- 1 teaspoon baking powder
- ½ teaspoon salt
Wet Ingredients
- 1¾ cups (350 g) granulated sugar
- 2 large eggs
- 1 cup (240 ml) buttermilk
- ½ cup (120 ml) vegetable oil
- 2 teaspoons vanilla extract
- 1 cup (240 ml) hot coffee or hot water
For the Chocolate Frosting
- 1 cup (226 g) unsalted butter, softened
- 3½ cups (420 g) powdered sugar
- ¾ cup (65 g) unsweetened cocoa powder
- 2 teaspoons vanilla extract
- ⅓ cup (80 ml) milk or heavy cream
- ¼ teaspoon salt
How to Make Devil’s Food Cake
1. Prepare the Cake Pans
Preheat your oven to 350°F (175°C), so it is fully heated when the batter is ready.
Grease two 9-inch round cake pans with butter or nonstick cooking spray, then line the bottoms with parchment paper.
The parchment makes it much easier to remove the delicate cake layers without sticking or breaking.
2. Combine the Dry Ingredients
Add the flour, cocoa powder, baking soda, baking powder, and salt to a large mixing bowl.
Whisk everything together until the cocoa is evenly distributed and there are no visible lumps.
This simple step helps the dry ingredients mix evenly into the batter and prevents pockets of cocoa or baking soda in the finished cake.
3. Mix the Wet Ingredients
In a separate large bowl, beat the sugar, eggs, vegetable oil, buttermilk, and vanilla extract until smooth and well combined.
The mixture should look evenly blended without any streaks of egg or oil.
Using oil instead of butter helps give this cake its soft, moist texture while the buttermilk adds richness and a slight tang.
4. Combine the Batter
Gradually add the dry ingredients to the wet mixture, stirring gently as you go.
Mix only until the ingredients are combined, and no large pockets of dry flour remain.
Avoid overmixing, as too much stirring can make the finished cake heavier instead of soft and tender.
5. Add the Hot Coffee
Slowly pour the hot coffee or hot water into the batter while stirring gently.
The batter will become quite thin at this stage, but that is completely normal for Devil’s Food Cake.
Hot liquid helps dissolve and bring out the flavor of the cocoa while adding moisture to the cake.
If using coffee, choose a plain brewed coffee rather than a sweetened or flavored variety.
6. Bake
Divide the batter evenly between the prepared cake pans and gently smooth the tops.
Place the pans in the center of the preheated oven and bake for about 30–35 minutes.
The cakes are ready when a toothpick inserted into the center comes out with a few moist crumbs but no wet batter.
Try not to overbake the layers, since even a few extra minutes can make a chocolate cake noticeably drier.
7. Cool Completely
Let the cakes cool in their pans for about 10 minutes after removing them from the oven.
Carefully run a thin knife around the edges, then turn the cakes onto a wire rack and remove the parchment paper.
Allow the layers to cool completely before frosting them.
Frosting a warm cake can cause the frosting to melt and slide, so giving the layers enough time to cool is well worth the wait.
How to Make Chocolate Frosting
Beat the softened butter in a large bowl for 2–3 minutes until smooth and creamy.
Add the cocoa powder and powdered sugar gradually, mixing on low speed to prevent the dry ingredients from flying out of the bowl.
Pour in the vanilla extract and slowly add the milk or heavy cream, a little at a time, until the frosting reaches a smooth, spreadable consistency.
Increase the mixer speed and beat the frosting for another 2–3 minutes until it becomes light, fluffy, and creamy.
If the frosting feels too thick, add a small splash of milk or cream, while a little extra powdered sugar can help if it becomes too thin.
How to Assemble the Cake
1. Add the First Cake Layer
Place one completely cooled cake layer on a serving plate or cake stand, with the flat side facing up.
2. Add the Frosting
Spread an even layer of chocolate frosting over the top, taking it close to the edges without letting it spill over the sides.
3. Add the Second Layer
Carefully place the second cake layer on top of the frosting, keeping the layers centered.
4. Frost the Cake
Spread the remaining frosting over the top and sides of the cake, using a spatula to create a smooth finish.
5. Slice and Serve
For cleaner slices, let the frosted cake rest for about 15–20 minutes before cutting it with a sharp knife.
Serve each slice as it is or pair it with vanilla ice cream, whipped cream, or fresh berries.
Tips for the Best Devil’s Food Cake
- Use unsweetened cocoa powder: It gives the cake a rich chocolate flavor without adding extra sweetness.
- Measure flour correctly: Spoon flour into your measuring cup and level it off to prevent a dense, dry cake.
- Use room-temperature ingredients: Eggs and buttermilk blend more smoothly, helping create an even batter.
- Do not overmix the batter: Mix just until combined to keep the cake soft and tender.
- Use hot coffee: It enhances the chocolate flavor and adds extra depth to the cake.
- Avoid overbaking: Remove the cake when a toothpick comes out with a few moist crumbs to prevent dryness.
- Cool completely before frosting: Warm cake can melt the frosting and make it difficult to spread evenly.
Common Mistakes to Avoid
- Overmixing the batter: Mix only until the ingredients are combined to keep the cake light and tender.
- Adding too much flour: Too much flour can make the cake dry and dense, so measure it carefully.
- Overbaking the cake: Bake just until a toothpick comes out with a few moist crumbs to preserve the cake’s moisture.
- Frosting warm cake layers: Let the layers cool completely so the frosting stays in place instead of melting.
- Using expired leavening agents: Old baking soda or baking powder may not work properly, leaving the cake flat and heavy.
- Unevenly dividing the batter: Divide the batter as evenly as possible so both cake layers bake at the same rate and have a similar thickness.
Variations
Devil’s Food Cupcakes
Turn this recipe into cupcakes by dividing the batter evenly among a lined muffin tin.
Fill each liner about two-thirds full, so the cupcakes have enough room to rise without overflowing.
Bake for about 18–22 minutes, or until a toothpick inserted into the center comes out with a few moist crumbs.
Let the cupcakes cool completely before adding the chocolate frosting.
One-Layer Devil’s Food Cake
For a simpler option, pour the batter into one greased and parchment-lined 9 × 13-inch baking pan.
Bake for about 30–35 minutes, checking for doneness with a toothpick near the end of the baking time.
Once completely cooled, spread the chocolate frosting evenly over the top.
This version is especially convenient when you want an easy dessert without stacking or decorating multiple layers.
Chocolate Ganache Frosting
For an even richer finish, replace the traditional chocolate frosting with smooth chocolate ganache.
Pour hot heavy cream over chopped chocolate and let it sit for a few minutes before stirring until silky and smooth.
Allow the ganache to cool slightly before spreading it over the cake so it thickens enough to stay in place.
Extra-Moist Devil’s Food Cake
For an especially moist crumb, replace part of the buttermilk with ½ cup sour cream or add sour cream alongside the buttermilk.
Sour cream adds moisture and richness while helping keep the cake tender for longer.
Be careful not to add too much extra liquid, as an overly wet batter can affect how the cake rises and sets.
What to Serve With Devil’s Food Cake
- Vanilla ice cream: The cool, creamy texture balances the rich chocolate cake beautifully.
- Fresh berries: Raspberries, blueberries, or mixed berries add a bright, slightly tart contrast.
- Whipped cream: A light spoonful of whipped cream adds softness without overpowering the chocolate flavor.
- Chocolate ganache: Drizzle warm ganache over each slice for an extra-rich chocolate finish.
- Fresh strawberries: Sweet, juicy strawberries pair especially well with the deep cocoa flavor.
- Coffee or milk: Serve with hot coffee or cold milk for a simple pairing that complements every bite.
How to Store Devil’s Food Cake
For short-term storage, keep the frosted cake covered at room temperature for up to 2 days, provided your frosting and toppings do not require refrigeration.
Place the cake in an airtight cake container or cover it tightly with plastic wrap to help keep the layers soft and moist.
If your kitchen is warm or the cake contains a perishable filling or frosting, refrigerate it instead.
Store the cake in the refrigerator for up to 5 days, keeping it well covered so the cold air does not dry out the cake.
For the best texture, let refrigerated slices sit at room temperature for about 20–30 minutes before serving.
Always keep the cake covered between servings, since exposed cake quickly loses moisture and can absorb odors from other foods in the refrigerator.
Can You Freeze Devil’s Food Cake?
Yes, Devil’s Food Cake freezes well, making it easy to prepare the cake layers ahead of time.
For best results, freeze the unfrosted cake layers once they have cooled completely.
Wrap each layer tightly in plastic wrap, then place the wrapped layers in a freezer-safe bag or airtight container to protect them from freezer burn and odors.
The cake can be frozen for up to 3 months while maintaining good flavor and texture.
When you are ready to use the cake, transfer the wrapped layers to the refrigerator and let them thaw overnight.
Allow the layers to come to room temperature before assembling the cake, as this makes them easier to frost.
Once completely thawed, add the chocolate frosting and assemble the cake as usual.
For easier handling, keep the layers wrapped while they thaw, then unwrap them once they have reached room temperature.
FAQs
What makes Devil’s Food Cake different from chocolate cake?
Devil’s Food Cake is typically darker, richer, and more intensely chocolatey than regular chocolate cake, with a soft, tender crumb.
Why is my Devil’s Food Cake dry?
A dry cake is often caused by overbaking, too much flour, or not enough moisture in the batter.
Can I use hot coffee instead of water?
Yes, hot coffee can deepen the chocolate flavor without making the cake taste strongly like coffee.
Can I make Devil’s Food Cake without buttermilk?
Yes, combine 1 cup milk with 1 tablespoon lemon juice or white vinegar, let it sit for 5–10 minutes, then use it as a buttermilk substitute.
Why did my Devil’s Food Cake sink?
A sunken cake can result from underbaking, opening the oven door too early, overmixing the batter, or using too much baking soda or baking powder.
How do I make Devil’s Food Cake extra moist?
Measure the ingredients accurately, avoid overbaking, and use moisture-rich ingredients such as buttermilk, vegetable oil, or sour cream.
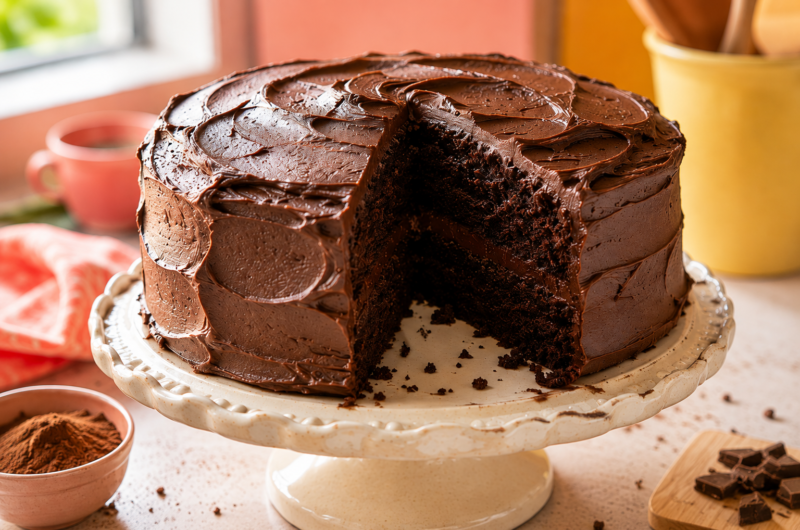
Devil’s Food Cake: The Ultimate Rich & Moist Chocolate Cake
Difficulty: Easy10
Slices25
minutes30
minutes1
hour30
minutesA rich, moist Devil’s Food Cake made with cocoa powder, buttermilk, and hot coffee, then covered with creamy chocolate frosting.
Ingredients
For the Cake
2 cups (250 g) all-purpose flour
¾ cup (65 g) unsweetened cocoa powder
1¾ cups (350 g) granulated sugar
1½ teaspoons baking soda
1 teaspoon baking powder
½ teaspoon salt
2 large eggs, room temperature
1 cup (240 ml) buttermilk
½ cup (120 ml) vegetable oil
2 teaspoons vanilla extract
1 cup (240 ml) hot brewed coffee or hot water
For the Chocolate Frosting
1 cup (226 g) unsalted butter, softened
3½ cups (420 g) powdered sugar
¾ cup (65 g) unsweetened cocoa powder
2 teaspoons vanilla extract
⅓ cup (80 ml) milk or heavy cream
¼ teaspoon salt
Directions
- Prepare the oven and pans: Preheat the oven to 350°F (175°C) and grease two 9-inch round cake pans, then line the bottoms with parchment paper.
- Mix the dry ingredients: Whisk the flour, cocoa powder, baking soda, baking powder, and salt together in a large bowl.
- Mix the wet ingredients: In a separate bowl, whisk the sugar, eggs, buttermilk, oil, and vanilla until smooth and well combined.
- Make the batter: Gradually add the dry ingredients to the wet mixture, stirring just until combined.
- Add the hot liquid: Slowly pour in the hot coffee or water while stirring gently. The batter will be thin, which is normal.
- Bake: Divide the batter evenly between the prepared pans and bake for 30–35 minutes, or until a toothpick inserted in the center comes out with a few moist crumbs.
- Cool: Let the cakes cool in the pans for 10 minutes, then transfer them to a wire rack and cool completely.
- Make the frosting: Beat the softened butter until creamy, then gradually mix in the powdered sugar and cocoa powder.
- Finish the frosting: Add the vanilla, salt, and milk or cream, then beat for 2–3 minutes until light, smooth, and spreadable.
- Assemble: Place one cake layer on a serving plate and spread frosting over the top.
- Add the second cake layer and cover the top and sides with the remaining frosting.
- Serve: Slice and serve once the frosting has set slightly.
Notes
- Use hot coffee for a deeper chocolate flavor; the finished cake will not taste strongly of coffee.
- Measure the flour carefully to prevent a dense cake.
- Do not overmix the batter or overbake the cake, as both can lead to a dry texture.
- Let the cake layers cool completely before frosting.
- Store the covered cake at room temperature for up to 2 days or refrigerate for up to 5 days.

Hi, I’m Sorenna Blythe, the baker and writer behind Mix Whisk Bake. I share simple, reliable recipes and honest kitchen moments to help home bakers bake with confidence and joy. When I’m not testing new treats, you’ll find me sipping coffee and dreaming up my next bake.