This page may contain affiliate links. As an Amazon Associate, I earn from qualifying purchases. If you choose to make a purchase after clicking a link, I may receive a commission at no additional cost to you. My goal is to provide helpful and valuable content, and any commissions help me maintain this site and continue creating high-quality content for my readers. Thank you for your support!
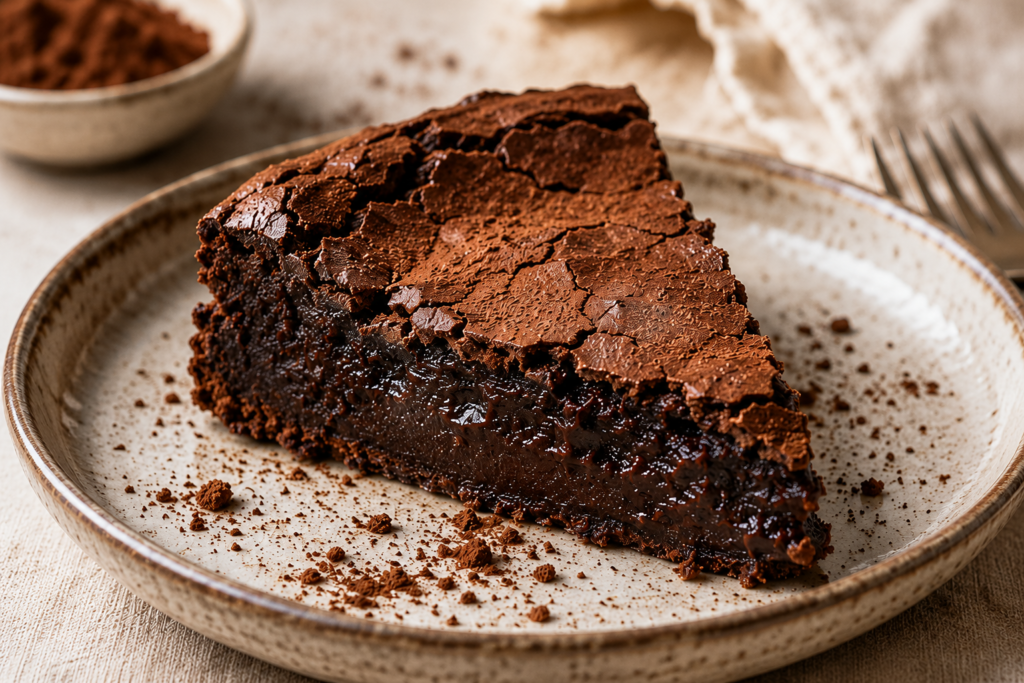
This flourless chocolate cake is rich, fudgy, and packed with deep chocolate flavor.
Despite being made without wheat flour, it has a smooth, tender texture that feels wonderfully indulgent.
Best of all, you only need a few simple ingredients to make it.
Serve it with fresh berries, whipped cream, or a scoop of vanilla ice cream for an easy dessert that looks as impressive as it tastes.
Why You’ll Love This Flourless Chocolate Cake
- Rich, intensely chocolatey flavor: Plenty of chocolate delivers a deep, satisfying flavor in every bite.
- Naturally flourless and easy to make: No wheat flour is needed, making this recipe simple to prepare.
- Fudgy, dense center with a delicate crust: The cake has a soft, rich middle surrounded by a lightly crisp top.
- Requires only a handful of ingredients: You can make this impressive dessert without a long shopping list.
- Perfect for dinner parties, holidays, and special occasions: Its elegant appearance makes it ideal for sharing with guests.
- Easy to prepare ahead of time: Make it in advance and store it until you’re ready to serve.
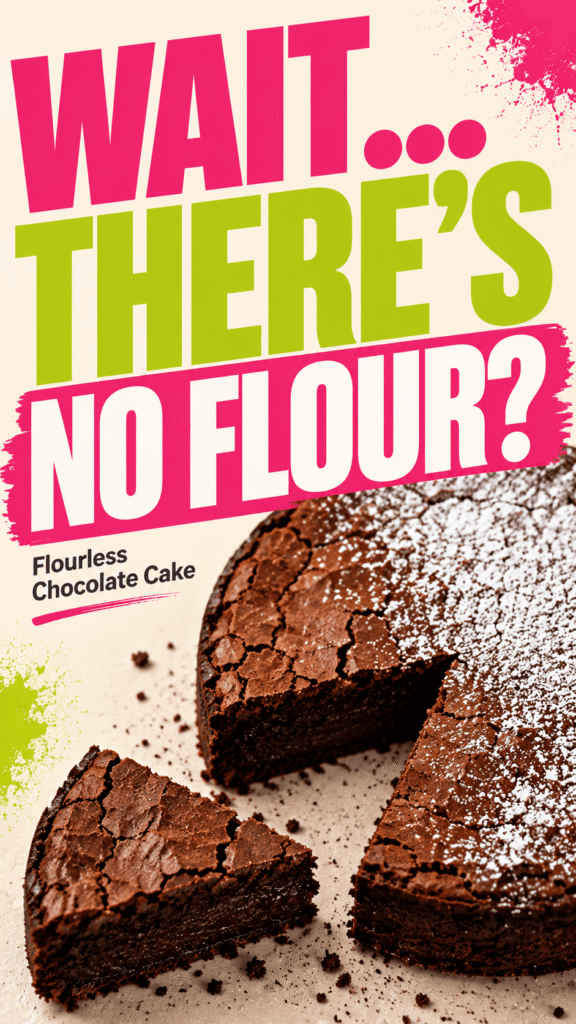
Ingredients for Flourless Chocolate Cake
Main Ingredients
- 200 g (7 oz) dark or semisweet chocolate: Use good-quality chocolate for a rich, deep chocolate flavor.
- 115 g (½ cup) unsalted butter: Adds richness and helps create a smooth, fudgy texture.
- 150 g (¾ cup) granulated sugar: Provides sweetness and helps form the cake’s delicate crust.
- 4 large eggs: Give the cake structure while keeping the center soft and tender.
- 30 g (¼ cup) unsweetened cocoa powder: Boosts the chocolate flavor without adding flour.
- 1 teaspoon vanilla extract: Adds warmth and balances the chocolate.
- ¼ teaspoon salt: Enhances the overall flavor.
Optional Ingredients and Toppings
- 1–2 tablespoons powdered sugar: Dust over the cooled cake for a simple finish.
- 1 cup fresh berries: Serve alongside the cake for a fresh, slightly tart contrast.
- ½ cup whipped cream: Adds a light and creamy element.
- ½ cup chocolate ganache: Pour over the cake for an extra-rich chocolate topping.
- ¼ cup chocolate shavings: Sprinkle over the top for an elegant finish.
- 1–2 cups vanilla ice cream: Serve alongside warm or room-temperature cake for a classic combination.
How to Make Flourless Chocolate Cake
1. Prepare the Pan
Preheat your oven to 175°C (350°F), so it is fully heated when the batter is ready.
Grease a 9-inch (23 cm) round cake pan with butter or nonstick cooking spray.
Line the bottom with a circle of parchment paper, then lightly grease the parchment as well.
This makes it much easier to lift the cake from the pan once it has cooled.
2. Melt the Chocolate and Butter
Place 200 g (7 oz) dark or semisweet chocolate and 115 g (½ cup) unsalted butter in a heatproof bowl.
Set the bowl over a saucepan of gently simmering water, making sure the bottom of the bowl does not touch the water.
Stir occasionally until the chocolate and butter are completely melted and the mixture is smooth.
You can also melt them together in the microwave in short 20-second intervals, stirring well between each interval.
Remove the mixture from the heat and let it cool for a few minutes.
It should still be warm and fluid, but not hot enough to cook the eggs when they are added later.
3. Mix the Wet Ingredients
In a large mixing bowl, whisk together 4 large eggs, 150 g (¾ cup) granulated sugar, and 1 teaspoon vanilla extract.
Whisk until the mixture is well combined and the sugar begins to blend into the eggs.
There is no need to beat the eggs until they are thick or fluffy, so keep this step simple.
4. Add the Chocolate Mixture
Slowly pour the slightly cooled chocolate and butter mixture into the egg mixture.
Whisk gently as you pour to help the chocolate blend evenly with the eggs.
Continue mixing until you have a smooth, glossy batter with no visible streaks of chocolate or egg.
Take your time with this step, especially if the chocolate is still warm.
5. Add the Cocoa Powder
Sift 30 g (¼ cup) unsweetened cocoa powder and ¼ teaspoon salt into the chocolate mixture.
Sifting helps break up any cocoa lumps, making it easier to create a smooth batter.
Fold or stir gently until the cocoa powder is fully incorporated.
Stop mixing as soon as the batter looks smooth because overmixing can affect the final texture.
6. Bake the Cake
Pour the batter into the prepared cake pan and gently spread it into an even layer.
Place the pan in the center of the preheated oven.
Bake for 25–30 minutes, or until the edges are set and the center still has a slight wobble.
Do not wait for the center to become completely firm, as the cake will continue to set while it cools.
A toothpick inserted near the edge should come out with a few moist crumbs, while the center should remain rich and fudgy.
7. Cool and Serve
Remove the cake from the oven and let it cool in the pan for about 15–20 minutes.
Run a thin knife carefully around the edge before removing the cake from the pan.
Transfer it to a serving plate and allow it to cool further before slicing.
For the cleanest slices and best texture, let the cake cool completely before cutting.
Dust the top with 1–2 tablespoons of powdered sugar, or serve each slice with fresh berries, whipped cream, chocolate ganache, or vanilla ice cream.
For an especially indulgent dessert, serve the cake slightly warm with a scoop of vanilla ice cream melting over the top.
Tips for Making the Best Flourless Chocolate Cake
- Use good-quality chocolate: Choose a good dark or semisweet chocolate because its flavor is the star of the cake.
- Avoid overbaking: Remove the cake while the center is still slightly soft to keep it rich and fudgy.
- Cool the melted chocolate slightly: Let the chocolate mixture cool before adding the eggs to prevent them from cooking.
- Line the pan with parchment paper: This makes the cake much easier to remove without sticking or breaking.
- Allow the cake to cool completely: Cooling helps the center firm up and makes slicing much easier.
- Use a sharp knife: A sharp, clean knife helps you create neat slices without crushing the delicate cake.
How to Tell When Flourless Chocolate Cake Is Done
The best way to tell if your flourless chocolate cake is ready is to look at both the edges and the center rather than relying only on the baking time.
The edges should look set and slightly firm, while the center should still appear soft and have a gentle wobble when you carefully move the pan.
That slight wobble is exactly what you want because the cake will continue to cook from its own residual heat after it comes out of the oven.
If the center looks completely firm before you remove the cake, it may already be overbaked and could lose some of its fudgy texture.
For another check, insert a toothpick near the edge of the cake rather than directly in the center.
It should come out with a few moist crumbs attached, which is a good sign that the cake is baked but still tender inside.
Once removed from the oven, let the cake cool in the pan for 15–20 minutes so the center can finish setting gently.
Flourless Chocolate Cake Variations
Flourless Chocolate Almond Cake
For a nutty twist, add ½ cup (50 g) finely ground almonds to the batter along with the cocoa powder.
The almonds add a gentle nutty flavor and give the cake a slightly more textured, hearty bite.
Make sure the almonds are finely ground so they blend smoothly into the batter without making the cake too heavy.
Flourless Chocolate Orange Cake
Chocolate and orange make a delicious combination, especially in a rich flourless cake.
Add 1 tablespoon finely grated orange zest and ½ teaspoon orange extract to the wet ingredients before mixing in the chocolate.
The orange adds a bright citrus flavor that cuts through the richness of the chocolate without overpowering it.
Flourless Chocolate Espresso Cake
If you love deep chocolate flavor, espresso powder is an easy way to make the cake taste even richer.
Add 1–2 teaspoons instant espresso powder to the cocoa powder before stirring the dry ingredients into the batter.
You will not get a strong coffee flavor from such a small amount, but it helps bring out the darker, more intense notes of the chocolate.
Flourless Chocolate Cake with Ganache
For an extra-decadent finish, cover the cooled cake with a smooth chocolate ganache.
To make a simple ganache, heat ½ cup (120 ml) heavy cream until steaming, then pour it over 100 g (3½ oz) finely chopped dark chocolate.
Let the mixture sit for a few minutes before stirring until glossy and smooth.
Allow the ganache to cool slightly and spread it over the completely cooled cake for a rich, silky topping.
What to Serve with Flourless Chocolate Cake
- Whipped cream: Adds a light, creamy contrast to the rich, fudgy cake.
- Fresh berries: Strawberries, raspberries, or blueberries provide a fresh, slightly tart balance.
- Raspberry sauce: Its bright berry flavor cuts through the richness of the chocolate beautifully.
- Vanilla ice cream: The cool, creamy texture pairs perfectly with the dense chocolate cake.
- Chocolate ganache: Adds an extra layer of smooth, luxurious chocolate flavor.
- Powdered sugar: A simple dusting adds a touch of sweetness and gives the cake an elegant finish.
How to Store Flourless Chocolate Cake
For short-term storage, keep the cooled flourless chocolate cake covered at room temperature for up to 2 days.
Place it in an airtight container or cover it tightly with plastic wrap to help prevent the cake from drying out.
Keep it somewhere cool and away from direct sunlight or heat.
For longer storage, refrigerate the cake in an airtight container for up to 5 days.
If the cake has been topped with whipped cream, fresh fruit, or ganache, refrigeration is the better option.
Refrigeration can make the cake firmer, so let it sit at room temperature for about 30–60 minutes before serving.
This gives the chocolate time to soften again and brings back the cake’s rich, fudgy texture.
For an even more indulgent treat, you can warm individual slices gently for a few seconds in the microwave before serving.
Can You Freeze Flourless Chocolate Cake?
Yes, flourless chocolate cake freezes very well, making it a convenient dessert to prepare ahead of time.
You can freeze the whole cake or cut it into individual slices if you want to enjoy smaller portions later.
To freeze the whole cake, let it cool completely, then wrap it tightly in plastic wrap followed by a layer of aluminum foil.
For individual slices, wrap each piece separately in plastic wrap and place the wrapped slices in a freezer-safe container or zip-top freezer bag.
Keeping the cake tightly sealed helps prevent freezer burn and protects its rich chocolate flavor and fudgy texture.
For the best quality, use the frozen cake within 2–3 months.
When you’re ready to serve it, transfer the cake or individual slices to the refrigerator and let them thaw overnight.
Then bring the cake to room temperature for about 30–60 minutes before serving so it softens and develops its best texture.
If you’re short on time, individual slices can be thawed at room temperature for a few hours, but keep the cake covered while it warms.
Common Mistakes to Avoid
- Overbaking the cake: Take it out when the center is still slightly soft to keep the cake fudgy rather than dry.
- Using chocolate that is too sweet: Very sweet chocolate can make the finished cake overly sugary and mask the rich cocoa flavor.
- Adding eggs to chocolate that is too hot: Let the melted chocolate cool slightly so it does not cook or scramble the eggs.
- Skipping parchment paper: Lining the pan helps prevent sticking and makes the delicate cake easier to remove.
- Cutting the cake while it is too warm: Allow the cake to cool properly so the center can set and the slices hold their shape.
- Incorrectly measuring cocoa powder: Too much cocoa can make the cake dry and bitter, so measure it carefully for the right balance.
Final Thoughts
This flourless chocolate cake is simple to make, wonderfully rich, and impressive enough for any special occasion.
Serve it with fresh berries, whipped cream, or vanilla ice cream for an extra delicious finish.
Give this recipe a try and enjoy every fudgy, chocolate-filled bite!
FAQs
Is flourless chocolate cake gluten-free?
Yes, this cake contains no traditional wheat flour, making it naturally flourless and suitable for a gluten-free diet.
If you need to avoid gluten completely, check the labels on your chocolate, cocoa powder, and other ingredients for gluten-free certification.
Why did my flourless chocolate cake sink?
Some sinking is completely normal because flourless cakes have a dense, fudgy structure.
Excessive sinking can happen if the cake is underbaked or the batter is overmixed.
Why is my flourless chocolate cake dry?
The most common cause is overbaking, which removes too much moisture from the cake.
Incorrect ingredient measurements can also affect the texture, so measure carefully and remove the cake while the center is still slightly soft.
Can I make flourless chocolate cake ahead of time?
Yes, you can make it 1–2 days ahead and keep it covered at room temperature for short-term storage.
For longer storage, refrigerate it in an airtight container and bring it to room temperature before serving.
Can I use milk chocolate instead of dark chocolate?
Yes, but milk chocolate is sweeter and contains more milk solids, which can make the cake softer and sweeter.
If you use milk chocolate, consider reducing the added sugar slightly to keep the flavor balanced.
How do I know when flourless chocolate cake is done?
The edges should be set while the center remains slightly soft with a gentle wobble.
A toothpick inserted near the edge should come out with a few moist crumbs rather than wet batter.
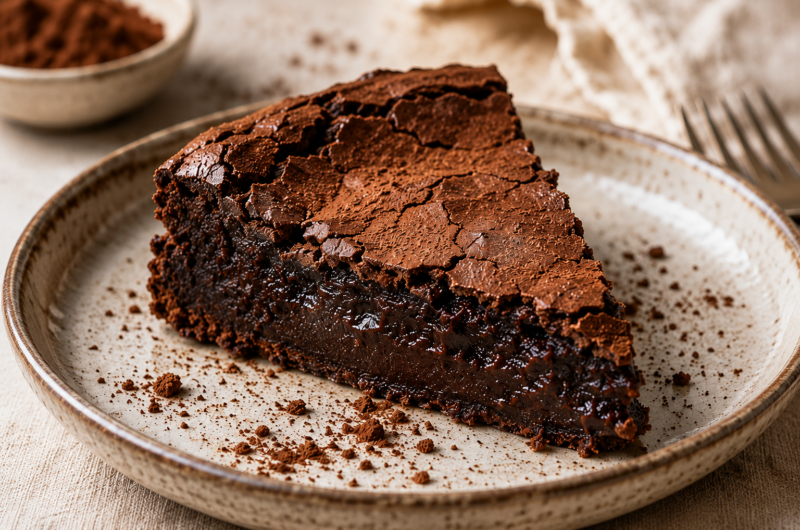
Easy Flourless Chocolate Cake Recipe – Rich, Fudgy & Decadent
Difficulty: Easy8
servings15
minutes30
minutes45
minutesA rich and fudgy flourless chocolate cake with a delicate crackly top and an intensely chocolatey center.
Ingredients
200 g (7 oz) dark or semisweet chocolate, finely chopped
115 g (½ cup) unsalted butter
150 g (¾ cup) granulated sugar
4 large eggs
30 g (¼ cup) unsweetened cocoa powder
1 teaspoon vanilla extract
¼ teaspoon salt
1–2 tablespoons powdered sugar, optional, for serving
Directions
- Prepare the pan: Preheat the oven to 175°C (350°F) and grease a 9-inch (23 cm) round cake pan.
- Line the pan: Place a round piece of parchment paper in the bottom and lightly grease it.
- Melt the chocolate: Combine the chopped chocolate and butter in a heatproof bowl and melt gently over simmering water, stirring until smooth.
- Cool slightly: Remove the chocolate mixture from the heat and let it cool for a few minutes so it is warm rather than hot.
- Mix the eggs: Whisk the eggs, sugar, and vanilla in a large bowl until well combined.
- Combine: Slowly whisk the melted chocolate mixture into the egg mixture until smooth.
- Add the cocoa: Sift in the cocoa powder and salt, then stir gently just until no dry spots remain.
- Bake: Pour the batter into the prepared pan and bake for 25–30 minutes, until the edges are set and the center still has a slight wobble.
- Cool: Let the cake cool in the pan for 15–20 minutes, then carefully remove it and allow it to cool further before slicing.
- Serve: Dust with powdered sugar and serve with berries, whipped cream, or vanilla ice cream if desired.
Notes
- Do not overbake: The slightly soft center is what gives this cake its signature fudgy texture.
- Use quality chocolate: Since chocolate is the main flavor, a good dark or semisweet chocolate makes a noticeable difference.
- For gluten-free baking: The cake contains no wheat flour, but check ingredient labels to ensure the chocolate and cocoa powder are certified gluten-free if needed.
- Storage: Keep covered at room temperature for up to 2 days or refrigerate for up to 5 days.
- Freezing: Wrap the cooled cake tightly and freeze for up to 2–3 months. Thaw overnight in the refrigerator and bring to room temperature before serving.

Hi, I’m Sorenna Blythe, the baker and writer behind Mix Whisk Bake. I share simple, reliable recipes and honest kitchen moments to help home bakers bake with confidence and joy. When I’m not testing new treats, you’ll find me sipping coffee and dreaming up my next bake.