This page may contain affiliate links. As an Amazon Associate, I earn from qualifying purchases. If you choose to make a purchase after clicking a link, I may receive a commission at no additional cost to you. My goal is to provide helpful and valuable content, and any commissions help me maintain this site and continue creating high-quality content for my readers. Thank you for your support!
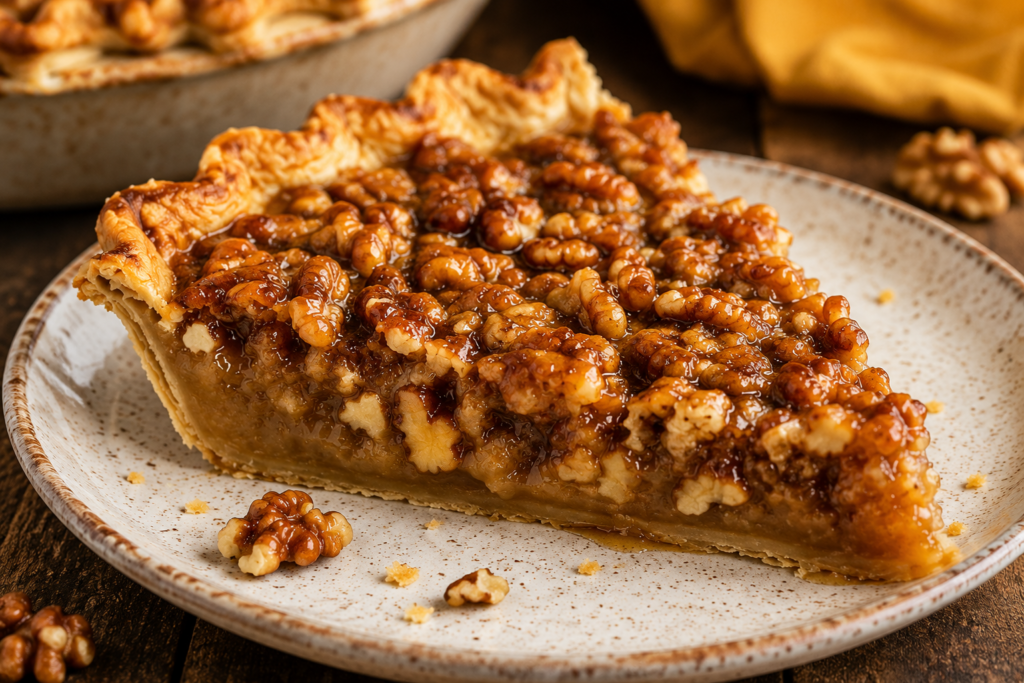
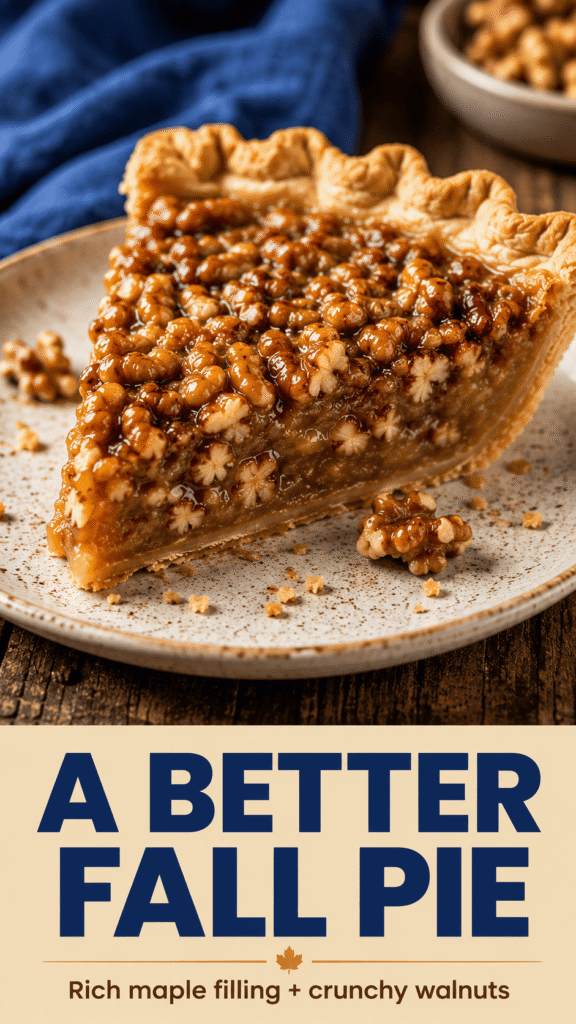
If you’re looking for a cozy fall dessert that’s a little different from classic pecan pie, this maple walnut pie is sure to become a favorite.
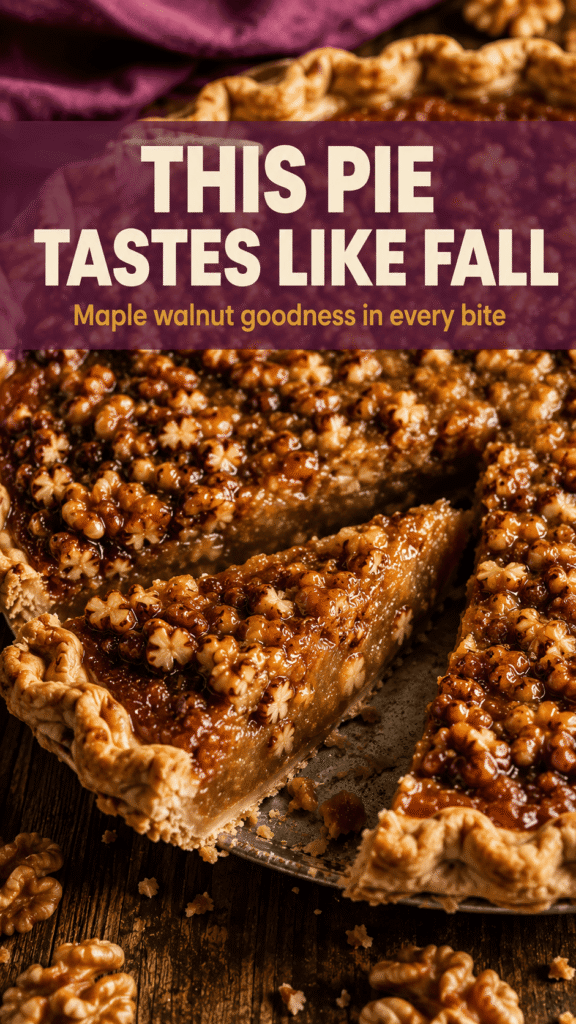
It has a rich maple filling, plenty of crunchy walnuts, and a buttery, flaky crust that comes together in every delicious bite.
This pie is simple enough for beginner bakers but impressive enough for Thanksgiving, Christmas, Friendsgiving, or any special gathering.
Why You’ll Love This Maple Walnut Pie
- Rich maple flavor – Pure maple syrup adds deep, warm sweetness without making the pie overly sugary.
- Perfect texture – Crunchy walnuts balance the smooth, gooey filling for a satisfying bite every time.
- Simple ingredients – Made with everyday pantry staples that are easy to find and use.
- Great for making ahead – Bake it a day or two in advance to save time before holidays and gatherings.
- Tastes amazing warm or cold – Enjoy it slightly warm with ice cream or chilled straight from the refrigerator.
Ingredients You’ll Need
For the Pie Crust
- 1 (9-inch) pie crust – Use a homemade crust or a store-bought refrigerated pie crust.
For the Maple Walnut Filling
- 1 cup pure maple syrup – Use 100% pure maple syrup for the best flavor.
- ½ cup light brown sugar, packed – Adds sweetness and a hint of caramel flavor.
- 3 large eggs – Helps set the filling as it bakes.
- ¼ cup unsalted butter, melted – Creates a rich, smooth filling.
- 1 teaspoon vanilla extract – Enhances the maple flavor.
- ¼ teaspoon salt – Balances the sweetness.
- 2 tablespoons all-purpose flour (or 1 tablespoon cornstarch) – Thickens the filling.
- 2 cups chopped walnuts – Adds plenty of crunch and nutty flavor.
- Optional: ½ teaspoon ground cinnamon or 1 tablespoon bourbon – For extra warmth and depth of flavor.
Ingredient Notes & Substitutions
Use Pure Maple Syrup
For the richest flavor, use 100% pure maple syrup instead of pancake syrup.
Pure maple syrup gives the filling a deep, natural sweetness and makes the pie taste much more homemade.
Best Walnuts to Use
- Chopped walnuts: Best for even distribution throughout the filling and easier slicing.
- Walnut halves: Great if you want a more decorative pie with a classic bakery-style look. You can also arrange halves on top before baking.
Can I Use Corn Syrup?
Yes, but the pie will have a different flavor and texture.
Corn syrup creates a sweeter, more traditional pie filling, while pure maple syrup gives the pie a richer taste with less sweetness and more depth.
Optional Flavor Additions
Try one or more of these for extra flavor:
- ½ teaspoon ground cinnamon for cozy warmth.
- ¼ teaspoon ground nutmeg for subtle spice.
- 1 tablespoon bourbon for a rich, caramel-like depth.
- 1 teaspoon orange zest to add a fresh, bright citrus note.
How to Make Maple Walnut Pie
Step 1: Prepare the Pie Crust
Preheat your oven to 350°F (175°C) so it’s fully heated before the pie goes in.
Place your 9-inch pie crust into a pie dish and gently press it into the bottom and sides without stretching the dough.
Trim any excess dough, then crimp or flute the edges however you like for a finished look.
If your crust feels soft after handling it, place it in the refrigerator for 10 to 15 minutes while you prepare the filling.
A chilled crust helps keep its shape and bakes up flakier.
If you’re using a homemade crust, make sure it’s rolled to an even thickness so it bakes evenly.
Step 2: Make the Maple Filling
In a large mixing bowl, whisk together the pure maple syrup, brown sugar, melted butter, eggs, vanilla extract, salt, and flour until the mixture is smooth.
Whisk gently instead of beating the mixture to avoid adding too much air.
Continue mixing until the brown sugar has mostly dissolved and no streaks of egg remain.
The filling should look smooth, glossy, and pour easily.
If you’re adding cinnamon, nutmeg, bourbon, or orange zest, stir them in now so the flavors are evenly mixed throughout the filling.
Step 3: Fold in the Walnuts
Add the chopped walnuts to the filling.
Use a spatula or wooden spoon to gently fold them into the mixture until every piece is coated.
Stir just until combined.
Overmixing isn’t necessary and can break the walnuts into smaller pieces.
If you toasted the walnuts beforehand, let them cool completely before adding them to the filling.
Step 4: Fill the Pie Shell
Place the prepared pie crust on a baking sheet to make it easier to move in and out of the oven.
Carefully pour the walnut filling into the crust.
Spread the walnuts into an even layer with a spatula if needed so every slice has a good balance of filling and nuts.
If you’d like a decorative finish, arrange a few walnut halves on top before baking.
The baking sheet will catch any small drips and makes handling the pie much easier.
Step 5: Bake Until Set
Bake the pie for 50 to 60 minutes, or until the edges are set and the center has a slight wobble when gently shaken.
The middle should jiggle just a little, not look completely liquid.
If the crust begins to brown too quickly, loosely cover the edges with aluminum foil or a pie shield during the last part of baking.
Avoid baking until the center is completely firm, as the filling will continue to set while the pie cools.
A properly baked pie will have a rich, smooth filling that slices beautifully.
Step 6: Cool Before Slicing
Transfer the pie to a wire rack as soon as it comes out of the oven.
Let it cool for at least 2 to 3 hours before slicing.
This cooling time is important because it allows the filling to fully set.
Cutting into the pie too early can cause the filling to run.
Serve the pie at room temperature or warm individual slices slightly before serving.
For an extra special dessert, add a dollop of whipped cream or a scoop of vanilla ice cream just before serving.
Tips for the Best Maple Walnut Pie
Don’t Overbake
Keep a close eye on the pie during the last 10 to 15 minutes of baking.
The filling is done when the edges are set, and the center still has a slight wobble when you gently move the pie.
The center will continue to firm up as the pie cools, so it’s better to take it out a little early than leave it in too long.
An overbaked pie can become dry and lose the soft, gooey texture that makes every slice so delicious.
If you’re unsure, check the pie a few minutes before the suggested baking time ends instead of waiting until the last minute.
Toast the Walnuts First
Toasting the walnuts is an easy step that adds even more flavor to your pie.
Spread the walnuts on a baking sheet and toast them at 350°F (175°C) for about 5 to 8 minutes, stirring once halfway through.
They should smell fragrant and lightly toasted, but not dark or burnt.
Let the walnuts cool completely before mixing them into the filling.
This simple step brings out their natural oils and gives the finished pie a richer, nuttier flavor.
If you’re short on time, you can skip this step, but toasted walnuts are well worth the extra few minutes.
Use Room Temperature Eggs
Take the eggs out of the refrigerator about 30 minutes before you begin baking.
Room temperature eggs blend more easily with the other ingredients, creating a smoother filling.
They also help the filling bake more evenly from edge to center.
If you forget to set them out ahead of time, place the eggs in a bowl of warm water for about 10 minutes to quickly bring them to room temperature.
Protect the Crust Edges
Pie crust edges usually brown faster than the center of the pie.
Check the crust about halfway through baking.
If the edges are already turning a deep golden brown, loosely cover them with strips of aluminum foil or use a pie shield.
This keeps the crust from burning while the filling finishes baking.
You’ll end up with a beautifully golden crust instead of one that’s too dark or dry.
Let the Pie Cool Completely
As tempting as it is to cut into the pie right away, giving it time to cool makes a big difference.
Let the pie rest on a wire rack for at least 2 to 3 hours after baking.
During this time, the filling finishes setting, making each slice neat and easy to serve.
If you slice it while it’s still hot, the filling may spill out instead of holding its shape.
A little patience is rewarded with clean slices, better texture, and the best maple walnut flavor in every bite.
Common Mistakes to Avoid
- Using imitation maple syrup – Stick with 100% pure maple syrup for the richest flavor and best texture.
- Overmixing the filling – Mix just until everything is combined to keep the filling smooth and prevent excess air bubbles.
- Cutting into the pie too soon – Let the pie cool completely so the filling has time to set properly.
- Burning the crust – Cover the crust edges with foil or a pie shield if they brown too quickly during baking.
- Underbaking the center – Bake until the edges are set and the center has only a slight wobble for perfectly sliced pie.
Variations to Try
Bourbon Maple Walnut Pie
Add 1 to 2 tablespoons of bourbon to the filling for a deeper, richer flavor.
The bourbon enhances the maple syrup with warm caramel and vanilla notes without overpowering the pie.
Most of the alcohol bakes off, leaving behind a subtle flavor that’s perfect for holiday desserts.
If you’re serving children or prefer not to use alcohol, simply leave it out and follow the original recipe.
Chocolate Maple Walnut Pie
Chocolate and walnuts are a classic pairing that works beautifully in this pie.
Stir ½ to ¾ cup semi-sweet chocolate chips into the filling before pouring it into the crust.
As the pie bakes, the chocolate melts into the filling and creates pockets of rich chocolate in every slice.
For an even bolder flavor, drizzle cooled slices with melted dark chocolate before serving.
A scoop of vanilla ice cream makes this variation even more irresistible.
Spiced Maple Walnut Pie
Give your pie a cozy fall twist by adding a few warm spices.
Mix ½ teaspoon ground cinnamon, ¼ teaspoon ground nutmeg, and a pinch of ground cloves into the filling.
These spices complement the maple syrup without hiding its natural flavor.
If you enjoy pumpkin spice desserts, this version offers a similar warmth while letting the walnuts remain the star.
Maple Walnut Pie Bars
Turn this recipe into easy-to-serve dessert bars for parties, bake sales, or holiday cookie trays.
Press a buttery shortbread crust into a 9×13-inch baking pan and bake it until lightly golden before adding the filling.
Spread the maple walnut filling evenly over the crust and bake until the center is set.
Once completely cool, slice into squares or rectangles for neat, portable treats.
These bars are easy to stack, store, and share, making them a great choice when serving a crowd.
Gluten-Free Maple Walnut Pie
It’s easy to make this pie gluten-free with a few simple swaps.
Use your favorite gluten-free pie crust, whether homemade or store-bought.
Replace the all-purpose flour in the filling with 1 tablespoon of cornstarch or a gluten-free flour blend designed for baking.
Double-check that all of your ingredients, especially vanilla extract and any optional flavorings, are labeled gluten-free if you’re baking for someone with gluten sensitivities.
The finished pie will still have the same rich maple flavor, crunchy walnuts, and smooth filling that everyone will enjoy.
What to Serve With Maple Walnut Pie
- Vanilla ice cream – The cool, creamy texture pairs perfectly with the warm maple filling.
- Fresh whipped cream – A light, fluffy topping that complements the rich pie without overpowering it.
- Salted caramel sauce – Adds a sweet and salty finish that enhances the maple and walnut flavors.
- Maple whipped cream – A touch of maple syrup in whipped cream makes every bite even more delicious.
- Hot coffee – A freshly brewed cup balances the pie’s sweetness and makes a cozy dessert pairing.
- Chai latte – Warm spices like cinnamon and cardamom pair beautifully with the maple filling.
- Hot apple cider – A classic fall drink that brings out the pie’s warm, comforting flavors.
How to Store Leftovers
Refrigerator Storage
Allow the pie to cool completely before storing it.
Cover the pie tightly with plastic wrap, aluminum foil, or place it in an airtight container.
Store the pie in the refrigerator for up to 4 days to keep the filling fresh and the crust tasting its best.
If you plan to enjoy a slice the next day, you can leave it whole and cover the pie dish, or store individual slices for quick servings.
For the best flavor, let refrigerated slices sit at room temperature for about 15 to 20 minutes before serving.
Freezing Instructions
Maple walnut pie freezes well, making it a great dessert to prepare ahead for the holidays.
Make sure the pie has cooled completely before wrapping it.
Wrap the entire pie or individual slices tightly in plastic wrap, then add a layer of aluminum foil or place them in a freezer-safe container.
Label the pie with the date so you know when it was frozen.
Store it in the freezer for up to 3 months.
When you’re ready to enjoy it, thaw the pie overnight in the refrigerator before reheating or serving.
Reheating Tips
If you prefer warm pie, reheat individual slices in a 300°F (150°C) oven for 10 to 15 minutes.
You can also warm a slice in the microwave for 15 to 30 seconds if you’re short on time.
Avoid overheating the pie, as the filling can become too soft and the crust may lose some of its crispness.
For the best texture, reheating in the oven is the preferred method because it helps keep the crust flaky.
Finish each warm slice with whipped cream or a scoop of vanilla ice cream for an extra special treat.
Make-Ahead Tips
This maple walnut pie is an excellent make-ahead dessert because the flavors become even richer after it has had time to rest.
If you’re planning for a holiday or special gathering, bake the pie one day in advance, let it cool completely, then cover it tightly and store it in the refrigerator until you’re ready to serve.
For even more flexibility, you can freeze the unbaked pie after assembling it by wrapping it well in plastic wrap followed by a layer of aluminum foil to protect it from freezer burn.
When you’re ready to bake, place the frozen pie directly into a preheated oven and simply add 10 to 15 extra minutes to the baking time, checking that the center is set before removing it from the oven.
You can also bake the pie completely and freeze it for longer storage, making it a great option for Thanksgiving, Christmas, or other busy holiday seasons.
Once the baked pie has cooled completely, wrap it tightly and freeze it for up to 3 months, then thaw it overnight in the refrigerator before serving.
If you’d like to enjoy it warm, reheat the thawed pie in a 300°F (150°C) oven for about 10 to 15 minutes to refresh the flaky crust and gently warm the filling.
FAQs
Can I make maple walnut pie ahead of time?
Yes! You can bake the pie up to 1 day in advance and store it covered in the refrigerator until you’re ready to serve.
Can I freeze maple walnut pie?
Absolutely. Wrap the cooled pie tightly and freeze it for up to 3 months. Thaw it overnight in the refrigerator before serving or reheating.
Can I use pancake syrup instead of pure maple syrup?
It’s not recommended. Pure maple syrup gives the pie its rich, natural flavor, while pancake syrup is much sweeter and won’t produce the same result.
Why is my maple walnut pie runny?
A runny pie is usually caused by underbaking or slicing it before it has fully cooled. Bake until the center has a slight wobble, then let it cool completely.
Should I toast the walnuts first?
Yes, if you have the time. Toasting the walnuts brings out their natural flavor and adds extra crunch to the finished pie.
Can I use pecans instead of walnuts?
Yes. Pecans make an excellent substitute and create a pie that’s similar to a classic pecan pie with a maple twist.
How do I know when the pie is done baking?
The pie is ready when the edges are set, and the center jiggles slightly when gently shaken. It will continue to firm up as it cools.
Does maple walnut pie need to be refrigerated?
Yes. Once the pie has cooled completely, store it covered in the refrigerator to keep it fresh for up to 4 days.
Maple Walnut Pie Recipe (Rich, Buttery & Perfect for Fall)
Difficulty: Easy8
Slices20
minutes1
hour1
hour20
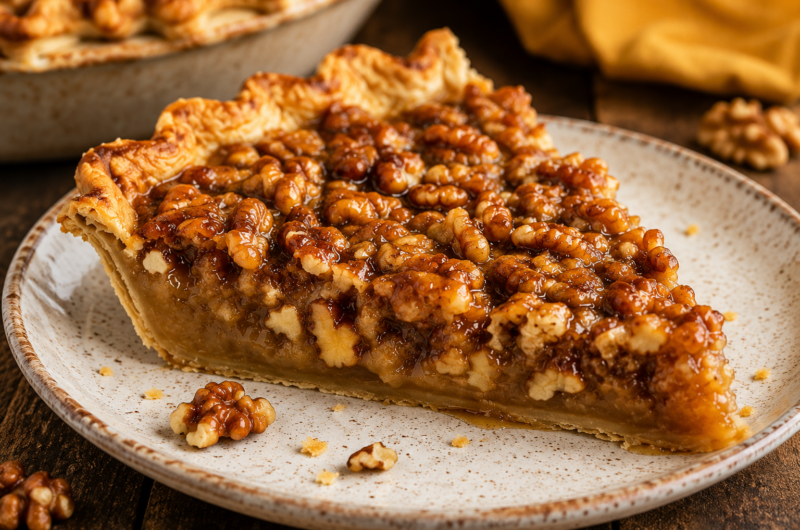
minutesA rich and buttery maple walnut pie made with pure maple syrup, crunchy walnuts, and a flaky pie crust, perfect for fall gatherings and holiday desserts.
Ingredients
1 (9-inch) pie crust, homemade or store-bought
1 cup pure maple syrup
½ cup packed light brown sugar
3 large eggs
¼ cup unsalted butter, melted
1 teaspoon vanilla extract
¼ teaspoon salt
2 tablespoons all-purpose flour
2 cups chopped walnuts
½ teaspoon ground cinnamon, optional
1 tablespoon bourbon, optional
Directions
- Preheat the oven: Heat your oven to 350°F (175°C) and place the pie crust in a 9-inch pie dish.
- Prepare the filling: In a large bowl, whisk together the maple syrup, brown sugar, eggs, melted butter, vanilla, salt, and flour until smooth.
- Add the walnuts: Fold the chopped walnuts into the filling until evenly distributed, being careful not to overmix.
- Fill the crust: Pour the mixture into the prepared pie crust and gently spread the walnuts into an even layer.
- Bake: Place the pie on a baking sheet and bake for 50–60 minutes, until the edges are set and the center has a slight wobble when gently shaken.
- Protect the crust: If the edges brown too quickly, loosely cover them with aluminum foil or a pie shield during the last part of baking.
- Cool: Transfer the pie to a wire rack and let it cool for 2–3 hours before slicing so the filling has time to set.
- Serve: Slice and serve at room temperature or slightly warm with whipped cream or vanilla ice cream.
Notes
- Use 100% pure maple syrup for the best flavor.
- Toast the walnuts for 5–8 minutes at 350°F (175°C) before adding them for extra nuttiness.
- Don’t worry if the center has a slight jiggle when the pie comes out of the oven; it will continue to set as it cools.
- Store leftovers covered in the refrigerator for up to 4 days.
- The baked pie can be frozen for up to 3 months when wrapped tightly.

Hi, I’m Sorenna Blythe, the baker and writer behind Mix Whisk Bake. I share simple, reliable recipes and honest kitchen moments to help home bakers bake with confidence and joy. When I’m not testing new treats, you’ll find me sipping coffee and dreaming up my next bake.