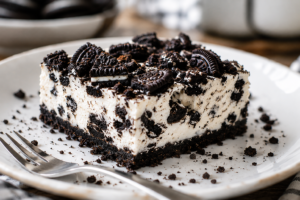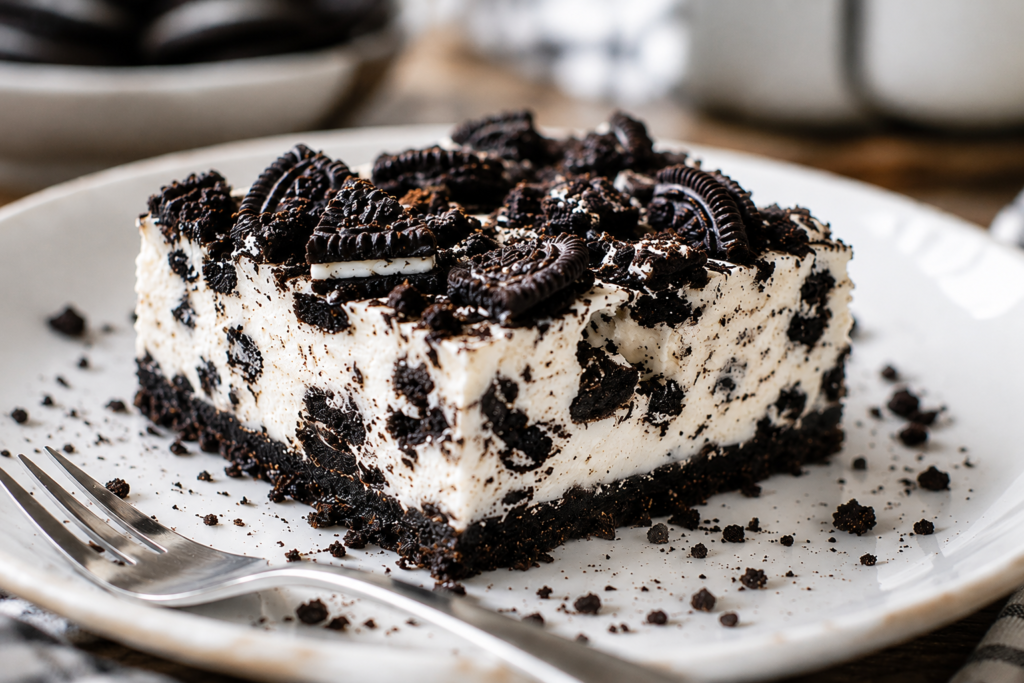
There’s something about Oreo cheesecake bars that makes them disappear fast at any gathering.
With a buttery Oreo crust, a rich and creamy cheesecake filling, and plenty of crunchy cookie pieces, they’re an easy dessert that everyone loves.
The best part is that you don’t need fancy ingredients or advanced baking skills to make them.
I’ll show you exactly how to make Oreo Crunch Cheesecake Bars that are smooth, creamy, and packed with Oreo flavor.
You’ll also find helpful tips to keep the crust crisp, the filling silky, and every slice looking just as delicious as it tastes.
Why You’ll Love This Oreo Crunch Cheesecake Bars Recipe
- Rich, creamy cheesecake filling – Every bite is smooth, velvety, and packed with classic cheesecake flavor.
- Thick Oreo cookie crust – A buttery Oreo base adds the perfect crisp texture and chocolatey taste.
- Crunchy Oreo pieces throughout – Crushed cookies mixed into the filling give every bite extra crunch.
- Easy to make with no complicated techniques – Simple ingredients and straightforward steps make this recipe beginner-friendly.
- Great make-ahead dessert – Prepare the bars in advance and chill until you’re ready to serve.
- Easy to customize with different Oreo flavors – Try Golden, Mint, Peanut Butter, or Birthday Cake Oreos for a fun twist.
- Perfect for freezing – Freeze individual bars for a quick dessert whenever you’re craving something sweet.
What Are Oreo Cheesecake Bars?
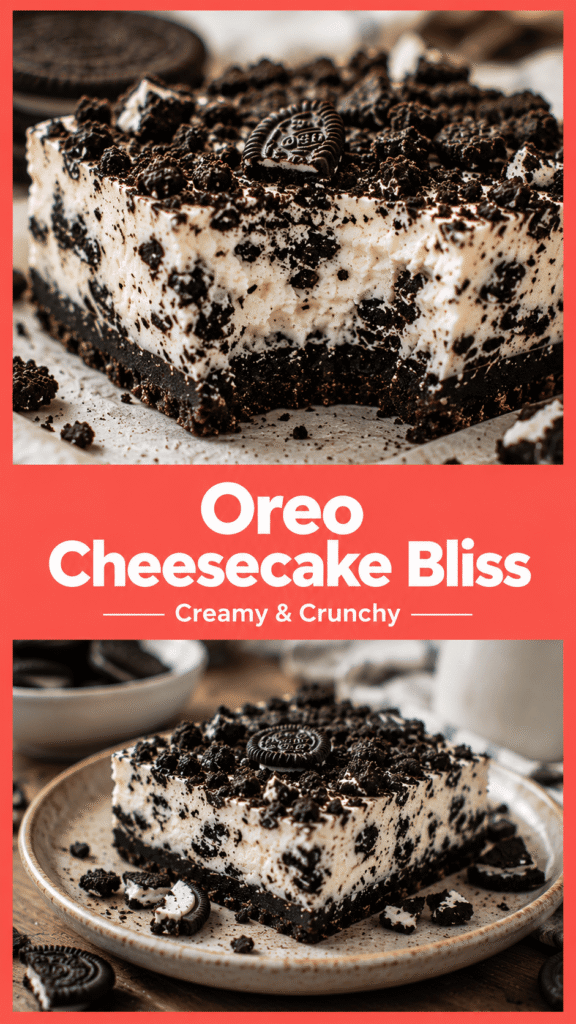
Oreo cheesecake bars are a simple, sliceable version of classic cheesecake that combines a buttery Oreo cookie crust, a rich cream cheese filling, and a crunchy Oreo topping into an easy-to-serve dessert.
Unlike a traditional round cheesecake that is often baked in a springform pan and may require a water bath or extra baking care, cheesecake bars are made in a square or rectangular baking pan, making them quicker to prepare, easier to bake, and much simpler to slice and serve.
One of the best things about Oreo cheesecake bars is their combination of textures, with a smooth and creamy cheesecake center sitting on a firm, chocolatey Oreo crust while crunchy Oreo pieces on top add a satisfying bite to every slice.
Because they are baked in a thinner layer than a full cheesecake, they also cool and chill faster, so you can enjoy them sooner without waiting all day for the dessert to set.
These bars are an excellent choice for beginner bakers because the recipe is forgiving, requires only a handful of everyday ingredients, and doesn’t involve complicated baking techniques or special equipment.
Even if this is your first time making cheesecake, following a few simple steps and allowing the bars to chill properly will reward you with neat slices that look impressive and taste just as delicious as those from your favorite bakery.
Ingredients You’ll Need
For the Oreo Crust
- 24 Oreo cookies, finely crushed (about 2½ cups)
- 5 tablespoons unsalted butter, melted
- Pinch of salt (optional), to balance the sweetness
Why this works
- The crushed Oreos and melted butter create a sturdy, buttery crust that holds its shape when sliced.
- Chilling the bars helps the crust firm up, making it easy to lift and cut into clean squares.
For the Cheesecake Filling
- 16 ounces (2 blocks) full-fat cream cheese, softened
- ½ cup granulated sugar
- 2 large eggs, at room temperature
- 1 teaspoon vanilla extract
- ¼ cup sour cream (optional), for an extra creamy texture
- 12 Oreo cookies, roughly crushed
Ingredient Tips
- Use full-fat cream cheese for the richest flavor and the smoothest, creamiest filling.
- Bring the cream cheese, eggs, and sour cream to room temperature so they blend together without lumps.
- Mix gently after adding the eggs to avoid incorporating too much air, which can cause cracks as the bars bake.
For the Topping
- 6 Oreo cookies, roughly crushed
- 8–10 mini Oreos (optional), for decorating
- 2 tablespoons melted chocolate (optional), for drizzling over the chilled bars
- Whipped cream (optional), for serving
Kitchen Equipment
You’ll only need a few basic kitchen tools to make these Oreo Crunch Cheesecake Bars:
- 8×8-inch or 9×9-inch baking pan – Perfect for baking evenly and creating thick, easy-to-slice bars.
- Mixing bowls – Use separate bowls for the crust and cheesecake filling.
- Electric mixer – Helps create a smooth, creamy filling without lumps.
- Rubber spatula – Great for scraping the bowl and gently folding in the crushed Oreos.
- Food processor or rolling pin – Use either to crush the Oreo cookies into fine crumbs for the crust.
- Measuring cups and measuring spoons – Ensure accurate ingredient measurements for the best results.
- Parchment paper – Lines the pan for easy removal and cleaner slices.
- Cooling rack – Allows the bars to cool evenly before chilling in the refrigerator.
How to Make Oreo Crunch Cheesecake Bars
Step 1: Prepare the Pan
Preheat your oven to 325°F (163°C) and line an 8×8-inch or 9×9-inch baking pan with parchment paper, leaving a little overhang on two sides so you can easily lift the bars out after they have chilled.
Lightly grease the parchment paper and any exposed sides of the pan with butter or non-stick cooking spray to help prevent sticking and make cleanup easier.
Step 2: Make the Oreo Crust
Place the Oreo cookies in a food processor and pulse until they become fine crumbs, or seal them in a zip-top bag and crush them with a rolling pin if you don’t have a food processor.
Pour the crumbs into a mixing bowl, add the melted butter, and stir until every crumb is evenly coated and resembles damp sand.
Transfer the mixture to the prepared pan and press it firmly into an even layer, making sure to reach the corners so every bar has a sturdy base.
If you’d like an extra crisp crust, bake it for 8–10 minutes, then let it cool for a few minutes before adding the cheesecake filling.
Pro Tip: Use the bottom of a measuring cup or a flat drinking glass to press the crust firmly into the pan for a smooth, level surface that won’t crumble when sliced.
Step 3: Prepare the Cheesecake Filling
Place the softened cream cheese in a large mixing bowl and beat it until it is completely smooth and free of lumps before adding any other ingredients.
Add the granulated sugar and continue mixing until the mixture is creamy and well combined.
Beat in the eggs one at a time, mixing just until each egg disappears into the batter before adding the next.
Stir in the vanilla extract, then gently fold the crushed Oreo cookies into the filling using a rubber spatula so the cookie pieces stay nice and chunky.
Step 4: Assemble
Pour the cheesecake filling over the prepared Oreo crust and spread it into an even layer with a spatula.
Lightly tap the pan on the counter a few times to remove any large air bubbles and help the filling settle evenly.
Sprinkle the remaining crushed Oreo pieces over the top, gently pressing a few larger chunks into the surface so they stay in place while baking.
Step 5: Bake
Bake the cheesecake bars for 35–40 minutes, or until the edges look set while the center still has a slight wobble when you gently shake the pan.
A small jiggle in the middle is exactly what you want because the cheesecake will continue to firm up as it cools.
Avoid baking until the center is completely firm, as overbaking can make the cheesecake less creamy and may cause cracks.
Step 6: Cool and Chill
Place the pan on a cooling rack and let the cheesecake bars cool completely to room temperature before transferring them to the refrigerator.
Refrigerate the bars for at least 4 hours, although chilling them overnight gives the best texture and makes slicing much easier.
Once fully chilled, lift the cheesecake out of the pan using the parchment paper, then slice it into bars with a sharp knife dipped in hot water and wiped dry between each cut for clean, bakery-style edges.
Expert Tips for Perfect Cheesecake Bars
- Don’t overmix the batter – Mix just until the ingredients are combined to help keep the cheesecake smooth and reduce the chance of cracks.
- Use room-temperature ingredients – Softened cream cheese and room-temperature eggs blend together more easily for a silky filling.
- Bake low and slow – A moderate oven temperature helps the cheesecake bake evenly without drying out.
- Chill before slicing – Refrigerating the bars for several hours allows the filling to fully set for neat, clean slices.
- Wipe the knife between cuts – Clean the knife after each slice for smooth, bakery-style edges.
- Use parchment for easy removal – The parchment overhang lets you lift the entire cheesecake out of the pan without breaking it.
Common Mistakes to Avoid
Overbaking
One of the most common cheesecake mistakes is leaving the bars in the oven for too long, which can turn the filling dry instead of rich and creamy.
The edges should look set while the center still has a slight wobble, as the cheesecake will continue to firm up while it cools.
If you’re unsure, it’s always better to remove the pan a minute or two early rather than bake it until the center is completely firm.
Using Cold Cream Cheese
Cold cream cheese doesn’t blend smoothly and often leaves small lumps throughout the filling that are difficult to remove later.
For the creamiest texture, let the cream cheese sit at room temperature for about 30 to 60 minutes before mixing.
Taking this simple step makes the batter smoother and much easier to work with.
Skipping Chill Time
It can be tempting to cut into the cheesecake as soon as it cools, but the filling needs time in the refrigerator to fully set.
Chilling the bars for at least four hours, or overnight if possible, helps them hold their shape and makes every slice cleaner and easier to serve.
The extra wait is worth it because the flavor also becomes richer as the bars chill.
Crushing Oreos Too Finely for the Filling
While fine crumbs are perfect for the crust, the Oreos folded into the cheesecake filling should be roughly crushed rather than finely ground.
Small cookie chunks create little pockets of chocolatey crunch that make every bite more interesting.
Aim for a mix of small and medium-sized pieces so you get the perfect balance of creamy cheesecake and crunchy Oreo in every slice.
Easy Recipe Variations
Golden Oreo Cheesecake Bars
Swap the classic Oreo cookies for Golden Oreos to give these cheesecake bars a delicious vanilla flavor with the same creamy texture you love.
This simple change creates a lighter-tasting dessert that pairs especially well with fresh berries or a drizzle of white chocolate.
Cookies and Cream Cheesecake Bars
For even more Oreo flavor, fold an extra 6 to 8 roughly crushed Oreo cookies into the cheesecake filling before spreading it over the crust.
The extra cookie pieces add more crunch and make every bite packed with cookies-and-cream goodness.
Double Chocolate Version
Chocolate lovers can stir ½ cup semi-sweet chocolate chips into the filling before baking and finish the chilled bars with a drizzle of melted chocolate.
The added chocolate creates an even richer dessert without changing the easy preparation.
Peanut Butter Oreo Bars
Warm ¼ cup creamy peanut butter just enough to make it easy to pour, then spoon it over the cheesecake batter and gently swirl it with a knife before baking.
The peanut butter adds a smooth, nutty flavor that pairs perfectly with the chocolate cookies and creamy cheesecake.
Mint Oreo Cheesecake Bars
Replace the regular Oreos with Mint Oreos to give the bars a cool, refreshing chocolate-mint flavor that’s perfect for holidays or anyone who loves mint desserts.
For an extra festive touch, sprinkle a few crushed Mint Oreos over the top after the bars have chilled.
Birthday Cake Oreo Bars
Use Birthday Cake Oreos in both the crust and filling to create a fun, colorful dessert that’s perfect for birthdays and celebrations.
Finish the bars with a handful of rainbow sprinkles and a drizzle of white chocolate for a cheerful bakery-style look that’s sure to impress both kids and adults.
Delicious Topping Ideas
- Chocolate ganache – Adds a rich, glossy chocolate layer for an extra indulgent finish.
- Whipped cream – A light and fluffy topping that balances the creamy cheesecake.
- Mini Oreos – Makes the bars look fun while adding even more Oreo crunch.
- Crushed candy bars – Sprinkle chopped chocolate candy bars on top for extra texture and flavor.
- Chocolate curls – Give the bars an elegant bakery-style appearance with little effort.
- Caramel drizzle – Adds a sweet, buttery flavor that pairs beautifully with the chocolate cookies.
- White chocolate drizzle – Creates a creamy contrast and makes the bars look extra special.
- Sprinkles – A colorful finishing touch that’s perfect for birthdays, holidays, and celebrations.
What to Serve with Oreo Cheesecake Bars
- Coffee – A hot cup of coffee balances the sweetness and complements the rich chocolate flavor.
- Espresso – The bold, smooth taste of espresso pairs perfectly with the creamy cheesecake.
- Cold milk – A classic choice that refreshes the palate between bites.
- Hot chocolate – For the ultimate chocolate treat, serve the bars with a warm mug of hot chocolate.
- Vanilla ice cream – A scoop of creamy vanilla ice cream adds a cool, delicious contrast.
- Fresh berries – Strawberries, raspberries, or blueberries provide a bright, fresh flavor that balances the richness.
- Chocolate sauce – Drizzle a little over each serving for an extra indulgent dessert.
How to Store Oreo Cheesecake Bars
Refrigerator
Once the cheesecake bars have cooled completely and chilled, place them in an airtight container or cover the baking pan tightly with plastic wrap or foil to keep them fresh.
Store the bars in the refrigerator for up to 5 days, where they’ll stay creamy, flavorful, and ready to enjoy whenever you’re craving a sweet treat.
If you’re stacking the bars in a container, place a sheet of parchment paper between the layers to prevent them from sticking together and to keep the toppings looking their best.
Freezer
Oreo Cheesecake Bars also freeze beautifully, making them a great dessert to prepare ahead for parties, holidays, or busy weeks.
Wrap each bar individually in plastic wrap, then place the wrapped bars in a freezer-safe container or zip-top freezer bag to protect them from freezer burn.
Freeze for up to 3 months for the best flavor and texture.
When you’re ready to serve them, transfer the bars to the refrigerator and let them thaw overnight, which helps the cheesecake return to its smooth, creamy consistency without becoming watery.
If you’d like a firmer texture, you can even enjoy the bars slightly chilled straight from the refrigerator after thawing, especially on warm days.
Make-Ahead Tips
Oreo Crunch Cheesecake Bars are an excellent make-ahead dessert because the flavors become even better after they’ve had time to chill, making them a stress-free choice for parties, holidays, birthdays, or any special occasion.
For the best results, bake the bars one day ahead so they have plenty of time to cool and fully set before serving, allowing you to focus on other dishes when it’s time to entertain.
Letting the cheesecake chill overnight creates a firmer texture that makes each bar easier to slice into clean, neat squares with smooth edges, giving them a bakery-style appearance.
If you’re planning to decorate the bars, wait until just before serving to add toppings like whipped cream, chocolate drizzle, caramel sauce, crushed Oreos, or sprinkles so they stay fresh, crisp, and visually appealing instead of becoming soft during storage.
Once everything is ready, simply slice, garnish, and serve for a delicious dessert that tastes freshly made with very little last-minute effort.
Troubleshooting Guide
Why did my cheesecake crack?
Cheesecake cracks are usually caused by overbaking or cooling too quickly after coming out of the oven.
Bake the bars just until the edges are set, and the center still has a slight jiggle, then let them cool gradually at room temperature before moving them to the refrigerator.
Even if a few small cracks appear, don’t worry because a sprinkle of crushed Oreos or a drizzle of chocolate easily covers them.
Why is my crust falling apart?
A crumbly crust usually means there wasn’t enough melted butter to hold the cookie crumbs together, or the mixture wasn’t pressed firmly into the pan.
Make sure every crumb is evenly coated with butter before pressing the crust into a compact, even layer using the bottom of a measuring cup or glass.
If you prefer an even sturdier base, bake the crust for 8 to 10 minutes before adding the cheesecake filling.
Why is my cheesecake runny?
A soft, runny center is often a sign that the cheesecake needed a little more baking time or more time to chill after baking.
The bars should still have a slight wobble in the middle when they come out of the oven, but they should firm up as they cool and chill.
For the best texture, refrigerate the cheesecake for at least four hours, although overnight chilling gives the most reliable results.
Why are my bars difficult to slice?
Cheesecake slices much more cleanly when it’s thoroughly chilled and cut with a warm, sharp knife.
Dip the knife into hot water, wipe it dry, and clean it between each cut to prevent the creamy filling from sticking to the blade.
Oreo Cheesecake Bar Flavor Combinations
- Chocolate Oreo + Chocolate Chips – Add semi-sweet or milk chocolate chips to the filling for an extra rich and chocolatey dessert.
- Peanut Butter Oreo + Peanut Butter Swirl – Use Peanut Butter Oreos and swirl creamy peanut butter through the cheesecake batter for a sweet and nutty twist.
- Mint Oreo + Dark Chocolate – Pair Mint Oreos with a drizzle of melted dark chocolate for a refreshing chocolate-mint combination.
- Golden Oreo + Vanilla Bean – Combine Golden Oreos with vanilla bean paste or vanilla bean seeds for a smooth, buttery vanilla flavor.
- Red Velvet Oreo + Cream Cheese Frosting Drizzle – Use Red Velvet Oreos and finish the chilled bars with a light cream cheese frosting drizzle for a festive dessert.
- Lemon Oreo + White Chocolate – Match Lemon Oreos with melted white chocolate for a bright, citrusy flavor that’s perfect for spring and summer.
Final Thoughts
Oreo Crunch Cheesecake Bars are the perfect combination of a buttery Oreo crust, a smooth and creamy cheesecake filling, and a crunchy cookie topping that makes every bite irresistible.
They’re easy enough for beginner bakers to make with confidence, yet delicious enough to serve at birthdays, holidays, potlucks, and family gatherings.
Feel free to try different Oreo flavors and your favorite toppings to make the recipe your own, and don’t be surprised if everyone comes back for another slice!
FAQs
Can I use reduced-fat cream cheese?
Yes, but full-fat cream cheese gives the bars a richer flavor and creamier texture.
Can I make these without sour cream?
Absolutely. Simply leave it out, and the bars will still be delicious.
Do I need a water bath?
No. Cheesecake bars bake evenly in a standard baking pan without a water bath.
Can I freeze them?
Yes. Wrap the bars individually and freeze them for up to 3 months.
Can I use different Oreo flavors?
Definitely! Golden, Mint, Peanut Butter, Birthday Cake, and many other Oreo varieties work well.
How long should they chill?
Chill the bars for at least 4 hours, but overnight is best for the cleanest slices.
Can I double the recipe?
Yes. Double the ingredients, use a 9×13-inch baking pan, and add a few extra minutes to the baking time if needed.
Oreo Crunch Cheesecake Bars (Creamy, Crunchy & Easy Dessert)
Difficulty: Easy16
Bars20
minutes35
minutes5
hours55
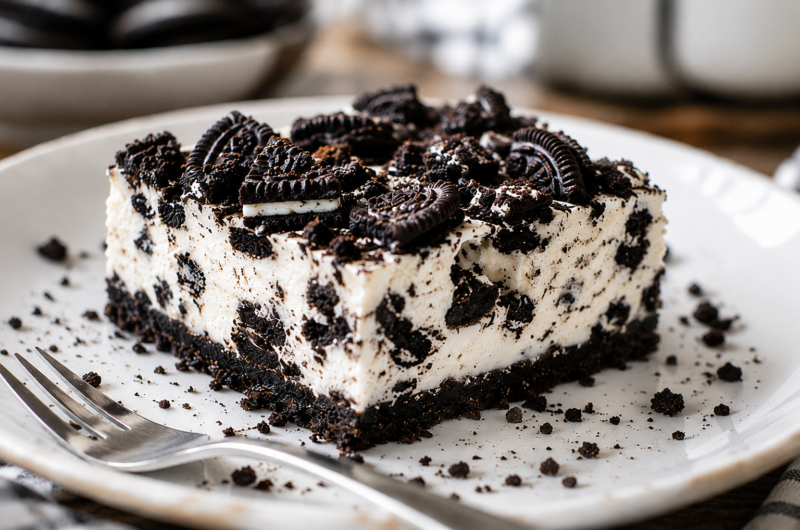
minutesCreamy Oreo Crunch Cheesecake Bars with a buttery cookie crust and crunchy Oreo topping. A simple make-ahead dessert that’s perfect for parties and family gatherings.
Ingredients
24 Oreo cookies, crushed
5 tbsp unsalted butter, melted
16 oz (450 g) cream cheese, softened
½ cup granulated sugar
2 large eggs
1 tsp vanilla extract
12 Oreo cookies, roughly chopped
Directions
- Preheat the oven to 325°F (163°C) and line an 8×8-inch baking pan with parchment paper.
- Mix the crushed Oreos with melted butter and press firmly into the pan.
- Beat the cream cheese and sugar until smooth, then mix in the eggs and vanilla.
- Fold in the chopped Oreos and spread the filling over the crust.
- Bake for 35–40 minutes, until the edges are set and the center has a slight jiggle.
- Cool completely, then refrigerate for at least 4 hours before slicing into bars.
Notes
- Use room-temperature cream cheese for the smoothest filling.
- Chill overnight for the cleanest slices.
- Store leftovers in the refrigerator for up to 5 days or freeze for up to 3 months.


Hi, I’m Sorenna Blythe, the baker and writer behind Mix Whisk Bake. I share simple, reliable recipes and honest kitchen moments to help home bakers bake with confidence and joy. When I’m not testing new treats, you’ll find me sipping coffee and dreaming up my next bake.