
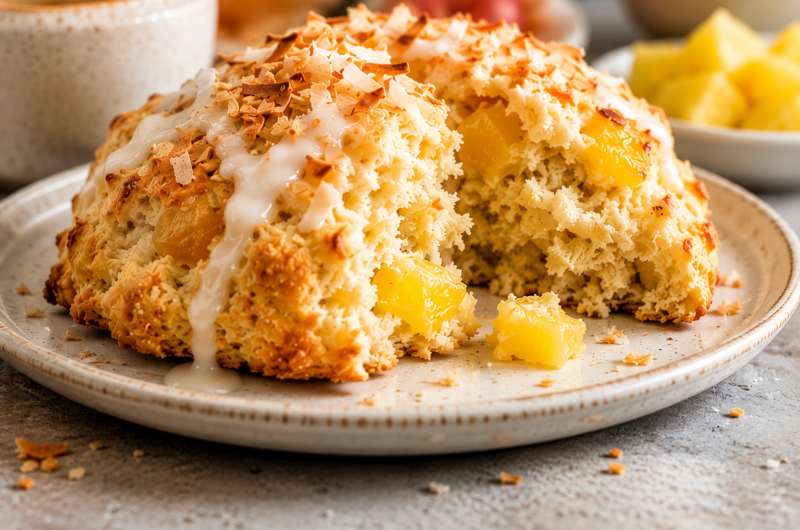
If you’re looking for a bakery-style treat with a tropical twist, these Pineapple Coconut Scones are a wonderful choice.
They’re soft, buttery, and filled with sweet pineapple and coconut flavor in every bite.
Pineapple adds a bright, fruity sweetness, while coconut brings a rich, slightly nutty taste that pairs perfectly with it.
Together, they create a scone that feels special without requiring complicated ingredients or techniques.
These scones are perfect for breakfast, brunch, afternoon tea, or whenever you want a simple homemade treat.
In this recipe, you’ll learn how to make tender, flavorful scones with easy-to-follow steps, helpful tips, and plenty of encouragement along the way.
Why You’ll Love These Pineapple Coconut Scones
- Soft and tender texture – These scones bake up light, moist, and buttery with a delicate crumb that stays tender in every bite.
- Sweet tropical flavor – The combination of juicy pineapple and coconut creates a bright, sunny flavor that feels like a mini tropical getaway.
- Easy to make with simple ingredients – You only need a handful of pantry staples and a few basic baking ingredients to make this recipe.
- Great for special occasions or everyday baking – They’re elegant enough for brunches and gatherings but simple enough to enjoy any day of the week.
- Freezer-friendly and make-ahead option – You can freeze the baked scones or prepare the dough ahead of time for fresh, homemade treats whenever you want them.

What Are Pineapple Coconut Scones?
Pineapple Coconut Scones are a tropical twist on traditional scones, a popular baked treat known for its rich, buttery texture and lightly sweet flavor.
Traditional scones are made with flour, butter, a leavening agent such as baking powder, and a liquid like cream or milk, creating a tender pastry that falls somewhere between a biscuit and a cake.
They are often enjoyed for breakfast, brunch, afternoon tea, or as a simple snack alongside coffee or tea.
British-style scones are typically less sweet and have a softer, lighter texture, making them ideal for serving with jam and clotted cream.
American-style scones are usually larger, slightly sweeter, and more buttery, with mix-ins such as fruit, chocolate, nuts, or spices baked directly into the dough.
This Pineapple Coconut Scones recipe follows the American-style approach, giving you a flavorful, bakery-style treat packed with tropical ingredients.
The addition of pineapple brings natural sweetness and a juicy burst of fruit flavor that helps keep the scones moist and tender.
Coconut adds a rich, lightly nutty taste and a subtle texture that pairs beautifully with the bright flavor of pineapple.
Together, these ingredients transform a classic scone into something that feels fresh, sunny, and a little more special than the traditional version.
The tropical flavors complement the buttery dough without overpowering it, creating a balanced scone that is sweet, comforting, and easy to enjoy.
Ingredients You’ll Need
For the Scones
- 2 cups (250g) all-purpose flour – Provides the structure for the scones while keeping them tender.
- 1/3 cup (67g) granulated sugar – Adds just the right amount of sweetness without overpowering the tropical flavors.
- 1 tablespoon baking powder – Helps the scones rise and creates a light, fluffy texture.
- 1/2 teaspoon salt – Balances the sweetness and enhances the overall flavor.
- 1/2 cup (113g) unsalted butter, cold and cubed – Creates flaky, buttery layers throughout the scones.
- 1/2 cup (120g) crushed pineapple, well-drained – Adds juicy pineapple flavor without making the dough too wet.
- 1/2 cup (40g) sweetened shredded coconut – Brings sweetness, texture, and a rich coconut flavor.
- 1/2 cup (120ml) heavy cream – Adds moisture and helps create a soft, tender crumb.
- 1 large egg – Binds the ingredients together and contributes to a rich texture.
- 1 teaspoon vanilla extract – Enhances the sweetness and complements the pineapple and coconut.
Optional Coconut Glaze
- 1 cup (120g) powdered sugar – Creates a smooth, sweet glaze.
- 2–3 tablespoons coconut milk – Thins the glaze while adding extra coconut flavor.
- 1/2 teaspoon vanilla extract – Adds a touch of warmth and depth to the glaze.
Ingredient Notes and Substitutions
Fresh vs Canned Pineapple
Fresh pineapple and canned pineapple both work well in this recipe, so you can use whichever is easier to find.
Fresh pineapple offers a bright, naturally sweet flavor and a slightly firmer texture that can add extra freshness to the finished scones.
If using fresh pineapple, finely chop it and gently pat it dry with paper towels to remove excess moisture before adding it to the dough.
Canned crushed pineapple is often the most convenient option because it is already finely chopped and easy to mix into the batter.
When using canned pineapple, drain it very well and lightly press out any extra liquid, as too much moisture can make the dough sticky and affect the texture of the scones.
Sweetened vs Unsweetened Coconut
Sweetened shredded coconut adds extra sweetness and helps create the classic tropical flavor many people expect from pineapple coconut baked goods.
It also tends to be slightly softer, which blends nicely into the dough and contributes to a tender bite.
Unsweetened shredded coconut can be used if you prefer a less sweet scone or want the pineapple flavor to stand out a little more.
Because unsweetened coconut contains less sugar, the finished scones may taste slightly less rich and sweet than the original recipe.
If you decide to use unsweetened coconut, you can leave the recipe as written or add an extra tablespoon of sugar if you prefer a sweeter result.
Dairy-Free Alternatives
If you need a dairy-free version, replace the butter with a good-quality plant-based baking butter that is designed for baking.
Keep the dairy-free butter cold just as you would regular butter, since cold fat helps create light and flaky scones.
The heavy cream can be replaced with full-fat canned coconut milk or a rich dairy-free cream alternative.
Using coconut milk is a great option because it complements the coconut flavor already present in the recipe.
The optional glaze can also be made dairy-free by using coconut milk in place of any dairy-based ingredients.
Tips for Achieving the Best Texture
One of the most important steps is keeping the butter cold until it is mixed into the flour.
Cold butter creates small pockets throughout the dough that help produce tender, flaky scones as they bake.
Be careful not to overmix the dough once the wet ingredients are added.
Mix only until the ingredients come together, as overworking the dough can make the scones dense instead of light and tender.
Always drain the pineapple thoroughly before measuring it for the recipe.
Excess liquid can make the dough overly wet and prevent the scones from rising properly.
If the dough feels very soft or sticky, place it in the refrigerator for 15 to 20 minutes before shaping and baking.
A short chill helps the butter firm up again and often leads to a better texture and taller rise.
Finally, measure the flour carefully by spooning it into the measuring cup and leveling it off rather than scooping directly from the bag.
This simple step helps prevent adding too much flour, which can make homemade scones dry instead of soft and tender.
Kitchen Equipment Needed
- Mixing bowls – You’ll need these for combining the dry ingredients and mixing the dough.
- Pastry cutter or fork – Used to cut the cold butter into the flour mixture for a flaky texture.
- Baking sheet – Provides a sturdy surface for baking the scones evenly.
- Parchment paper – Prevents sticking and makes cleanup quick and easy.
- Measuring cups and spoons – Help ensure accurate measurements for consistent baking results.
- Cooling rack – Allows the scones to cool properly while maintaining their texture.
How to Make Pineapple Coconut Scones
Step 1: Prepare the Oven and Baking Sheet
Preheat your oven to 400°F (200°C), so it has plenty of time to reach the correct temperature before the scones are ready to bake.
Line a large baking sheet with parchment paper to prevent sticking and make cleanup easier.
Setting up your baking sheet before mixing the dough helps everything move smoothly once the scones are shaped.
Step 2: Mix the Dry Ingredients
In a large mixing bowl, whisk together the all-purpose flour, granulated sugar, baking powder, and salt until evenly combined.
Taking a moment to thoroughly mix the dry ingredients helps distribute the baking powder evenly, which encourages a consistent rise during baking.
A quick whisk also helps break up any small lumps in the flour for a smoother dough.
Step 3: Cut in the Butter
Add the cold, cubed butter to the flour mixture.
Use a pastry cutter or fork to work the butter into the dry ingredients until the mixture resembles coarse crumbs with some pea-sized pieces of butter remaining.
Those small pieces of butter are important because they create pockets of steam in the oven, helping the scones become light and flaky.
If the butter starts to feel soft while you work, place the bowl in the refrigerator for a few minutes before continuing.
Step 4: Add the Wet Ingredients
In a separate bowl, stir together the well-drained crushed pineapple, heavy cream, egg, and vanilla extract until combined.
Pour the wet mixture into the bowl of dry ingredients.
Gently stir with a spoon or spatula until a shaggy dough begins to form.
The dough may look slightly uneven at this stage, and that is perfectly normal.
Avoid excessive mixing because overworked dough can lead to dense scones instead of tender ones.
Step 5: Fold in the Coconut
Add the shredded coconut to the dough.
Fold it in gently until it is evenly distributed throughout the mixture.
Use slow, light motions rather than vigorous stirring to keep the dough soft and tender.
Once the coconut is mixed in and no large pockets remain, stop mixing.
Step 6: Shape the Dough
Transfer the dough onto a lightly floured surface.
Gently bring it together with your hands until it forms a cohesive mass.
Pat the dough into a circle approximately 1 inch thick.
Use a sharp knife or bench scraper to cut the circle into 8 equal wedges.
Carefully transfer the wedges to the prepared baking sheet, leaving a little space between each one.
If the dough feels soft, chilling the shaped scones for 15 minutes before baking can help them hold their shape even better.
Step 7: Bake
Place the baking sheet in the preheated oven and bake for 18 to 22 minutes.
The exact baking time may vary slightly depending on your oven, so begin checking near the lower end of the time range.
The scones are ready when the tops and edges are lightly golden, and the centers look set rather than wet.
A gentle touch should feel firm but not hard.
The aroma of buttery coconut and sweet pineapple is another good sign that they are nearly done.
Step 8: Cool and Glaze
Remove the baking sheet from the oven and allow the scones to cool on the pan for about 5 minutes.
Transfer them to a cooling rack and let them cool completely or until just slightly warm.
If using the coconut glaze, whisk together the powdered sugar, coconut milk, and vanilla extract until smooth.
Drizzle the glaze over the cooled scones using a spoon or whisk.
Allow the glaze to set for a few minutes before serving.
Enjoy your Pineapple Coconut Scones fresh from the kitchen with a cup of coffee, tea, or your favorite tropical-inspired drink.
Tips for Perfect Pineapple Coconut Scones
Drain Pineapple Thoroughly
Pineapple contains a lot of natural juice, which can quickly add too much moisture to the dough if it is not drained properly.
After measuring the crushed pineapple, press it gently with the back of a spoon or pat it dry with paper towels to remove excess liquid.
Taking this extra minute helps prevent sticky dough and allows the scones to bake with a lighter, fluffier texture.
Properly drained pineapple also helps the scones hold their shape better during baking.
Avoid Overworking the Dough
One of the easiest ways to keep scones tender is to handle the dough as little as possible.
Mix the ingredients only until everything comes together, and no large pockets of flour remain.
It is completely normal for scone dough to look slightly rough and uneven.
Overmixing develops the gluten in the flour, which can make the finished scones tougher and less delicate.
A gentle touch will reward you with a softer crumb and a more enjoyable texture.
Use Cold Butter
Cold butter is one of the secrets behind bakery-style scones.
As the butter melts in the oven, it creates small pockets of steam that help form flaky layers throughout the dough.
For the best results, keep the butter refrigerated until you are ready to use it.
If your kitchen is warm, consider placing the cubed butter in the freezer for a few minutes before mixing.
Starting with cold butter gives the scones a lighter texture and a beautiful rise.
Chill the Dough if Needed Before Baking
If the dough feels soft, sticky, or difficult to handle, a short chill can make a big difference.
Place the shaped scones in the refrigerator for 15 to 20 minutes before baking.
This allows the butter to firm up again, which helps the scones keep their shape in the oven.
Chilled dough often produces taller, flakier scones with more defined edges.
This simple step is especially helpful on warm days when ingredients soften more quickly.
Measure Flour Correctly
Too much flour is one of the most common reasons homemade scones turn out dry.
Instead of scooping directly from the flour bag, spoon the flour into the measuring cup and level it off with a knife.
This method prevents the flour from becoming packed into the cup.
Accurate measuring helps maintain the right balance between the wet and dry ingredients.
When the flour is measured correctly, the dough stays easier to work with and the baked scones remain soft, tender, and delicious.
Variations to Try
Pineapple Coconut Macadamia Scones
If you enjoy a little crunch in your baked goods, try adding chopped macadamia nuts to the dough.
Macadamia nuts have a rich, buttery flavor that pairs beautifully with both pineapple and coconut.
Add about 1/2 cup of roughly chopped macadamia nuts when folding in the coconut for extra texture and flavor.
This variation feels especially special for brunches, holidays, or when you want a bakery-style treat at home.
Pineapple Coconut Lime Scones
A little lime can brighten the entire recipe and make the tropical flavors stand out even more.
Add the finely grated zest of one lime to the dry ingredients before mixing the dough.
The fresh citrus aroma complements the sweetness of the pineapple while balancing the richness of the coconut.
For even more flavor, stir a small amount of fresh lime juice into the glaze before drizzling it over the cooled scones.
This version is refreshing, vibrant, and perfect for warm-weather gatherings.
Toasted Coconut Scones
Toasting the coconut before adding it to the dough creates a deeper and more intense coconut flavor.
Simply spread the shredded coconut on a baking sheet and bake it for a few minutes until lightly golden.
Allow the coconut to cool completely before mixing it into the dough.
The toasted coconut adds a subtle nuttiness and a slightly crisp texture that makes each bite even more enjoyable.
This simple change can make the scones taste richer without adding extra ingredients.
Pineapple Coconut White Chocolate Scones
White chocolate adds a creamy sweetness that works wonderfully with tropical flavors.
Fold about 1/2 cup of white chocolate chips into the dough along with the coconut.
As the scones bake, the white chocolate becomes soft and melty, creating sweet pockets throughout the pastry.
This variation is a great choice for dessert-style scones or special occasions when you want something a little more indulgent.
A light coconut glaze on top complements the white chocolate beautifully.
Tropical Mixed Fruit Scones
Turn these scones into a tropical fruit medley by adding a few extra fruits to the dough.
Finely chopped mango, papaya, or dried pineapple works particularly well alongside the coconut.
Keep the total amount of added fruit moderate so the dough remains easy to handle and bakes evenly.
The combination of multiple fruits creates layers of flavor and makes every bite slightly different.
This variation is a fun way to use up extra fruit while bringing even more tropical character to the recipe.
What to Serve with Pineapple Coconut Scones
- Fresh fruit – Sliced mango, pineapple, berries, or melon add a refreshing contrast to the rich, buttery scones.
- Coffee – A hot cup of coffee pairs beautifully with the sweet tropical flavors and makes these scones perfect for breakfast.
- Tropical tea blends – Fruity or coconut-infused teas complement the pineapple and coconut without overpowering them.
- Coconut latte – The creamy coconut flavor enhances the tropical notes in the scones for a delicious café-style pairing.
- Whipped butter or cream cheese – A light spread of either adds extra richness and makes each bite even more satisfying.
Storage Instructions
Room Temperature Storage
If you plan to enjoy the scones within a couple of days, room temperature storage works perfectly.
Allow the scones to cool completely before storing them to prevent excess moisture from building up inside the container.
Place the scones in an airtight container or a sealed food storage bag.
They will stay fresh at room temperature for up to 2 days.
Keeping them sealed helps preserve their soft texture and prevents them from drying out too quickly.
Refrigerator Storage
For longer storage, place the cooled scones in an airtight container and refrigerate them.
They can be stored in the refrigerator for up to 5 days.
The cooler temperature helps maintain freshness, especially if the weather is warm or humid.
If your scones are topped with a coconut glaze, refrigeration can also help keep the glaze looking its best.
Keep in mind that refrigerated scones may become slightly firmer, but they soften nicely when warmed before serving.
Freezing Instructions
Pineapple Coconut Scones freeze very well, making them a convenient make-ahead treat.
Allow the baked scones to cool completely before freezing.
Wrap each scone individually in plastic wrap or foil to help protect it from freezer burn.
Place the wrapped scones in a freezer-safe container or zip-top freezer bag.
They can be frozen for up to 3 months while maintaining good flavor and texture.
Labeling the container with the date can help you keep track of freshness.
You can also freeze unbaked scone wedges and bake them directly from frozen when needed.
Simply add a few extra minutes to the baking time if baking from frozen.
Reheating Tips
For the best texture, warm stored scones before serving.
A microwave can quickly warm a scone in about 10 to 15 seconds.
If you prefer a slightly crisp exterior, reheat the scones in a 300°F (150°C) oven for 5 to 8 minutes.
Frozen scones can be thawed overnight in the refrigerator or at room temperature for about an hour before reheating.
A freshly warmed scone brings back much of the soft texture and buttery flavor that makes homemade baking so enjoyable.
If desired, add a fresh drizzle of glaze after reheating for an extra-special finishing touch.
Final Thoughts
These Pineapple Coconut Scones are a simple way to bring bright tropical flavors into your baking, combining sweet pineapple, rich coconut, and a tender, buttery texture in every bite.
The recipe is easy to follow, making it a great choice for both beginner and experienced bakers looking for a delicious homemade treat.
Feel free to make the recipe your own by trying some of the variations or adding your favorite mix-ins to create a new flavor combination.
FAQs
Can I use fresh pineapple?
Yes, fresh pineapple works well in this recipe. Just finely chop it and drain or pat it dry to remove excess moisture before adding it to the dough.
Can I make the dough ahead of time?
Yes, you can prepare and shape the dough up to 24 hours in advance. Keep the unbaked scones covered in the refrigerator until you’re ready to bake.
Why are my scones dry?
Dry scones are often caused by too much flour, overmixing the dough, or baking them for too long. Measure carefully and mix only until the dough comes together.
Can I freeze baked scones?
Absolutely. Allow the scones to cool completely, then store them in a freezer-safe container or bag for up to 3 months.
Can I use coconut milk instead of cream?
Yes, full-fat coconut milk is a great substitute for heavy cream. It adds extra coconut flavor while keeping the scones moist and tender.
Fluffy Pineapple Coconut Scones That Melt in Your Mouth
Difficulty: Easy8
Scones15
minutes20
minutes35
minutesThese Pineapple Coconut Scones are soft, buttery, and filled with sweet tropical flavors from juicy pineapple and shredded coconut. Perfect for breakfast, brunch, or an afternoon treat.
Ingredients
2 cups all-purpose flour
1/3 cup granulated sugar
1 tbsp baking powder
1/2 tsp salt
1/2 cup cold unsalted butter, cubed
1/2 cup crushed pineapple, well drained
1/2 cup sweetened shredded coconut
1/2 cup heavy cream
1 large egg
1 tsp vanilla extract
Directions
- Preheat the oven to 400°F (200°C) and line a baking sheet with parchment paper.
- Whisk together the flour, sugar, baking powder, and salt in a large bowl.
- Cut in the cold butter until the mixture resembles coarse crumbs.
- In a separate bowl, mix the pineapple, cream, egg, and vanilla.
- Add the wet ingredients to the dry ingredients and stir until just combined.
- Fold in the shredded coconut.
- Shape the dough into a circle, cut into 8 wedges, and place on the prepared baking sheet.
- Bake for 18–22 minutes or until lightly golden.
- Cool slightly before serving or adding glaze.
Notes
- Drain the pineapple thoroughly to prevent soggy dough.
- Keep the butter cold for flaky, tender scones.
- For extra coconut flavor, top with a simple coconut glaze after cooling.
- Store leftovers in an airtight container for up to 2 days.


Hi, I’m Sorenna Blythe, the baker and writer behind Mix Whisk Bake. I share simple, reliable recipes and honest kitchen moments to help home bakers bake with confidence and joy. When I’m not testing new treats, you’ll find me sipping coffee and dreaming up my next bake.


