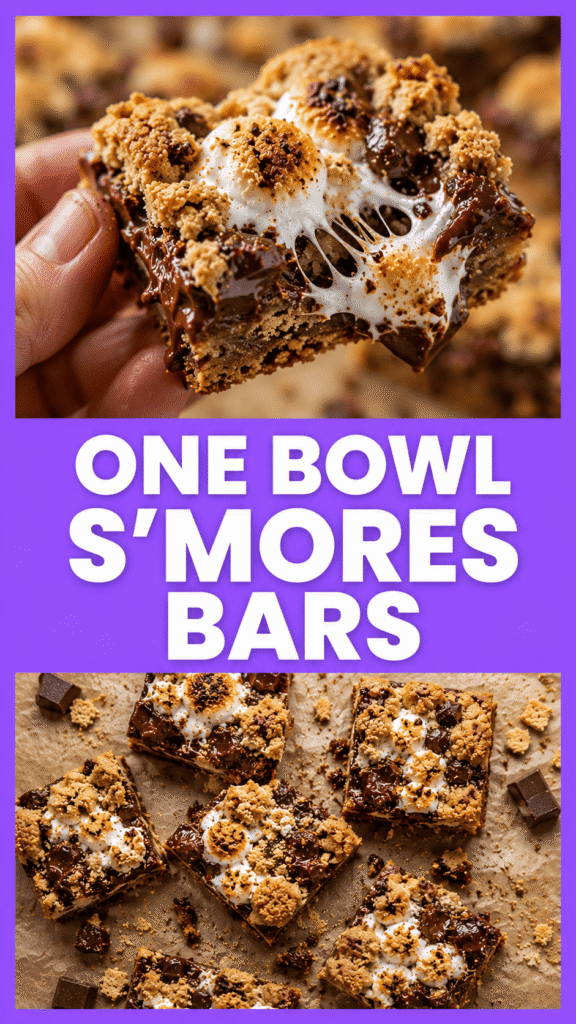
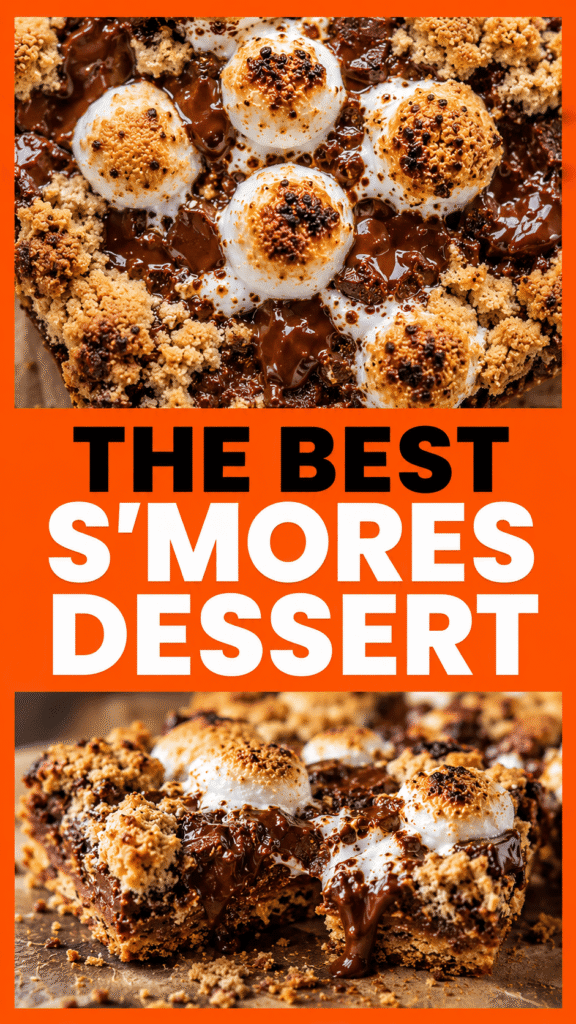
S’Mores Cookie Bars bring all the flavors of a classic campfire treat into one easy-to-make dessert.
With layers of graham crackers, melty chocolate, gooey marshmallows, and soft cookie dough, every bite is rich, sweet, and completely satisfying.
The best part? There’s no need to build a fire or roast marshmallows one at a time.
Everything bakes together in a single pan, making this recipe simple enough for beginners and perfect for busy days.
Grab your ingredients, and let’s make a dessert everyone will be asking for again and again.
Why You’ll Love These S’Mores Cookie Bars
- Easy to Make – Simple ingredients and straightforward steps make this a great recipe for both beginners and experienced bakers.
- No Campfire Required – Enjoy all the classic s’mores flavors right from your oven, any time of year.
- Perfect for Parties and Potlucks – These bars are easy to slice, serve, and transport, making them ideal for sharing.
- Rich, Gooey, and Crowd-Pleasing – Every bite is packed with soft cookie dough, melted chocolate, crunchy graham crackers, and gooey marshmallows.
What Are S’Mores Cookie Bars?
S’Mores Cookie Bars are a baked dessert that combines all the flavors people love about traditional s’mores into easy-to-slice bars that can be enjoyed any time of year.
Classic s’mores have been a favorite campfire treat for generations, made by sandwiching toasted marshmallows and melted chocolate between crunchy graham crackers, creating a simple dessert that is both comforting and memorable.
While traditional s’mores require a fire and can be a little messy to assemble, S’Mores Cookie Bars take those same familiar ingredients and layer them into a baking pan, making the process much easier and more convenient.
Instead of roasting marshmallows one at a time, everything bakes together in the oven, allowing the flavors to blend while saving time and effort.
The cookie dough adds a delicious twist to the original dessert by creating a soft, buttery base and topping that holds all the ingredients together.
A layer of graham crackers brings the classic honey-like flavor and subtle crunch that makes s’mores instantly recognizable.
The chocolate melts into rich pockets throughout the bars, adding sweetness and creating that irresistible gooey texture people expect from a great s’mores dessert.
As the bars bake, the marshmallows become soft and lightly toasted, giving each bite the familiar flavor of a freshly made campfire treat.
One of the best things about S’Mores Cookie Bars is the contrast of textures, with chewy cookie dough, crisp graham crackers, melted chocolate, and fluffy marshmallows all working together in every bite.
They offer the nostalgic taste of classic s’mores while being easier to prepare, easier to serve, and perfect for feeding a crowd.
Ingredients You’ll Need
For the Cookie Dough Base
- 1 cup (227g) unsalted butter, softened – Creates a rich, buttery flavor and helps keep the bars soft and chewy.
- 1 cup (220g) packed brown sugar – Adds moisture and a deeper caramel-like sweetness.
- ½ cup (100g) granulated sugar – Balances the flavor and helps create a tender texture.
- 2 large eggs – Provide structure and help bind the dough together.
- 2 teaspoons vanilla extract – Enhances the sweetness and overall flavor.
- 2½ cups (315g) all-purpose flour – Forms the base of the cookie dough.
- 1 teaspoon baking soda – Helps the bars rise slightly and stay soft.
- ½ teaspoon salt – Balances the sweetness and enhances the other flavors.
For the S’Mores Filling
- 9 whole graham cracker sheets (about 1 sleeve) – Creates the classic s’mores layer and adds a light crunch.
- 2 cups (340g) milk chocolate chips or 6 standard milk chocolate bars, broken into pieces – Provides rich, melty chocolate throughout the bars.
- 2 cups (100g) mini marshmallows – Add the gooey, toasted flavor that makes s’mores so irresistible.
Ingredient Tips and Substitutions
Best Chocolate to Use
Milk chocolate is the most traditional choice for s’mores cookie bars because it melts easily and provides the classic sweet flavor that many people associate with campfire s’mores.
Chocolate bars often create larger, gooey pockets of melted chocolate throughout the bars, making every bite extra rich and satisfying.
Chocolate chips are a convenient alternative and work just as well when you want a quicker prep process.
If you prefer a less sweet dessert, semi-sweet chocolate chips can help balance the sweetness of the marshmallows and cookie dough.
Dark chocolate is another great option for anyone who enjoys a deeper chocolate flavor with a little less sugar.
You can even combine different types of chocolate for extra flavor and texture in every slice.
Marshmallow Options
Mini marshmallows are the easiest choice because they spread evenly throughout the filling and create a soft, gooey texture.
Regular marshmallows can also be used if that is what you have on hand.
If using large marshmallows, cut them into smaller pieces so they distribute more evenly throughout the bars.
Some marshmallows may melt into the filling during baking, while others remain soft and fluffy, creating delicious texture throughout the dessert.
For extra marshmallow flavor, sprinkle a small handful on top during the last few minutes of baking.
Keep an eye on them as they bake since marshmallows can brown quickly under high heat.
Gluten-Free Alternatives
Making gluten-free s’mores cookie bars is simple with a few easy ingredient swaps.
Replace the all-purpose flour with a reliable one-to-one gluten-free baking flour that is designed to substitute regular flour in baking recipes.
Be sure to check the label on your graham crackers, as traditional versions usually contain wheat.
Many grocery stores now carry gluten-free graham crackers that provide the same classic flavor and crunch.
Double-check your chocolate and marshmallows as well, since ingredients can vary between brands.
Fun Add-Ins and Variations
One of the best things about s’mores cookie bars is how easy they are to customize.
A handful of peanut butter chips can add a rich, nutty flavor that pairs beautifully with chocolate and marshmallows.
Caramel bits create pockets of soft caramel that make the bars even more indulgent.
Chopped pecans or walnuts add a pleasant crunch and a slightly toasted flavor.
Cookies and cream pieces can give the bars a fun twist with extra texture and sweetness.
For a touch of contrast, sprinkle a little flaky sea salt over the bars after baking to help balance the sweetness.
You can also experiment with white chocolate, toffee bits, or crushed candy bars to create your own unique version of this crowd-pleasing dessert.
Kitchen Tools You’ll Need
- Mixing Bowls – Used for combining the cookie dough ingredients and organizing your filling components.
- Electric Mixer – Helps cream the butter and sugars quickly for a smooth, fluffy dough.
- Measuring Cups and Spoons – Ensure accurate measurements for consistent baking results.
- 9×13-Inch Baking Pan – Provides the perfect size and thickness for evenly baked cookie bars.
- Parchment Paper – Prevents sticking and makes it easy to lift the bars out of the pan for slicing.
How to Make S’Mores Cookie Bars
Step 1: Prepare the Baking Pan
Preheat your oven to 350°F (175°C) so it reaches the correct temperature before the bars go in.
Line a 9×13-inch baking pan with parchment paper, leaving a little overhang on the sides to make removing the bars easier later.
If needed, lightly grease any exposed areas of the pan to prevent sticking.
Taking a few extra minutes to prepare the pan properly will make serving and cleanup much simpler.
Step 2: Make the Cookie Dough
In a large mixing bowl, beat the softened butter, brown sugar, and granulated sugar together until the mixture looks light and creamy.
Add the eggs one at a time, mixing well after each addition to create a smooth batter.
Mix in the vanilla extract until fully combined.
In a separate bowl, whisk together the flour, baking soda, and salt.
Gradually add the dry ingredients to the wet ingredients, mixing just until a soft cookie dough forms.
Avoid overmixing at this stage, as too much mixing can make the finished bars less tender.
Step 3: Create the Graham Cracker Layer
Press about two-thirds of the cookie dough evenly into the bottom of the prepared baking pan.
Use clean hands or the back of a measuring cup to gently spread the dough into an even layer.
Arrange the graham cracker sheets over the dough, covering as much of the surface as possible.
The graham crackers create the signature s’mores flavor and add a slight crunch between the soft layers.
Don’t worry if the crackers need to be broken into smaller pieces to fit the pan.
Step 4: Add Chocolate and Marshmallows
Sprinkle the chocolate chips or broken chocolate bar pieces evenly over the graham cracker layer.
Distribute the mini marshmallows across the chocolate so every slice gets plenty of gooey goodness.
Try to spread the filling evenly from edge to edge to ensure a consistent flavor throughout the bars.
This layer is where the classic s’mores magic really starts to come together.
Step 5: Top with Remaining Cookie Dough
Take the remaining cookie dough and drop small spoonfuls over the marshmallow and chocolate layer.
Gently flatten some of the pieces with your fingers if needed to help cover more surface area.
The dough does not need to completely cover the filling.
Leaving a few gaps allows the chocolate and marshmallows to peek through and creates a beautiful finished appearance.
Step 6: Bake Until Golden Brown
Place the pan in the preheated oven and bake for 28 to 32 minutes, or until the top is lightly golden brown.
The edges should look set while the center may still appear slightly soft.
This is completely normal, as the bars will continue to firm up as they cool.
Avoid overbaking, since it can dry out the cookie dough and reduce the gooey texture that makes these bars so special.
If the marshmallows begin browning too quickly, loosely cover the pan with foil during the final few minutes of baking.
Step 7: Cool and Slice
Remove the pan from the oven and place it on a wire rack to cool.
Allow the bars to cool for at least 1 hour before slicing.
This cooling time helps the chocolate set slightly and makes the bars easier to cut into neat squares.
Once cooled, use the parchment paper overhang to lift the bars out of the pan.
Slice into squares or rectangles using a sharp knife.
For extra clean cuts, wipe the knife between slices.
Serve and enjoy every gooey, chocolate-filled bite.
Tips for Perfect S’Mores Cookie Bars
- Don’t Overbake – Remove the bars when the edges are golden, and the center is just set to keep them soft and gooey.
- Use Room Temperature Ingredients – Softened butter and room-temperature eggs mix more evenly, creating a smoother cookie dough.
- Let the Bars Cool Before Cutting – Allowing the bars to cool helps the layers set and makes slicing much easier.
- Line the Pan for Easy Removal – Parchment paper prevents sticking and lets you lift the entire batch out of the pan in one piece.
Common Mistakes to Avoid
- Overmixing the Dough – Mixing the dough too much can make the bars denser and less soft after baking.
- Using Too Many Marshmallows – Excess marshmallows can overflow during baking and create a sticky, uneven texture.
- Cutting While Still Hot – Slicing too soon can cause the bars to fall apart before the chocolate and marshmallows have time to set.
- Under-Layering the Chocolate – Using too little chocolate can reduce the rich, gooey flavor that makes S’Mores Cookie Bars so irresistible.
Delicious Variations
Peanut Butter S’Mores Cookie Bars
If you love the combination of chocolate and peanut butter, this variation is a must-try.
Add 1 cup of peanut butter chips alongside the chocolate chips for extra richness and a creamy, nutty flavor.
You can also drizzle melted peanut butter over the cooled bars for an easy finishing touch.
The peanut butter blends beautifully with the marshmallows and creates a dessert that feels even more indulgent.
This version is especially popular with kids and anyone who enjoys classic peanut butter cup flavors.
Cookies and Cream S’Mores Bars
For a fun twist, mix 1 cup of crushed chocolate sandwich cookies into the filling layer.
The cookie pieces add extra crunch while bringing a familiar cookies-and-cream flavor to every bite.
You can also replace some of the milk chocolate with white chocolate chips to enhance the cookies-and-cream theme.
The combination of crunchy cookies, melted chocolate, and gooey marshmallows creates a delicious contrast of textures.
Salted Caramel S’Mores Bars
Salted caramel adds a rich, buttery flavor that pairs wonderfully with chocolate and marshmallows.
Sprinkle caramel bits between the chocolate and marshmallow layers before baking.
You can also drizzle caramel sauce over the bars once they have cooled slightly.
A light sprinkle of flaky sea salt on top helps balance the sweetness and makes the flavors stand out even more.
The sweet-and-salty combination gives these bars a bakery-style feel without adding much extra work.
Double Chocolate S’Mores Bars
Chocolate lovers will appreciate this extra-rich version.
Replace ½ cup of the all-purpose flour with unsweetened cocoa powder to create a chocolate cookie dough base.
Add chocolate chips to both the filling and the cookie dough for even more chocolate flavor.
The result is a deeply chocolatey dessert with gooey marshmallows and plenty of melted chocolate in every bite.
Nutty S’Mores Cookie Bars
Adding nuts is an easy way to introduce extra crunch and flavor.
Stir ¾ cup of chopped pecans, walnuts, or almonds into the filling layer before baking.
The nuts provide a pleasant texture that contrasts nicely with the soft cookie dough and marshmallows.
Lightly toasting the nuts before adding them can bring out even more flavor.
How to Store S’Mores Cookie Bars
Proper storage helps keep your S’Mores Cookie Bars soft, chewy, and delicious long after they come out of the oven.
If you plan to enjoy them within a few days, allow the bars to cool completely and store them in an airtight container at room temperature.
Keeping the bars sealed helps prevent them from drying out and preserves the soft texture of the cookie dough and marshmallows.
When stored at room temperature, the bars typically stay fresh for up to 4 days.
For longer storage, place the cooled bars in an airtight container and refrigerate them for up to 1 week.
Separating layers with parchment paper can help prevent the bars from sticking together, especially if the chocolate and marshmallows are still slightly soft.
Before serving refrigerated bars, let them sit at room temperature for 15 to 20 minutes to soften and regain some of their gooey texture.
If you enjoy warm desserts, a few seconds in the microwave can help bring back the freshly baked taste and texture.
For the longest storage option, freeze the bars after they have cooled completely.
Wrap individual bars tightly in plastic wrap and place them in a freezer-safe container or zip-top freezer bag.
Freezing individual portions makes it easy to thaw only the amount you need.
Properly stored, S’Mores Cookie Bars can be frozen for up to 3 months without a significant loss of quality.
When you’re ready to enjoy them, transfer the bars to the refrigerator overnight or let them thaw at room temperature for about 1 hour.
A quick warm-up in the microwave after thawing can make the chocolate soft and melty again, giving the bars that fresh-from-the-oven appeal.
Make-Ahead Tips
S’Mores Cookie Bars are a great make-ahead dessert because several parts of the recipe can be prepared in advance without affecting the final results.
If you want to save time on baking day, prepare the cookie dough up to 2 days ahead and store it in an airtight container in the refrigerator.
Chilling the dough can actually make it easier to handle and spread when you’re ready to assemble the bars.
Before using refrigerated dough, let it sit at room temperature for 15 to 20 minutes so it softens slightly and becomes easier to work with.
You can also fully assemble the bars in the baking pan several hours before baking.
Simply layer the cookie dough, graham crackers, chocolate, marshmallows, and remaining dough as directed, then cover the pan tightly and refrigerate it until needed.
This option is especially helpful when preparing desserts for parties, holidays, or busy weekends.
When you’re ready to bake, remove the pan from the refrigerator while the oven preheats.
If the pan is very cold, you may need to add a few extra minutes to the baking time to ensure the center bakes evenly.
For even longer storage, the unbaked bars can be frozen before baking.
Assemble the bars in a freezer-safe pan, wrap the entire pan tightly with plastic wrap, followed by a layer of foil, and freeze for up to 3 months.
Labeling the pan with the date and baking instructions can make things easier when you’re ready to use it later.
When it’s time to bake, thaw the bars overnight in the refrigerator before placing them in the oven.
You can also bake them directly from frozen, but expect the baking time to increase by several minutes.
Serving Suggestions
- With Vanilla Ice Cream – A scoop of vanilla ice cream adds a cool, creamy contrast to the warm chocolate and marshmallows.
- Warm and Fresh from the Oven – Serve the bars slightly warm for the ultimate gooey texture and melted chocolate experience.
- For Birthday Parties and Gatherings – Easy-to-slice bars make serving a crowd simple while offering a dessert that guests of all ages enjoy.
- Holiday Dessert Tray Addition – These bars add a fun, nostalgic treat to holiday dessert spreads and cookie platters.
Final Thoughts
S’Mores Cookie Bars are the perfect way to enjoy all the classic flavors of s’mores in an easy, crowd-pleasing dessert.
With gooey marshmallows, melty chocolate, crunchy graham crackers, and chewy cookie dough in every bite, they deliver the comfort and nostalgia people love without the need for a campfire.
Don’t be afraid to make the recipe your own by adding favorite mix-ins like peanut butter, caramel, cookies, or nuts.
Share them with family and friends, and enjoy every delicious bite together.
FAQs
Can I use chocolate chips instead of chocolate bars?
Yes, chocolate chips work very well and are a convenient substitute for chocolate bars. They melt nicely and provide plenty of chocolate flavor throughout the bars.
Why are my marshmallows disappearing during baking?
Marshmallows naturally melt as they bake and may blend into the filling. Adding a few extra marshmallows on top during the last few minutes of baking can help them remain visible.
Can I freeze S’Mores Cookie Bars?
Yes, you can freeze baked or unbaked S’Mores Cookie Bars for up to 3 months when stored in an airtight freezer-safe container.
How do I keep the bars from sticking to the pan?
Line the baking pan with parchment paper before adding the dough. This makes removing and slicing the bars much easier.
Can I make these in a smaller baking dish?
Yes, but the bars will be thicker and may require a longer baking time. Watch the center closely and bake until it is set.
How long do S’Mores Cookie Bars stay fresh?
They stay fresh for up to 4 days at room temperature in an airtight container or up to 1 week when refrigerated.

S’Mores Cookie Bars: Gooey, Chocolatey Campfire Flavor
Difficulty: Easy16
Bars15
minutes30
minutes45
minutesThese S’Mores Cookie Bars combine chewy cookie dough, gooey marshmallows, melted chocolate, and crunchy graham crackers in one easy-to-make dessert that’s perfect for sharing.
Ingredients
1 cup unsalted butter, softened
1 cup brown sugar
½ cup granulated sugar
2 large eggs
2 teaspoons vanilla extract
2½ cups all-purpose flour
1 teaspoon baking soda
½ teaspoon salt
9 graham cracker sheets
2 cups milk chocolate chips or chopped milk chocolate
2 cups mini marshmallows
Directions
- Preheat the oven to 350°F (175°C) and line a 9×13-inch baking pan with parchment paper.
- Beat the butter and sugars until creamy, then mix in the eggs and vanilla.
- Stir in the flour, baking soda, and salt until a soft dough forms.
- Press two-thirds of the dough into the prepared pan.
- Layer the graham crackers over the dough, then top with chocolate and marshmallows.
- Drop spoonfuls of the remaining dough over the filling.
- Bake for 28–32 minutes, or until golden brown around the edges.
- Cool completely before slicing into bars.
Notes
- Do not overbake to keep the bars soft and gooey.
- Let the bars cool fully for cleaner slices.
- Store in an airtight container for up to 4 days.
- Freeze for up to 3 months for longer storage.

Hi, I’m Sorenna Blythe, the baker and writer behind Mix Whisk Bake. I share simple, reliable recipes and honest kitchen moments to help home bakers bake with confidence and joy. When I’m not testing new treats, you’ll find me sipping coffee and dreaming up my next bake.