Some of the best desserts are also the easiest to make.
You don’t need a long ingredient list or hours in the kitchen to create something sweet, comforting, and delicious.
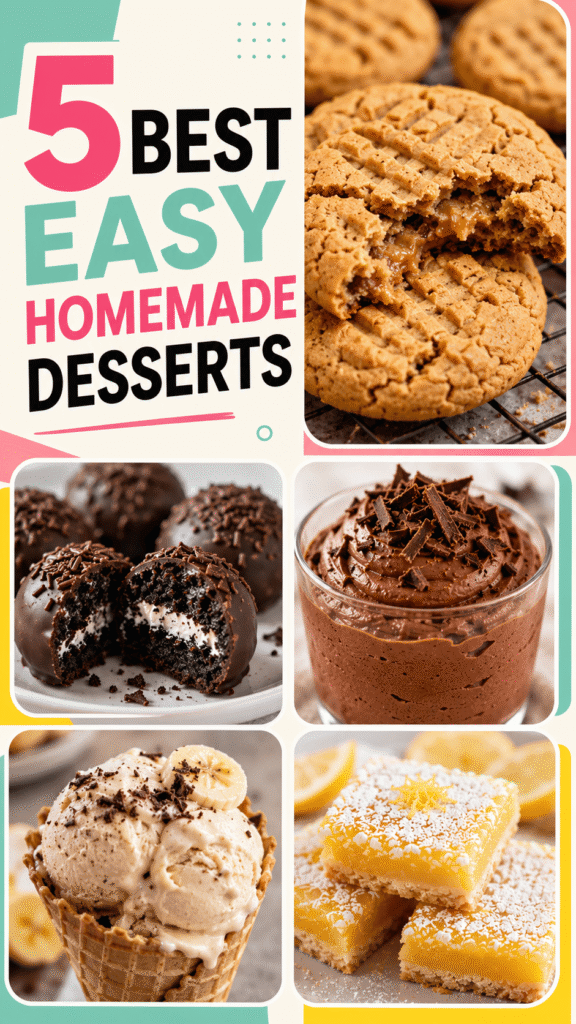
These 3-ingredient dessert recipes are perfect for busy days, last-minute cravings, or anyone just getting started with baking.
The ingredients are simple, the steps are easy to follow, and the results taste far better than you’d expect.

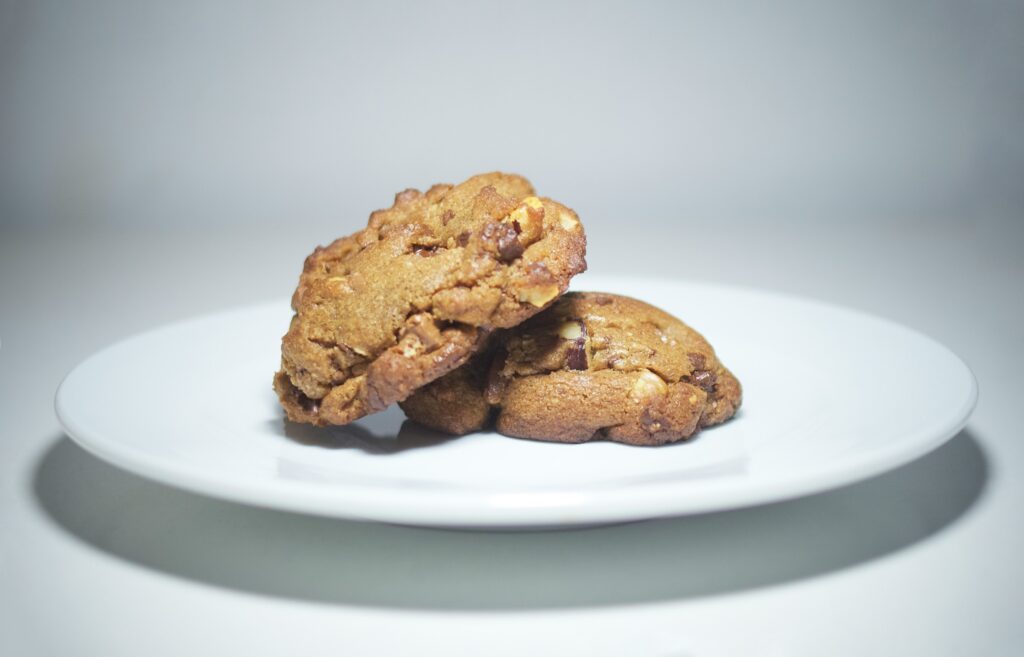
1. 3 Ingredient Peanut Butter Cookies
Why You’ll Love This Recipe
These peanut butter cookies are one of the easiest desserts you can make at home, but they still taste like something from a bakery.
They have crisp edges, soft centers, and a rich peanut butter flavor in every bite.
Because there’s no flour needed, the dough comes together in minutes with almost no cleanup.
This recipe is especially great for beginner bakers since the steps are simple and hard to mess up.
If you’ve never baked cookies before, this is a perfect place to start.
They’re also ready fast.
From mixing bowl to warm cookies, the whole process takes less than 20 minutes.
Ingredients
- 1 cup creamy peanut butter
- 1 cup granulated sugar
- 1 large egg
Instructions
Step 1: Mix the Ingredients
Preheat your oven to 350°F (175°C). Line a baking tray with parchment paper or lightly grease it.
In a medium mixing bowl, add the peanut butter, sugar, and egg. Stir everything together until a thick cookie dough forms. The dough should look smooth and slightly glossy.
If the mixture feels too sticky to handle, let it sit for 2 to 3 minutes before shaping the cookies.
Step 2: Shape the Cookies
Scoop about 1 tablespoon of dough and roll it into balls using your hands. Place the dough balls onto the prepared baking tray, leaving a little space between each one.
Use a fork to gently press down each cookie in a crisscross pattern. This helps the cookies bake evenly and gives them that classic homemade look.
Step 3: Bake Until Golden
Bake for 8 to 10 minutes, or until the edges look lightly golden.
The cookies may seem soft when they first come out of the oven, but they will firm up as they cool. Let them rest on the tray for 5 minutes before moving them to a wire rack.
Tips for the Best Cookies
- Use creamy peanut butter for the smoothest texture and easiest mixing.
- Don’t overbake. The cookies continue setting as they cool.
- For extra flavor, sprinkle a tiny pinch of sea salt on top before baking.
- If you like softer cookies, remove them from the oven closer to the 8-minute mark.
2. 3 Ingredient Chocolate Mousse
Why This Dessert Is So Popular
Chocolate mousse sounds fancy, but this version keeps things incredibly simple.
It’s smooth, rich, and creamy without requiring complicated steps or special tools.
This dessert works well for almost any occasion.
You can serve it at dinner parties, make it for birthdays, or enjoy it as a quick late-night treat.
Since there’s no baking involved, it’s also perfect for warmer days when you don’t want to turn on the oven.
The texture is light and airy while still feeling indulgent and chocolatey.
Ingredients
- 1 cup chocolate chips or chopped chocolate
- 1 ½ cups heavy cream
- 2 tablespoons powdered sugar
Instructions
Step 1: Melt the Chocolate
Place the chocolate into a microwave-safe bowl. Heat in 20-second intervals, stirring between each one until smooth and melted.
Let the chocolate cool slightly so it doesn’t melt the whipped cream later.
Step 2: Whip the Cream
In a separate bowl, pour in the heavy cream and powdered sugar. Use a hand mixer or whisk to beat the cream until soft peaks form.
Soft peaks mean the cream holds its shape but still has a slight droop at the tip.
Step 3: Fold and Chill
Add the melted chocolate to the whipped cream slowly. Gently fold everything together using a spatula until fully combined.
Try not to stir too aggressively. Folding keeps the mousse light and fluffy.
Spoon the mousse into serving glasses or bowls and refrigerate for at least 1 hour before serving.
Serving Ideas
- Top with fresh strawberries or raspberries
- Add chocolate shavings for extra richness
- Serve with crushed cookies for texture
- Chill overnight for an even thicker mousse
3. 3 Ingredient Banana Ice Cream
Why You’ll Love It
This banana ice cream is creamy, naturally sweet, and surprisingly satisfying for such a simple recipe.
It’s a great option when you want something cold and chocolatey without making a traditional ice cream base.
Frozen bananas create a smooth texture that feels very close to soft serve ice cream.
The peanut butter adds richness, while cocoa powder gives it a deep chocolate flavor.
It’s also a fun recipe for kids because the blender does most of the work.
Ingredients
- 4 ripe bananas, sliced and frozen
- 2 tablespoons peanut butter
- 2 tablespoons cocoa powder
Instructions
Step 1: Freeze the Bananas
Slice ripe bananas into small rounds and place them on a tray or plate lined with parchment paper.
Freeze for at least 3 hours, or until fully solid. Using ripe bananas makes the dessert sweeter and creamier.
Step 2: Blend Until Creamy
Add the frozen bananas, peanut butter, and cocoa powder to a food processor or blender.
Blend until smooth and creamy. At first, the mixture may look crumbly, but keep blending. It will slowly turn into a soft ice cream texture.
Pause occasionally to scrape down the sides if needed.
Step 3: Serve Immediately or Freeze
Serve right away for a soft serve consistency.
If you prefer firmer ice cream, transfer it to a container and freeze for another 1 to 2 hours before scooping.
Flavor Variations
- Add a pinch of cinnamon for warmth
- Swap cocoa powder for fresh strawberries
- Blend in chocolate chips or crushed nuts
- Add a splash of vanilla extract for extra flavor
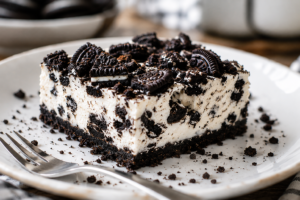
4. 3 Ingredient Oreo Truffles
What Makes These So Easy
Oreo truffles are one of those desserts that always look impressive, even though they take very little effort to make.
They’re rich, creamy, and coated in chocolate, almost like homemade cake pops.
Since there’s no baking involved, this recipe is beginner-friendly and perfect for parties, holidays, or edible gifts.
The inside stays soft and fudgy while the chocolate coating adds a satisfying crunch.
Ingredients
- 36 Oreo cookies
- 8 ounces cream cheese, softened
- 2 cups melted chocolate
Instructions
Step 1: Crush the Oreos
Place the Oreo cookies into a food processor and blend until fine crumbs form.
If you don’t have a food processor, place the cookies in a zip-top bag and crush them using a rolling pin.
Step 2: Mix with Cream Cheese
Add the softened cream cheese to the Oreo crumbs and mix until fully combined.
Roll the mixture into small balls and place them onto a parchment-lined tray.
Freeze the truffles for 15 to 20 minutes, so they hold their shape better when dipped.
Step 3: Dip in Melted Chocolate
Melt the chocolate until smooth.
Using a fork or spoon, dip each truffle into the chocolate coating and let the extra chocolate drip off before placing them back onto the tray.
Allow the chocolate to set completely before serving.
Decoration Ideas
- Sprinkle crushed Oreos on top
- Drizzle with white chocolate
- Add colorful sprinkles for parties
- Use dark chocolate for a richer flavor
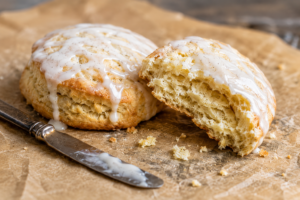
5. 3 Ingredient Lemon Bars
Why These Lemon Bars Stand Out
These lemon bars are bright, soft, and full of fresh citrus flavor.
The texture is somewhere between a cake bar and a fudgy brownie, making them extra satisfying.
Using lemon pie filling keeps the recipe quick and simple while still delivering bold lemon flavor.
The cake mix creates a soft, buttery base without needing extra ingredients.
They’re perfect for spring gatherings, bake sales, or afternoon snacks with coffee or tea.
Ingredients
- 1 box yellow cake mix
- 1 can lemon pie filling
- 2 large eggs
Instructions
Step 1: Prepare the Batter
Preheat your oven to 350°F (175°C). Grease or line an 8×8-inch baking pan.
In a large bowl, mix together the cake mix, lemon pie filling, and eggs until fully combined. The batter will be thick.
Spread the mixture evenly into the prepared pan.
Step 2: Bake Until Set
Bake for 25 to 30 minutes, or until the edges are lightly golden and the center looks set.
Avoid overbaking so the bars stay soft and moist.
Step 3: Cool and Slice
Let the bars cool completely before slicing. This helps them firm up and gives cleaner cuts.
Cut into squares and serve chilled or at room temperature.
Optional Add-Ons
- Dust with powdered sugar before serving
- Add fresh lemon zest for a stronger citrus flavor
- Serve with whipped cream
- Chill in the fridge for a firmer texture
Tips for Making 3 Ingredient Desserts
Choose High-Quality Ingredients for the Best Flavor
With simple desserts, every ingredient matters.
Since these recipes only use a few items, the flavor of each one stands out much more than it would in a complicated recipe.
Good peanut butter gives cookies a richer taste and smoother texture.
Better chocolate creates a creamier mousse and more flavorful truffles.
Even ripe bananas can make a huge difference in homemade ice cream.
You don’t need the most expensive ingredients in the store, but choosing fresh and good-quality basics will make your desserts taste noticeably better.
If possible, use:
- Real butter or full-fat dairy for richer flavor
- Fresh eggs for better texture
- Chocolate you actually enjoy eating on its own
- Ripe fruit for natural sweetness
Small upgrades can completely change the final result.
Measure Carefully
Three-ingredient desserts are simple, but that also means there’s less room for mistakes.
A little too much flour, peanut butter, or liquid can change the texture quickly.
For the best results, measure ingredients carefully and avoid guessing amounts.
Even quick recipes work better when the balance is right.
When measuring sticky ingredients like peanut butter, lightly greasing the measuring cup first can help everything slide out more easily.
For dry ingredients, level the top with a spoon or knife instead of packing it down.
If your dough or batter looks slightly different from what you expected, don’t panic.
Small texture changes happen depending on the brand of ingredients you use.
Most of these desserts are very forgiving and still turn out delicious.
Keep Pantry Staples Stocked for Easy Last-Minute Desserts
One of the best things about 3-ingredient desserts is how easy they are to make with ingredients you may already have at home.
Keeping a few basic baking staples in your kitchen makes it simple to throw together a quick dessert whenever cravings hit.
This is especially helpful on busy nights, during holidays, or when unexpected guests stop by.
Some great pantry staples to keep on hand include:
- Peanut butter
- Cake mix
- Chocolate chips
- Oreo cookies
- Cocoa powder
- Sweetened condensed milk
- Eggs
- Frozen bananas
Having these basics ready means you’re always just a few minutes away from a homemade treat.
And remember, simple baking is still real baking.
You don’t need complicated recipes or fancy equipment to make desserts that taste amazing.
Sometimes the easiest recipes become the ones you make again and again.
Final Thoughts
These 3 ingredient desserts prove that homemade treats don’t have to be complicated to taste amazing.
With just a few simple ingredients and easy steps, you can make cookies, mousse, ice cream, and more without spending hours in the kitchen.
Try one recipe or make a few favorites throughout the week.
They’re quick, beginner-friendly, and perfect for satisfying sweet cravings anytime.
Which 3-ingredient dessert are you making first?
FAQs
Can I make these desserts ahead of time?
Yes. Most of these desserts can be made a day or two in advance. Store them in an airtight container in the fridge to keep them fresh and delicious.
Are 3-ingredient desserts beginner-friendly?
Absolutely. These recipes are simple, quick, and easy to follow, which makes them perfect for beginner bakers or anyone short on time.
Can I customize these recipes?
Definitely. You can add chocolate chips, nuts, fruit, spices, or toppings to create different flavors and make each dessert your own.
How should I store leftovers?
Store cookies and bars in an airtight container at room temperature for a few days.
Desserts like mousse, truffles, and banana ice cream should be kept in the refrigerator or freezer until ready to serve.

Hi, I’m Sorenna Blythe, the baker and writer behind Mix Whisk Bake. I share simple, reliable recipes and honest kitchen moments to help home bakers bake with confidence and joy. When I’m not testing new treats, you’ll find me sipping coffee and dreaming up my next bake.