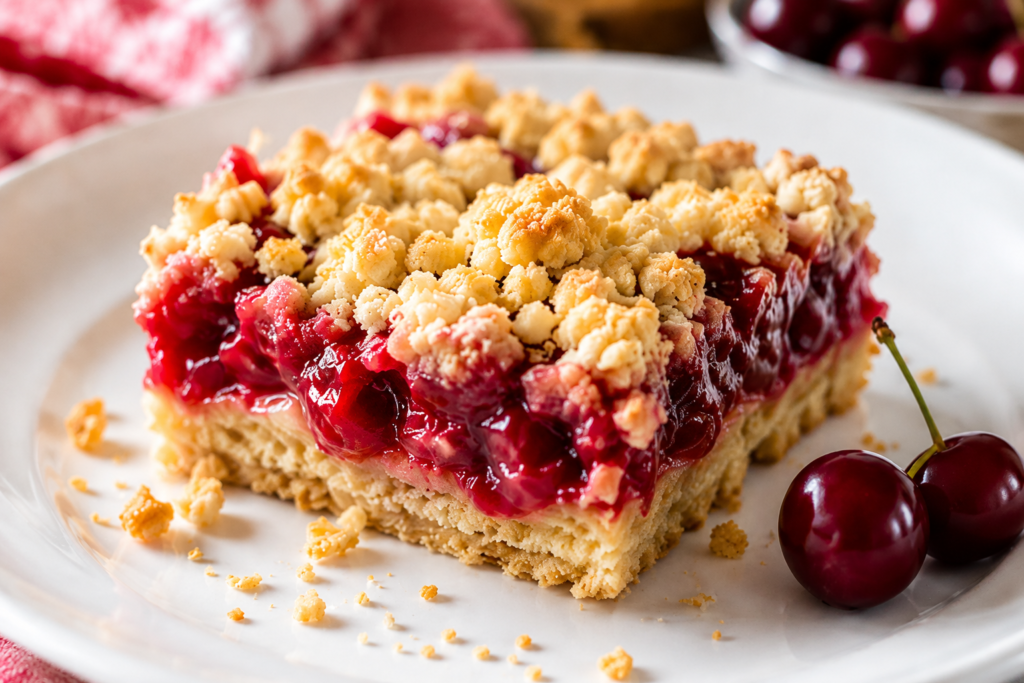
Cherry Crumble Pie Bars combine the sweet-tart flavor of cherry pie with the buttery crunch of a classic crumble topping.
These easy dessert bars feature a tender shortbread-style crust, juicy cherry filling, and golden oat crumble, making them perfect for holidays, potlucks, summer gatherings, or an everyday treat.
Why You’ll Love These Cherry Crumble Pie Bars
- Easy Alternative to Traditional Cherry Pie – Enjoy all the flavors of classic cherry pie without the hassle of rolling out pie dough.
- Made with Simple Pantry Ingredients – Most of the ingredients are kitchen staples you likely already have on hand.
- Perfect Balance of Sweet and Tart Flavors – Juicy cherries and a buttery crumble create an irresistible flavor combination.
- Great for Parties, Picnics, and Bake Sales – Easy-to-serve bars make sharing simple and mess-free.
- Can Be Made Ahead of Time – Prepare them in advance for stress-free entertaining and gatherings.
- Delicious Served Warm or Chilled – Enjoy them fresh from the oven or straight from the refrigerator for a tasty treat any time.
What Are Cherry Crumble Pie Bars?
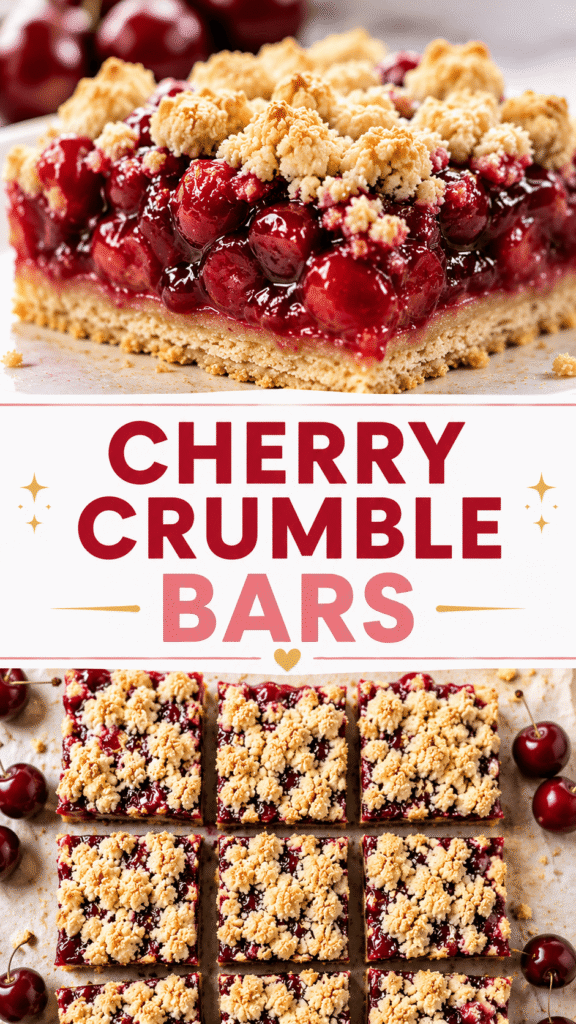
Cherry Crumble Pie Bars are a simple, crowd-pleasing dessert that takes everything people love about classic cherry pie and transforms it into easy-to-serve bars.
Instead of slicing and serving a traditional pie, you can cut these bars into neat squares, making them perfect for parties, potlucks, lunchboxes, or whenever you want a handheld treat.
They are built with three delicious layers that work together to create the perfect bite.
The bottom layer is a buttery crust that provides a sturdy base while adding a rich, cookie-like flavor.
On top of the crust sits a sweet and slightly tart cherry filling that brings all the familiar flavors of homemade cherry pie.
The final layer is a golden crumble topping, often called a streusel, which adds a lightly crisp texture and buttery sweetness that pairs beautifully with the juicy cherries underneath.
One of the best things about Cherry Crumble Pie Bars is how much easier they are to make than a traditional pie.
There is no need to roll out pie dough, shape a crust, or worry about creating decorative pie edges.
The crust and crumble topping are usually made from the same mixture, which saves time and keeps the recipe beginner-friendly.
That means less work in the kitchen and more time enjoying the finished dessert.
Ingredients You’ll Need
For the Crust and Crumble Topping
- 2 cups all-purpose flour – Creates a sturdy, tender base and crumbly topping.
- 1 cup old-fashioned oats – Adds texture and a classic crumble crunch.
- ¾ cup brown sugar, packed – Brings rich sweetness and a hint of caramel flavor.
- ¼ cup granulated sugar – Helps balance the sweetness and texture.
- 1 teaspoon baking powder – Gives the crust and crumble a lighter texture.
- ½ teaspoon salt – Enhances the overall flavor and balances the sweetness.
- 1 cup unsalted butter, melted – Binds the mixture together and creates a buttery taste.
- 1 teaspoon vanilla extract – Adds warmth and depth of flavor.
For the Cherry Filling
- 4 cups fresh or frozen cherries, pitted – The star ingredient that provides sweet-tart flavor and juicy texture.
- ½ cup granulated sugar – Sweetens the filling without overpowering the cherries.
- 3 tablespoons cornstarch – Thickens the filling so the bars slice neatly.
- 1 tablespoon fresh lemon juice – Brightens the flavor and enhances the cherries.
- ½ teaspoon almond extract (optional) – Adds a subtle bakery-style flavor that pairs beautifully with cherries.
Equipment Needed
You don’t need any special baking equipment to make these Cherry Crumble Pie Bars.
A few basic kitchen tools are all it takes:
- 9×13-inch baking pan – The perfect size for creating thick, evenly baked bars.
- Mixing bowls – You’ll need at least one large bowl for the crust and crumble mixture and another for the cherry filling.
- Measuring cups and spoons – Accurate measurements help ensure the bars bake up perfectly every time.
- Cherry pitter (if using fresh cherries) – Makes removing pits quick and easy, saving time during prep.
- Spatula – Helpful for mixing ingredients and spreading the cherry filling evenly over the crust.
- Parchment paper – Makes it easy to lift the bars out of the pan and helps prevent sticking for cleaner slices.
How to Make Cherry Crumble Pie Bars
Step 1: Prepare the Baking Pan
Start by preheating your oven to 350°F (175°C) so it’s fully heated and ready when it’s time to bake.
Line a 9×13-inch baking pan with parchment paper, leaving a little overhang on the sides to make lifting the bars out easier later.
If your parchment paper doesn’t stay in place, lightly grease the pan first to help it stick.
Taking a minute to prepare the pan properly will make serving and cleanup much easier once the bars are baked.
Step 2: Make the Crumble Mixture
In a large mixing bowl, combine the flour, oats, brown sugar, granulated sugar, baking powder, and salt.
Stir the dry ingredients together until everything is evenly distributed.
Pour in the melted butter and vanilla extract.
Mix until the ingredients come together and form a crumbly mixture with no dry pockets remaining.
The texture should resemble damp sand with small and medium-sized crumbs throughout.
Before moving on, set aside about 1½ cups of the mixture for the crumble topping.
This reserved portion will create the golden, crunchy layer on top of the bars.
Step 3: Create the Crust
Transfer the remaining crumble mixture to the prepared baking pan.
Press it firmly into an even layer using your hands, the back of a spoon, or the bottom of a measuring cup.
Try to reach all the corners so the crust bakes evenly.
A firmly packed crust helps support the juicy cherry filling and keeps the bars from falling apart when sliced.
Bake the crust for about 12 to 15 minutes, or until it is lightly golden around the edges.
The crust doesn’t need to be fully browned at this stage since it will continue baking later.
Remove it from the oven and allow it to cool slightly while you prepare the filling.
Step 4: Prepare the Cherry Filling
Place the cherries in a large bowl.
Add the granulated sugar, cornstarch, and lemon juice.
If you’re using almond extract, add it now for an extra layer of flavor that pairs beautifully with cherries.
Stir everything together gently until the cherries are evenly coated.
The cornstarch will help thicken the juices as the bars bake, creating a filling that holds together nicely instead of becoming runny.
Don’t worry if the mixture looks a little powdery at first because the juices released during baking will create a smooth filling.
Step 5: Assemble the Bars
Spread the cherry filling evenly over the partially baked crust.
Use a spatula to distribute the cherries so every bite gets plenty of fruit.
Sprinkle the reserved crumble mixture evenly over the top.
Some cherry filling peeking through is perfectly fine and gives the finished bars a beautiful homemade appearance.
Try not to press the topping down because a loose crumble creates the best texture.
Step 6: Bake
Place the pan back into the oven and bake for 35 to 40 minutes.
The bars are ready when the crumble topping is golden brown, and the cherry filling is bubbling gently around the edges.
Those bubbling juices are a good sign that the filling has thickened properly.
If the topping begins browning too quickly, loosely cover the pan with foil during the final minutes of baking.
Once baked, remove the pan from the oven and place it on a wire rack.
Step 7: Cool and Slice
Allow the bars to cool completely in the pan before slicing.
This step is important because the filling continues to set as it cools.
Cutting the bars while they’re still warm can cause the filling to spill out and make the bars difficult to serve.
For especially clean slices, place the cooled bars in the refrigerator for about an hour before cutting.
Use the parchment paper overhang to lift the bars out of the pan.
Slice into squares or rectangles and serve.
Tips for the Best Cherry Crumble Pie Bars
Use Ripe, Flavorful Cherries
The quality of your cherries has a big impact on the final flavor of the bars.
If you’re using fresh cherries, choose ones that are firm, juicy, and deeply colored for the best balance of sweetness and tartness.
Taste a cherry before baking if possible, since naturally sweet cherries often require less added sugar.
When cherries are at their peak, the filling develops a richer flavor that truly stands out in every bite.
Don’t Skip the Parchment Paper
Lining your baking pan with parchment paper may seem like a small step, but it makes a huge difference when it’s time to serve the bars.
The parchment creates a barrier that prevents sticking and helps the bars release easily from the pan.
The overhanging edges also act like handles, allowing you to lift the entire batch out in one piece.
This makes slicing cleaner and much less stressful, especially if you’re serving the bars for a gathering or special occasion.
Let the Bars Cool Fully Before Cutting
It can be tempting to cut into the bars while they’re still warm because they smell amazing fresh from the oven.
However, the cherry filling needs time to cool and set properly.
If you slice too early, the filling may spread out and create messy servings.
Allowing the bars to cool completely helps them hold their shape and gives you neat, bakery-style slices.
Patience here is rewarded with a much better texture and presentation.
Use Frozen Cherries Without Thawing for Best Texture
Frozen cherries are a fantastic option when fresh cherries aren’t in season.
For the best results, add them directly to the filling mixture while they’re still frozen.
Thawing first can release excess liquid, which may make the filling thinner than desired.
Using frozen cherries straight from the freezer helps maintain their texture while allowing the filling to thicken properly during baking.
It’s an easy shortcut that still delivers delicious results.
Add Almond Extract for Bakery-Style Flavor
A small amount of almond extract can take these bars from good to unforgettable.
Cherries and almonds naturally complement each other, creating a flavor combination often found in bakery desserts.
You only need a little because almond extract is quite strong.
Just a few drops add warmth and depth without overpowering the fresh cherry flavor.
If you’ve ever wondered why some cherry desserts taste extra special, this simple ingredient is often the secret.
Variations to Try
Cherry Almond Crumble Bars
If you love the classic pairing of cherries and almonds, this variation is an easy way to add even more flavor and texture.
Simply sprinkle ½ cup of sliced almonds over the crumble topping before baking.
As the bars bake, the almonds become lightly toasted and add a delicate crunch to every bite.
For an even stronger almond flavor, you can also include a small amount of almond extract in the cherry filling.
This version feels a little more elegant while still being just as simple to make.
Mixed Berry Crumble Bars
Cherries pair beautifully with other berries, making this a great option when you want to use what you already have on hand.
Replace up to half of the cherries with fresh or frozen blueberries, raspberries, or a combination of both.
Blueberries add sweetness and extra juiciness, while raspberries bring a brighter tart flavor.
The mixture creates a colorful filling with more depth and variety in every bite.
If using frozen berries, there’s no need to thaw them first.
Simply mix them with the filling ingredients and bake as directed.
Chocolate Cherry Bars
Chocolate and cherries are a timeless dessert combination that never disappoints.
For a richer dessert, stir ½ to ¾ cup of mini chocolate chips into the cherry filling or sprinkle them over the filling before adding the crumble topping.
The chocolate melts slightly during baking, creating pockets of sweetness throughout the bars.
Dark chocolate chips add a deeper flavor, while milk chocolate creates a sweeter treat.
This variation is especially popular with chocolate lovers and makes the bars feel a little more indulgent.
Gluten-Free Version
Making these bars gluten-free is easier than you might think.
Replace the all-purpose flour with your favorite gluten-free flour blend that is designed for baking.
Choose a blend that can be substituted cup-for-cup for the simplest results.
Be sure to use certified gluten-free oats as well, since regular oats can sometimes be exposed to gluten during processing.
The finished bars still have a buttery crust, juicy filling, and crumbly topping that everyone can enjoy.
Many people won’t even notice they’re gluten-free, which makes this variation perfect for sharing with family and friends who have different dietary needs.
Storage Instructions
Room Temperature
If you plan to enjoy the bars within a day or two, they can be stored at room temperature in an airtight container.
Keeping them covered helps prevent the crust and crumble topping from drying out.
Store the container in a cool, dry place away from direct sunlight or heat.
The bars will stay fresh for up to 2 days while maintaining their flavor and texture.
Refrigerator
For longer storage, place the bars in an airtight container and refrigerate them.
The cooler temperature helps keep the cherry filling fresh and allows the bars to hold their shape well.
They can be stored in the refrigerator for up to 5 days.
Many people enjoy these bars chilled, but you can also let them sit at room temperature for a few minutes before serving if you prefer a softer texture.
Freezer
These Cherry Crumble Pie Bars freeze beautifully, making them a great make-ahead dessert.
Allow the bars to cool completely before freezing.
Wrap individual bars tightly in plastic wrap or place them in freezer-safe containers.
Freezing individual portions makes it easy to grab just what you need later.
Store the bars in the freezer for up to 3 months.
When you’re ready to enjoy them, thaw them overnight in the refrigerator or let them sit at room temperature for about 30 minutes.
The bars will still have their delicious cherry flavor and buttery crumble texture after thawing.
What to Serve with Cherry Crumble Pie Bars
- Vanilla Ice Cream – The creamy, cold texture pairs perfectly with the warm, sweet-tart cherry filling.
- Whipped Cream – A light and fluffy topping that adds a touch of sweetness without overpowering the bars.
- Hot Coffee – The rich, bold flavor of coffee balances the sweetness of the dessert beautifully.
- Iced Coffee – A refreshing option that complements the buttery crumble, especially on warm days.
- Tea – A comforting cup of black, green, or herbal tea makes a simple and satisfying pairing.
- Fresh Cherries – Serve a few fresh cherries alongside the bars for extra color and a burst of natural fruit flavor.
Common Mistakes to Avoid
Using Too Much Filling
Adding extra cherries may seem like a good idea, but too much filling can make the bars difficult to slice and serve.
An overloaded filling can also release excess juice during baking, causing the crust to become soggy.
For the best texture, stick to the recommended amount of filling in the recipe.
Cutting Bars Before Cooling
Freshly baked bars smell tempting, but cutting them too soon can lead to messy slices.
The cherry filling needs time to cool and set properly after baking.
Allowing the bars to cool completely helps them hold their shape and makes serving much easier.
If you want especially neat slices, chill the bars briefly before cutting.
Underbaking the Crust
The crust forms the foundation of the entire dessert, so it needs enough time to bake before adding the filling.
A crust that is underbaked may turn soft or soggy once the cherry layer is added.
Look for lightly golden edges before removing the crust from the oven during the first bake.
This simple step helps create a sturdier and more flavorful base.
Not Thickening the Filling Enough
The cornstarch in the filling plays an important role in creating bars that hold together well.
If there isn’t enough thickener, the filling can remain too runny after baking.
Be sure to measure the cornstarch accurately and mix it evenly with the cherries.
You’ll know the filling is properly thickening when it bubbles around the edges during baking.
Overmixing the Crumble Topping
The crumble topping should have a loose, crumbly texture rather than a smooth dough-like consistency.
Mixing too much can break down the crumbs and create a dense topping.
Once the butter is evenly incorporated and the mixture forms crumbs, stop mixing.
Those uneven crumbs are what create the delicious crunchy topping that makes these bars so irresistible.
Final Thoughts
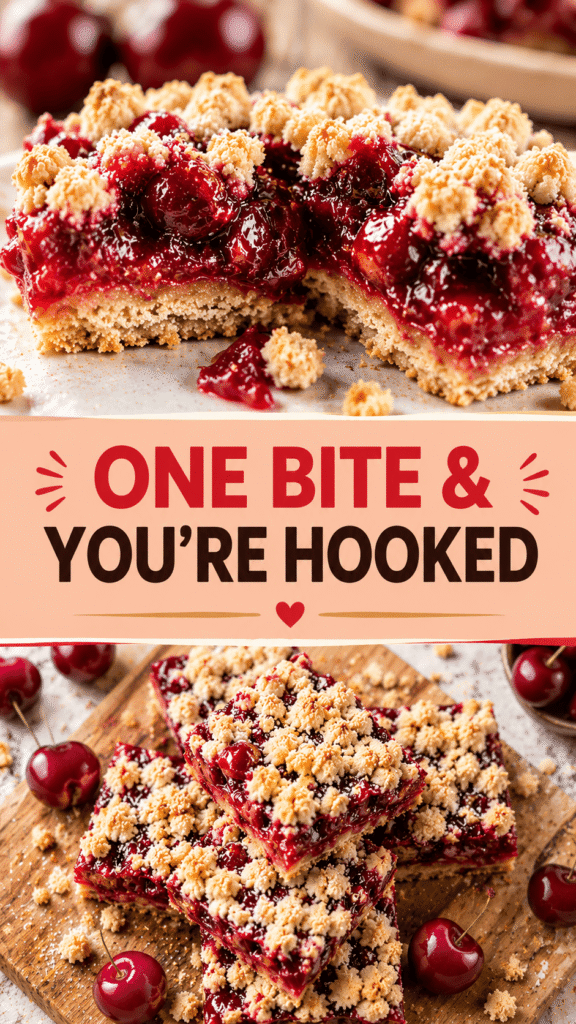
These Cherry Crumble Pie Bars deliver all the comforting flavors of homemade cherry pie in a simple, easy-to-serve dessert bar.
With a buttery crust, juicy cherry filling, and irresistible crumble topping, they’re guaranteed to become a family favorite for every season.
FAQs
Can I use canned cherry pie filling?
Yes, canned filling works as a convenient shortcut.
Can I use frozen cherries?
Absolutely. Use them directly from frozen.
Why are my bars falling apart?
They likely need more cooling time before slicing.
Can I make these ahead of time?
Yes, they taste even better after chilling overnight.
Do I need to refrigerate them?
For longer freshness, refrigeration is recommended.
Easy Cherry Crumble Pie Bars Recipe with a Buttery Oat Topping
Difficulty: Easy16
Bars20
minutes40
minutes1
hourThese Cherry Crumble Pie Bars feature a buttery crust, juicy cherry filling, and a golden crumble topping. They’re easier than traditional cherry pie and perfect for sharing.
Ingredients
- For the Crust and Crumble:
2 cups all-purpose flour
1 cup old-fashioned oats
¾ cup brown sugar
¼ cup granulated sugar
1 teaspoon baking powder
½ teaspoon salt
1 cup unsalted butter, melted
1 teaspoon vanilla extract
- For the Cherry Filling:
4 cups pitted cherries (fresh or frozen)
½ cup granulated sugar
3 tablespoons cornstarch
1 tablespoon lemon juice
½ teaspoon almond extract (optional)
Directions
- Preheat oven to 350°F (175°C) and line a 9×13-inch baking pan with parchment paper.
- In a large bowl, combine flour, oats, sugars, baking powder, and salt. Stir in melted butter and vanilla until crumbly.
- Reserve about 1½ cups of the mixture for the topping.
- Press the remaining mixture into the prepared pan and bake for 12–15 minutes.
- In another bowl, mix cherries, sugar, cornstarch, lemon juice, and almond extract.
- Spread the cherry filling evenly over the partially baked crust.
- Sprinkle the reserved crumble mixture over the filling.
- Bake for 35–40 minutes, or until golden brown and bubbly.
- Cool completely before slicing into bars.
Notes
- Frozen cherries can be used straight from the freezer.
- For cleaner slices, chill the bars for 1 hour before cutting.
- Store leftovers in an airtight container in the refrigerator for up to 5 days.

Hi, I’m Sorenna Blythe, the baker and writer behind Mix Whisk Bake. I share simple, reliable recipes and honest kitchen moments to help home bakers bake with confidence and joy. When I’m not testing new treats, you’ll find me sipping coffee and dreaming up my next bake.


