There’s something special about homemade cherry pie bars.
They have all the cozy flavor of classic cherry pie, but they’re much easier to make and even easier to share.
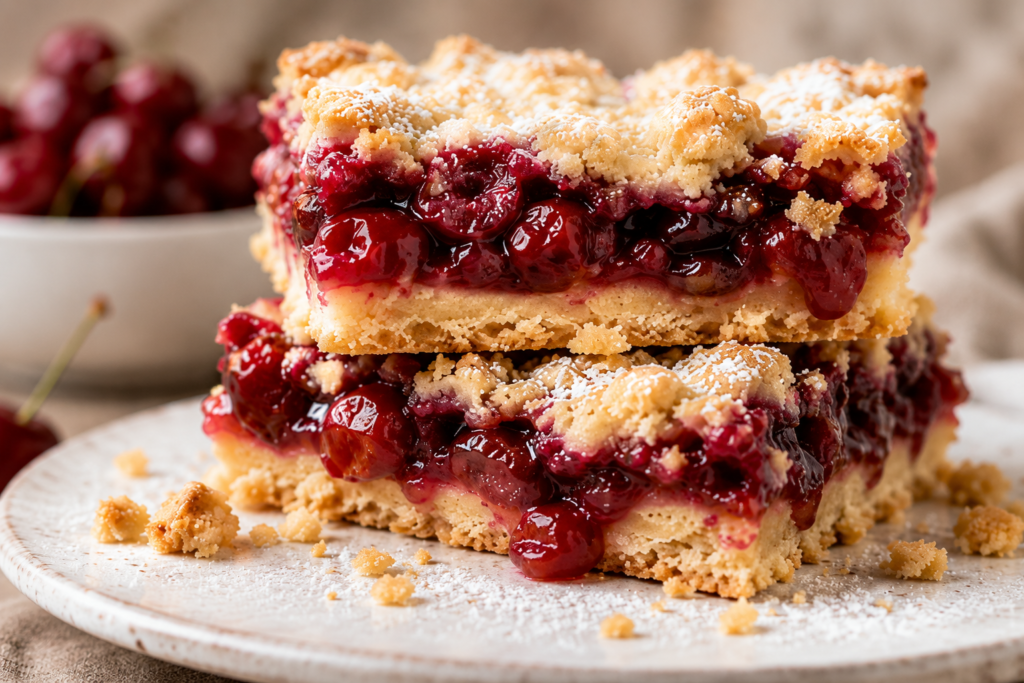
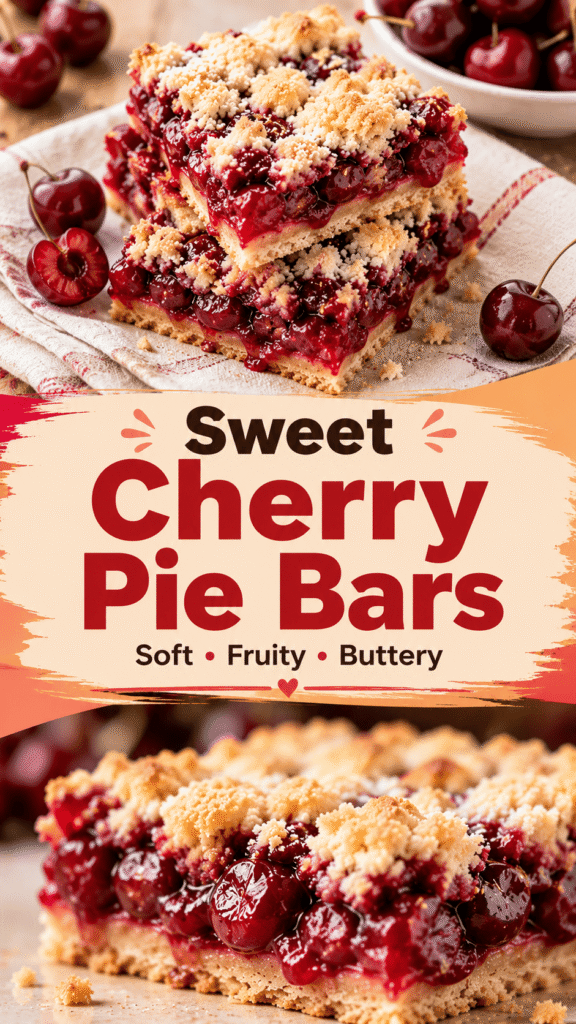
With a soft buttery crust, sweet cherry filling, and a golden crumbly topping, every bite tastes like comfort baked into a simple dessert bar.
These bars are perfect for holidays, potlucks, picnics, or weekend baking at home.
You can make them ahead of time, slice them neatly, and serve them to a crowd without any fuss.
If you love cherry pie but want a simpler recipe that still feels homemade and special, this is one you’ll want to keep on repeat.
Why You’ll Love These Cherry Pie Bars
Easy To Make
These cherry pie bars are much simpler than making a traditional cherry pie from scratch.
There’s no need to roll out pie dough or worry about shaping a perfect crust.
The dough comes together in one bowl with simple pantry ingredients, which makes this recipe feel easy and approachable from the start.
You’ll press part of the dough into the pan for the crust, spread the cherry filling over the top, then crumble the remaining dough over everything before baking.
The layered steps are simple to follow, even if you’re new to baking.
If you’ve ever felt nervous about making homemade pie, these bars are a great place to start.
They give you the same cozy flavor with far less work and stress.
Perfect Texture
The texture is one of the best parts of this recipe.
The base bakes up soft, buttery, and sturdy enough to hold the sweet cherry filling without becoming soggy.
The cherries stay juicy and rich while baking, creating a filling that tastes bright, sweet, and slightly tart all at once.
On top, the dough turns golden and lightly crisp around the edges, adding just the right amount of crumbly texture.
Every bite gives you a mix of soft crust, fruity filling, and buttery topping.
If you love desserts with contrast in texture, these bars truly deliver.
They taste especially good slightly chilled or at room temperature when the layers have fully set.
Great For Any Occasion
These cherry pie bars fit almost any gathering or celebration.
They’re easy to transport, simple to slice, and perfect for serving a crowd.
You can bring them to summer picnics, family dinners, bake sales, birthday parties, or holiday dessert tables without worrying about messy serving.
Because they’re cut into bars, guests can grab one quickly and enjoy it without plates or forks if needed.
They also look beautiful stacked on a dessert tray with a light dusting of powdered sugar on top.
This recipe feels casual enough for a weekend treat but special enough for celebrations too.
Make-Ahead Friendly
One of the most helpful things about these cherry pie bars is how well they store.
You can bake them a day ahead, keep them in the fridge, and slice them when you’re ready to serve.
In fact, the flavor becomes even better after the bars have had time to rest.
The crust softens slightly, the filling settles, and the layers hold together more cleanly.
This makes them a great option when you want to prepare dessert early and save time later.
If you’re planning for a party or busy holiday, having a dessert ready in advance can make baking feel much more relaxed and enjoyable.
What Are Cherry Pie Bars?
Cherry pie bars are a simple, handheld version of classic cherry pie that gives you all the same comforting flavor in an easier, more casual dessert form.
Instead of rolling out pie dough and carefully shaping a full pie, everything is layered into one baking pan and sliced into neat squares once cooled.
The bottom layer is a soft buttery crust that acts as the base and gives the bars their rich homemade flavor.
On top of the crust sits a thick layer of sweet cherry filling that becomes warm, juicy, and packed with bright cherry flavor as it bakes.
The final layer is a crumbly topping or pieces of dough scattered over the cherries, which turns golden in the oven and adds a delicious buttery texture to every bite.
The combination of these three layers creates a dessert that tastes comforting, fruity, and perfectly balanced without feeling overly complicated to make.
Cherry pie bars are especially popular because they’re faster and easier than traditional pie while still feeling homemade and special.
You don’t need any special baking skills, fancy equipment, or extra time shaping pie crusts to get great results.
Everything comes together in a straightforward way, making this recipe ideal for beginners and experienced bakers alike.
They’re also easier to serve since you can simply slice them into bars and place them on a tray for sharing.
That makes them perfect for parties, family gatherings, bake sales, holidays, or anytime you want a dessert that feels cozy and impressive without requiring hours in the kitchen.
Ingredients You’ll Need
For The Crust And Topping
- 1 cup unsalted butter, softened
- 2 cups granulated sugar
- 4 large eggs
- 1 teaspoon vanilla extract
- 3 cups all-purpose flour
- 1 teaspoon baking powder
- ½ teaspoon salt
For The Cherry Filling
- 2 cans (21 ounces each) cherry pie filling
- 1 cup fresh cherries, pitted and halved (optional for extra texture and flavor)
- 1 tablespoon lemon juice
- ¼ teaspoon almond extract (optional, but highly recommended for a richer cherry flavor)
Best Cherries To Use
Canned Cherry Pie Filling
Canned cherry pie filling is the easiest and most reliable option for making cherry pie bars at home.
It already has the perfect thick texture for baking, which helps the bars hold together nicely after slicing.
The cherries are sweet, soft, and evenly coated in filling, so you don’t need to do much extra preparation.
This option is especially helpful for beginners because it removes the guesswork and saves a lot of time in the kitchen.
Using canned filling also gives consistent results every time, which is great when baking for holidays, parties, or family gatherings.
If you want to make the flavor taste a little more homemade, you can add a splash of lemon juice or a tiny bit of almond extract before spreading the filling over the crust.
Some bakers also like mixing in a handful of fresh cherries for extra texture and a brighter cherry flavor.
Fresh Cherries
Fresh cherries are a wonderful choice when they’re in season because they bring a naturally sweet and vibrant flavor to the bars.
They create a filling that tastes fresher and slightly less sugary than canned pie filling.
If you decide to use fresh cherries, you’ll need to wash, pit, and cook them down with sugar and a thickener before baking.
This takes a little more effort, but many people love the homemade flavor and texture it creates.
Sweet cherries like Bing cherries give the bars a rich, juicy flavor and a naturally sweeter taste.
Tart cherries are more tangy and bright, which makes the bars taste closer to a traditional cherry pie.
If using tart cherries, you may want to add a bit more sugar to balance the flavor.
Fresh cherries can also vary in juiciness, so cooking the filling properly helps prevent watery bars.
Frozen Cherries
Frozen cherries are an excellent option when fresh cherries are not in season.
They’re convenient, easy to store, and available year-round, which makes them perfect for baking anytime cravings hit.
Most frozen cherries are picked and frozen at peak ripeness, so they still have great flavor once baked.
Before using them, it’s important to thaw the cherries fully and drain away excess liquid.
Too much liquid can make the filling thin and cause the crust to become soggy during baking.
Patting the cherries lightly with paper towels after thawing can also help remove extra moisture.
Frozen cherries work especially well if you want a more homemade filling without needing to wait for cherry season.
No matter which type of cherries you choose, the goal is the same: a thick, flavorful filling that bakes beautifully between those buttery layers.
Kitchen Tools Needed
- Mixing bowls – Used for combining the dough and cherry filling ingredients easily.
- Hand mixer or stand mixer – Helps cream the butter and sugar until light and smooth.
- 9×13 baking pan – The perfect size for baking evenly thick cherry pie bars.
- Spatula – Makes it easy to spread the dough and filling into even layers.
- Measuring cups and spoons – Helps ensure accurate ingredient amounts for consistent results.
- Parchment paper – Prevents sticking and makes lifting the bars out of the pan much easier.
How To Make Homemade Cherry Pie Bars
Step 1: Prepare The Pan
Start by preheating your oven to 350°F so it’s fully heated before the bars go in.
Preparing the oven first helps the bars bake evenly from the beginning.
Lightly grease a 9×13 baking pan or line it with parchment paper for easier cleanup and smoother removal later.
If you use parchment paper, leave a little extra hanging over the sides so you can lift the bars out easily after they cool.
This small step makes slicing much simpler and helps prevent sticking.
Step 2: Make The Dough
In a large mixing bowl, cream the softened butter and sugar together until the mixture looks light and fluffy.
This step adds air into the dough and helps create a soft, tender texture once baked.
Add the eggs one at a time, mixing well after each addition so everything blends smoothly.
Pour in the vanilla extract and stir until combined.
In a separate bowl, whisk together the flour, baking powder, and salt.
Gradually add the dry ingredients into the wet mixture and mix just until a soft dough forms.
Try not to overmix once the flour is added because that can make the bars heavier instead of soft and buttery.
The dough will be thick, which is exactly what you want.
Step 3: Create The Base Layer
Spread about three-quarters of the dough into the prepared baking pan.
Using a spatula or lightly greased hands can make this step much easier since the dough is soft and slightly sticky.
Press the dough into an even layer so the bars bake evenly from edge to center.
Set aside the remaining dough because you’ll use it for the topping later.
The base layer acts like the crust and gives the bars structure while holding all that cherry filling beautifully.
Step 4: Add Cherry Filling
Spoon the cherry pie filling evenly over the crust layer.
Spread it gently all the way to the edges so every slice gets plenty of cherry flavor.
If you’re adding fresh cherries, lemon juice, or almond extract, stir them into the filling before spreading it over the dough.
The almond extract is optional, but even a small amount adds a rich bakery-style flavor that pairs perfectly with cherries.
Be careful not to overload the pan with extra liquid because too much moisture can soften the crust too much while baking.
Step 5: Add The Topping
Take the remaining dough and drop small spoonfuls over the cherry filling.
The topping does not need to completely cover the cherries.
Leaving small gaps allows the bright red filling to peek through, which gives the bars their classic homemade look.
As the bars bake, the topping turns lightly golden and creates a soft crumb texture on top.
This rustic style is part of what makes cherry pie bars feel easy, cozy, and inviting.
Step 6: Bake
Place the pan into the preheated oven and bake for about 35 to 40 minutes.
The bars are ready when the top looks lightly golden, and the filling is bubbling slightly around the edges.
Your kitchen will smell rich, buttery, and filled with warm cherry flavor while they bake.
If the center still looks overly wet, give the bars a few extra minutes in the oven.
Every oven bakes a little differently, so keep an eye on the color and texture near the end of baking time.
Step 7: Cool And Slice
Once baked, place the pan on a wire rack and let the bars cool completely before slicing.
This part takes patience, but it’s important because the filling needs time to set properly.
Cutting the bars too early can cause the layers to slide apart while still warm.
For extra clean slices, place the cooled bars in the refrigerator for about 1 hour before cutting.
A chilled pan makes it much easier to create neat bakery-style squares with clean edges.
Once sliced, the bars are ready to serve and enjoy.
Tips For The Best Cherry Pie Bars
Don’t Overmix The Dough
Once the dry ingredients are added, mix the dough only until everything is combined.
Overmixing can develop too much gluten in the flour, which may make the bars dense instead of soft and tender.
The dough should look thick, smooth, and fully mixed without being beaten for too long.
A few small streaks of flour are completely fine as long as they disappear while folding the dough together gently.
This simple step helps create that soft buttery texture that makes cherry pie bars so good.
Use Quality Cherry Filling
The cherry filling is the heart of this dessert, so using a good-quality filling makes a noticeable difference.
Choose a filling with plenty of whole cherries and a rich, deep cherry flavor instead of one that looks overly thin or artificial.
A thicker filling also helps the bars hold their shape better after slicing.
If you want the dessert to taste even more homemade, try stirring in a few fresh cherries or a small squeeze of lemon juice for extra brightness.
Even simple upgrades can make the flavor taste fresher and more balanced.
Let The Bars Cool Fully
It can be tempting to slice into the bars while they’re still warm, especially when your kitchen smells amazing, but letting them cool fully is important.
As the bars cool, the filling thickens, and the layers settle into place.
This makes the bars easier to cut and helps them hold together neatly when served.
Warm bars may fall apart or become messy when sliced too soon.
If you want extra clean bakery-style squares, chill the bars in the refrigerator for about an hour before cutting them.
The cooler temperature firms everything up and creates cleaner edges.
Add Almond Extract Carefully
Almond extract pairs beautifully with cherries and gives the bars a warm bakery-style flavor that makes them taste extra special.
A very small amount goes a long way, so you only need a little to enhance the cherry flavor without overpowering it.
Too much almond extract can become strong very quickly, especially in fruity desserts.
Start with a small amount and let it gently support the cherry flavor rather than dominate it.
If you already love cherry-almond desserts, this tiny addition can make the bars even more irresistible.
Flavor Variations
Cherry Almond Bars
Cherry and almond are a classic combination that tastes rich, warm, and bakery-style.
To create this variation, add a handful of sliced almonds over the top before baking for extra crunch and texture.
You can also increase the almond flavor slightly by adding a tiny splash of almond extract to the filling or dough.
Once the bars have cooled, drizzle a simple almond glaze over the top using powdered sugar, milk, and a drop of almond extract.
The glaze adds a soft sweetness that pairs beautifully with the cherries without making the bars too heavy.
This version feels elegant enough for holidays and special gatherings while still being easy to make at home.
Chocolate Cherry Bars
Chocolate and cherries work surprisingly well together because the rich chocolate balances the bright fruit flavor perfectly.
For this variation, stir mini chocolate chips directly into the cherry filling before spreading it over the crust.
Mini chocolate chips work best because they distribute more evenly throughout the bars.
As the bars bake, the chocolate becomes soft and slightly melty, creating little pockets of richness in every bite.
Dark chocolate chips create a deeper flavor, while milk chocolate makes the bars sweeter and more dessert-like.
If you enjoy chocolate-covered cherries, this version is especially delicious.
A light drizzle of melted chocolate over the cooled bars can make them feel even more special.
Mixed Berry Pie Bars
If you want a fruitier twist, try combining cherries with other berries for extra flavor and color.
Raspberries add a bright tartness that balances the sweetness of the cherries beautifully.
Blueberries create a softer, sweeter flavor and make the filling taste even more juicy and rich.
You can use fresh or frozen berries, depending on what you have available.
Just make sure to avoid adding too much extra liquid so the filling stays thick enough for slicing.
Mixed berry pie bars are especially nice during summer when fresh berries are easy to find and full of flavor.
The combination of different fruits gives each bite a slightly different taste, which makes the bars feel extra fresh and fun.
Cream Cheese Cherry Bars
Adding a cream cheese layer creates a dessert that tastes part cherry pie and part cheesecake.
The creamy layer adds richness and balances the sweet cherry filling perfectly.
To make it, beat softened cream cheese with sugar, an egg, and a little vanilla until smooth.
Spread the cream cheese mixture over the crust before adding the cherry filling on top.
As the bars bake, the cheesecake layer becomes soft, creamy, and slightly tangy.
This variation feels extra comforting and works especially well for holidays or special occasions.
For an even prettier finish, dust the cooled bars lightly with powdered sugar before serving.
What To Serve With Cherry Pie Bars
- Vanilla ice cream – Adds a cold, creamy contrast that pairs perfectly with the warm cherry flavor.
- Whipped cream – A light and fluffy topping that makes the bars feel extra special without overpowering them.
- Coffee or tea – The rich buttery crust and sweet cherries pair beautifully with a hot drink.
- Fresh cherries – A simple garnish that adds freshness and makes the dessert look even more inviting.
- Powdered sugar dusting – Gives the bars a pretty bakery-style finish with a touch of extra sweetness.
How To Store Cherry Pie Bars
At Room Temperature
Cherry pie bars can be stored at room temperature for short periods if your kitchen is cool and not too humid.
Place the bars in an airtight container to help keep the crust soft and prevent them from drying out.
They usually stay fresh for about 1 to 2 days on the counter.
If you’re stacking the bars, place a sheet of parchment paper between the layers so they don’t stick together.
Keeping the container tightly sealed also helps preserve the buttery texture and fresh cherry flavor.
In The Refrigerator
For longer freshness, store the bars in the refrigerator.
The cooler temperature helps the filling stay firm and keeps the bars tasting fresh for several more days.
Place the bars in an airtight container or cover the baking pan tightly with plastic wrap or foil.
Properly stored cherry pie bars can last about 4 to 5 days in the fridge.
Many people actually enjoy these bars chilled because the filling becomes thicker and the slices hold together beautifully.
If you prefer a softer texture, let the bars sit at room temperature for a few minutes before serving.
Freezing Instructions
Cherry pie bars freeze very well, which makes them great for make-ahead desserts or future sweet cravings.
Start by allowing the bars to cool completely before freezing.
Cut them into individual slices so they’re easier to grab and thaw later.
Wrap each bar tightly in plastic wrap, then place them into a freezer-safe container or zip-top bag.
Wrapping the bars individually helps protect them from freezer burn and keeps the texture fresher.
The bars can be frozen for up to 3 months while still tasting delicious.
When you’re ready to enjoy them, let the bars thaw overnight in the refrigerator or sit at room temperature for about 30 minutes.
You can even enjoy them slightly chilled straight from the fridge for a firmer, bakery-style texture.
Common Mistakes To Avoid
Using Too Much Filling
It can be tempting to pile on extra cherry filling, especially if you love fruity desserts, but too much filling can quickly make the bars overly soft and difficult to slice.
Excess filling releases more moisture during baking, which can cause the crust to become soggy instead of buttery and firm.
A thick but balanced layer of filling works best because it allows the crust and topping to bake properly while still giving plenty of cherry flavor in every bite.
If you’re adding fresh or frozen cherries to canned filling, avoid adding extra liquid along with them.
Keeping the filling thick helps the bars hold their shape beautifully once cooled.
Cutting Before Cooling
One of the hardest parts of making cherry pie bars is waiting for them to cool completely before slicing.
Warm bars may smell amazing, but the filling is still soft and loose straight out of the oven.
If you cut them too early, the layers can slide apart and create messy slices that don’t hold together well.
Allowing the bars to cool gives the filling time to thicken and settle between the crust layers.
This simple step makes a huge difference in both texture and appearance.
For especially clean slices, place the cooled bars in the refrigerator for about an hour before cutting.
Using a sharp knife and wiping it clean between slices can also help create neat edges.
Overbaking
Overbaking is one of the easiest ways to dry out the crust and topping.
The bars should look lightly golden on top with slightly bubbling filling around the edges when they’re done.
Leaving them in the oven too long can cause the buttery layers to become hard and dry instead of soft and tender.
Since every oven bakes a little differently, it’s a good idea to start checking the bars a few minutes before the suggested baking time ends.
The center should look set but not overly dark or crisp.
Remember that the bars continue to firm up slightly as they cool, so they don’t need to feel completely firm while still hot from the oven.
Pulling them out at the right time helps keep the texture rich, soft, and perfectly balanced.
Final Thoughts
These homemade cherry pie bars are the perfect mix of easy, buttery, fruity, and comforting.
They give you all the cozy flavor of classic cherry pie without the extra work, which makes them great for both beginner bakers and longtime dessert lovers.
Whether you’re making them for a holiday, picnic, bake sale, or simple weekend treat, these bars are always a crowd-pleaser.
I hope this recipe brings a little extra sweetness to your kitchen and becomes one you’ll love making again and again.
Slice them up, share them with people you love, and enjoy every cherry-filled bite.
FAQs
Can I Use Homemade Cherry Pie Filling?
Yes, homemade cherry pie filling works wonderfully and adds even more fresh flavor to the bars.
Can I Make These Ahead Of Time?
Absolutely.
These bars are perfect for making a day ahead of time since the flavor and texture get even better after resting.
Do Cherry Pie Bars Need Refrigeration?
Refrigeration is recommended for longer freshness and cleaner slices.
Can I Use Other Fruit Fillings?
Yes, blueberry, apple, raspberry, and peach fillings all work beautifully in this recipe.
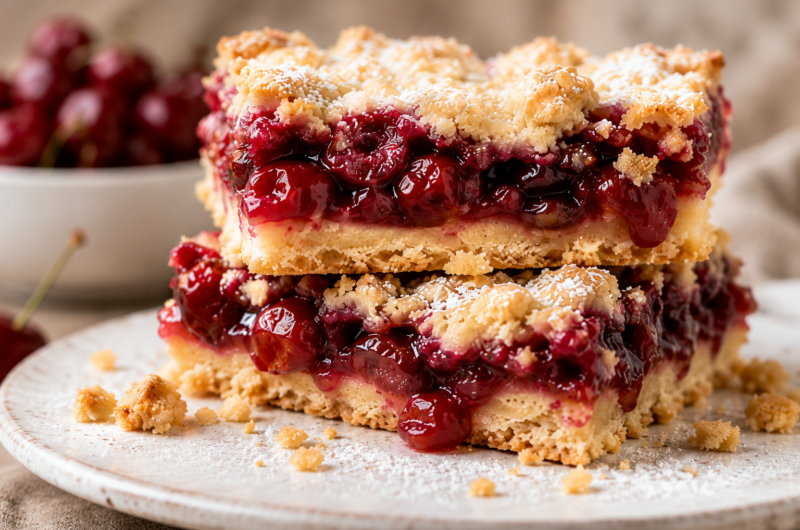
The Best Homemade Cherry Pie Bars – Buttery, Easy & Irresistible
Difficulty: Easy12
Bars15
minutes40
minutes55
minutesThese homemade cherry pie bars feature a buttery crust, sweet cherry filling, and crumbly topping for an easy dessert that tastes just like classic cherry pie.
Ingredients
- For The Crust And Topping
1 cup unsalted butter, softened
2 cups granulated sugar
4 large eggs
1 teaspoon vanilla extract
3 cups all-purpose flour
1 teaspoon baking powder
½ teaspoon salt
- For The Filling
2 cans (21 ounces each) cherry pie filling
1 tablespoon lemon juice
¼ teaspoon almond extract (optional)
Directions
- Preheat oven to 350°F and line a 9×13 baking pan with parchment paper.
- Cream butter and sugar together until light and fluffy.
- Add eggs and vanilla extract, then mix until smooth.
- Stir in flour, baking powder, and salt until a thick dough forms.
- Spread about three-quarters of the dough into the prepared pan.
- Mix cherry pie filling with lemon juice and almond extract, then spread evenly over the crust.
- Drop spoonfuls of the remaining dough over the cherry filling.
- Bake for 35–40 minutes or until lightly golden and set.
- Cool completely before slicing into bars.
Notes
- Chill the bars before slicing for cleaner cuts.
- Almond extract adds extra flavor, but can be skipped if preferred.
- Store leftovers in the refrigerator for up to 5 days.


Hi, I’m Sorenna Blythe, the baker and writer behind Mix Whisk Bake. I share simple, reliable recipes and honest kitchen moments to help home bakers bake with confidence and joy. When I’m not testing new treats, you’ll find me sipping coffee and dreaming up my next bake.