
If you’re craving a rich, chocolatey dessert that looks impressive but is easy to make, this chocolate bundt cake is for you. It’s soft, moist, and full of deep chocolate flavor in every bite.
What makes it special is the beautiful bundt shape. You get a stunning cake without any complicated decorating.
You’ll notice the ingredients are simple and the steps are straightforward, so don’t worry if you’re new to baking.
This is the kind of cake you can bring out for birthdays, holidays, or even a cozy weekend treat. It feels special every time, but it’s easy enough to make whenever the craving hits.
What Is a Bundt Cake?
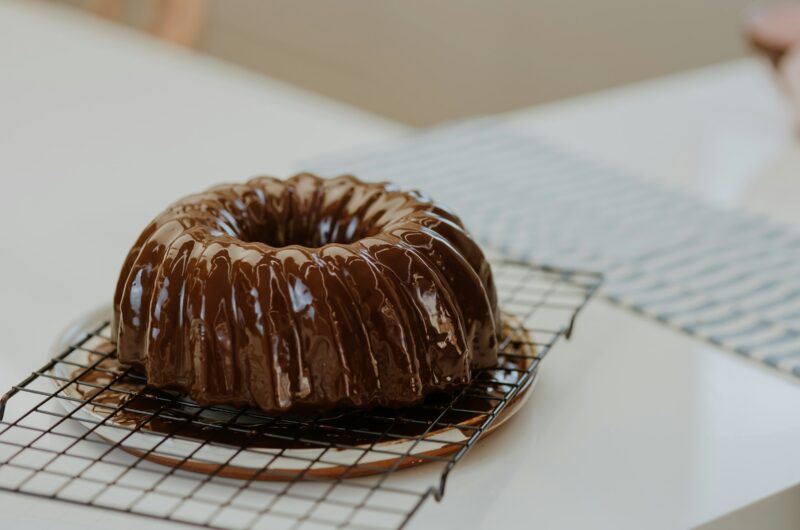
A bundt cake is simply a cake baked in a special pan with a hole in the center, which gives it that classic ring shape you’ve probably seen.
Unlike regular cakes that are often stacked or layered, bundt cakes are all about the pan—they don’t rely on frosting or decoration to stand out. The shape isn’t just for looks, though.
That center hole helps the heat spread more evenly while baking, so the cake cooks through without dry edges or an undercooked middle.
You’ll notice the ridges and curves of the pan also create a beautiful pattern on the outside, which means your cake comes out looking detailed and finished with very little effort.
Don’t worry if you’re new to using a bundt pan, just make sure it’s well-greased so the cake releases cleanly, and you’ll end up with a smooth, bakery-style cake that’s ready to serve as is or with a simple glaze.
Why You’ll Love This Chocolate Bundt Cake
Ultra-Moist and Tender Texture
This cake stays soft and moist from the first slice to the last. You’ll notice the crumb is tender without being too delicate, so it holds together beautifully when sliced.
Using ingredients like oil and a warm liquid (such as coffee or water) helps lock in moisture, which means you don’t have to worry about a dry cake.
Even if you bake it a minute longer than planned, it still stays forgiving and delicious.
Deep Chocolate Flavor
The chocolate flavor here is rich and balanced, not overly sweet or flat.
Cocoa powder gives it that bold base, and adding hot coffee (don’t worry, you won’t taste the coffee) brings out the chocolate even more.
You’ll get a full, satisfying flavor in every bite, whether you serve it plain or with a simple glaze.
Easy, No-Fuss Recipe
Let’s keep things simple. This recipe doesn’t require complicated steps or special techniques. You mix the ingredients, pour the batter into the pan, and let the oven do the work.
No layering, no tricky decorating. The bundt pan does most of the visual work for you, so you can focus on getting the texture and flavor just right.
Perfect for Beginners and Experienced Bakers
If you’re new to baking, this is a great place to start. The steps are straightforward, and the results are reliable if you follow them closely.
If you’ve baked before, you’ll appreciate how consistent and adaptable this recipe is because you can easily tweak flavors or add mix-ins.
Either way, you’ll end up with a cake that looks impressive and tastes even better.
Ingredients You’ll Need
Dry Ingredients
- 2 cups (250g) all-purpose flour
- 3/4 cup (75g) unsweetened cocoa powder
- 1 1/2 teaspoons baking powder
- 1 1/2 teaspoons baking soda
- 1/2 teaspoon salt
- 2 cups (400g) granulated sugar
Wet Ingredients
- 2 large eggs (room temperature)
- 1 cup (240ml) milk or buttermilk
- 1/2 cup (120ml) vegetable oil (or 115g melted butter)
- 2 teaspoons vanilla extract
- 1 cup (240ml) hot coffee or hot water (coffee enhances the chocolate flavor, but water works just fine)
Equipment Needed
- Bundt pan (10–12 cup capacity) – This is key for the signature shape. Make sure it’s well-greased so your cake releases cleanly.
- Mixing bowls (1 large, 1 medium) – You’ll use one for dry ingredients and one for wet to keep things simple and organized.
- Whisk or electric mixer – A whisk works well for this recipe, but an electric mixer can make it even easier and faster.
- Measuring cups and spoons – Accurate measuring helps you get the right texture, so try to level off your ingredients.
- Cooling rack – Helps the cake cool evenly and prevents it from becoming soggy on the bottom.
How to Make Chocolate Bundt Cake (Step-by-Step)
1. Preheat Oven and Prepare Bundt Pan
Start by preheating your oven to 180°C (350°F). This gives your cake a steady temperature right from the beginning.
While the oven heats, grease your bundt pan really well (get into every curve and corner). You can use butter or oil, then lightly dust with flour or cocoa powder to prevent sticking.
Don’t rush this step; it makes all the difference when it’s time to remove the cake.
2. Mix Dry Ingredients
In a large bowl, add the flour, cocoa powder, baking powder, baking soda, salt, and sugar. Whisk everything together until it looks evenly combined and free of lumps.
This helps distribute the raising agents evenly, so your cake bakes up with a consistent texture.
3. Combine Wet Ingredients
In a separate bowl, whisk together the eggs, milk (or buttermilk), oil (or melted butter), and vanilla extract. You’re looking for a smooth, well-mixed liquid.
Make sure the eggs are fully blended in so the batter comes together easily later.
4. Blend Wet and Dry Mixtures
Pour the wet ingredients into the bowl of dry ingredients. Gently mix until everything is combined.
You don’t need to overmix. Stop once you no longer see dry streaks. Overmixing can make the cake dense, so keep it simple and light.
5. Add Hot Coffee/Water
Slowly pour in the hot coffee or hot water while mixing. The batter will become thinner, and that’s exactly what you want.
You’ll notice it looks very liquid at this stage, but don’t worry, this is what helps create that soft, moist texture in the final cake.
6. Pour Batter into Pan
Carefully pour the batter into your prepared bundt pan. Tap the pan gently on the counter a couple of times to release any trapped air bubbles.
This helps the cake bake evenly and keeps the surface smooth.
7. Bake Until Done
Place the pan in the oven and bake for about 40–50 minutes. You’ll know it’s ready when a skewer or toothpick inserted into the center comes out clean or with just a few moist crumbs.
Try not to open the oven too early, as this can affect how the cake rises.
8. Cool and Release from Pan
Once baked, let the cake cool in the pan for about 10–15 minutes. This gives it time to set and makes it easier to remove. Then gently invert it onto a cooling rack.
If it doesn’t release right away, give the pan a light tap and let gravity help. Allow the cake to cool completely before adding any glaze or slicing.
Chocolate Glaze or Frosting Options
Simple Chocolate Glaze
If you want something quick and reliable, a simple chocolate glaze is the way to go. Just mix powdered sugar, cocoa powder, and a little milk until smooth and pourable.
You’ll notice it flows easily over the curves of the cake and settles into the grooves, giving you a clean, polished look.
Let it sit for a few minutes to set slightly before serving, so it doesn’t run off when slicing.
Ganache (Rich and Glossy)
For a more indulgent finish, go with ganache. It’s made by pouring warm cream over chopped chocolate and stirring until smooth. The result is thick, shiny, and deeply chocolatey.
Let it cool slightly before pouring so it drapes nicely over the cake instead of running straight off. This option adds a rich layer without being overly sweet.
Dusting with Powdered Sugar
If you prefer something light, a dusting of powdered sugar works beautifully. Once the cake has cooled completely, sprinkle a thin layer over the top.
The sugar highlights the shape of the bundt cake and gives it a soft, elegant finish. This is a great option when you want to keep things simple but still make the cake look special.
Cream Cheese Frosting Option
For a slightly tangy contrast, cream cheese frosting pairs really well with chocolate. You can drizzle it over the top or pipe it along the ridges.
It’s thicker than glaze, so you’ll get more defined lines and a richer bite. If it feels too thick to work with, just add a small splash of milk to loosen it until it’s easy to spread or drizzle.
Tips for the Perfect Bundt Cake
Grease the Pan Thoroughly
Take your time with this step. Use butter or oil and make sure you coat every corner, curve, and center tube of the pan.
You can lightly dust it with flour or cocoa powder after greasing to add extra protection. You’ll notice this small effort makes a big difference when it’s time to release the cake cleanly.
Don’t Overmix the Batter
Once you combine the wet and dry ingredients, mix just until everything comes together. Overmixing can make the cake dense instead of soft and tender.
If you still see a few tiny lumps, that’s okay; they’ll smooth out during baking.
Use Room Temperature Ingredients
Let your eggs and milk sit out for a bit before using them. Room temperature ingredients blend more easily, which helps create a smoother batter.
This leads to a more even texture in the final cake.
Let the Cake Cool Before Removing
After baking, give the cake about 10–15 minutes to cool in the pan. This helps it set and reduces the chance of breaking when you turn it out.
Don’t rush this step, but also don’t leave it too long, or it may stick.
Tap Out Air Bubbles Before Baking
Once your batter is in the pan, gently tap it on the counter a few times. This helps release trapped air bubbles, so you get a smoother, more even crumb.
It’s a quick step, but it helps your cake look and slice better.
Variations to Try
Chocolate Chip Bundt Cake
For extra texture and bursts of chocolate, fold in about 1 cup of chocolate chips into the batter before pouring it into the pan.
You’ll notice little pockets of melted chocolate throughout the cake, which makes each bite more indulgent.
If you’re worried about the chips sinking, lightly toss them in a bit of flour first to help keep them evenly distributed.
Marble Bundt Cake
If you’d like a mix of flavors, you can turn this into a marble cake. Simply reserve a portion of the batter before adding cocoa, or prepare a small vanilla batter alongside it.
Then alternate spoonfuls of chocolate and vanilla batter in the pan and gently swirl with a knife. Don’t over-swirl, though; just a few turns will give you that classic marbled look.
Orange Chocolate Bundt Cake
For a fresh twist, add 1–2 tablespoons of orange zest to the batter. The citrus brightens the chocolate flavor without overpowering it.
You can also add a small amount of orange juice to the glaze for a light, refreshing finish that pairs really well with the rich cake.
Espresso Chocolate Bundt Cake
If you enjoy a deeper, slightly bold flavor, swap the hot water for strong brewed espresso. You can also add 1 teaspoon of instant coffee powder to the dry ingredients.
You won’t get a strong coffee taste, but you’ll notice the chocolate flavor becomes more intense and balanced.
Nut-Filled Version
For added crunch, fold in 1/2 to 1 cup of chopped nuts like walnuts or pecans. This gives the cake a nice contrast to its soft texture.
Make sure the nuts are evenly mixed in so every slice gets a bit of that extra bite.
Storage and Freezing Tips
How to Store at Room Temperature
Once the cake has cooled completely, store it in an airtight container or cover it well with plastic wrap. It will stay fresh at room temperature for up to 3 days.
You’ll notice it keeps its moisture best when it’s sealed properly, so try not to leave it uncovered for long.
Refrigeration Tips
If your kitchen is warm or if the cake has a glaze or frosting that needs chilling, you can store it in the fridge. Place it in an airtight container to prevent it from drying out or absorbing fridge smells.
Before serving, let it sit at room temperature for about 20–30 minutes, so it softens and tastes its best.
Freezing Instructions
This cake freezes very well, which makes it great for planning ahead. Wrap the whole cake or individual slices tightly in plastic wrap, then place them in a freezer-safe bag or container.
It can be frozen for up to 2–3 months. When you’re ready to use it, let it thaw in the fridge overnight or at room temperature for a few hours.
How to Reheat or Refresh
If the cake feels slightly firm after storing, you can warm individual slices in the microwave for about 10–15 seconds. This helps bring back that soft, fresh texture.
You can also add a light drizzle of glaze or a dusting of powdered sugar to freshen up the look and flavor before serving.
Serving Suggestions
This chocolate bundt cake is easy to dress up or keep simple, depending on the moment.
You can serve it with a dollop of whipped cream or a scoop of vanilla ice cream, which adds a creamy contrast to the rich chocolate. You’ll notice how nicely it balances each bite.
If you’re enjoying it as a treat during the day, pair it with a warm cup of coffee or tea to bring out the deep cocoa flavor even more.
For a lighter touch, add a handful of fresh berries like strawberries or raspberries; their natural sweetness and slight tartness help cut through the richness and make the cake feel a bit more refreshing.
This cake also fits right into special occasions like birthdays, holidays, or family gatherings, because it looks beautiful straight out of the pan and feels just as special as more decorated desserts, without the extra effort.
Common Mistakes to Avoid
- Cake sticking to the pan – This usually comes from not greasing the pan well enough. Make sure you coat every curve and corner, and consider dusting with flour or cocoa powder for extra protection. Let the cake cool for 10–15 minutes before removing, so it releases more easily.
- Dry texture – This can happen if there’s too much flour or not enough moisture. Measure your ingredients carefully and avoid overmixing the batter, which can make the cake dense instead of soft.
- Overbaking – Leaving the cake in the oven too long will dry it out. Start checking a few minutes before the recommended time. You’re looking for a toothpick that comes out with a few moist crumbs, not completely dry.
- Uneven baking – This can be caused by an oven that’s too hot or batter that wasn’t mixed properly. Make sure your oven is fully preheated and try to mix the batter evenly before pouring it into the pan.
Final Thoughts
This chocolate bundt cake works because it’s simple, reliable, and full of rich flavor with a soft, moist texture. You don’t need complicated steps to get a beautiful result.
Give it a try, and you’ll notice how easily it comes together and how impressive it looks once it’s out of the pan. Don’t worry if it’s your first time; just follow the steps, and you’ll do great.
If you make it, feel free to share your results or try one of the variations. It’s a recipe you can come back to and make your own every time!
FAQs
Yes, you can use a regular cake pan or loaf pan. Just keep an eye on the baking time, as it may vary slightly.
This usually happens if the pan wasn’t greased well enough or the cake didn’t cool properly before removing. Make sure to coat every corner and let it rest for 10–15 minutes first.
Yes, melted butter works fine. You’ll get a slightly richer flavor, but the cake may be a bit less moist than when using oil.
The oil, milk, and hot coffee (or water) all help keep the cake soft. Not overbaking also plays a big role.
Absolutely. This cake stays moist for a few days and can also be frozen, making it perfect to prepare in advance.
Chocolate Bundt Cake Recipe – Rich, Moist & Easy to Make
Difficulty: Easy10
Slices15
minutes50
minutes1
hour5
minutesA rich, moist chocolate bundt cake with deep flavor and a soft crumb, made with simple ingredients and minimal effort.
Ingredients
2 cups (250g) all-purpose flour
3/4 cup (75g) cocoa powder
2 cups (400g) sugar
1 1/2 tsp baking powder
1 1/2 tsp baking soda
1/2 tsp salt
2 eggs
1 cup (240ml) milk or buttermilk
1/2 cup (120ml) oil or 115g melted butter
2 tsp vanilla extract
1 cup (240ml) hot coffee or hot water
Directions
- Preheat oven to 180°C (350°F) and grease a bundt pan well.
- Whisk together all dry ingredients in a large bowl.
- In another bowl, mix eggs, milk, oil, and vanilla.
- Combine wet and dry ingredients until just mixed.
- Slowly add hot coffee/water and mix until smooth (batter will be thin).
- Pour into the prepared pan and tap gently to remove air bubbles.
- Bake for 40–50 minutes, until a toothpick comes out clean.
- Cool for 10–15 minutes, then turn out onto a rack to cool completely.
Notes
- Grease the pan thoroughly to prevent sticking.
- Don’t overmix the batter—mix just until combined.
- Hot coffee enhances the chocolate flavor but won’t taste like coffee.
- Let the cake cool before removing it to avoid breaking.

Hi, I’m Sorenna Blythe, the baker and writer behind Mix Whisk Bake. I share simple, reliable recipes and honest kitchen moments to help home bakers bake with confidence and joy. When I’m not testing new treats, you’ll find me sipping coffee and dreaming up my next bake.


