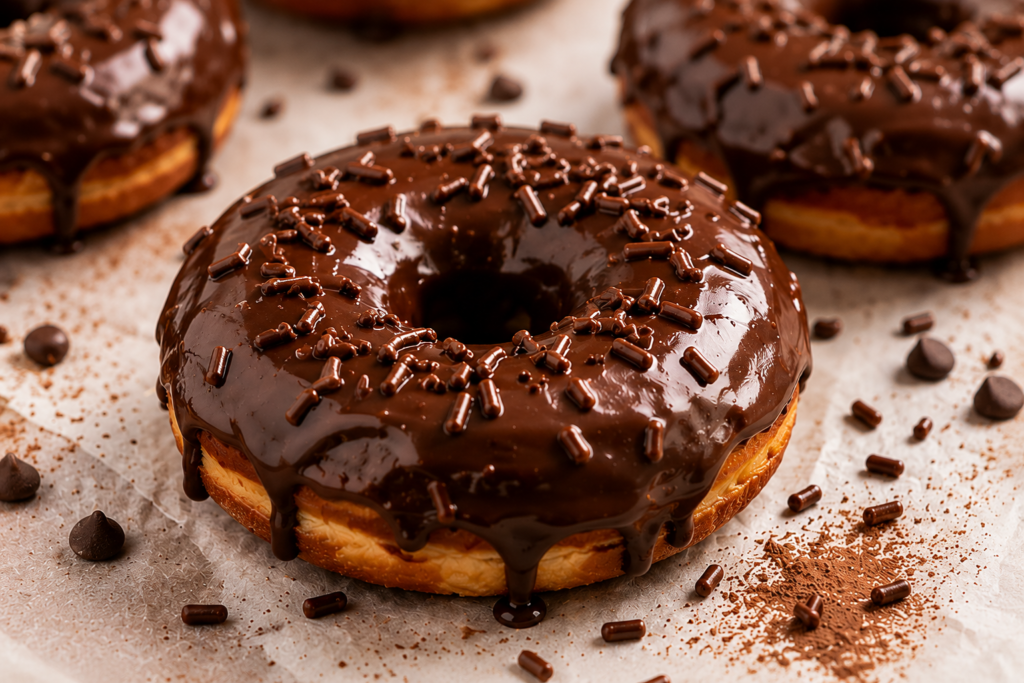
There’s nothing quite like biting into a fresh chocolate-glazed donut with a soft, fluffy center and a rich chocolate coating that melts in your mouth.
While bakery donuts are always tempting, making them at home is easier than you might think, and the results are every bit as delicious.
This recipe uses simple ingredients to create light, airy donuts with a smooth chocolate glaze that sets beautifully.
You’ll learn how to make the dough, fry it until golden, and finish each donut with a glossy chocolate coating that looks just as good as it tastes.
If you’re new to working with yeast dough, don’t worry. I’ll guide you through each step so you can bake with confidence.
Why You’ll Love This Chocolate Glazed Donuts Recipe
- Soft and pillowy texture – Every bite is light, fluffy, and tender, just like your favorite bakery donut.
- Rich chocolate glaze that sets beautifully – The smooth chocolate coating hardens just enough for the perfect glossy finish without becoming brittle.
- Simple pantry ingredients – Made with everyday baking staples you may already have in your kitchen.
- Beginner-friendly instructions – Clear, step-by-step directions make this recipe easy to follow, even if it’s your first time making donuts.
- Perfect for breakfast, brunch, or dessert – These homemade donuts are a delicious treat for any time of day or special occasion.
- Easy to customize – Add sprinkles, chopped nuts, coconut, or your favorite toppings to make each batch uniquely yours.

What Are Chocolate Glazed Donuts?
Chocolate glazed donuts are classic yeast or cake donuts coated in a smooth chocolate glaze that adds a rich, slightly sweet finish while letting the soft donut underneath remain the star of the show.
Glazed donuts have been enjoyed for generations, with early versions becoming popular after yeast-raised donuts gained attention in the United States during the early 1900s, and over time, bakers began experimenting with different glazes, including chocolate, to create the delicious variety we know today.
Unlike donuts filled with cream or topped with thick frosting, chocolate glazed donuts are covered with a thin, glossy coating that lightly sets as it cools, making them easy to hold while still delivering plenty of chocolate flavor in every bite.
Chocolate glazed donuts are often confused with chocolate cake donuts, but they are quite different in both texture and preparation.
A chocolate glazed donut usually starts with a plain yeast dough that is fried until light and airy before being dipped in chocolate glaze, while a chocolate cake donut is made with a batter that contains baking powder or baking soda and often includes cocoa powder directly in the dough.
The result is a noticeable difference in texture, with yeast donuts being soft, fluffy, and slightly chewy, while cake donuts are denser, more crumbly, and have a texture similar to a slice of moist cake.
Both styles are delicious, so the best choice comes down to the kind of donut you enjoy most.
This recipe uses a yeast dough because it creates the classic bakery-style texture that many people expect from a chocolate glazed donut.
As the dough rises, tiny air pockets form, giving the donuts their light, pillowy center and delicate chew that simply can’t be matched by most cake-style recipes.
After frying, the warm donuts develop a lightly crisp exterior that contrasts beautifully with the soft interior, making them the perfect base for a silky chocolate glaze.
The glaze clings evenly to the slightly warm surface, creating a smooth coating that sets without becoming overly hard, so every bite has the ideal balance of fluffy donut and rich chocolate.
If you’re making homemade donuts for the first time, don’t let working with yeast worry you.
The process is simpler than it may seem, and with a little patience while the dough rises, you’ll be rewarded with homemade chocolate glazed donuts that taste fresh, comforting, and every bit as good as those from your favorite bakery.
Ingredients You’ll Need
For the Donuts
- 4 cups (500 g) all-purpose flour – Provides the structure for soft, fluffy donuts.
- ¼ cup (50 g) granulated sugar – Adds a touch of sweetness and helps feed the yeast.
- 2¼ teaspoons (1 packet/7 g) active dry yeast or instant yeast – Helps the dough rise and creates a light, airy texture.
- 1 cup (240 ml) warm whole milk (100–110°F/38–43°C) – Activates the yeast and keeps the dough soft and tender.
- 2 large eggs, room temperature – Add richness, moisture, and structure.
- ¼ cup (57 g) unsalted butter, softened – Creates a tender crumb and enhances the flavor.
- 1 teaspoon vanilla extract – Adds warm, sweet flavor to the dough.
- 1 teaspoon salt – Balances the sweetness and strengthens the dough.
For the Chocolate Glaze
- 2 cups (240 g) powdered sugar – Creates a smooth, sweet glaze.
- ½ cup (50 g) unsweetened cocoa powder – Gives the glaze its rich chocolate flavor.
- ¼ cup (60 ml) milk or heavy cream – Thins the glaze to the perfect dipping consistency.
- 1 teaspoon vanilla extract – Adds extra depth of flavor.
- 2 tablespoons (28 g) unsalted butter, melted – Makes the glaze silky and glossy.
- Pinch of salt – Enhances the chocolate flavor and balances the sweetness.
Optional Toppings
- 2–3 tablespoons chocolate sprinkles – For extra chocolate flavor and crunch.
- 2–3 tablespoons rainbow sprinkles – Add a colorful, fun finish.
- ¼ cup (30 g) chopped nuts – Pecans, walnuts, or peanuts add a satisfying crunch.
- ¼ cup (45 g) mini chocolate chips – Perfect for chocolate lovers.
- ¼ cup (20 g) toasted shredded coconut – Adds a lightly sweet, nutty flavor.
- ¼ cup (30 g) crushed cookies – Try chocolate sandwich cookies or chocolate wafers for extra texture.
Kitchen Equipment You’ll Need
- Mixing bowls – You’ll need a large bowl for mixing the dough and a smaller bowl for preparing the chocolate glaze.
- Stand mixer (optional) – A stand mixer with a dough hook makes kneading easier, but you can also knead the dough by hand.
- Rolling pin – Helps roll the dough to an even thickness so the donuts cook evenly.
- Donut cutter (or biscuit cutters) – A donut cutter creates perfectly shaped donuts, while two round biscuit cutters work just as well if you don’t have one.
- Baking sheet – Holds the cut donuts while they rise before frying.
- Parchment paper – Prevents the dough from sticking to the baking sheet and makes transferring the donuts much easier.
- Dutch oven or deep fryer – A heavy Dutch oven retains heat well for even frying, while a deep fryer helps maintain a steady oil temperature.
- Kitchen thermometer – The easiest way to keep the oil between 350–375°F (175–190°C) for evenly cooked, golden-brown donuts.
- Cooling rack – Allows excess oil to drain and helps the donuts cool without becoming soggy.
- Whisk – Quickly combines the glaze ingredients into a smooth, lump-free chocolate coating.
How to Make Chocolate Glazed Donuts
Step 1 – Activate the Yeast
Pour the warm milk into a large mixing bowl, then stir in the granulated sugar and sprinkle the active dry yeast over the top.
Let the mixture sit for 5 to 10 minutes until it becomes foamy, which shows the yeast is active and ready to help the dough rise.
If you’re using instant yeast, you can skip this waiting step and mix it directly with the dry ingredients, although proofing it first can still give you extra confidence that it’s working.
Make sure the milk is warm rather than hot, around 100–110°F (38–43°C), since excessive heat can damage the yeast and prevent the dough from rising properly.
Step 2 – Mix the Dough
Add the eggs, softened butter, vanilla extract, and salt to the yeast mixture and stir until everything is well combined.
Gradually add the flour, one cup at a time, mixing after each addition until a soft dough begins to form.
The dough should feel slightly sticky but still easy to handle, so avoid adding extra flour too quickly, as too much flour can make the finished donuts heavy instead of light and fluffy.
Step 3 – Knead Until Smooth
Transfer the dough to a lightly floured surface or continue kneading with a stand mixer fitted with a dough hook.
Knead the dough for about 8 to 10 minutes by hand or 5 to 7 minutes with a mixer until it becomes smooth, soft, and elastic.
A simple way to check is to gently press the dough with your finger; if it slowly springs back, it’s ready for the first rise.
Step 4 – First Rise
Place the dough in a lightly greased bowl and turn it once so the surface is lightly coated with oil or butter.
Cover the bowl with a clean kitchen towel or plastic wrap to prevent the dough from drying out.
Leave it in a warm, draft-free place for about 1 to 1½ hours, or until it has doubled in size.
Don’t rush this step because a full rise creates the airy texture that makes homemade yeast donuts so enjoyable.
Step 5 – Roll and Cut the Donuts
Gently press down the risen dough to release the large air bubbles without aggressively punching it.
Transfer the dough to a lightly floured work surface and roll it to about ½ inch (1.25 cm) thick for evenly sized donuts.
Use a donut cutter or two round biscuit cutters to cut out the donut shapes, and gather the scraps to cut a few extra donuts if needed.
Place each cut donut on a parchment-lined baking sheet, leaving a little space between them so they have room to rise again.
Step 6 – Second Rise
Cover the shaped donuts loosely with a clean kitchen towel.
Allow them to rise for another 30 to 45 minutes, or until they look slightly puffy and have increased in size.
This second rise helps create the soft, light texture that gives yeast donuts their bakery-style quality.
Step 7 – Fry the Donuts
Pour about 2 to 3 inches of neutral oil, such as vegetable or canola oil, into a Dutch oven or deep fryer.
Heat the oil to 350–375°F (175–190°C) and use a kitchen thermometer to keep the temperature steady throughout frying.
Carefully lower two or three donuts into the hot oil without overcrowding the pot, as giving them space helps them cook evenly.
Fry each donut for about 1 to 2 minutes per side, turning once when the underside is golden brown.
The donuts are done when both sides are evenly golden, they feel light when lifted, and the centers are fully cooked without looking doughy.
Transfer the fried donuts to a cooling rack lined with paper towels underneath to catch any excess oil.
Step 8 – Cool Slightly
Let the donuts cool for about 5 minutes before glazing them.
They should still feel warm to the touch because the chocolate glaze sticks best to warm donuts while remaining smooth and even.
Avoid glazing them straight from the fryer, since excess heat can cause the glaze to become thin and slide off.
Step 9 – Make the Chocolate Glaze
In a medium bowl, whisk together the powdered sugar, cocoa powder, and a pinch of salt until there are no visible lumps.
Add the melted butter, vanilla extract, and milk or heavy cream, then whisk until the glaze is smooth, glossy, and easy to dip.
If the glaze seems too thick, whisk in a little more milk, one teaspoon at a time.
If it becomes too thin, simply add a little more powdered sugar until it reaches a coating consistency.
Step 10 – Dip and Decorate
Hold each warm donut by the sides and dip the top into the chocolate glaze, allowing any excess to drip back into the bowl.
Place the glazed donuts on a wire rack so the coating can set evenly.
If you’re adding sprinkles, chopped nuts, toasted coconut, mini chocolate chips, or crushed cookies, sprinkle them on immediately before the glaze begins to harden.
Let the glaze set for about 10 to 15 minutes before serving if you want a smooth, shiny finish that won’t smudge when picked up.
Enjoy your chocolate glazed donuts while they’re still fresh, as that’s when the fluffy texture and rich chocolate glaze are at their very best.
Tips for Perfect Chocolate Glazed Donuts
- Measure flour correctly – Spoon the flour into your measuring cup and level it off to avoid dense, heavy donuts.
- Don’t overheat the milk – Keep the milk warm, around 100–110°F (38–43°C), so the yeast activates without being damaged.
- Allow enough rising time – Let the dough double in size during the first rise and become puffy during the second rise for the lightest texture.
- Maintain consistent oil temperature – Keep the oil between 350–375°F (175–190°C) so the donuts cook evenly without becoming greasy.
- Avoid overcrowding the fryer – Fry only a few donuts at a time to prevent the oil temperature from dropping too much.
- Dip donuts while still slightly warm – Warm donuts help the chocolate glaze spread smoothly and adhere evenly.
- Let the glaze set before stacking – Allow the glaze to harden for about 10–15 minutes to prevent smudging and sticking.
Common Mistakes to Avoid
- Using expired yeast – Always check the expiration date and proof active dry yeast first to ensure it’s still active.
- Adding too much flour – Too much flour creates dense, dry donuts, so add only enough to form a soft, slightly sticky dough.
- Under-kneading the dough – Knead until the dough is smooth and elastic to develop the structure needed for light, fluffy donuts.
- Over-proofing – Let the dough rise until doubled, but don’t leave it too long or the donuts may collapse and lose their airy texture.
- Frying at the wrong temperature – Oil that’s too cool makes greasy donuts, while oil that’s too hot browns the outside before the center is fully cooked.
- Making the glaze too thick or too thin – Aim for a smooth, pourable consistency that coats the donuts evenly without dripping off completely.
- Glazing hot donuts – Let the donuts cool for about 5 minutes before dipping so the chocolate glaze sticks well and sets with a smooth finish.
| Problem | Possible Cause | Solution |
|---|---|---|
| Dense donuts | Too much flour | Measure flour by weight or spoon and level |
| Dough won’t rise | Inactive yeast | Test yeast before mixing |
| Greasy donuts | Oil too cool | Fry at 350–375°F (175–190°C) |
| Burnt exterior | Oil too hot | Use a thermometer and adjust heat |
| Glaze won’t stick | Donuts too cool | Dip while slightly warm |
| Glaze too runny | Too much liquid | Add more powdered sugar |
| Glaze too thick | Too much sugar | Add milk 1 teaspoon at a time |
Delicious Variations
Double Chocolate Donuts
If you can’t get enough chocolate, this variation is the perfect choice.
Replace about ¼ cup (30 g) of the all-purpose flour with ¼ cup (25 g) of unsweetened cocoa powder to create a lightly chocolate-flavored dough.
Once the donuts are fried, dip them in the chocolate glaze and finish with mini chocolate chips, chocolate sprinkles, or finely grated dark chocolate for even more rich flavor.
The result is a deeper chocolate taste without making the donuts heavy, giving you a treat that’s perfect for serious chocolate lovers.
Chocolate Espresso Glaze
A small amount of espresso brings out the chocolate flavor without making the glaze taste strongly like coffee.
Stir 1 to 2 teaspoons of instant espresso powder into the warm milk or cream before mixing the glaze ingredients.
The espresso adds depth and richness, making the chocolate taste bolder and more balanced.
This variation pairs especially well with a hot cup of coffee or a creamy latte.
Dark Chocolate Glaze
For a less sweet finish, use Dutch-process cocoa powder or replace part of the cocoa with melted dark chocolate.
You can also reduce the powdered sugar slightly if you enjoy a more intense chocolate flavor.
A pinch of extra salt helps balance the sweetness while making the chocolate taste even richer.
This version is ideal if you prefer desserts with a deeper, more sophisticated chocolate taste.
Chocolate Peanut Butter Donuts
Chocolate and peanut butter are a classic combination that’s always a crowd-pleaser.
After the chocolate glaze has set, drizzle warm peanut butter over each donut using a spoon or piping bag.
You can also sprinkle chopped roasted peanuts on top for extra crunch and flavor.
These donuts are rich, creamy, and perfect for anyone who loves sweet and salty desserts.
Chocolate Mint Donuts
For a refreshing twist, add ¼ teaspoon of peppermint extract to the chocolate glaze.
A little goes a long way, so start with a small amount to keep the mint from overpowering the chocolate.
Decorate with crushed peppermint candies or chocolate curls for a festive finish during the holiday season.
The cool mint flavor pairs beautifully with the smooth chocolate coating and fluffy donut.
Cookies and Cream Donuts
Turn your homemade donuts into a bakery-style treat by adding crushed chocolate sandwich cookies.
Dip each donut in the chocolate glaze, then immediately sprinkle crushed chocolate sandwich cookies over the top before the glaze sets.
The cookie pieces add a delicious crunch while complementing the rich chocolate coating.
This easy variation is always a favorite with both kids and adults.
Salted Chocolate Glaze
If you enjoy sweet desserts with a hint of contrast, try finishing the glazed donuts with a light sprinkle of flaky sea salt.
The salt enhances the chocolate flavor and balances the sweetness without making the donuts taste salty.
Use just a small pinch on each donut so every bite has the perfect balance of rich chocolate and delicate saltiness.
This simple finishing touch gives homemade chocolate glazed donuts an elegant bakery-style look and an unforgettable flavor.
What to Serve with Chocolate Glazed Donuts
- Coffee – A freshly brewed cup of coffee balances the sweetness of the chocolate glaze.
- Espresso – The bold, rich flavor of espresso pairs perfectly with soft, fluffy donuts.
- Cappuccino – Creamy steamed milk and espresso create a smooth, comforting combination.
- Hot chocolate – A warm mug of hot chocolate makes these donuts an extra-indulgent treat.
- Milk – A cold glass of milk is a simple, classic pairing that everyone enjoys.
- Fresh berries – Strawberries, raspberries, or blueberries add a refreshing burst of natural sweetness.
- Vanilla yogurt – Creamy vanilla yogurt provides a light, tangy contrast to the rich chocolate glaze.
- Fruit salad – A colorful mix of fresh fruit adds freshness and helps balance the richness of the donuts.
Storage Instructions
Room Temperature
Chocolate glazed donuts taste best on the day they’re made, when the dough is at its softest and the glaze is fresh and glossy.
If you have leftovers, let the glaze set completely before storing them to prevent sticking.
Place the donuts in an airtight container and keep them at room temperature for up to 2 days.
If you’re stacking the donuts, place a sheet of parchment or wax paper between each layer to protect the chocolate glaze.
Keep the container away from direct sunlight and heat, as warm temperatures can soften or melt the glaze.
Refrigeration
If you need to store the donuts for a little longer, the refrigerator is a good option.
Arrange the donuts in a single layer inside an airtight container or separate layers with parchment paper to keep the glaze looking neat.
Store them in the refrigerator for up to 5 days.
Keep in mind that refrigeration can make the donuts firmer than when they’re freshly made, but a quick warm-up before serving helps restore some of their softness.
Freezing
Chocolate glazed donuts freeze well, making them a great make-ahead treat.
For the best texture, freeze the donuts before adding the chocolate glaze whenever possible.
Wrap each donut individually in plastic wrap, then place them in a freezer-safe bag or airtight container.
Freeze for up to 3 months.
When you’re ready to enjoy them, thaw the donuts at room temperature before glazing or reheating.
If you’ve already glazed the donuts, freeze them in a single layer until the glaze is firm, then transfer them to a freezer-safe container with parchment paper between the layers.
Best Way to Reheat
For the softest texture, warm room-temperature or thawed donuts in the microwave for 8 to 10 seconds.
If the donuts have been refrigerated, microwave them for 10 to 15 seconds, checking after a few seconds to avoid overheating.
You can also warm unglazed donuts in a 300°F (150°C) oven for about 5 minutes to refresh their texture before adding a fresh layer of chocolate glaze.
Avoid heating glazed donuts for too long, as the chocolate coating may melt completely instead of staying smooth and glossy.
For the best flavor and texture, enjoy the donuts while they’re slightly warm, when the dough is soft, and the chocolate glaze is perfectly rich.
Can You Make Them Ahead?
Yes, chocolate glazed donuts can be prepared ahead of time, making them a great option when you’re baking for a special breakfast, brunch, holiday, or family gathering.
One of the easiest ways to save time is to prepare the dough the night before, allowing you to spread the work over two days instead of doing everything at once.
After kneading the dough, place it in a lightly greased bowl, cover it tightly, and refrigerate it overnight instead of letting it rise at room temperature.
The slow, overnight rise gives the dough plenty of time to develop flavor while fitting easily into a busy schedule.
The next morning, remove the dough from the refrigerator and let it sit at room temperature for about 30 to 60 minutes, or until it’s no longer cold and feels slightly puffy.
Once the dough has warmed up, roll it out, cut the donuts, and allow them to complete their second rise before frying as directed in the recipe.
If you’d like to prepare even further in advance, fry the donuts and allow them to cool completely without adding the chocolate glaze.
Store the unglazed donuts in a freezer-safe container or freezer bag for up to 3 months, separating layers with parchment paper to prevent sticking.
When you’re ready to serve them, thaw the donuts at room temperature and warm them gently for a few seconds in the microwave or a few minutes in a low oven to refresh their soft texture.
Freshly made chocolate glaze can also be prepared 1 to 2 days ahead and stored in an airtight container in the refrigerator.
Before using the glaze, let it come to room temperature and whisk in a teaspoon or two of milk if it has thickened too much during storage.
For the freshest flavor and the smoothest finish, it’s always best to glaze the donuts shortly before serving, giving you that beautiful glossy coating and the soft, bakery-style texture everyone loves.
Expert Tips for Bakery-Style Donuts
- Use bread flour for a chewier texture – If you prefer a classic bakery-style bite, substitute bread flour for all-purpose flour to create a slightly chewier, more elastic donut.
- Let the dough rise until doubled, not by the clock – Rising times can vary depending on your kitchen, so judge the dough by its size rather than the minutes listed in the recipe.
- Fry only a few donuts at a time – Cooking two or three donuts per batch helps maintain the oil temperature and ensures even browning.
- Use a thermometer for accurate oil temperature – Keeping the oil between 350–375°F (175–190°C) produces donuts that are golden outside, fully cooked inside, and never greasy.
- Dip each donut only once for a smooth finish – A single, even dip creates a glossy chocolate coating without streaks or thick, uneven layers.
- Cool on a wire rack to prevent soggy bottoms – Allowing air to circulate around the donuts keeps the bottoms crisp while the chocolate glaze sets beautifully.
Final Thoughts
Homemade chocolate glazed donuts are every bit as soft, fluffy, and delicious as the ones from your favorite bakery, and making them from scratch is easier than you might expect.
Once you’ve mastered the basic recipe, have fun trying different glazes, toppings, and flavor combinations to make each batch your own.
Don’t be afraid to experiment, because some of the best baking ideas come from adding your own personal touch.
FAQs
Can I bake these instead of frying?
Yes, you can bake them, but they won’t have the same light, fluffy texture or crisp exterior as traditional fried donuts. Bake at 375°F (190°C) for about 10–12 minutes or until lightly golden.
What’s the best oil for frying donuts?
Neutral oils with a high smoke point, such as vegetable oil, canola oil, peanut oil, or sunflower oil, work best because they don’t overpower the flavor.
Can I use instant yeast?
Yes. Instant yeast can be mixed directly with the dry ingredients, and you can use the same amount as active dry yeast.
Why are my donuts greasy?
Greasy donuts are usually caused by oil that’s too cool. Keep the oil between 350–375°F (175–190°C) so the donuts cook quickly without absorbing excess oil.
Why didn’t my dough rise?
The most common reasons are expired yeast, milk that was too hot or too cold, or a room that wasn’t warm enough for the dough to rise properly.
Can I make these without a stand mixer?
Absolutely. You can knead the dough by hand for about 8–10 minutes until it’s smooth and elastic.
How long does the glaze take to set?
The chocolate glaze usually sets in 10–15 minutes at room temperature, depending on the temperature and humidity in your kitchen.
Can I freeze glazed donuts?
Yes. Freeze the glazed donuts in a single layer until firm, then transfer them to a freezer-safe container with parchment paper between the layers for up to 3 months.
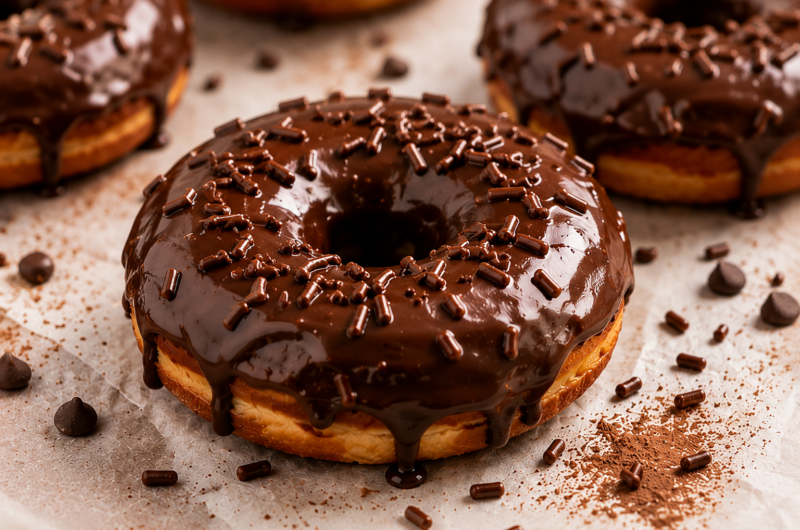
Chocolate Glazed Donuts Recipe: Soft, Fluffy, Bakery-Style Donuts
Difficulty: Easy12
Donuts30
minutes20
minutes2
hours50
minutesThese homemade chocolate glazed donuts are soft, fluffy, and topped with a rich chocolate glaze that sets perfectly. They’re a bakery-style treat that’s surprisingly easy to make from scratch.
Ingredients
- For the Donuts
4 cups all-purpose flour
¼ cup granulated sugar
2¼ teaspoons active dry yeast
1 cup warm whole milk
2 large eggs
¼ cup unsalted butter, softened
1 teaspoon vanilla extract
1 teaspoon salt
Vegetable or canola oil, for frying
- For the Chocolate Glaze
2 cups powdered sugar
½ cup unsweetened cocoa powder
¼ cup milk or heavy cream
2 tablespoons melted butter
1 teaspoon vanilla extract
Pinch of salt
Directions
- Activate the yeast in the warm milk with the sugar until foamy.
- Mix in the remaining donut ingredients and knead until the dough is smooth and elastic.
- Let the dough rise until doubled, then roll it out, cut the donuts, and let them rise again.
- Fry the donuts in 350–375°F (175–190°C) oil until golden on both sides, then cool slightly.
- Whisk together the glaze ingredients until smooth and dip each warm donut into the chocolate glaze.
- Allow the glaze to set for 10–15 minutes before serving.
Notes
- Measure the flour carefully to keep the donuts light and fluffy.
- Maintain the oil temperature between 350–375°F (175–190°C) for the best results.
- Dip the donuts while they’re still slightly warm so the glaze coats evenly.
- Homemade donuts are best enjoyed the same day but can be stored in an airtight container for up to 2 days.


Hi, I’m Sorenna Blythe, the baker and writer behind Mix Whisk Bake. I share simple, reliable recipes and honest kitchen moments to help home bakers bake with confidence and joy. When I’m not testing new treats, you’ll find me sipping coffee and dreaming up my next bake.