Frozen desserts just hit different on a warm day, and these frozen cheesecake bars are one of the easiest treats to make at home.
They’re creamy, refreshing, and have the perfect balance of rich cheesecake filling and buttery crust in every bite.
The best part? You can make them ahead of time and keep them in the freezer until you’re ready to serve.
They’re perfect for birthdays, summer parties, or those days when you simply want a cold sweet treat without much effort.
You can also switch things up with your favorite toppings and flavors.
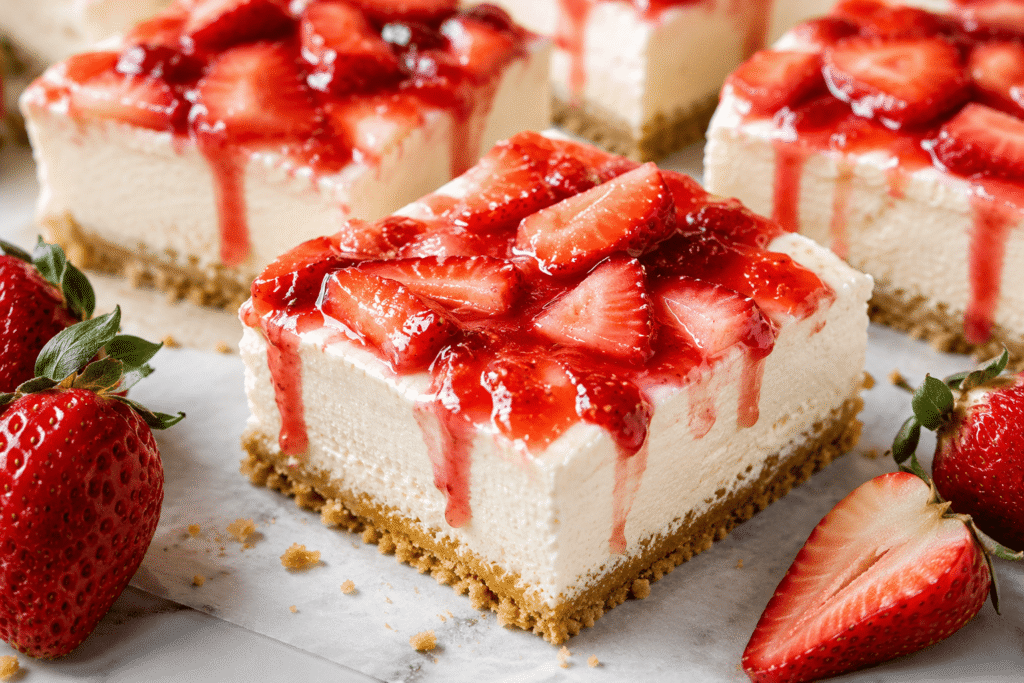
Fresh berries, chocolate drizzle, caramel, or crushed cookies all work beautifully, so it’s easy to make them your own.
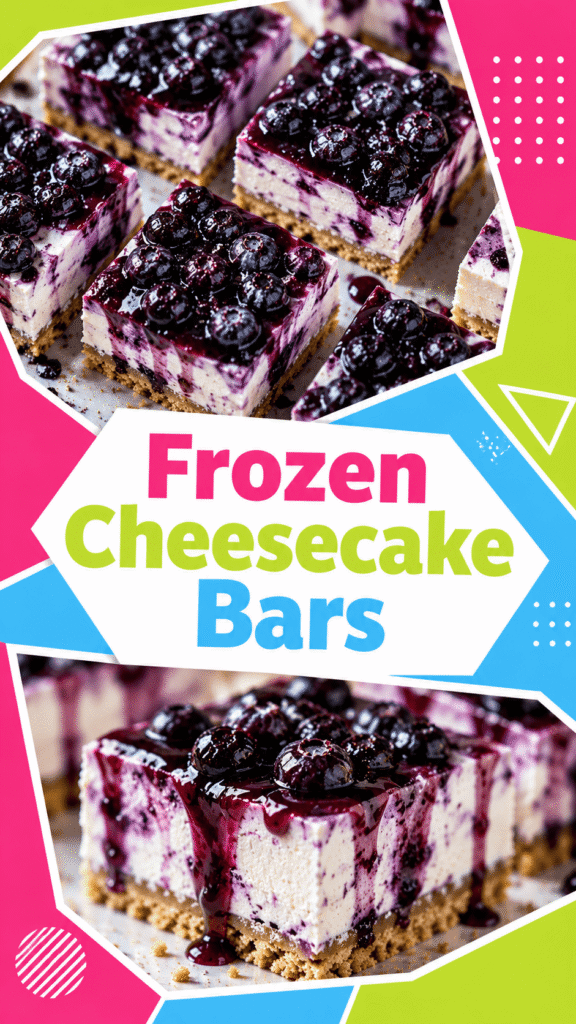
Why You’ll Love These Frozen Cheesecake Bars
- No complicated baking required – This simple recipe comes together with minimal effort and beginner-friendly steps.
- Creamy and smooth texture – Every bite is rich, cold, and perfectly creamy straight from the freezer.
- Perfect make-ahead dessert – You can prepare the bars in advance and keep them frozen until ready to serve.
- Easy to slice and serve – The bars cut neatly into portions, making them great for sharing.
- Great for summer gatherings – These chilled cheesecake bars are refreshing and ideal for warm-weather parties and family get-togethers.
- Easy to customize – Add your favorite toppings like fresh fruit, chocolate drizzle, caramel sauce, or crushed cookies to make them your own.
What Are Frozen Cheesecake Bars?
Frozen cheesecake bars are a chilled version of classic cheesecake, made to be served straight from the freezer instead of the refrigerator.
Traditional cheesecake is usually baked or chilled until soft and creamy, while frozen cheesecake bars have a firmer texture that feels a bit like cheesecake and ice cream combined.
They stay cold, smooth, and refreshing, which makes them especially perfect for warm days or summer parties.
The base is usually made with a buttery graham cracker crust that adds a slightly crunchy bite and balances the creamy filling beautifully.
On top of that sits a rich cheesecake layer made with cream cheese, whipped cream, and simple ingredients that blend into a smooth and fluffy texture once frozen.
The bars are sliced into easy-to-serve portions, making them convenient for gatherings, birthdays, or quick desserts at home.
One of the best things about frozen cheesecake bars is how flexible they are.
You can keep them simple and classic or add flavors like chocolate, berries, caramel, lemon, or crushed cookies to create something a little different every time.
Ingredients You’ll Need
For the Crust
- 2 cups graham cracker crumbs – Creates a buttery and slightly crunchy base for the bars.
- ½ cup unsalted butter, melted – Helps hold the crust together while adding rich flavor.
- 2 tablespoons granulated sugar – Adds a touch of sweetness to the crust.
For the Cheesecake Filling
- 16 ounces cream cheese, softened – The main ingredient that gives the bars their creamy cheesecake texture.
- 1 cup heavy whipping cream – Makes the filling light, smooth, and fluffy once whipped.
- ¾ cup powdered sugar – Sweetens the filling while keeping it silky smooth.
- 1 teaspoon vanilla extract – Adds warm and classic cheesecake flavor.
- 1 tablespoon lemon juice – Brightens the flavor and balances the sweetness.
Optional Toppings
- ¼ cup strawberry sauce – Adds a fruity and refreshing finish.
- ¼ cup chocolate drizzle – Perfect for extra richness and dessert-style flavor.
- ½ cup crushed cookies – Adds crunch and works well with Oreo or graham cookies.
- 1 cup fresh berries – Strawberries, blueberries, or raspberries add freshness and color.
- ¼ cup caramel sauce – Brings a sweet and buttery flavor to the bars.
- 1 cup whipped cream – Makes each serving extra light and creamy.
Kitchen Tools Needed
- Mixing bowls – You’ll need a few bowls for mixing the crust and cheesecake filling separately.
- Electric mixer – Helps create a smooth, creamy filling without lumps. A hand mixer or stand mixer both work well.
- Spatula – Useful for folding the whipped cream into the filling and smoothing the top evenly.
- 8×8 baking pan – The perfect size for thick, easy-to-slice cheesecake bars.
- Parchment paper – Makes it much easier to lift the bars out of the pan after freezing.
- Measuring cups and spoons – Helps keep the ingredient amounts accurate for the best texture and flavor.
How to Make Frozen Cheesecake Bars
Step 1: Prepare the Crust
Start by lining your 8×8 baking pan with parchment paper, leaving a little extra hanging over the sides so the bars are easier to lift out later.
In a mixing bowl, combine the graham cracker crumbs, melted butter, and sugar until the mixture looks like wet sand.
Every crumb should be lightly coated with butter so the crust holds together properly after freezing.
Pour the mixture into the prepared pan and press it down firmly into an even layer using the back of a spoon, a spatula, or the bottom of a measuring cup.
Pressing the crust tightly helps prevent it from crumbling when sliced later.
Once the crust is packed down, place the pan in the refrigerator or freezer while you prepare the filling.
Chilling it now helps the base stay firm under the creamy cheesecake layer.
Step 2: Make the Cheesecake Filling
In a large bowl, beat the softened cream cheese until completely smooth and creamy.
Taking a minute to soften the cream cheese first makes a big difference and helps avoid lumps in the filling.
Add the powdered sugar, vanilla extract, and lemon juice, then continue mixing until everything is fully combined and silky.
The lemon juice adds a light freshness that balances the sweetness without making the bars taste strongly lemony. In a separate bowl, whip the heavy cream until soft peaks form.
This simply means the cream becomes thick and fluffy enough to hold its shape when lifted with a whisk or beaters.
Gently fold the whipped cream into the cream cheese mixture using a spatula instead of stirring aggressively.
Folding keeps the filling light and airy, giving the bars their smooth frozen texture.
Step 3: Assemble the Bars
Remove the chilled crust from the refrigerator and spoon the cheesecake filling over the top. Spread it evenly into all corners of the pan using a spatula.
Take your time smoothing the top because it helps the finished bars look neat once sliced.
If you want to add swirls of strawberry sauce, caramel, or melted chocolate, now is a great time to gently swirl them into the filling with a knife.
Even simple toppings can make the bars look extra special with very little effort.
Step 4: Freeze
Cover the pan tightly with plastic wrap or foil to keep the cheesecake fresh while freezing.
Place the pan in the freezer for at least 4 to 6 hours, though overnight is even better if you have the time.
The bars should feel firm all the way through before slicing.
Freezing slowly also helps the texture stay creamy instead of icy.
This is the perfect make-ahead dessert because you can leave it frozen until you need it.
Step 5: Slice and Serve
When ready to serve, remove the bars from the freezer and let them sit at room temperature for about 5 minutes.
This slight softening makes slicing much easier and gives the cheesecake a creamier bite.
Lift the bars out of the pan using the parchment paper and place them on a cutting board.
Use a sharp knife to cut clean squares or rectangles, wiping the knife between cuts if needed for smoother edges.
Add your favorite toppings right before serving, whether that’s fresh berries, whipped cream, chocolate drizzle, caramel sauce, or crushed cookies.
The result is a cold, creamy dessert that feels impressive but is surprisingly simple to make at home.
Flavor Variations
- Chocolate Frozen Cheesecake Bars – Mix 2 tablespoons of cocoa powder or ½ cup melted chocolate into the filling for a rich chocolate flavor.
- Strawberry Cheesecake Bars – Swirl fresh strawberry puree or strawberry sauce into the cheesecake mixture before freezing.
- Oreo Cheesecake Bars – Fold crushed sandwich cookies into the filling and sprinkle extra cookie crumbs on top.
- Lemon Cheesecake Bars – Add extra lemon zest and a little more lemon juice for a brighter, fresher flavor.
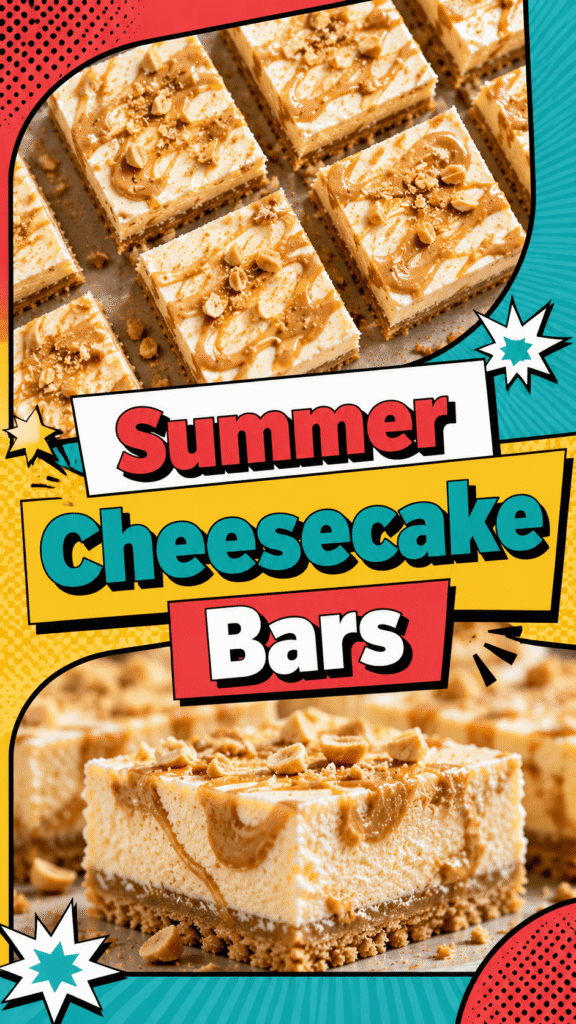
- Peanut Butter Cheesecake Bars – Swirl creamy peanut butter into the cheesecake layer for a rich and slightly salty twist.
Tips for the Best Frozen Cheesecake Bars
Use Softened Cream Cheese for a Smooth Filling
One of the easiest ways to get a creamy cheesecake filling is to start with properly softened cream cheese.
Cold cream cheese tends to stay lumpy no matter how long you mix it, which can affect the final texture of the bars.
Let it sit at room temperature for about 30 to 45 minutes before making the filling.
It should feel soft enough to press gently with your finger.
This simple step helps everything blend together smoothly and gives the cheesecake its rich, velvety texture.
Line the Pan with Parchment Paper for Easy Removal
Lining the baking pan with parchment paper makes a huge difference when it’s time to remove the bars.
Leave a little extra parchment hanging over the sides of the pan so you can easily lift the entire cheesecake out in one piece after freezing.
This not only makes slicing easier but also helps keep the bars looking clean and neat.
It’s a small step that saves time and frustration later, especially for beginners.
Freeze Long Enough for Clean Slices
Patience really helps with this recipe.
The cheesecake bars need enough time in the freezer to fully firm up before slicing.
If they are cut too early, the filling may be too soft, and the slices can lose their shape.
Freezing the bars overnight gives the best texture and makes serving much easier.
If you’re preparing them for a party or gathering, making them a day ahead is a great option.
Use a Warm Knife When Cutting the Bars
For cleaner slices, run a sharp knife under warm water and dry it before cutting each row.
The warmth helps the knife glide through the frozen cheesecake more smoothly without cracking the top layer.
Wiping the knife between cuts also helps keep the edges neat.
This simple trick gives the bars a more polished look with very little extra effort.
Store the Bars Tightly Covered
Frozen desserts can dry out quickly if they are not stored properly.
Keep the cheesecake bars tightly covered with plastic wrap, foil, or in an airtight container to protect them from freezer burn.
This helps preserve both the creamy texture and fresh flavor.
If stacking the bars, place parchment paper between layers so they don’t stick together.
Proper storage keeps them tasting delicious whenever you’re ready for another slice.
How to Store Frozen Cheesecake Bars
Frozen cheesecake bars store beautifully, which makes them perfect for making ahead and enjoying whenever a dessert craving hits.
Once the bars are fully frozen and sliced, place them in an airtight container to help keep their creamy texture fresh and prevent ice crystals from forming.
If you plan to stack the bars, place a sheet of parchment paper between each layer so they don’t stick together or lose their shape when removed from the container.
Keeping them tightly covered also protects them from absorbing freezer odors, which helps preserve their flavor.
For the best taste and texture, try to enjoy the bars within 1 to 2 weeks.
They will still be safe to eat after that, but the crust may soften slightly, and the filling can become less creamy over time.
When ready to serve, let the bars sit at room temperature for a few minutes before eating so they soften just enough for the perfect smooth and creamy bite.
Can You Make Them Ahead?
Yes, frozen cheesecake bars are one of the best make-ahead desserts because they are designed to stay in the freezer until you’re ready to serve them.
This makes them incredibly convenient for birthdays, holidays, summer parties, or busy weeks when you want dessert already prepared ahead of time.
You can make the entire recipe a day or two in advance without worrying about the texture or flavor changing.
In fact, giving the bars extra time in the freezer often helps them firm up even better, making them easier to slice cleanly.
Once frozen, simply keep them tightly covered in an airtight container or wrapped well in the pan to keep them fresh.
When it’s time to serve, all you need to do is let the bars sit at room temperature for a few minutes so they soften slightly for the perfect creamy bite.
This easy prep-ahead option takes away last-minute stress and makes entertaining much simpler, especially when you want a dessert that looks impressive without needing extra work on the day of serving.
What to Serve with Frozen Cheesecake Bars
- Fresh fruit – Strawberries, blueberries, raspberries, or sliced peaches add a fresh and juicy balance to the creamy cheesecake bars.
- Coffee – A hot cup of coffee pairs perfectly with the rich and sweet cheesecake flavor.
- Iced latte – The cold and creamy texture of an iced latte makes it a refreshing match for frozen desserts.
- Milkshakes – Serve with vanilla, chocolate, or strawberry milkshakes for an extra fun dessert combination.
- Hot chocolate – Warm hot chocolate creates a cozy contrast against the cold cheesecake bars.
- Fruit sauces – Strawberry, raspberry, blueberry, or mango sauce adds extra flavor and a beautiful finishing touch.
Final Thoughts
These frozen cheesecake bars are simple to make, incredibly creamy, and perfect for warm days when you want an easy homemade dessert.
Don’t be afraid to try different flavors and toppings to make them your own, whether you love chocolate, fruit, caramel, or cookies.
Once you make them, they’re the kind of treat you’ll want to keep in your freezer all summer long.
If you enjoyed this recipe, be sure to save it and share it with friends and family so they can enjoy it too.
FAQs
Can I use store-bought crust?
Yes, but homemade crust tastes fresher.
How long do frozen cheesecake bars need to freeze?
Usually 4–6 hours or overnight.
Can I make them without heavy cream?
Mention possible substitutes like whipped topping.
Are frozen cheesecake bars served fully frozen?
Slightly softened gives the best texture.
Can I use different cookies for the crust?
Yes, Oreos, vanilla wafers, or digestive biscuits work well.
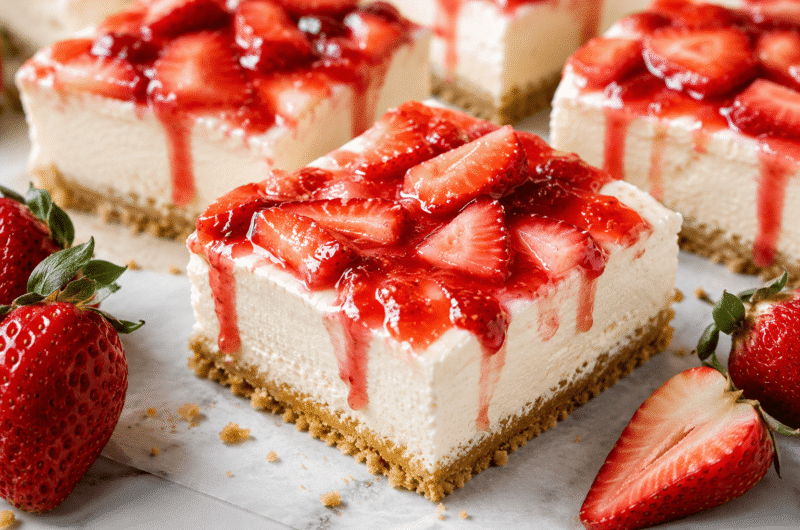
Frozen Cheesecake Bars – Creamy, Easy & Perfect for Summer
Difficulty: Easy9
Bars20
minutes6
hours20
minutesThese frozen cheesecake bars are creamy, refreshing, and perfect for warm days. Made with a buttery graham cracker crust and smooth no-bake cheesecake filling, they’re an easy make-ahead dessert for any occasion.
Ingredients
- Crust
2 cups graham cracker crumbs
½ cup melted butter
2 tablespoons sugar
- Filling
16 oz cream cheese, softened
1 cup heavy whipping cream
¾ cup powdered sugar
1 teaspoon vanilla extract
1 tablespoon lemon juice
- Optional Toppings
Strawberry sauce
Chocolate drizzle
Fresh berries
Crushed cookies
Directions
- Line an 8×8 pan with parchment paper.
- Mix graham cracker crumbs, melted butter, and sugar until combined. Press firmly into the pan and chill.
- Beat cream cheese until smooth. Mix in powdered sugar, vanilla, and lemon juice.
- In a separate bowl, whip heavy cream until fluffy, then gently fold it into the cream cheese mixture.
- Spread filling evenly over the crust and smooth the top.
- Cover and freeze for 4–6 hours or until firm.
- Let it sit for a few minutes before slicing and adding toppings.
Notes
- Use softened cream cheese for the smoothest filling.
- Freeze overnight for cleaner slices.
- Store leftovers in an airtight container in the freezer for up to 2 weeks.

Hi, I’m Sorenna Blythe, the baker and writer behind Mix Whisk Bake. I share simple, reliable recipes and honest kitchen moments to help home bakers bake with confidence and joy. When I’m not testing new treats, you’ll find me sipping coffee and dreaming up my next bake.