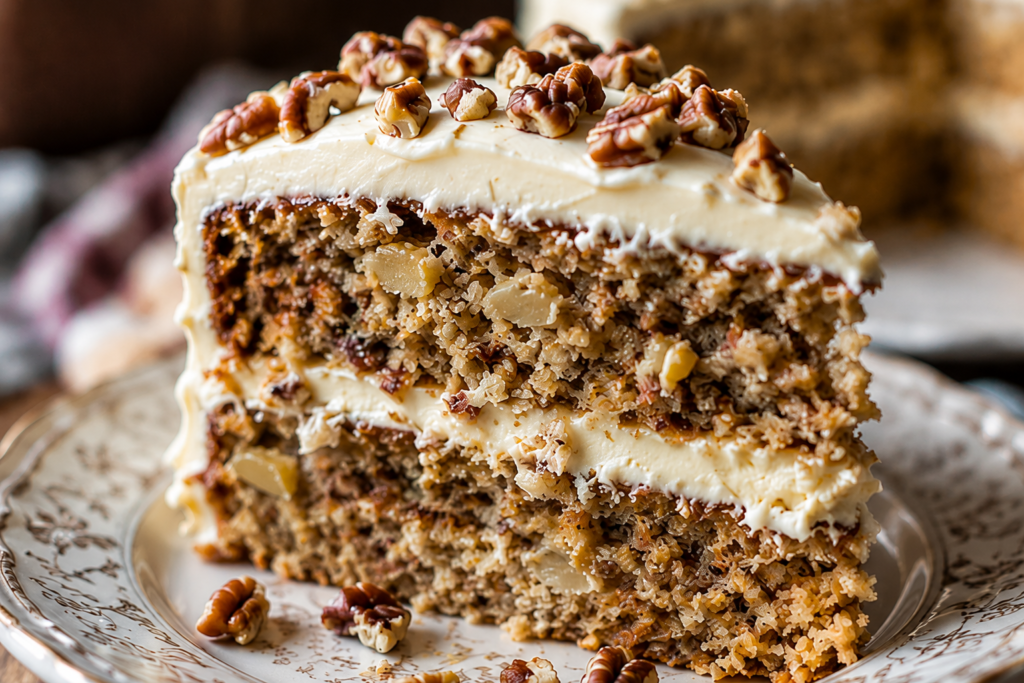
If you’re looking for a cake that is incredibly moist, packed with flavor, and guaranteed to impress, Hummingbird Cake is a wonderful choice.
This Southern favorite combines sweet bananas, juicy pineapple, crunchy pecans, and rich cream cheese frosting to create a dessert that’s both comforting and unforgettable.
Despite its impressive appearance, Hummingbird Cake is surprisingly simple to make.
The fruit keeps every bite soft and tender, while the cream cheese frosting adds the perfect finishing touch.
Follow along and I’ll show you exactly how to make it with confidence.
What Is Hummingbird Cake?
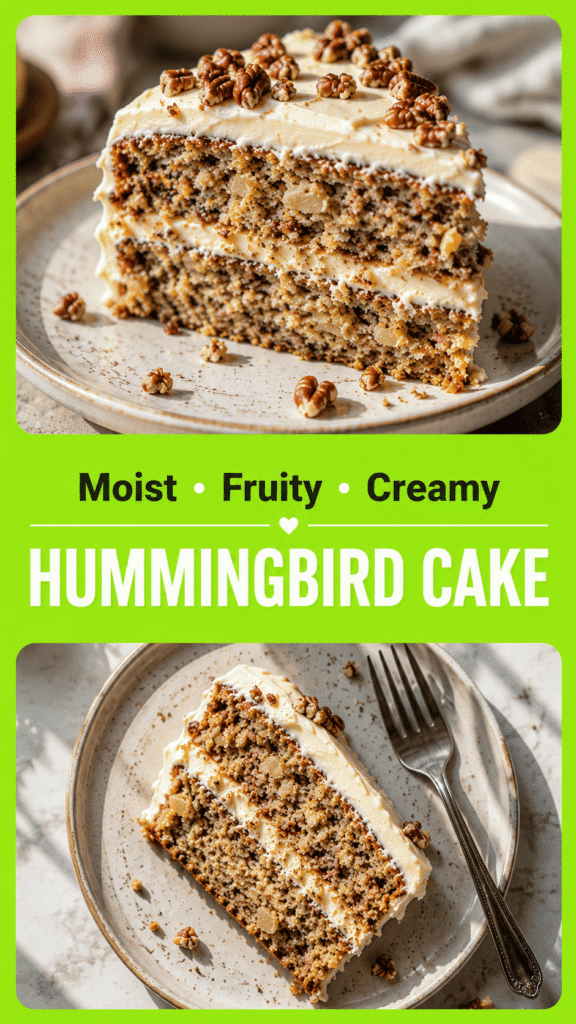
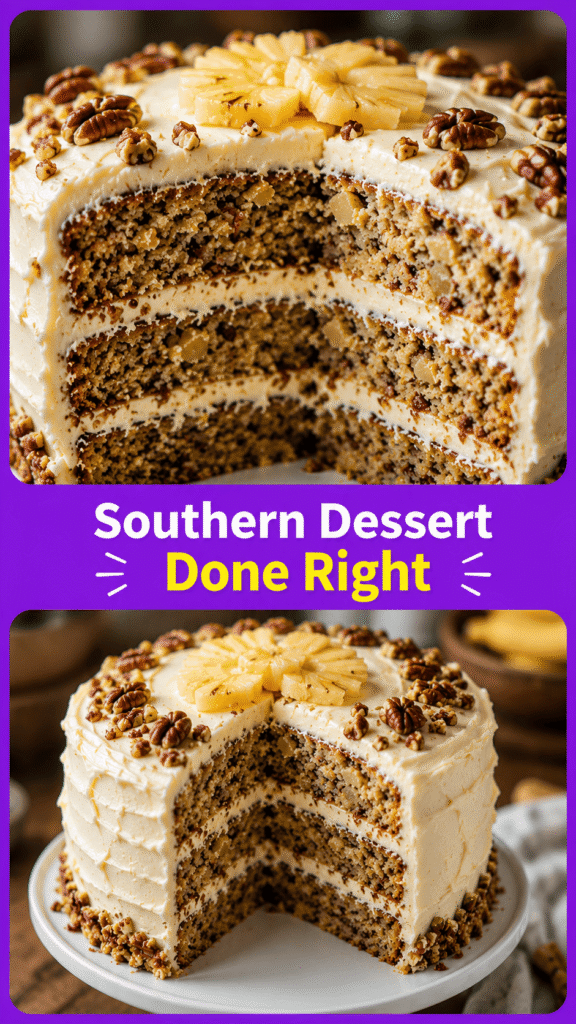
Hummingbird Cake is a classic Southern dessert made with ripe bananas, crushed pineapple, chopped pecans, warm spices, and a rich cream cheese frosting.
It is known for its incredibly moist texture and its perfect balance of sweet, fruity, and nutty flavors.
Unlike many traditional layer cakes, Hummingbird Cake gets much of its flavor and softness from fruit rather than relying solely on butter or chocolate.
The combination may sound unusual at first, but the ingredients work together beautifully.
The bananas add natural sweetness.
The pineapple brings moisture and a light tropical flavor.
The pecans provide a satisfying crunch, while the cream cheese frosting adds a smooth and slightly tangy finish.
The result is a cake that feels comforting, homemade, and special enough for celebrations.
The History of Hummingbird Cake
Although Hummingbird Cake is widely known as a Southern classic, its origins can be traced back to Jamaica.
The cake featured ingredients that were commonly enjoyed throughout the Caribbean, including bananas and pineapple, which helped create its signature flavor and texture.
As the recipe spread beyond Jamaica, it eventually found its way into the Southern United States during the 1970s.
Home bakers were immediately drawn to its rich taste, simple preparation, and unique combination of ingredients.
It quickly became a popular choice for family gatherings, church potlucks, holidays, and special occasions.
The cake’s charming name has inspired several theories over the years.
Many people believe it was named after the hummingbird because the cake is sweet and appealing, much like the nectar that attracts these colorful birds.
Others think the name reflects the tropical ingredients that give the dessert its bright and cheerful character.
Whatever the true origin of the name may be, it has certainly helped make the cake memorable.
Today, Hummingbird Cake remains one of the most beloved homemade desserts in Southern baking.
What Makes Hummingbird Cake Unique?
What sets Hummingbird Cake apart is the way each ingredient contributes something special to the finished dessert.
The ripe bananas and crushed pineapple create an exceptionally moist cake that stays soft long after baking.
Many bakers find that the flavor becomes even better the next day as the ingredients have more time to blend together.
Ground cinnamon adds a gentle warmth that complements the fruit without overpowering it.
The spice helps create a cozy, comforting flavor that makes every bite more enjoyable.
Chopped pecans bring texture and a rich nutty taste that balances the softness of the cake layers.
The final touch is the cream cheese frosting.
Its creamy texture and slight tanginess help balance the sweetness of the fruit-filled cake.
Why You’ll Love This Hummingbird Cake Recipe
Perfect for Any Occasion
- Birthdays – A beautiful layered cake that feels special enough for celebrating with family and friends.
- Easter Celebrations – Its light fruit flavors and homemade charm make it a perfect spring dessert.
- Family Gatherings – Easy to share and always a crowd-pleaser, making it ideal for bringing people together.
- Holiday Desserts – Rich, comforting flavors fit right in alongside your favorite holiday treats.
Key Features
- Easy to Make – Simple steps and everyday ingredients make this recipe beginner-friendly.
- Incredibly Moist – Bananas and pineapple keep every slice soft, tender, and full of flavor.
- Made with Simple Pantry Ingredients – Most of the ingredients are easy to find and may already be in your kitchen.
- Better the Next Day – The flavors deepen as the cake rests, making leftovers even more delicious.
Ingredients You’ll Need
For the Cake
Dry Ingredients
- 3 cups all-purpose flour – Provides structure and creates a soft, tender crumb.
- 2 cups granulated sugar – Adds sweetness and helps keep the cake moist.
- 1 teaspoon baking soda – Helps the cake rise and become light and fluffy.
- 1 teaspoon ground cinnamon – Adds a warm, comforting flavor.
- ½ teaspoon salt – Balances the sweetness and enhances the other flavors.
Wet Ingredients
- 3 large ripe bananas, mashed – Add natural sweetness and moisture.
- 1 can (8 ounces) crushed pineapple, undrained – Keeps the cake incredibly moist and flavorful.
- 3 large eggs – Help bind the ingredients together and provide structure.
- 1 cup vegetable oil – Creates a rich, tender texture.
- 2 teaspoons vanilla extract – Adds depth and enhances the overall flavor.
Mix-Ins
- 1 cup chopped pecans – Add a delicious crunch and nutty flavor throughout the cake.
For the Cream Cheese Frosting
- 16 ounces cream cheese, softened – Creates a smooth and tangy frosting base.
- ½ cup unsalted butter, softened – Adds richness and helps create a creamy texture.
- 4 cups powdered sugar – Sweetens and thickens the frosting.
- 2 teaspoons vanilla extract – Adds a touch of warmth and flavor to the frosting.
Kitchen Tools Required
- Mixing Bowls – You’ll need a few bowls for combining the dry ingredients, wet ingredients, and frosting.
- Measuring Cups and Spoons – Accurate measurements help ensure the cake turns out soft, moist, and flavorful.
- Electric Mixer – Makes it easy to prepare a smooth, creamy frosting with minimal effort.
- Two 9-Inch Round Cake Pans – Allow the batter to bake evenly and create the classic layered cake presentation.
- Cooling Rack – Helps the cake layers cool properly and prevents excess moisture from building up.
- Offset Spatula – Makes spreading and smoothing the cream cheese frosting simple and neat.
How to Make Hummingbird Cake
Step 1: Prepare the Cake Pans
Start by preheating your oven to 350°F (175°C) so it reaches the correct temperature before the batter is ready.
Grease two 9-inch round cake pans with butter or nonstick cooking spray.
Line the bottoms of the pans with parchment paper to help the cakes release easily after baking.
A few extra minutes spent preparing the pans now can save you from broken cake layers later.
Set the prepared pans aside while you make the batter.
Step 2: Mix the Dry Ingredients
In a large mixing bowl, add the flour, granulated sugar, baking soda, ground cinnamon, and salt.
Whisk everything together until the ingredients are evenly combined.
Mixing the dry ingredients first helps distribute the baking soda and cinnamon throughout the batter.
This simple step helps create a consistent texture and flavor in every slice.
Once combined, set the bowl aside.
Step 3: Prepare the Wet Ingredients
Place the ripe bananas in a separate large bowl and mash them until mostly smooth.
A few small lumps are perfectly fine and will blend into the batter during mixing.
Add the crushed pineapple along with its juice unless your pineapple contains an excessive amount of liquid.
The pineapple juice helps create the cake’s signature moist texture.
Add the eggs, vegetable oil, and vanilla extract to the bowl.
Whisk everything together until the mixture looks smooth and evenly combined.
Step 4: Make the Batter
Pour the wet ingredients into the bowl of dry ingredients.
Use a spatula or wooden spoon to gently stir until no large pockets of flour remain.
Once the batter is mostly combined, fold in the chopped pecans.
Folding simply means gently stirring while lifting the batter from the bottom of the bowl.
Try not to overmix the batter.
Overmixing can make the cake denser and less tender.
Stop mixing as soon as everything is evenly incorporated.
Step 5: Bake the Cake Layers
Divide the batter evenly between the prepared cake pans.
Smooth the tops with a spatula so the layers bake evenly.
Place the pans on the center oven rack.
Bake for 30 to 35 minutes, or until the cakes are golden brown and spring back lightly when touched.
To check for doneness, insert a toothpick into the center of each cake layer.
If the toothpick comes out clean or with only a few moist crumbs attached, the cakes are ready.
If wet batter remains on the toothpick, bake for a few more minutes and test again.
Step 6: Cool Completely
Remove the cakes from the oven and place the pans on a cooling rack.
Allow the layers to cool in the pans for about 10 to 15 minutes.
Carefully run a knife around the edges and turn the cakes out onto the cooling rack.
Peel away the parchment paper and allow the layers to cool completely before frosting.
Patience is important here.
Even slightly warm cake layers can cause cream cheese frosting to melt and slide.
For the cleanest frosting and easiest assembly, wait until the cakes are completely cool to the touch before moving on to the next step.
Making the Cream Cheese Frosting
Step 1: Beat the Cream Cheese and Butter
Place the softened cream cheese and softened butter in a large mixing bowl.
Using an electric mixer, beat them together on medium speed until completely smooth.
Continue mixing for 2 to 3 minutes to remove any small lumps.
Taking the time to properly blend these ingredients creates a silky frosting that spreads easily.
Make sure both the cream cheese and butter are at room temperature before you begin.
Cold ingredients can leave lumps that are difficult to smooth out later.
Once the mixture looks creamy and uniform, you’re ready for the next step.
Step 2: Add Sugar and Vanilla
Gradually add the powdered sugar, about one cup at a time.
Mix on low speed at first to prevent the sugar from spilling out of the bowl.
After each addition is incorporated, increase the speed slightly and continue mixing.
Add the vanilla extract and beat until everything is fully combined.
Continue mixing for another 1 to 2 minutes until the frosting becomes light and fluffy.
The finished frosting should be smooth, creamy, and easy to spread.
If it looks thick but still soft, you’ve reached the perfect consistency.
Step 3: Adjust Texture if Needed
Frosting can sometimes vary slightly depending on the temperature of your kitchen and ingredients.
If the frosting feels too thick, add 1 teaspoon of milk at a time and mix until it reaches your desired texture.
If the frosting seems too soft, add a little more powdered sugar and mix again.
Avoid adding large amounts at once.
Small adjustments give you more control and help prevent the frosting from becoming too thin or overly sweet.
If the frosting becomes very soft while you’re working, place it in the refrigerator for 15 to 20 minutes.
A short chill can help it firm up and make frosting the cake much easier.
Once the frosting is smooth, fluffy, and easy to spread, it’s ready to transform your Hummingbird Cake into a beautiful finished dessert.
How to Assemble the Cake
Layering the Cake
Place one completely cooled cake layer onto a serving plate or cake stand.
If the top of the cake has a noticeable dome, use a serrated knife to gently trim it so the layer sits flat.
Creating even layers helps the finished cake look neat and prevents it from leaning.
Spread a generous layer of cream cheese frosting over the top of the first cake layer.
Use an offset spatula to spread the frosting evenly from edge to edge.
Try to keep the frosting layer level so the second cake layer sits comfortably on top.
Carefully place the second cake layer over the frosting.
Take a moment to check that the layers are aligned before continuing.
Small adjustments now will make frosting the outside much easier later.
Frosting the Outside
Add a thin layer of frosting around the top and sides of the cake.
This first layer is often called a crumb coat because it helps trap loose crumbs.
Place the cake in the refrigerator for about 15 to 20 minutes to allow the crumb coat to set.
Once chilled, spread the remaining frosting over the top and sides.
For a smooth finish, hold your spatula at a slight angle and gently glide it across the frosting.
Rotate the cake as you work to create an even surface.
Don’t worry if it isn’t perfect.
A homemade cake should look inviting, not flawless.
If you prefer a more relaxed appearance, create a rustic finish by making soft swirls and peaks with the back of a spoon or spatula.
This style is simple, beautiful, and very beginner-friendly.
Decorating Ideas
Decorating Hummingbird Cake doesn’t need to be complicated.
A few thoughtful touches can make the cake look extra special while highlighting its delicious ingredients.
Sprinkle toasted pecans around the top edge or over the center of the cake for added crunch and visual appeal.
Arrange banana chips on top for a simple decoration that hints at the flavors inside.
If you’re feeling creative, pineapple flowers can create an elegant presentation for holidays and special occasions.
These decorative flowers are made by baking thin pineapple slices until they dry and curl into flower-like shapes.
For a classic bakery-style look, sprinkle a few cake crumbs around the edges or over the top of the frosting.
Choose one decoration or combine several for a personalized finish.
Expert Tips for the Best Hummingbird Cake
Use Very Ripe Bananas
When it comes to Hummingbird Cake, the riper the bananas, the better.
Look for bananas with plenty of brown spots on the peel.
These bananas are naturally sweeter and softer than yellow bananas.
Their extra sweetness adds more flavor to the cake without requiring additional sugar.
They also mash more easily, which helps create a smoother batter.
If your bananas are not quite ripe enough, you can place them in a paper bag for a day or two to speed up the ripening process.
Using very ripe bananas is one of the simplest ways to improve the flavor and texture of the finished cake.
Don’t Skip the Pineapple
Crushed pineapple is one of the key ingredients that makes Hummingbird Cake so special.
It adds moisture that helps keep the cake soft and tender.
Without it, the cake can lose some of its signature texture.
The pineapple also brings a subtle fruity flavor that works beautifully with the bananas and cinnamon.
Even if you’re not usually a fan of pineapple, you’ll likely appreciate how it blends into the cake.
The flavor isn’t overwhelming.
Instead, it adds balance and depth while helping create an incredibly moist crumb.
Toast the Pecans
Toasting pecans before adding them to the batter is a small step that makes a noticeable difference.
The heat brings out their natural oils and enhances their nutty flavor.
It also adds a little extra crunch that stands out against the soft cake.
To toast pecans, spread them in a single layer on a baking sheet.
Bake them at 350°F (175°C) for about 5 to 8 minutes, or until they become fragrant.
Allow them to cool before adding them to the batter.
This quick step adds a richer flavor that many bakers consider worth the extra few minutes.
Chill Before Slicing
Once the cake is fully assembled and frosted, place it in the refrigerator for at least 30 minutes before slicing.
Chilling allows the frosting to firm up and helps the layers settle into place.
This makes cutting the cake much easier.
You’ll get cleaner slices with more defined layers.
The chilled frosting is also less likely to stick to your knife.
For the neatest slices, wipe your knife clean between cuts.
Variations and Customizations
One of the best things about Hummingbird Cake is how easy it is to customize.
The classic recipe is delicious on its own, but a few simple changes can help you create a version that perfectly matches your preferences or special occasion.
Coconut Hummingbird Cake
If you enjoy tropical flavors, shredded coconut is a wonderful addition to Hummingbird Cake.
The coconut pairs naturally with the bananas and pineapple, creating an even richer flavor profile.
Simply stir 1 cup of sweetened or unsweetened shredded coconut into the batter before baking.
You can also sprinkle toasted coconut over the finished cake for extra texture and visual appeal.
The coconut adds a subtle chewiness that many people love.
It’s a simple upgrade that makes the cake feel even more special.
Sheet Cake Version
For larger gatherings, turning this recipe into a sheet cake can make serving much easier.
Instead of dividing the batter between round cake pans, pour it into a greased 9×13-inch baking dish.
Bake until a toothpick inserted into the center comes out clean.
Once cooled, spread the cream cheese frosting evenly over the top.
This version eliminates the need for stacking and frosting multiple layers.
It’s a great choice for potlucks, family dinners, school events, and holiday parties.
You’ll still enjoy all the same flavors with less assembly time.
Cupcake Version
Hummingbird Cake also works beautifully as cupcakes.
This option is perfect for birthdays, bake sales, parties, and events where individual servings are more convenient.
Line a muffin tin with cupcake liners and fill each cup about two-thirds full with batter.
Bake until the tops are lightly golden, and a toothpick comes out clean.
Allow the cupcakes to cool completely before frosting.
Pipe or spread the cream cheese frosting on top and finish with a sprinkle of chopped pecans if desired.
These cupcakes offer all the flavor of the traditional cake in a fun, portable form.
Layer Cake with Extra Filling
For an extra-decadent dessert, add a flavorful filling between the cake layers.
A pineapple cream cheese filling works especially well because it complements the ingredients already found in the cake.
To make a simple filling, fold finely drained crushed pineapple into a portion of the cream cheese frosting.
Spread the filling evenly between the cake layers before frosting the outside.
The pineapple adds extra moisture and bursts of fruity flavor throughout the cake.
This variation creates a more bakery-style presentation while keeping the classic Hummingbird Cake flavors front and center.
Storage and Make-Ahead Tips
How to Store Hummingbird Cake
Because the cake is topped with cream cheese frosting, it should be stored in the refrigerator.
Place the cake in an airtight cake container or cover it loosely with plastic wrap.
This helps protect the frosting while preventing the cake from absorbing odors from other foods.
Properly stored, Hummingbird Cake will stay fresh for up to 5 days in the refrigerator.
For the best flavor and texture, remove the cake from the refrigerator about 20 to 30 minutes before serving.
Allowing it to come closer to room temperature helps soften the frosting and enhances the cake’s flavor.
To keep the cake moist, always keep it covered when not serving.
Exposure to air can gradually dry out the cake layers.
A covered cake will stay soft and delicious much longer.
Can You Freeze It?
Hummingbird Cake freezes surprisingly well.
This makes it a convenient option for holidays, birthdays, and other occasions when you’d like to get some of the work done ahead of time.
Freezing Cake Layers
If you’re planning ahead, freeze the cake layers before assembling the cake.
Allow the baked layers to cool completely.
Wrap each layer tightly in plastic wrap.
For added protection, wrap them again in aluminum foil or place them inside a freezer-safe bag.
The layers can be frozen for up to 3 months.
When you’re ready to use them, transfer the layers to the refrigerator and allow them to thaw overnight.
Once thawed, frost and decorate the cake as usual.
Freezing a Fully Assembled Cake
A fully assembled Hummingbird Cake can also be frozen.
Place the cake in the freezer uncovered for about 1 hour to firm up the frosting.
Once the frosting is firm, wrap the cake carefully in plastic wrap, followed by a layer of foil.
This helps protect the frosting and prevent freezer burn.
Freeze for up to 2 months.
When ready to serve, thaw the cake overnight in the refrigerator.
The texture and flavor should remain very close to freshly made.
Make-Ahead Instructions
Hummingbird Cake is an excellent make-ahead dessert.
Many bakers actually prefer preparing it a day in advance because the flavors have more time to develop.
The cake layers can be baked up to 2 days ahead and stored tightly wrapped in the refrigerator.
The cream cheese frosting can also be prepared ahead of time and stored in an airtight container in the refrigerator.
Before using refrigerated frosting, allow it to sit at room temperature for a short time and give it a quick stir to restore its smooth texture.
You can even assemble and frost the entire cake the day before serving.
An overnight rest allows the flavors to blend beautifully while making entertaining much easier.
When it’s time to serve, you’ll have a fully prepared dessert waiting for you with very little last-minute work.
Common Mistakes to Avoid
- Using Under-Ripe Bananas – Less ripe bananas contain less sweetness and moisture, which can affect the cake’s flavor and texture.
- Overmixing the Batter – Mixing too much can create a dense cake instead of the soft, tender crumb you’re aiming for.
- Overbaking the Cake – Leaving the cake in the oven too long can dry it out and reduce its signature moist texture.
- Frosting a Warm Cake – Warm cake layers can cause the cream cheese frosting to melt and slide off.
- Adding Too Many Mix-Ins – Excess nuts, fruit, or other additions can weigh down the batter and affect how evenly the cake bakes.
What to Serve with Hummingbird Cake
Beverage Pairings
- Coffee – A hot cup of coffee balances the cake’s sweetness and complements its warm cinnamon notes.
- Tea – Black tea, chai, or herbal tea pairs beautifully with the cake’s fruity and spiced flavors.
- Milk – A cold glass of milk provides a simple, creamy contrast to the rich cream cheese frosting.
Dessert Pairings
- Vanilla Ice Cream – Its smooth, creamy texture pairs perfectly with the moist cake and adds a refreshing contrast.
- Fresh Fruit – Sliced strawberries, pineapple, or berries add brightness and complement the cake’s tropical flavors.
- Whipped Cream – A light dollop of whipped cream adds extra creaminess without overpowering the dessert.
Final Thoughts
Hummingbird Cake is a dessert that delivers big flavor with simple ingredients.
Its moist texture, sweet fruit, crunchy pecans, and creamy frosting make it a cake that people remember long after the last slice is gone.
It’s a timeless Southern favorite that’s just as welcome at a holiday table as it is at a casual family gathering.
Don’t be afraid to make it your own by trying some of the variations and decorating ideas shared above.
Gather your ingredients, preheat the oven, and enjoy the process.
With every slice, you’ll see why Hummingbird Cake has remained a beloved classic for generations.
FAQs
Why Is It Called Hummingbird Cake?
The exact origin is unclear, but many believe the cake was named for its sweetness, which is said to be as appealing to hummingbirds as nectar.
Can I Make Hummingbird Cake Without Pecans?
Yes, you can leave out the pecans if needed, and the cake will still be moist and delicious.
Can I Use Fresh Pineapple Instead of Canned?
Yes, finely crushed fresh pineapple can be used, but include some of its juice to maintain the cake’s moisture.
How Long Does Hummingbird Cake Last?
When stored in the refrigerator, Hummingbird Cake stays fresh for up to 5 days.
Can I Make This Cake Ahead of Time?
Absolutely, and many bakers prefer it because the flavors become even better after resting overnight.
Should Hummingbird Cake Be Refrigerated?
Yes, because of the cream cheese frosting, the cake should be stored in the refrigerator.
Can I Turn This Recipe Into Cupcakes?
Yes, the batter works well for cupcakes and is perfect for parties, bake sales, and individual servings.
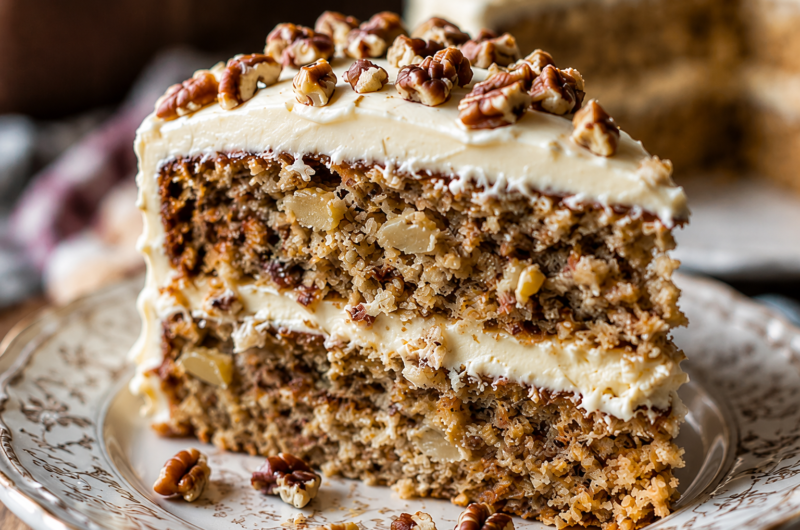
Hummingbird Cake: A Moist Southern Classic Packed with Flavor
Difficulty: Easy12
Slices20
minutes35
minutes55
minutesThis classic Hummingbird Cake is incredibly moist and flavorful, made with ripe bananas, crushed pineapple, crunchy pecans, and rich cream cheese frosting.
Ingredients
- For the Cake
3 cups all-purpose flour
2 cups granulated sugar
1 tsp baking soda
1 tsp ground cinnamon
½ tsp salt
3 ripe bananas, mashed
1 can (8 oz) crushed pineapple, undrained
3 large eggs
1 cup vegetable oil
2 tsp vanilla extract
1 cup chopped pecans
- For the Frosting
16 oz cream cheese, softened
½ cup unsalted butter, softened
4 cups powdered sugar
2 tsp vanilla extract
Directions
- Preheat the oven to 350°F (175°C) and grease two 9-inch round cake pans.
- Whisk together the flour, sugar, baking soda, cinnamon, and salt.
- In a separate bowl, combine the bananas, pineapple, eggs, oil, and vanilla.
- Stir the wet ingredients into the dry ingredients, then fold in the pecans.
- Divide the batter between the pans and bake for 30–35 minutes.
- Cool the cakes completely before frosting.
- Beat the cream cheese and butter until smooth, then mix in the powdered sugar and vanilla.
- Frost the cake layers and serve.
Notes
- Use very ripe bananas for the best flavor and texture.
- Toast the pecans for extra crunch and richness.
- Refrigerate leftovers for up to 5 days.
- The cake tastes even better the next day after the flavors have had time to develop.

Hi, I’m Sorenna Blythe, the baker and writer behind Mix Whisk Bake. I share simple, reliable recipes and honest kitchen moments to help home bakers bake with confidence and joy. When I’m not testing new treats, you’ll find me sipping coffee and dreaming up my next bake.