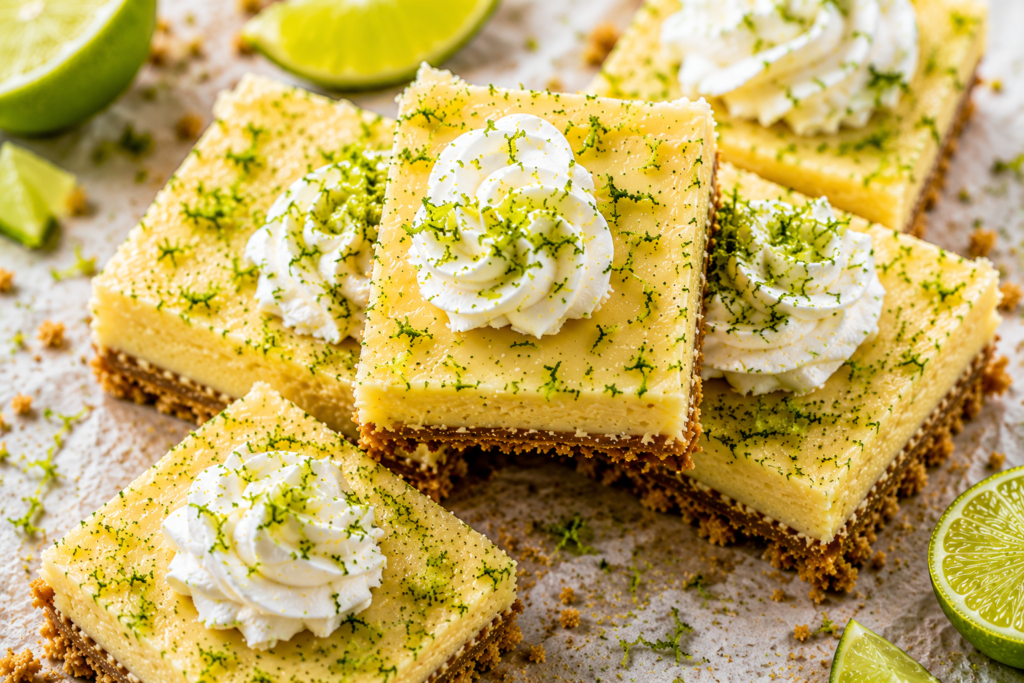
These easy key lime pie bars are creamy, bright, and packed with fresh citrus flavor in every bite.
The buttery graham cracker crust pairs perfectly with the smooth sweet-and-tart filling, making them hard to resist after just one slice.
The best part? They’re simple to make with a handful of basic ingredients and very little effort.
Even if you’re new to baking, this recipe comes together easily and chills into beautiful bars every time.
They’re perfect for summer gatherings, holidays, potlucks, or anytime you want a refreshing dessert you can make ahead.
Serve them cold with a little whipped cream on top, and watch them disappear fast.
Why You’ll Love This Recipe
- Beginner-friendly recipe – Simple steps and basic ingredients make these bars easy for anyone to bake with confidence.
- Bright citrus flavor – Fresh key lime juice gives every bite a refreshing sweet-and-tart taste.
- Creamy smooth filling – The filling bakes into a rich, silky texture that melts in your mouth.
- Buttery graham cracker crust – The crisp crust adds the perfect balance to the soft creamy topping.
- Great make-ahead dessert – These bars chill beautifully, making them perfect for prepping ahead of time.
- Easy to slice and serve – The bar shape makes them simple to cut, share, and bring to gatherings or parties.
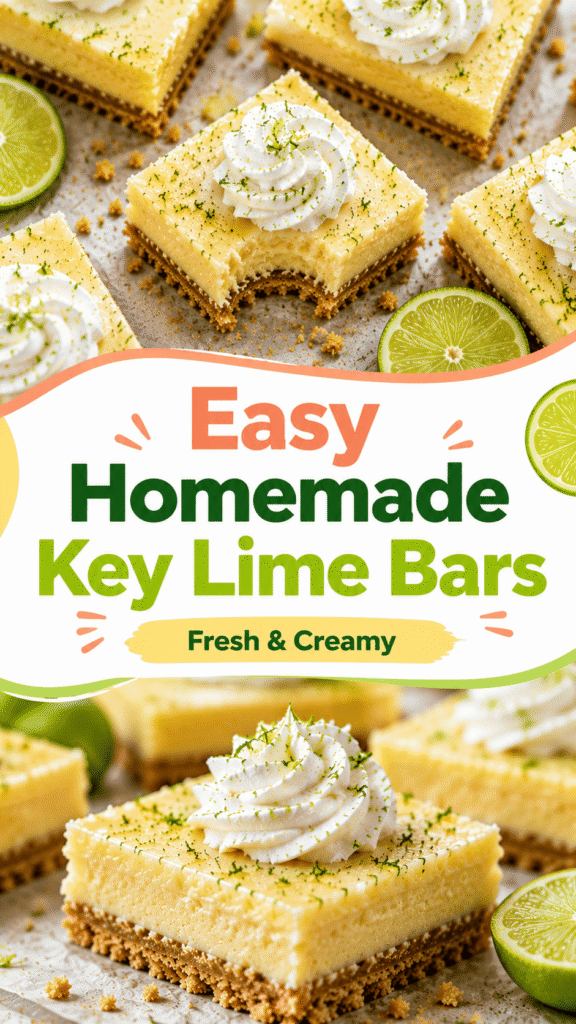
What Are Key Lime Pie Bars?
Key lime pie bars are a simple bar-style version of the classic key lime pie, made with all the same bright, creamy flavors, but baked in an easy-to-slice square pan instead of a pie dish.
They start with a buttery graham cracker crust that bakes up crisp and slightly crunchy, creating the perfect base for the smooth citrus filling on top.
The filling is rich, creamy, and packed with fresh lime flavor, giving these bars the refreshing sweet-and-tart taste that makes them especially popular during warmer months.
One thing that makes key lime desserts special is the type of lime used.
Key limes are smaller than regular limes and have a stronger, slightly more tangy flavor with a hint of natural sweetness.
They also tend to be more aromatic, which gives the filling its signature taste.
If you can’t find fresh key limes, regular limes still work well and will give you delicious results.
Either way, these bars are easy to make, easy to serve, and perfect when you want a dessert that feels light, creamy, and full of fresh citrus flavor.
Ingredients You’ll Need
For the Graham Cracker Crust
- 1 ½ cups graham cracker crumbs
- ⅓ cup granulated sugar
- 6 tablespoons unsalted butter, melted
For the Key Lime Filling
- 2 cans (14 ounces each) sweetened condensed milk
- 4 large egg yolks
- ¾ cup key lime juice
- 1 tablespoon lime zest
- 1 teaspoon vanilla extract (optional)
Optional Toppings
- Whipped cream for serving
- Thin lime slices for garnish
- Extra lime zest for topping
Kitchen Tools Needed
- Mixing bowls – Used for preparing both the crust and the creamy key lime filling.
- 8×8 or 9×9 baking pan – Gives the bars their perfect thickness and makes slicing easy.
- Parchment paper – Helps lift the bars out cleanly and prevents sticking.
- Whisk – Makes it easy to mix the filling until smooth and creamy.
- Citrus juicer – Helps squeeze fresh key lime juice quickly with less mess.
- Measuring cups and spoons – Ensures accurate measurements for the best texture and flavor.
How to Make Easy Key Lime Pie Bars
Step 1 – Prepare the Pan
Start by preheating your oven to 350°F (175°C) so it’s fully heated before baking.
Line an 8×8 or 9×9 baking pan with parchment paper, leaving a little extra hanging over the sides to create handles for easy lifting later.
This small step makes removing and slicing the bars much easier once they’ve chilled.
If you do not have parchment paper, lightly greasing the pan will still work, but parchment gives the cleanest results.
Step 2 – Make the Graham Cracker Crust
In a mixing bowl, combine the graham cracker crumbs, granulated sugar, and melted butter until the mixture resembles wet sand.
Every crumb should be coated so the crust holds together properly after baking.
Pour the mixture into the prepared pan and press it down firmly into an even layer using the bottom of a measuring cup or glass.
Pressing firmly helps create a sturdy crust that will not crumble when sliced.
Bake the crust for about 8 to 10 minutes, or until it looks lightly golden and smells buttery.
Let it cool slightly while you prepare the filling.
Step 3 – Make the Key Lime Filling
In another bowl, whisk the egg yolks and sweetened condensed milk together until smooth and creamy.
The mixture should look thick and pale yellow with no streaks remaining.
Add the key lime juice and lime zest, then whisk again until fully combined.
The filling will naturally thicken slightly as the lime juice mixes with the condensed milk.
Fresh lime zest adds extra flavor and makes the bars taste brighter and fresher, so it’s worth including if possible.
Step 4 – Bake the Bars
Pour the filling over the warm crust and spread it gently into an even layer.
Place the pan back into the oven and bake for about 15 to 18 minutes.
The edges should look set, while the center should still have a slight jiggle when the pan is gently moved.
Avoid overbaking, since the filling continues to firm up as it cools.
Keeping the center slightly soft helps create that smooth and creamy texture key lime pie bars are known for.
Step 5 – Chill Before Slicing
Remove the bars from the oven and let them cool at room temperature first.
Once they are no longer warm, transfer the pan to the refrigerator and chill for at least 3 to 4 hours, or until fully set.
Chilling is one of the most important steps because it helps the filling firm up properly and makes the bars much easier to slice neatly.
If you want extra clean cuts, wipe the knife clean between each slice.
Step 6 – Garnish and Serve
Once chilled, lift the bars out of the pan using the parchment paper handles and place them on a cutting board.
Slice into squares or rectangles, depending on your preferred serving size.
For a simple finishing touch, top each bar with whipped cream, extra lime zest, or a small lime slice.
Serve them cold straight from the refrigerator for the best flavor and texture.
The cool creamy filling and crisp buttery crust make every bite refreshing and satisfying.
Tips for the Best Key Lime Pie Bars
Use Fresh Lime Juice for the Best Flavor
Fresh lime juice makes a big difference in both flavor and freshness.
Bottled juice can work in a pinch, but fresh key limes give the filling a brighter and more natural citrus taste that really stands out.
If key limes are difficult to find, regular limes are still a great option and will give you delicious results.
For even more flavor, add fresh lime zest along with the juice.
The zest contains natural oils that make the bars smell and taste extra fresh.
Don’t Overbake the Filling
One of the easiest ways to keep the filling smooth and creamy is to avoid overbaking it.
The bars are ready when the edges look set, and the center still has a slight jiggle when gently shaken.
It may seem slightly underdone at first, but the filling continues to firm up as it cools and chills in the refrigerator.
Overbaking can cause the texture to become dry or slightly rubbery, so it’s better to pull them out a little early rather than too late.
Chill Completely Before Cutting
Patience really pays off with key lime pie bars.
After baking, let them cool to room temperature before transferring them to the refrigerator.
Chilling for several hours helps the filling fully set and gives the bars their clean, firm texture.
Trying to cut them too early can lead to messy slices and a softer center.
If possible, let them chill overnight for the best texture and flavor.
Use Parchment Paper for Easy Removal
Lining the pan with parchment paper is a simple step that makes serving much easier later.
Leave a little extra parchment hanging over the sides of the pan so you can lift the entire batch out once chilled.
This helps prevent sticking and allows you to cut the bars neatly on a flat surface instead of inside the pan.
It also makes cleanup faster, which is always a nice bonus after baking.
Wipe the Knife Clean Between Slices
For clean bakery-style slices, wipe the knife clean after each cut.
The creamy filling can build up on the blade quickly, especially once the bars start warming up slightly at room temperature.
Using a clean knife each time keeps the edges smooth and neat.
You can even run the knife under warm water and dry it before slicing for extra clean cuts.
Small details like this make the bars look just as good as they taste.
Variations to Try
- Coconut Key Lime Bars – Add shredded coconut to the graham cracker crust for extra texture and a tropical flavor twist.
- Gluten-Free Version – Use gluten-free graham crackers to make the bars completely gluten-free without changing the creamy texture.
- Extra Tart Bars – Mix in extra lime zest for a stronger citrus flavor and a brighter, tangy finish.
- Frozen Key Lime Bars – Freeze the bars before serving for a cool and refreshing summer dessert with an ice cream-like texture.
How to Store Key Lime Pie Bars
Store in an airtight container in the Refrigerator
Because the filling is creamy and made with sweetened condensed milk and egg yolks, key lime pie bars should always be stored in the refrigerator.
Once the bars are fully chilled and sliced, place them in an airtight container or cover the baking pan tightly with plastic wrap or foil.
Keeping them covered helps prevent the bars from drying out and keeps the fresh lime flavor tasting its best.
If you are stacking slices, place a small piece of parchment paper between layers so they do not stick together.
Best Enjoyed Within 4–5 Days
These bars taste best when enjoyed within 4 to 5 days.
The crust stays crispest during the first couple of days, while the filling remains smooth and creamy.
As they sit longer, the crust may soften slightly from the moisture in the filling, though they will still taste delicious.
For the freshest flavor and texture, serve them chilled straight from the refrigerator.
Freeze for Longer Storage
Key lime pie bars also freeze very well, making them a great make-ahead dessert option.
To freeze, place the chilled bars on a baking sheet until firm, then transfer them to a freezer-safe container or bag.
Wrapping each bar individually can make grabbing single servings even easier later.
When ready to enjoy, let the bars thaw in the refrigerator for a few hours before serving.
You can even enjoy them partially frozen for a colder, more refreshing dessert during hot weather.
What to Serve with Key Lime Pie Bars
- Fresh berries – Strawberries, raspberries, or blueberries add natural sweetness and pair beautifully with the bright lime flavor.
- Iced coffee – A cold coffee drink balances the creamy citrus filling and makes the dessert feel even more refreshing.
- Coconut whipped cream – Adds a light tropical flavor that complements the tart key lime perfectly.
- Vanilla ice cream – The smooth, creamy texture and mild vanilla flavor pair wonderfully with the tangy bars.
- Summer fruit salad – A mix of fresh seasonal fruit keeps the dessert spread light, colorful, and refreshing.
Final Thoughts
These easy key lime pie bars are the perfect mix of creamy, sweet, and refreshing citrus flavor, all with simple ingredients and easy steps anyone can follow.
They’re great for parties, holidays, or whenever you want a chilled dessert that feels bright and homemade without a lot of work.
Give them a try and make them your own with your favorite toppings or variations.
FAQs
Can I use regular limes instead of key limes?
Yes, regular limes work well if you cannot find key limes. The flavor will be slightly less tart but still delicious.
How do I know when the bars are done baking?
The edges should look set while the center still has a slight jiggle when gently shaken.
Can I make key lime pie bars ahead of time?
Absolutely. These bars are great for making ahead since they need time to chill before serving.
Can I freeze key lime pie bars?
Yes, you can freeze them in an airtight container for longer storage and thaw them in the refrigerator before serving.
Why did my filling not set properly?
This usually happens if the bars were underbaked or not chilled long enough before slicing.
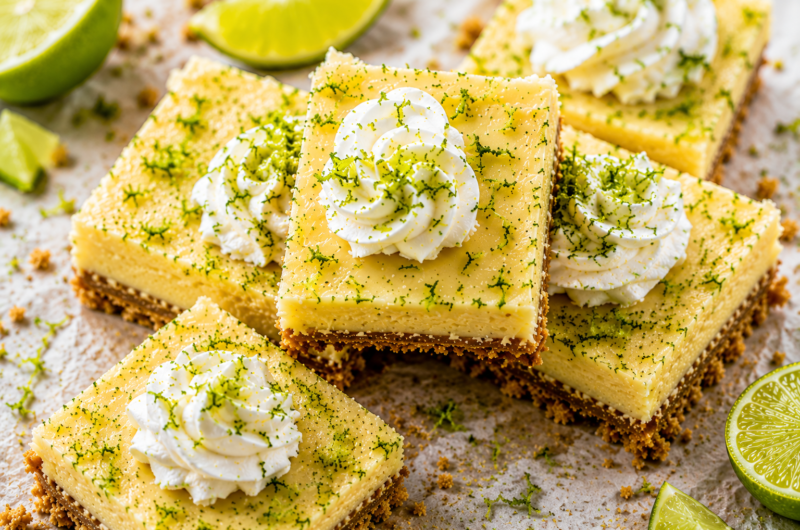
Easy Homemade Key Lime Pie Bars with Graham Cracker Crust
Difficulty: Easy12
Bars15
minutes25
minutes40
minutesThese easy key lime pie bars are creamy, bright, and refreshing with a buttery graham cracker crust and smooth citrus filling. Perfect for summer parties, holidays, or an easy make-ahead dessert.
Ingredients
- For the Crust
1 ½ cups graham cracker crumbs
⅓ cup granulated sugar
6 tablespoons melted butter
- For the Filling
2 cans (14 ounces each) sweetened condensed milk
4 egg yolks
¾ cup key lime juice
1 tablespoon lime zest
Directions
- Preheat oven to 350°F (175°C) and line an 8×8 baking pan with parchment paper.
- Mix graham cracker crumbs, sugar, and melted butter until combined. Press firmly into the pan and bake for 8–10 minutes.
- In a bowl, whisk sweetened condensed milk and egg yolks until smooth. Add lime juice and zest, then mix well.
- Pour filling over the crust and bake for 15–18 minutes until the center is slightly jiggly.
- Let cool completely, then refrigerate for at least 3 hours before slicing.
- Top with whipped cream and extra lime zest if desired, then serve chilled.
Notes
- Fresh lime juice gives the best flavor.
- Chill completely before cutting for clean slices.
- Store leftovers in the refrigerator for up to 5 days.

Hi, I’m Sorenna Blythe, the baker and writer behind Mix Whisk Bake. I share simple, reliable recipes and honest kitchen moments to help home bakers bake with confidence and joy. When I’m not testing new treats, you’ll find me sipping coffee and dreaming up my next bake.