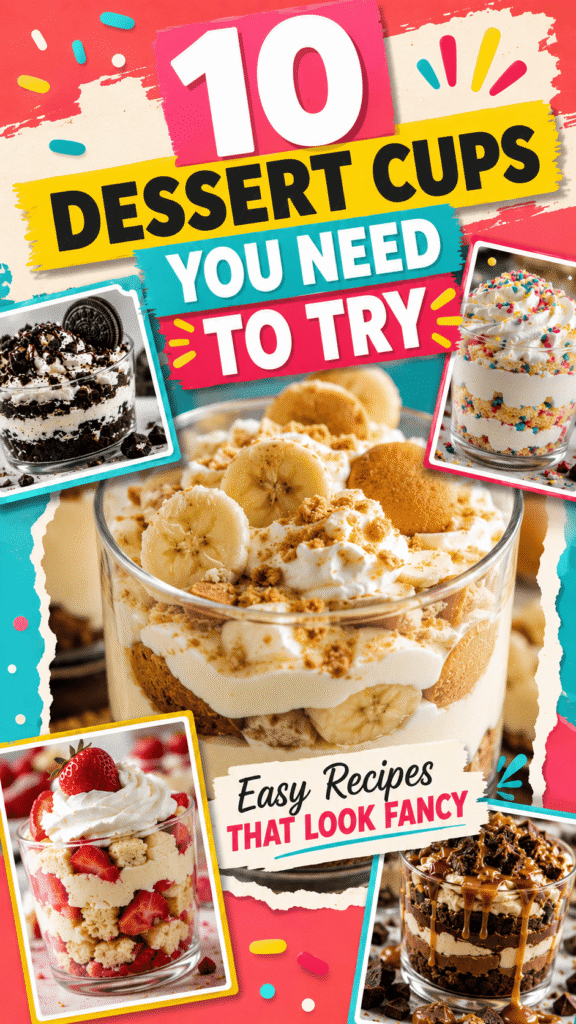
Layered dessert cups are one of the easiest ways to make any dessert table feel extra special.
They look beautiful, are simple to serve, and make parties, holidays, and family gatherings so much less stressful.
No slicing. No messy serving. Just grab a cup and enjoy.
Another reason to love them? Most can be made ahead of time, which is always helpful when you’re hosting or planning for a busy day.
Plus, everyone gets their own perfectly portioned dessert with delicious layers in every bite.
In this list, you’ll find everything from creamy cheesecake cups to rich chocolate treats and fruity favorites.
Some are no-bake, some come together in minutes, and all of them are easy enough for beginners to make with confidence.
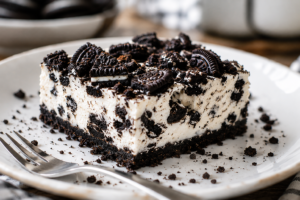
1. No-Bake Oreo Cheesecake Cups
Why You’ll Love This Recipe
These Oreo cheesecake cups are creamy, rich, and incredibly easy to make.
The crushed Oreo layers add the perfect crunch, while the fluffy cheesecake filling makes every bite smooth and delicious.
Since there’s no baking involved, they’re perfect for busy days, parties, birthdays, or late-night dessert cravings.
They also look impressive in clear dessert cups, even though they come together with very little effort.
Ingredients
Oreo Layers
- 24 Oreo cookies, crushed
- 3 tablespoons melted butter
Cheesecake Filling
- 8 oz (225 g) cream cheese, softened
- 1/2 cup powdered sugar
- 1 teaspoon vanilla extract
- 1 1/2 cups whipped topping or whipped cream
Optional Toppings
- Extra crushed Oreos
- Mini Oreo cookies
- Chocolate drizzle
Instructions
Step 1: Prepare the Oreo Crumbs
Crush the Oreo cookies into fine crumbs using a food processor or by placing them in a zip-top bag and crushing with a rolling pin.
Mix the crumbs with melted butter until evenly coated.
Step 2: Make the Cheesecake Filling
In a large bowl, beat the softened cream cheese until smooth and creamy.
Add powdered sugar and vanilla extract, then mix until fully combined.
Fold in the whipped topping gently until light and fluffy.
Step 3: Assemble the Dessert Cups
Spoon a layer of Oreo crumbs into the bottom of each dessert cup.
Add a layer of cheesecake filling, then repeat the layers until the cups are full.
Step 4: Chill and Serve
Refrigerate the dessert cups for at least 1 hour before serving. This helps the layers set and improves the texture.
Top with extra Oreo crumbs or mini Oreos right before serving.
Serving Ideas
- Mini dessert cups for parties
- Fun birthday dessert table addition
- Easy movie night dessert
- Make-ahead holiday treat
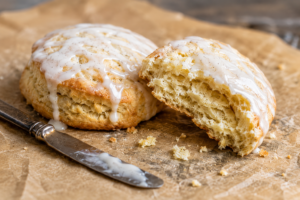
2. Strawberry Shortcake Dessert Cups
Why It’s a Favorite
These strawberry shortcake dessert cups are light, fresh, and perfect for spring and summer gatherings.
The soft cake, juicy strawberries, and fluffy whipped cream create a simple dessert that feels special without requiring much work.
They’re especially great for beginners because the layers are easy to assemble and hard to mess up.
Ingredients
Strawberry Layer
- 2 cups fresh strawberries, sliced
- 2 tablespoons sugar
- 1/4 cup strawberry glaze or strawberry jam
Cake Layer
- 4 cups cubed pound cake or vanilla cake
Cream Layer
- 2 cups whipped cream or whipped topping
Optional Garnishes
- Extra strawberries
- Crushed shortbread cookies
- Mint leaves
Instructions
Step 1: Prepare the Strawberries
Place the sliced strawberries in a bowl with the sugar and strawberry glaze.
Stir gently and let them sit for about 10 minutes. This helps release the juices and creates extra flavor.
Step 2: Prepare the Dessert Cups
Add a layer of cake cubes to the bottom of each cup.
Spoon some strawberry mixture over the cake.
Add a layer of whipped cream.
Step 3: Repeat the Layers
Continue layering cake, strawberries, and whipped cream until the cups are filled.
Finish with whipped cream and extra strawberries on top.
Step 4: Chill Before Serving
Refrigerate for at least 30 minutes before serving for the best flavor and texture.
Tips for Best Results
Use Chilled Ingredients
Cold whipped cream and strawberries help the dessert stay fresh and hold its layers better.
Assemble Close to Serving Time
For the best texture, assemble the cups shortly before serving so the cake stays soft without becoming soggy.
3. Chocolate Peanut Butter Mousse Cups
What Makes Them Special
If you love chocolate and peanut butter together, these mousse cups are hard to beat.
They’re creamy, rich, and feel like a bakery-style dessert without requiring complicated steps.
The chocolate pudding layers pair perfectly with the fluffy peanut butter mousse, while crushed cookies add a little crunch in every bite.
Ingredients
Chocolate Layer
- 1 package (3.9 oz) instant chocolate pudding mix
- 2 cups cold milk
Peanut Butter Mousse
- 8 oz (225 g) cream cheese, softened
- 3/4 cup creamy peanut butter
- 1/2 cup powdered sugar
- 1 teaspoon vanilla extract
- 1 1/2 cups whipped topping
Crunch Layer
- 1 1/2 cups crushed chocolate cookies
Optional Toppings
- Chocolate chips
- Peanut butter drizzle
- Mini peanut butter cups
- Whipped cream
Instructions
Step 1: Make the Chocolate Pudding
Whisk the pudding mix and cold milk together in a bowl for about 2 minutes until thickened.
Place in the refrigerator while preparing the mousse.
Step 2: Prepare the Peanut Butter Mousse
In a large bowl, beat the cream cheese until smooth.
Add peanut butter, powdered sugar, and vanilla extract. Mix until creamy and fully combined.
Fold in the whipped topping gently until fluffy.
Step 3: Assemble the Cups
Add crushed chocolate cookies to the bottom of each dessert cup.
Spoon in a layer of chocolate pudding.
Add a layer of peanut butter mousse.
Repeat the layers until the cups are filled.
Step 4: Add Toppings
Top with chocolate chips, peanut butter drizzle, or mini peanut butter cups for extra flavor and texture.
Step 5: Chill Before Serving
Refrigerate the mousse cups for at least 1 hour before serving.
Optional Topping Ideas
Chocolate Chips
Add a little crunch and extra chocolate flavor.
Peanut Butter Drizzle
Warm peanut butter slightly for easier drizzling.
Mini Peanut Butter Cups
Perfect for parties and chocolate lovers.
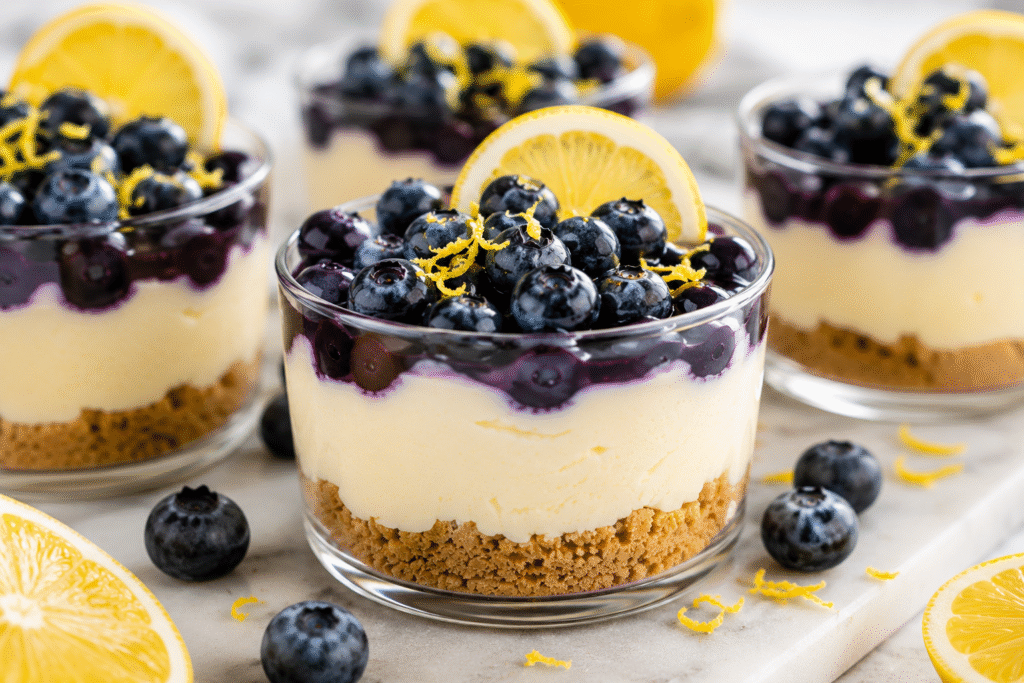
4. Lemon Blueberry Cheesecake Cups
Why Readers Will Love Them
These lemon blueberry cheesecake cups are bright, creamy, and perfect for warm-weather desserts.
The smooth cheesecake filling pairs beautifully with sweet blueberry layers and tangy lemon flavor, creating a dessert that tastes light but is still satisfying.
They’re also easy to make ahead, which makes them great for parties, baby showers, brunches, or summer gatherings.
Ingredients
Graham Cracker Layer
- 1 1/2 cups graham cracker crumbs
- 3 tablespoons melted butter
- 2 tablespoons sugar
Cheesecake Filling
- 8 oz (225 g) cream cheese, softened
- 1/2 cup powdered sugar
- 1 teaspoon vanilla extract
- 1 cup whipped topping or whipped cream
Lemon Layer
- 1/2 cup lemon curd
Blueberry Layer
- 1 cup blueberry pie filling
Optional Garnishes
- Lemon zest
- Fresh blueberries
- Crushed graham crackers
Instructions
Step 1: Prepare the Graham Cracker Layer
In a bowl, mix the graham cracker crumbs, melted butter, and sugar until evenly combined.
Set aside.
Step 2: Make the Cheesecake Filling
Beat the cream cheese in a large bowl until smooth.
Add powdered sugar and vanilla extract, then mix until creamy.
Fold in the whipped topping gently until fluffy.
Step 3: Assemble the Dessert Cups
Add a layer of graham cracker crumbs to the bottom of each cup.
Spoon in a layer of cheesecake filling.
Add a small layer of lemon curd, followed by blueberry pie filling.
Repeat the layers until the cups are full.
Step 4: Chill Before Serving
Refrigerate the dessert cups for at least 2 hours before serving. This helps the flavors blend together and gives the cheesecake filling a better texture.
Top with lemon zest or fresh blueberries right before serving.
Make-Ahead Tips
Chill for Best Flavor
These dessert cups taste even better after a few hours in the refrigerator.
Add Toppings Later
For the freshest look, add graham cracker crumbs and garnishes just before serving.
5. Banana Pudding Dessert Cups
Classic Comfort Dessert
Banana pudding dessert cups are creamy, simple, and always a crowd favorite.
They have all the comforting flavors of classic banana pudding layered into easy individual servings.
This recipe is especially great for family gatherings, potlucks, or casual weekends when you want a dessert that everyone recognizes and loves.
Ingredients
Pudding Layer
- 1 package (3.4 oz) instant vanilla pudding mix
- 2 cups cold milk
Cream Layer
- 1 1/2 cups whipped topping or whipped cream
Layers
- 3 bananas, sliced
- 2 cups vanilla wafer cookies
Optional Garnishes
- Crushed vanilla wafers
- Banana slices
- Whipped cream
Instructions
Step 1: Prepare the Pudding
In a bowl, whisk together the vanilla pudding mix and cold milk for about 2 minutes until thickened.
Refrigerate for 5 minutes.
Step 2: Layer the Dessert Cups
Place a few vanilla wafer cookies into the bottom of each cup.
Add a layer of banana slices.
Spoon in some vanilla pudding, then add whipped topping.
Step 3: Repeat the Layers
Continue layering cookies, bananas, pudding, and whipped topping until the cups are filled.
Finish with whipped cream and crushed vanilla wafers on top.
Step 4: Chill Before Serving
Refrigerate for at least 30 minutes before serving so the flavors can come together.
Storage Tips
Best Served Within 24 Hours
Bananas can brown over time, so these dessert cups are best enjoyed the same day or within 24 hours.
Keep Refrigerated
Store covered in the refrigerator until ready to serve.
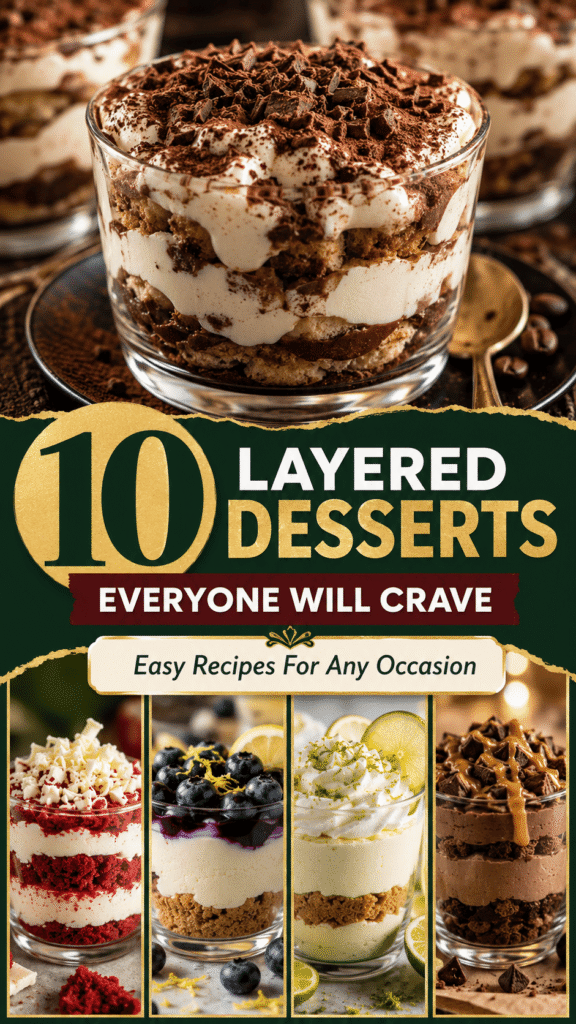
6. Tiramisu Dessert Cups
Elegant Yet Easy
These tiramisu dessert cups bring all the rich flavors of classic tiramisu into simple individual servings.
The coffee-soaked ladyfingers and creamy mascarpone filling create a dessert that feels fancy without being difficult to make.
They’re perfect when you want something impressive for guests but still easy enough to prepare ahead of time.
Ingredients
Coffee Layer
- 1 cup brewed espresso or strong coffee, cooled
Cream Filling
- 8 oz (225 g) mascarpone cheese
- 1 cup heavy whipping cream
- 1/3 cup powdered sugar
- 1 teaspoon vanilla extract
Layers
- 18 to 20 ladyfinger cookies
Topping
- 2 tablespoons cocoa powder
Instructions
Step 1: Prepare the Coffee
Brew the espresso or strong coffee and allow it to cool completely.
Step 2: Make the Mascarpone Filling
In a large bowl, beat the heavy cream until soft peaks form.
In a separate bowl, mix mascarpone cheese, powdered sugar, and vanilla extract until smooth.
Fold the whipped cream gently into the mascarpone mixture.
Step 3: Prepare the Ladyfingers
Quickly dip each ladyfinger into the cooled coffee. Do not soak them too long, or they may become too soft.
Break them into smaller pieces if needed to fit the dessert cups.
Step 4: Assemble the Cups
Add a layer of coffee-soaked ladyfingers to the bottom of each cup.
Spoon over a layer of mascarpone filling.
Repeat the layers until the cups are full.
Step 5: Finish and Chill
Dust the tops with cocoa powder.
Refrigerate for at least 2 hours before serving for the best flavor and texture.
Perfect For
Dinner Parties
These elegant dessert cups look beautiful served in clear glasses or small jars.
Holiday Desserts
A great make-ahead option for busy holiday meals.
Date Nights
Rich, creamy, and perfect for sharing after a special dinner.
7. Red Velvet Cheesecake Cups
Why They Stand Out
These red velvet cheesecake cups look like they came straight from a bakery, but they’re surprisingly simple to make at home.
The soft red velvet cake layers combined with creamy cheesecake filling create a rich dessert that’s perfect for birthdays, holidays, Valentine’s Day, or special occasions.
The bright red layers also make these dessert cups extra eye-catching on any dessert table.
Ingredients
Red Velvet Layer
- 4 cups red velvet cake crumbs
- 1 tablespoon cocoa powder (optional for extra flavor)
Cheesecake Filling
- 8 oz (225 g) cream cheese, softened
- 1/2 cup powdered sugar
- 1 teaspoon vanilla extract
- 1 1/2 cups whipped topping or whipped cream
Optional Decorations
- White chocolate shavings
- Extra red velvet cake crumbs
- Mini chocolate chips
Instructions
Step 1: Prepare the Cake Crumbs
Crumble the red velvet cake into fine crumbs using your hands or a fork.
Set aside.
Step 2: Make the Cheesecake Filling
In a large bowl, beat the cream cheese until smooth and creamy.
Add powdered sugar and vanilla extract, then mix well.
Fold in the whipped topping gently until fluffy.
Step 3: Assemble the Dessert Cups
Add a layer of red velvet cake crumbs to the bottom of each dessert cup.
Spoon over a layer of cheesecake filling.
Repeat the layers until the cups are full.
Step 4: Decorate and Chill
Top with white chocolate shavings or extra cake crumbs.
Refrigerate for at least 1 hour before serving.
Decoration Ideas
White Chocolate Shavings
They add a pretty contrast and extra sweetness.
Red Velvet Crumbs
Sprinkle extra crumbs on top for a bakery-style finish.
8. Key Lime Pie Dessert Cups
Refreshing and Creamy
These key lime pie dessert cups are cool, creamy, and packed with bright citrus flavor.
The tangy lime filling pairs perfectly with buttery graham cracker crumbs, making this dessert feel light and refreshing.
They’re especially perfect for warm days when you want something sweet without turning on the oven.
Ingredients
Graham Cracker Layer
- 1 1/2 cups graham cracker crumbs
- 3 tablespoons melted butter
- 2 tablespoons sugar
Key Lime Filling
- 8 oz (225 g) cream cheese, softened
- 1/2 cup key lime juice
- 1 can (14 oz) sweetened condensed milk
- 1 teaspoon lime zest
Topping
- 1 1/2 cups whipped cream or whipped topping
Optional Garnishes
- Lime slices
- Extra lime zest
- Graham cracker crumbs
Instructions
Step 1: Prepare the Graham Cracker Mixture
Combine graham cracker crumbs, melted butter, and sugar in a bowl.
Mix until the crumbs are evenly coated.
Step 2: Make the Lime Filling
In a large bowl, beat the cream cheese until smooth.
Add sweetened condensed milk, key lime juice, and lime zest.
Mix until creamy and fully combined.
Step 3: Assemble the Dessert Cups
Add a layer of graham cracker crumbs to each dessert cup.
Spoon in the key lime filling.
Top with whipped cream.
Repeat the layers if desired.
Step 4: Chill Before Serving
Refrigerate the dessert cups for at least 2 hours before serving.
Serving Suggestions
Garnish with Lime Zest
A little lime zest on top adds fresh flavor and color.
Serve Well Chilled
These dessert cups taste best cold straight from the refrigerator.
9. Salted Caramel Brownie Trifle Cups
Rich Chocolate Lovers’ Dessert
These brownie trifle cups are rich, gooey, and loaded with chocolate flavor.
The combination of fudgy brownies, creamy pudding, and salted caramel creates an easy dessert that feels extra indulgent.
They’re a great choice for parties, holidays, or anytime you want a dessert that gets everyone excited.
Ingredients
Brownie Layer
- 4 cups brownie chunks
- 1 batch baked brownies or store-bought brownies
Chocolate Layer
- 1 package (3.9 oz) instant chocolate pudding mix
- 2 cups cold milk
Caramel Layer
- 3/4 cup caramel sauce
- Sea salt flakes, for topping
Cream Layer
- 1 1/2 cups whipped topping or whipped cream
Optional Toppings
- Chocolate shavings
- Mini chocolate chips
- Extra caramel drizzle
Instructions
Step 1: Prepare the Chocolate Pudding
Whisk together the pudding mix and cold milk until thickened.
Refrigerate for 5 minutes.
Step 2: Layer the Dessert Cups
Add brownie chunks to the bottom of each cup.
Spoon over chocolate pudding.
Drizzle caramel sauce on top.
Add whipped topping.
Step 3: Repeat the Layers
Continue layering brownies, pudding, caramel, and whipped topping until the cups are filled.
Step 4: Finish with Toppings
Drizzle extra caramel sauce over the top and sprinkle lightly with sea salt flakes.
Party Presentation Tips
Use Clear Dessert Cups
The layers look especially beautiful in clear cups or glass jars.
Add Toppings Right Before Serving
This keeps the whipped topping fresh and fluffy.
10. Funfetti Cake Batter Dessert Cups
Perfect Celebration Dessert
These funfetti dessert cups are colorful, playful, and perfect for birthdays or celebrations.
The creamy cake batter filling and rainbow sprinkles make them feel fun and festive while still being incredibly easy to prepare.
Kids especially love these bright layered desserts.
Ingredients
Cake Batter Filling
- 1 box Funfetti cake mix, heat-treated
- 1 package (3.4 oz) instant vanilla pudding mix
- 2 cups cold milk
- 1 teaspoon vanilla extract
Cream Layer
- 1 1/2 cups whipped topping or whipped cream
Crunch Layer
- 1 cup crushed vanilla cookies or graham crackers
Decorations
- Rainbow sprinkles
- Extra whipped cream
Instructions
Step 1: Heat-Treat the Cake Mix
Spread the dry cake mix onto a baking sheet.
Bake at 350°F (175°C) for 5 minutes, then allow it to cool completely. This makes the dry mix safe to use in no-bake desserts.
Step 2: Prepare the Filling
In a bowl, whisk together the pudding mix and cold milk until thickened.
Mix in the cooled cake mix and vanilla extract until smooth.
Fold in the whipped topping gently.
Step 3: Assemble the Dessert Cups
Add crushed cookies to the bottom of each cup.
Spoon in the funfetti filling.
Repeat the layers until the cups are full.
Step 4: Decorate and Chill
Top with whipped cream and rainbow sprinkles.
Refrigerate for at least 1 hour before serving.
Fun Variations
Holiday Sprinkle Themes
Swap rainbow sprinkles for seasonal colors during holidays and parties.
Mini Dessert Shooters
Serve in small shooter cups for birthdays, baby showers, or dessert buffets.
Tips for Making Perfect Layered Dessert Cups
Layered dessert cups may look fancy, but they’re actually one of the easiest desserts to put together once you know a few simple tricks.
The best part is that you don’t need professional baking skills to make them look beautiful.
Small details like neat layers, the right cups, and proper chilling time can make a big difference.
If you’re making dessert cups for the first time, don’t stress about making every layer perfectly even.
They’ll still taste amazing, and with a little practice, they quickly become easier to assemble.
Best Cup Options
The container you use can completely change the look and feel of your dessert cups.
Clear cups work best because they show off all the colorful layers and textures inside.
Plastic Party Cups
Plastic dessert cups are one of the easiest and most affordable options.
They’re lightweight, easy to find, and perfect for birthdays, potlucks, baby showers, and large gatherings.
Mini plastic cups also work well when you want smaller portions for dessert tables or party trays.
Mason Jars
Mason jars give layered desserts a cozy homemade look that’s perfect for picnics, holidays, and rustic-style parties.
They also come with lids, which makes storing and transporting desserts much easier.
Wide-mouth jars are especially helpful because they give you more room to add neat layers without making a mess.
Mini Dessert Shooter Cups
Dessert shooter cups are great when you want elegant bite-sized desserts.
They look impressive on party tables and let guests sample multiple desserts without feeling too full.
These smaller cups are also perfect for rich desserts like cheesecake, mousse, or tiramisu since a little goes a long way.
Layering Tips
Beautiful layers don’t have to be difficult.
A few simple techniques can help your dessert cups look cleaner and more polished with very little extra effort.
Use Piping Bags for Neat Layers
Piping bags make it much easier to add pudding, mousse, whipped cream, or cheesecake filling neatly into cups.
This keeps the sides cleaner and helps each layer stand out.
If you don’t have piping bags, you can use a zip-top bag with one corner snipped off.
Chill Between Layers if Needed
If your filling feels soft or runny, place the dessert cups in the refrigerator for 10 to 15 minutes before adding the next layer.
This helps keep the layers separate instead of blending together.
This step is especially helpful for mousse, pudding, cheesecake fillings, and whipped cream layers.
Add Crunchy Toppings Just Before Serving
Crushed cookies, graham crackers, nuts, and cereal toppings can soften quickly in the refrigerator.
For the best texture, sprinkle crunchy toppings on right before serving.
This keeps every bite crisp and fresh instead of soggy.
Make-Ahead and Storage Advice
One of the biggest reasons people love layered dessert cups is how easy they are to prepare ahead of time.
Most recipes can be assembled the day before, which makes party prep much less stressful.
Most Recipes Can Be Prepared 1 Day Ahead
Cheesecake cups, pudding cups, trifles, and mousse desserts usually taste even better after chilling for a few hours because the flavors have more time to blend together.
If possible, wait to add final toppings until closer to serving time for the freshest presentation.
Keep Refrigerated Until Serving
Since many layered desserts contain cream cheese, whipped cream, pudding, or fresh fruit, they should stay refrigerated until ready to serve.
Cover the cups with plastic wrap or lids to keep them fresh and prevent them from drying out in the refrigerator.
Final Thoughts
Layered dessert cups are one of the easiest ways to make desserts feel fun, beautiful, and party-ready without a lot of extra work.
They’re simple to prepare, easy to serve, and perfect for everything from birthdays to holiday gatherings and casual weekends at home.
The best part is how many flavors you can try.
From rich chocolate desserts to fruity favorites and creamy cheesecakes, there’s something here for everyone to enjoy.
Don’t be afraid to mix and match layers or add your own twist along the way.
FAQs
How far ahead can dessert cups be made?
Most layered dessert cups can be made 1 to 2 days ahead and stored covered in the refrigerator until serving.
Can layered dessert cups be frozen?
Some cheesecake-based dessert cups freeze well for short periods. Thaw them in the refrigerator before serving for the best texture.
What are the best cups for serving desserts?
Clear dessert cups, mason jars, and mini shooter cups work best because they beautifully show off the layers.
Can I make these desserts without baking?
Yes. Many layered dessert cup recipes are completely no-bake and very beginner-friendly.

Hi, I’m Sorenna Blythe, the baker and writer behind Mix Whisk Bake. I share simple, reliable recipes and honest kitchen moments to help home bakers bake with confidence and joy. When I’m not testing new treats, you’ll find me sipping coffee and dreaming up my next bake.