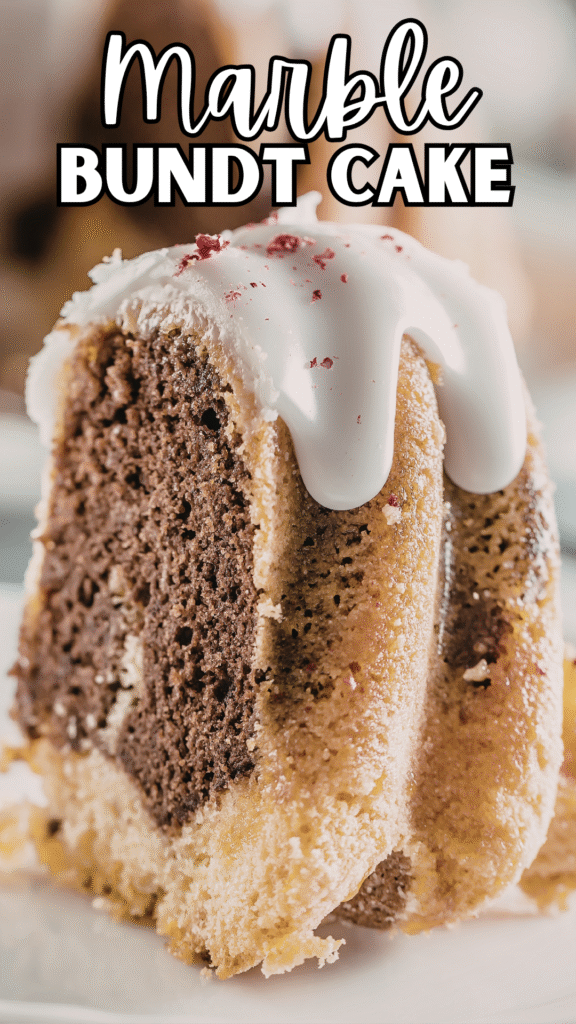
There’s something special about a marble bundt cake. You get soft vanilla and rich chocolate in every slice, swirled together in the most beautiful way.
It’s a classic for a reason. This is the kind of cake that works for everything: afternoon tea, birthdays, or just a quiet baking day at home.
In this recipe, you’ll learn how to create that perfect swirl without overthinking it. The texture stays soft and moist, and the flavor is rich without being heavy.
Don’t worry if you’ve never made a marble cake before because I’ll guide you through it step by step so you can bake with confidence.
What is a Marble Bundt Cake?
A marble bundt cake is a soft, buttery cake made by combining two batters, usually vanilla and chocolate, and gently swirling them together before baking, which creates that signature marbled look in every slice.
Instead of choosing between flavors, you get both at once, and you’ll notice each bite has a slightly different pattern and taste.
Unlike a plain vanilla or fully chocolate cake, where the flavor stays the same throughout, a marble cake gives you contrast without extra effort. The bundt pan plays a big role here too.
Its round shape and deep ridges help the cake bake evenly, giving you a tender crumb inside and a lightly crisp edge on the outside.
It also creates that beautiful, detailed finish, so even a simple cake looks impressive without needing much decoration.
Why You’ll Love This Recipe
Soft, Moist Crumb
This cake is all about texture. You’ll get a soft, tender crumb that stays moist from the first slice to the last.
The balance of butter, eggs, and milk keeps it rich without feeling heavy. If you’ve ever had a dry cake, you’ll notice the difference right away here.
Beautiful Swirl Pattern
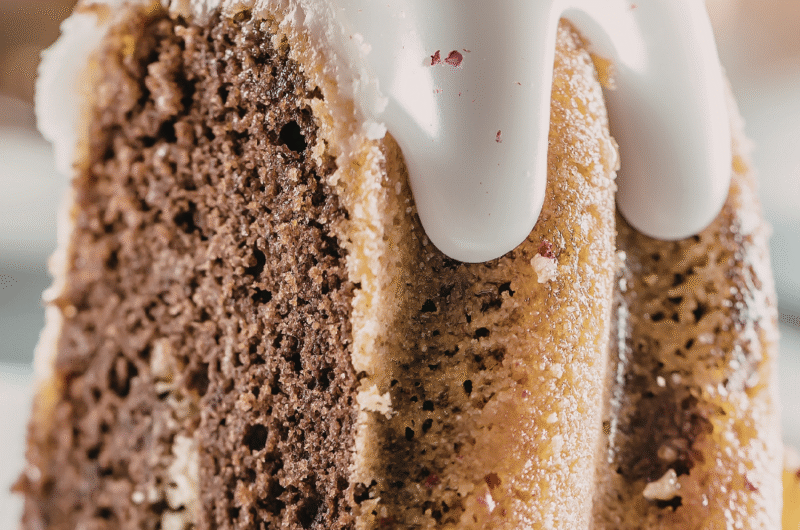
The marble effect looks impressive, but it’s easier than it seems. As you swirl the batters together, each slice comes out with its own unique pattern.
Simple, gentle swirls create the best results.
Simple Ingredients
You won’t need anything fancy for this recipe. Most of the ingredients are everyday baking staples you likely already have in your kitchen.
This makes it easy to bake anytime without extra planning.
No Complicated Techniques
Let’s keep things simple. The steps are straightforward, and you don’t need any special skills to get it right. If you can mix, pour, and swirl, you’re already set up for success.
Great for Beginners and Experienced Bakers
If you’re new to baking, this recipe will guide you with ease and build your confidence. If you’ve baked before, it’s a reliable go-to that still feels satisfying to make.
Either way, you’ll end up with a cake that looks beautiful and tastes even better.
Ingredients You’ll Need
A. Dry Ingredients
- 2 ½ cups (315g) all-purpose flour
- 2 ½ teaspoons baking powder
- ½ teaspoon salt
B. Wet Ingredients
- 1 cup (225g) unsalted butter, softened
- 1 ¾ cups (350g) granulated sugar
- 4 large eggs, room temperature
- 1 cup (240ml) milk or buttermilk, room temperature
- 2 teaspoons vanilla extract
C. Chocolate Batter
- ⅓ cup (30g) unsweetened cocoa powder
- ¼ cup (60ml) hot water or hot milk
Tip: Using room temperature ingredients helps everything mix smoothly and gives you a better, more even texture.
Equipment Needed
- Bundt pan (10–12 cup capacity) – This gives the cake its classic shape and helps it bake evenly. Make sure to grease it well so the cake releases easily.
- Mixing bowls (2–3 medium to large bowls) – You’ll need separate bowls for dry ingredients, wet ingredients, and dividing the batter.
- Electric mixer or whisk – An electric mixer makes creaming butter and sugar quicker, but a whisk works fine with a bit of effort.
- Spatula – Useful for scraping the bowl and folding the batter gently without overmixing.
- Skewer or knife – This is what you’ll use to create the marble swirl. A simple tool works best, no need for anything fancy.
Tip: If you don’t have a bundt pan, you can still bake this in a loaf or round pan, just adjust the baking time and keep an eye on it.
Step-by-Step Instructions
Step 1: Prepare the Pan
Start by greasing your bundt pan thoroughly. Use butter or oil, making sure you get into every curve and corner. Then lightly dust it with flour and tap out the excess.
This step matters more than it seems. You’ll thank yourself later when the cake releases cleanly.
Step 2: Make the Vanilla Batter
In a large bowl, cream the butter and sugar together until the mixture looks light and fluffy. This usually takes a few minutes, and you’ll notice the color becomes paler.
Add the eggs one at a time, mixing well after each addition so the batter stays smooth. Stir in the vanilla extract.
Now, add the dry ingredients and milk in turns. Start with dry, then milk, and repeat. Mix gently and stop as soon as everything is combined to keep the cake soft.
Step 3: Prepare the Chocolate Batter
In a small bowl, mix the cocoa powder with hot water or milk until smooth and lump-free. Take a portion of your vanilla batter and stir it into the cocoa mixture.
This creates a rich chocolate batter without needing a separate base, and it keeps both batters consistent in texture.
Step 4: Layer and Swirl
Spoon some vanilla batter into the prepared pan, followed by a layer of chocolate batter. Continue alternating until all the batter is used.
Then take a skewer or knife and gently swirl through the batter a few times. Don’t overdo it, as just a few light swirls will give you that classic marble look.
Step 5: Bake
Place the pan in a preheated oven at 175°C (350°F). Bake for about 45–55 minutes.
You’ll know it’s ready when a toothpick inserted into the cake comes out clean or with a few soft crumbs.
If the top browns too quickly, you can loosely cover it with foil near the end.
Step 6: Cool and Release
Let the cake cool in the pan for about 10–15 minutes. This helps it firm up and makes it easier to remove. Then gently turn it out onto a rack and let it cool completely.
If you greased the pan well, it should slide out easily. Don’t worry if it needs a light tap to release.
Tips for the Perfect Marble Effect
Don’t Over-Swirl
It’s tempting to keep swirling until it looks “just right,” but less really is more here. A few gentle passes are all you need to create that classic marbled look.
If you swirl too much, the batters will blend together, and you’ll lose the contrast between vanilla and chocolate. You’re aiming for visible streaks, not a fully mixed batter.
Use a Knife or Skewer Lightly
A simple knife or skewer works perfectly for this step. Insert it into the batter and move it in slow, smooth motions—think of drawing soft curves or figure-eight shapes.
Don’t press too deep or move too fast. You’ll notice that light, controlled movements create cleaner, more defined patterns.
Layer Strategically
How you add the batter to the pan makes a big difference. Start with a layer of vanilla, then add chocolate, and repeat. Try to spread each layer evenly before adding the next.
This helps the swirl form naturally when you run your knife through. Don’t worry about making it perfect because slight unevenness often leads to the most beautiful results.
Variations and Flavor Ideas
Chocolate-Orange Marble Cake
If you enjoy a fresh citrus touch, try adding orange zest to the vanilla batter. The light, fragrant flavor pairs beautifully with the rich chocolate swirl.
You can also add a small splash of orange juice or extract for a stronger taste. You’ll notice it brings a bright, slightly tangy balance to the cake without overpowering it.
Coffee Marble Cake
For a deeper, more grown-up flavor, mix a teaspoon of instant coffee or espresso powder into the chocolate batter.
This doesn’t make the cake taste like coffee; it simply enhances the chocolate and gives it a richer, more intense flavor.
If you enjoy coffee, this is an easy upgrade that makes a big difference.
Nutella Swirl
For a more indulgent twist, replace the chocolate batter with slightly warmed Nutella. It’s smooth, easy to swirl, and adds a creamy hazelnut flavor throughout the cake.
Don’t worry if it looks a bit messy going into the pan because it bakes into beautiful, rich ribbons.
Marble Cake with Glaze or Icing
Once your cake has cooled, you can add a simple glaze or icing for extra flavor and presentation. A light vanilla glaze, chocolate drizzle, or even a dusting of powdered sugar works well.
If you want something richer, a thicker icing can turn this into a more dessert-style cake. Keep it simple or dress it up, it’s completely up to you.
How to Serve Marble Bundt Cake
Serving this cake can be as simple or as dressed-up as you like, and you don’t need much to make it shine.
For a quick finish, lightly dust the top with powdered sugar. You’ll notice how it settles into the curves of the bundt shape and instantly makes the cake look more polished.
If you want something a bit richer, drizzle a warm chocolate glaze over the top and let it flow naturally down the sides; don’t worry about making it perfect, the uneven drips add to the charm.
For an extra treat, serve each slice with a spoonful of whipped cream or a scoop of ice cream.
The cool, creamy texture pairs beautifully with the soft cake and brings out both the vanilla and chocolate flavors.
Storage Tips
To keep your marble bundt cake fresh, start by storing it at room temperature if you plan to enjoy it within a few days.
Place it in an airtight container or wrap it well so it doesn’t dry out. You’ll notice it stays soft and flavorful for about 2–3 days this way.
If your kitchen is warm or you want it to last a bit longer, you can refrigerate it.
Just make sure it’s tightly covered, and let slices come to room temperature before serving so the texture softens again.
For longer storage, freezing works very well. Slice the cake or keep it whole, wrap it securely in plastic wrap and then foil, and freeze for up to 2–3 months.
When you’re ready to enjoy it, let it thaw at room temperature. Don’t worry if it feels slightly firm at first because it will soften as it sits, and the flavor will still be just as good.
Common Mistakes to Avoid
- Overmixing batter – Mixing too much after adding flour can make the cake dense instead of soft, so stop as soon as everything is combined.
- Cake sticking to the pan – Skipping proper greasing and flouring can cause the cake to stick, so take your time to coat every corner of the pan.
- Dry texture – Overbaking or using too much flour can dry out the cake, so measure carefully and check for doneness early.
- Uneven swirl – Swirling too much or too little can affect the pattern, so use gentle, controlled movements for a balanced marble effect.
Final Thoughts
This marble bundt cake is simple to make, full of flavor, and always looks impressive without extra effort.
You get the best of both worlds in every slice, with a soft texture that’s hard to beat.
Feel free to play around with flavors and make it your own. Once you’ve tried it, you’ll see how easy it is to customize!
FAQs
Yes, you can use a loaf or round pan. Just adjust the baking time and check for doneness earlier.
You may have over-swirled or not layered the batters evenly; keep the swirls light and simple.
Yes, but the flavor will be lighter and less rich; butter gives the best taste and texture.
Avoid overbaking, measure ingredients carefully, and store it in an airtight container.
Yes, it stays fresh for a couple of days and can also be frozen for longer storage.
Moist Marble Bundt Cake (Perfect Chocolate Vanilla Swirl!)
Difficulty: Easy10
Slices15
minutes45
minutes1
hourA soft, moist marble bundt cake with rich chocolate and vanilla swirls, simple to make and perfect for any occasion.
Ingredients
2 ½ cups (315g) all-purpose flour
2 ½ tsp baking powder
½ tsp salt
1 cup (225g) butter, softened
1 ¾ cups (350g) sugar
4 eggs
1 cup (240ml) milk or buttermilk
2 tsp vanilla extract
⅓ cup (30g) cocoa powder
¼ cup (60ml) hot water or milk
Directions
- Preheat oven to 175°C (350°F) and grease a bundt pan well.
- Cream butter and sugar until light and fluffy. Add eggs one at a time, then mix in vanilla.
- Add dry ingredients and milk in turns, mixing gently until combined.
- Mix cocoa powder with hot liquid, then stir it into a portion of the batter.
- Layer vanilla and chocolate batters in the pan, then swirl lightly.
- Bake for 45–55 minutes or until a toothpick comes out clean.
- Cool for 10–15 minutes, then turn out and cool completely.
Notes
- Don’t overmix the batter to keep the cake soft.
- Swirl gently for a clear marble effect.
- Store in an airtight container to keep it moist.

Hi, I’m Sorenna Blythe, the baker and writer behind Mix Whisk Bake. I share simple, reliable recipes and honest kitchen moments to help home bakers bake with confidence and joy. When I’m not testing new treats, you’ll find me sipping coffee and dreaming up my next bake.


