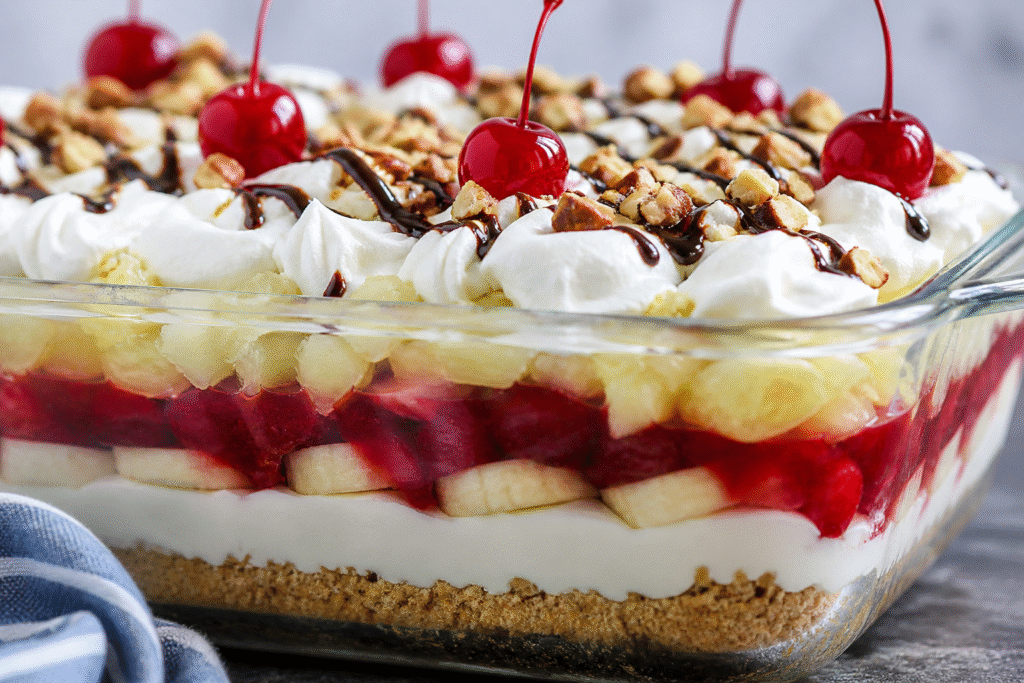
This no-bake banana split dessert brings all those classic flavors you love into one easy, layered treat—no ice cream melting, no oven needed.
It’s quick to put together, which makes it perfect for busy days, last-minute guests, or when you just want something sweet without the extra effort.
Each layer adds something special—creamy, fruity, and just the right amount of crunch.
You can keep it classic or switch things up with your favorite toppings, so it always feels a little personal.
If you can mix, spread, and chill, you’ve got this. I’ll walk you through each step so you can make it with confidence and enjoy every bite.
What is a No-Bake Banana Split Dessert?
A no-bake banana split dessert is a simple, layered treat you make without using an oven.
It’s built in a dish, then chilled until firm and ready to slice.
No baking, no complicated steps—just mix, layer, and refrigerate.
It takes its inspiration from the classic banana split you’d find at an ice cream shop.
You still get the same familiar flavors. Sweet bananas, creamy filling, juicy fruit, and a touch of chocolate all come together in one dessert.
The difference is that everything is layered instead of scooped, which makes it easier to serve and share.
The layers are what make this dessert stand out. You start with a firm, buttery crust. Then comes a smooth cream layer that holds everything together.
On top of that, you add bananas and fruit for freshness and flavor.
It’s finished with a light, fluffy topping and your favorite extras.
Each layer is simple on its own, but together they create a dessert that feels complete, balanced, and satisfying.
Why You’ll Love This Recipe
- No baking required: You can skip the oven completely, which saves time and keeps things simple.
- Easy to make ahead: Prepare it a few hours or even a day in advance, so it’s ready when you need it.
- Great for parties and potlucks: It’s made in one dish and easy to slice, making serving quick and stress-free.
- Customizable toppings and flavors: You can swap fruits, sauces, or add extras to suit your taste or what you have on hand.
- Kid-friendly and beginner-friendly: The steps are simple, and it’s a fun recipe that anyone can make with confidence.
Ingredients You’ll Need
For the Crust
- 2 cups crushed graham crackers (about 12–14 crackers, finely crushed)
- ½ cup (115g) melted butter
- ¼ cup granulated sugar
For the Creamy Layer
- 2 blocks (16 oz / 450g) cream cheese, softened
- 1 cup powdered sugar
- 1½ cups whipped topping (such as Cool Whip)
For the Fruit Layers
- 3–4 medium fresh bananas, sliced
- 1 can (20 oz / 565g) crushed pineapple, well drained
- 1½ cups chopped fresh strawberries (or 1 cup strawberry topping)
Toppings
- 2 cups whipped cream (or extra whipped topping)
- ¼ cup chocolate syrup
- ½ cup chopped nuts (optional, such as peanuts or walnuts)
- 8–10 maraschino cherries
Kitchen Tools Required
- Mixing bowls: Use at least two—one for the crust and one for the creamy layer to keep things organized.
- Electric mixer (optional): Helps make the cream layer smooth and fluffy faster, but a whisk or spoon works too, with a bit more effort.
- Spatula: Great for folding, spreading, and smoothing each layer evenly without making a mess.
- 9×13-inch baking dish: The ideal size for building neat layers that slice cleanly once chilled.
- Measuring cups and spoons: Keep your ingredient amounts accurate so the texture turns out just right.
Step-by-Step Instructions
Step 1: Prepare the Crust
Start by combining the crushed graham crackers, melted butter, and sugar in a mixing bowl.
Stir until the crumbs are fully coated and the mixture feels like damp sand.
This helps the crust hold together once chilled. Pour the mixture into your baking dish, then press it down firmly and evenly using the back of a spoon or the bottom of a glass.
Take a moment here to smooth it out because an even base makes layering much easier later.
Place the dish in the fridge while you move on, so the crust can firm up.
Step 2: Make the Cream Cheese Layer
In a clean bowl, beat the softened cream cheese and powdered sugar until smooth and lump-free.
This step is important, so give it a little time, as smooth cream makes a better texture overall.
Once ready, gently fold in the whipped topping using a spatula.
Folding means mixing slowly to keep the mixture light and airy.
Spread this creamy layer evenly over the chilled crust, making sure to reach the edges so every slice holds together nicely.
Step 3: Add Banana Layer
Slice the bananas into even rounds, not too thick or too thin.
This helps them layer neatly and makes each bite balanced.
Arrange the slices over the cream layer in a single, even layer.
Try to cover as much surface as possible so the banana flavor comes through in every piece.
Step 4: Add Pineapple & Strawberry Layers
Take your crushed pineapple and make sure it’s well-drained.
Extra liquid can make the dessert too soft.
Spread it gently over the bananas, keeping the layer even.
Next, add the strawberries or strawberry topping.
Spread carefully so you don’t disturb the layers underneath.
At this stage, you’ll start to see those classic banana split colors come together.
Step 5: Add Final Toppings
Spread the whipped cream over the top in a smooth, even layer.
This is your finishing layer, so take a little extra care to make it look neat.
Drizzle chocolate syrup over the surface, then sprinkle on chopped nuts if you’re using them.
Finish with maraschino cherries for that classic touch.
You can keep it simple or decorate a bit more; it’s up to you.
Step 6: Chill
Place the dessert in the fridge and let it chill for at least 4 hours, or overnight if you have time.
This step allows the layers to set properly, making it easier to slice and serve.
Don’t rush it because this is what brings everything together.
Once chilled, cut into squares and enjoy a dessert that’s creamy, fresh, and full of flavor.
Tips for the Best Banana Split Dessert
- Prevent bananas from browning: Lightly brush or toss the slices with a little lemon juice to keep them fresh-looking without changing the taste.
- Drain pineapple thoroughly: Press out as much liquid as possible so the dessert stays firm and not watery.
- Use full-fat cream cheese for the best texture: It creates a richer, smoother layer that holds its shape better.
- Chill long enough for clean slices: Give it at least 4 hours in the fridge so the layers set properly and cut neatly.
Variations & Substitutions
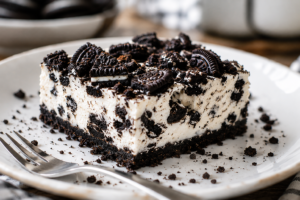
- Oreo crust instead of graham crackers: Swap in crushed Oreo cookies for a richer, chocolatey base.
- Add caramel drizzle: Drizzle caramel sauce over the top for extra sweetness and a deeper flavor.
- Use different fruits (blueberries, peaches): Change the fruit layer based on what you like or have on hand for a fresh twist.
- Make it lighter with low-fat ingredients: Use low-fat cream cheese and light whipped topping to reduce richness while keeping the texture.
- Individual dessert cups version: Layer everything in small cups for easy serving and a fun, single-portion option.
How to Store & Make Ahead
How to Store It Properly
Once your dessert is fully set, cover the dish tightly with plastic wrap or a fitted lid and keep it in the fridge.
This helps prevent it from drying out and keeps the layers fresh.
If you’ve already sliced it, you can also store individual pieces in airtight containers for easy grab-and-serve portions.
How Long It Lasts
This dessert is best enjoyed within 2–3 days while the texture is still firm and the bananas are fresh.
After that, the bananas may start to soften and brown slightly, which can affect both the look and taste.
It will still be safe to eat, but it won’t be at its best.
Can You Freeze It?
You can freeze it, but it’s not always the best option.
Freezing helps it last longer, but the texture may change once thawed.
The cream layer can become slightly watery, and the fruit may lose its freshness.
If you do freeze it, wrap it well and thaw it slowly in the fridge before serving.
Best Make-Ahead Timeline
For the best results, make this dessert the day before you plan to serve it.
This gives it enough time to chill properly and set into clean, neat layers.
If you’re short on time, aim for at least 4 hours in the fridge.
A little patience here makes a big difference when it comes to slicing and serving.
Serving Suggestions
- Perfect for summer gatherings: It’s cool, refreshing, and easy to serve, making it ideal for warm days and group events.
- Serve chilled for best texture: Keep it in the fridge until serving so the layers stay firm and slice neatly.
- Pair with coffee or iced drinks: Enjoy it with a cup of coffee or a cold drink to balance the sweetness.
Final Thoughts
This no-bake banana split dessert is simple, flexible, and easy to enjoy any time you need a quick treat.
You don’t need special skills—just a few basic steps and a little chill time.
Give it a try and make it your own with your favorite toppings.
If you make it, I’d love to hear how it turned out or what twist you added.
FAQs
Can I make a banana split dessert ahead of time?
Yes, it’s best made a day in advance for easier slicing and better flavor.
How do I keep bananas from turning brown?
Lightly coat the slices with lemon juice to keep them fresh-looking.
Can I use fresh whipped cream instead of whipped topping?
Yes, just stabilize it so it holds its shape longer.
Can I make this dessert without cream cheese?
Yes, you can use pudding or a whipped filling as a substitute.

No-Bake Banana Split Dessert (Easy, Creamy & Crowd-Pleasing)
Difficulty: Easy12
servings20
minutes6
hours20
minutesA creamy, layered no-bake dessert with bananas, fruit, and a buttery crust—perfect for quick prep and make-ahead serving.
Ingredients
2 cups crushed graham crackers
½ cup melted butter
¼ cup sugar
16 oz cream cheese, softened
1 cup powdered sugar
1½ cups whipped topping (such as Cool Whip)
3–4 bananas, sliced
1 can (20 oz) crushed pineapple, drained
1½ cups strawberries or 1 cup strawberry topping
2 cups whipped cream
¼ cup chocolate syrup
½ cup chopped nuts (optional)
Maraschino cherries
Directions
- Mix graham crackers, butter, and sugar, then press into a dish and chill.
- Beat cream cheese and powdered sugar, fold in whipped topping, and spread over the crust.
- Layer sliced bananas evenly on top.
- Add drained pineapple, then strawberries or topping.
- Spread whipped cream, drizzle chocolate syrup, and add nuts and cherries.
- Chill for at least 4 hours before slicing and serving.
Notes
- Lightly coat bananas with lemon juice to prevent browning.
- Drain pineapple well to avoid excess moisture.
- Chill overnight for the cleanest slices.

Hi, I’m Sorenna Blythe, the baker and writer behind Mix Whisk Bake. I share simple, reliable recipes and honest kitchen moments to help home bakers bake with confidence and joy. When I’m not testing new treats, you’ll find me sipping coffee and dreaming up my next bake.