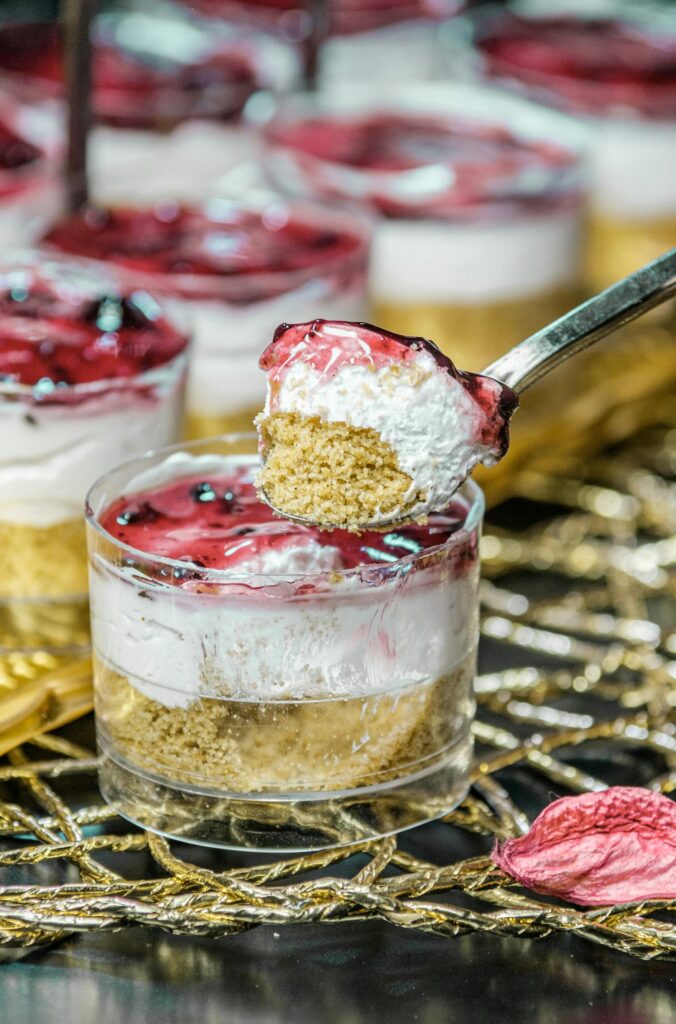
Craving something sweet but don’t want to turn on the oven? These no-bake cheesecake cups are the answer. They are cool, creamy, and perfect for warm days or last-minute desserts.
You only need a handful of simple ingredients, and the steps are easy to follow, even if you’re new to baking. No complicated techniques here—just mix, layer, and chill.
You can keep them classic or switch things up with fresh fruit, chocolate, or cookie toppings.
Serve them in small cups for parties or make a few just for yourself.
Best part? You can have them ready in under 20 minutes.
Then let the fridge do the rest.
Key Takeaways
- No-bake, quick, and beginner-friendly – Simple steps, no oven, and ready with minimal effort.
- Easily customizable flavors – Switch toppings and mix-ins to suit your taste every time.
- Perfect make-ahead dessert – Prepare in advance and let the fridge do the work.
- Ideal for parties and individual servings – Easy to serve, neat portions, and great for sharing.
Why You’ll Love These No-Bake Cheesecake Cups
No Oven Required (Perfect for Summer)
You don’t need to heat up your kitchen to enjoy a rich, creamy dessert.
Everything comes together with simple mixing and layering, so it’s ideal for hot days when turning on the oven feels like too much.
It’s also a great option if you don’t have access to an oven or just want something fuss-free.
Quick Prep Time
These cheesecake cups come together fast.
The crust takes just a few minutes to mix, and the filling is smooth and ready in no time.
If you can stir and whip, you can make this. It’s a great recipe to turn to when you want something homemade without spending hours in the kitchen.
Individual Servings (Great for Parties)
Serving these in small cups or jars makes everything easier.
No slicing, no mess—just grab and enjoy.
They look neat, feel special, and are perfect for sharing at gatherings, birthdays, or even casual get-togethers.
You can also control portion sizes without any extra effort.
Customizable Flavors and Toppings
This recipe is easy to make your own.
Add fresh berries for something light, swirl in chocolate for a richer treat, or sprinkle crushed cookies on top for extra texture.
You can mix and match flavors depending on what you have at home, which keeps things fun and flexible every time you make it.
Make-Ahead Friendly
These cheesecake cups are even better when made ahead.
Once assembled, they chill in the fridge and set beautifully, which means less stress later.
You can prepare them a few hours in advance, or even the day before, so when it’s time to serve, they’re already perfect and ready to enjoy.
Ingredients You’ll Need
For the Crust
- 1 ½ cups (150g) graham cracker crumbs (about 10–12 crackers, or use digestive biscuits)
- 5 tablespoons (70g) unsalted butter, melted
- 1–2 tablespoons sugar (optional) (add if your biscuits aren’t very sweet)
Tip: Crush the crackers as finely as you can. This helps the base hold together nicely in each cup.
For the Cheesecake Filling
- 450g (16 oz) cream cheese, softened (this makes mixing smooth and lump-free)
- ¾ cup (90g) powdered sugar
- 1 teaspoon vanilla extract
- 1 cup (240ml) heavy cream, cold (or use 1 cup whipped topping as a shortcut)
Tip: If your cream cheese is still cold, let it sit out for 20–30 minutes. It makes a big difference in texture.
Optional Toppings
- Fresh berries (strawberries, blueberries, raspberries)
- Chocolate sauce (for a rich finish)
- Caramel drizzle (adds a sweet, buttery touch)
- ½ cup crushed cookies (like Oreos or biscuits for crunch)
- ¼ cup lemon curd (for a bright, tangy contrast)
You can mix and match here. Even a simple fruit topping can make these feel extra special.
How to Make No-Bake Cheesecake Cups (Step-by-Step)
Step 1 – Prepare the Crust
Start by crushing your graham crackers into fine crumbs.
You can use a food processor for a quick result, or place them in a sealed bag and crush them with a rolling pin.
Aim for a sand-like texture so the base holds together well.
Pour the crumbs into a bowl and mix in the melted butter.
Stir until all the crumbs are evenly coated. The mixture should feel slightly damp and hold together when pressed.
Spoon the mixture into your serving cups and press it down firmly using the back of a spoon.
Take a moment here because pressing it well helps create a stable base that won’t fall apart later.
Step 2 – Make the Cheesecake Filling
Place the softened cream cheese in a bowl and beat it until smooth. This step is important.
If the cream cheese is soft, it will turn creamy quickly and won’t leave lumps in your filling.
Add the powdered sugar and vanilla extract. Mix again until everything is well combined and silky.
In a separate bowl, whip the cold cream until it forms soft peaks.
This means it should hold its shape but still look smooth and not stiff.
Gently fold the whipped cream into the cream cheese mixture.
Use a spatula and slow motions here to keep the filling light and airy.
Step 3 – Assemble the Cups
Spoon or pipe the cheesecake filling over the prepared crust.
Fill each cup evenly, leaving a little space at the top for toppings.
Smooth the surface with the back of a spoon or a small spatula.
If you want a cleaner look, a piping bag works really well and makes the layers neat without much effort.
Step 4 – Chill
Place the cups in the fridge and let them chill for at least 2–4 hours.
This gives the filling time to set and firm up properly.
If you have the time, letting them chill a bit longer will give you an even better texture.
It’s worth the wait.
Step 5 – Add Toppings & Serve
Once chilled, add your favorite toppings just before serving.
Fresh berries, a drizzle of chocolate, or a spoonful of caramel all work beautifully.
Serve them cold straight from the fridge.
The texture will be smooth, creamy, and perfectly set, which is just how a no-bake cheesecake should be.
Pro Tips for Perfect Cheesecake Cups
Use Room Temperature Cream Cheese for a Smooth Texture
Start with cream cheese that’s soft, not cold. This small step makes a big difference.
Soft cream cheese blends quickly and turns silky without lumps, which means your filling will be smooth from the start.
If you forget to take it out early, don’t worry. Cut it into small cubes and let it sit for 15–20 minutes.
It will soften faster and be much easier to work with.
Don’t Overmix After Adding Whipped Cream
Once your whipped cream goes into the mixture, be gentle.
Fold it in slowly using a spatula instead of beating it. This helps keep the filling light and airy.
If you mix too much, the filling can lose that soft, fluffy texture and become dense. Take your time here.
A few careful folds are all you need.
Chill Long Enough for Proper Setting
Chilling isn’t just a waiting step, but it’s what gives your cheesecake its structure.
Give the cups at least 2–4 hours in the fridge so the filling can firm up properly.
If they still look soft, let them chill a bit longer.
You’ll know they’re ready when the tops look set and hold their shape when you gently tilt the cup.
Use a Piping Bag for Clean Layers
For neat, even layers, a piping bag works really well.
It helps you fill each cup smoothly without making a mess, especially if you’re serving these to guests.
If you don’t have one, you can use a spoon or even a zip-top bag with the corner cut off.
Either way, aim to keep the layers even because it makes the final result look just as good as it tastes.
Flavor Variations to Try
Strawberry Cheesecake Cups
For a fresh, fruity twist, add a layer of chopped strawberries or a spoon of strawberry sauce on top of the cheesecake filling.
You can also fold a few mashed strawberries into the filling for a light pink color and gentle flavor throughout.
This version feels light and refreshing, especially on warm days.
Oreo Cheesecake Cups
If you love cookies and cream, this one is a favorite.
Crush a few Oreos and mix them into the filling, then add extra on top for crunch.
You can even swap the graham cracker base for crushed Oreos to carry that flavor all the way through.
It’s rich, creamy, and always a crowd-pleaser.
Lemon Cheesecake Cups
For something bright and slightly tangy, add a tablespoon or two of lemon juice and a bit of lemon zest (the yellow outer peel) to the filling.
This balances the sweetness and gives the cheesecake a fresh, zesty lift.
A small spoon of lemon curd on top makes it even better.
Chocolate Cheesecake Cups
Stir melted and cooled chocolate into the filling for a deeper, richer flavor.
You can also add a drizzle of chocolate sauce on top or sprinkle chocolate shavings for extra texture.
This version is smooth, indulgent, and perfect when you want something a little more decadent.
Peanut Butter Cheesecake Cups
Mix a few tablespoons of creamy peanut butter into the filling until smooth. It adds a nutty flavor that pairs beautifully with the creamy base.
For extra detail, drizzle a bit of melted chocolate or peanut butter on top.
It’s simple, satisfying, and hard to resist.
How to Store & Make Ahead
These cheesecake cups store really well, which makes them perfect for planning ahead.
Once they’ve set, keep them in the fridge for up to 3–4 days, and they’ll stay creamy and fresh.
Make sure to cover them tightly. Use lids, plastic wrap, or an airtight container to stop them from drying out or picking up fridge smells.
If you’re preparing them in advance for a party or a busy week, you can assemble everything ahead of time and simply add your toppings just before serving so they look their best.
Freezing isn’t recommended here, as the texture can change once thawed and become slightly grainy or watery instead of smooth and creamy.
Serving Suggestions
- Perfect for parties and gatherings – Easy to serve, no slicing needed, and they look neat on any dessert table.
- Great for portion control desserts – Individual cups help keep servings balanced without extra effort.
- Serve in mini cups for events – Smaller portions are ideal for events, letting guests enjoy a quick, mess-free treat.
Common Mistakes to Avoid
- Using cold cream cheese – Cold cream cheese doesn’t mix smoothly and can leave lumps in your filling.
- Skipping chill time – The cheesecake won’t set properly and will stay too soft to hold its shape.
- Overmixing the filling – Mixing too much can make the texture dense instead of light and creamy.
- Too much butter in the crust – Excess butter makes the base greasy and prevents it from holding together well.
Final Thoughts
These no-bake cheesecake cups are simple, flexible, and easy to make yourself.
Try different flavors, play with toppings, and find what you enjoy most.
Give them a go and see how they turn out for you!
FAQs
Yes, you can substitute it with whipped topping.
They need at least 2–4 hours in the fridge to set properly.
Freezing is not recommended, as it can affect the texture.
You can use digestive biscuits, Oreos, or vanilla wafers.
Use low-fat cream cheese and reduce the sugar.
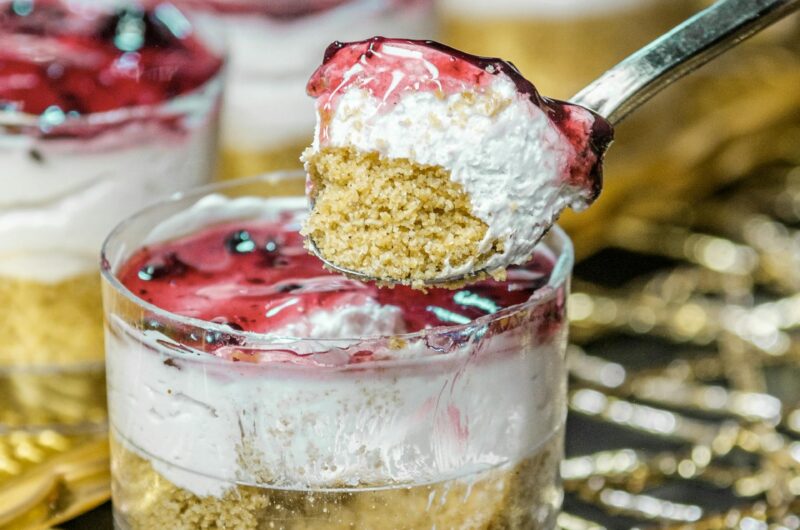
No Bake Cheesecake Cups (Easy, Creamy & Ready in Minutes)
Difficulty: Easy6
Cups15
minutes4
hoursCreamy, no-bake cheesecake cups with a buttery biscuit base—quick to make, easy to customize, and perfect for any occasion.
Ingredients
1 ½ cups (150g) graham cracker crumbs
5 tbsp (70g) melted butter
450g cream cheese, softened
¾ cup (90g) powdered sugar
1 tsp vanilla extract
1 cup (240ml) heavy cream (or whipped topping)
Optional toppings: fruit, chocolate, caramel, crushed cookies
Directions
- Mix graham cracker crumbs with melted butter and press into the bottom of cups.
- Beat cream cheese until smooth, then mix in sugar and vanilla.
- Whip cream separately, then gently fold into the cream cheese mixture.
- Spoon or pipe filling over the crust and smooth the top.
- Chill for 2–4 hours until set.
- Add toppings and serve chilled.
Notes
- Use room temperature cream cheese for a smooth filling.
- Chill fully for the best texture.
- Add toppings just before serving for the freshest look.

Hi, I’m Sorenna Blythe, the baker and writer behind Mix Whisk Bake. I share simple, reliable recipes and honest kitchen moments to help home bakers bake with confidence and joy. When I’m not testing new treats, you’ll find me sipping coffee and dreaming up my next bake.