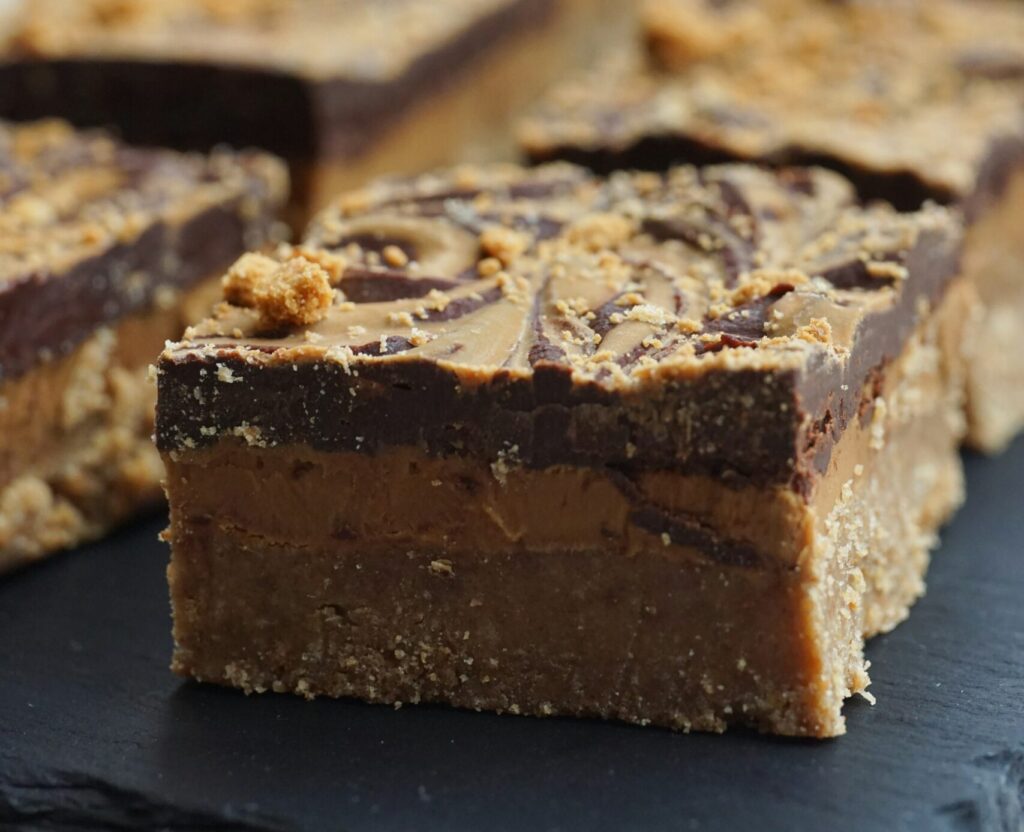
Craving something rich, creamy, and chocolatey without turning on the oven? These no-bake chocolate peanut butter bars are exactly what you need.
They come together fast with simple ingredients you likely already have in your kitchen.
This recipe is perfect for beginners.
No baking skills, no special equipment. Just mix, press, chill, and enjoy.
If you can stir and spread, you can make these.
They’re great for almost any moment.
Serve them as an easy dessert, pack them as a snack, or bring them to a party when you need something everyone will love.
Why You’ll Love This Recipe
No Oven Required
You don’t need to turn on the oven at all.
That means no waiting for it to heat up and no extra warmth in your kitchen.
Just mix everything together, press it into a pan, and let the fridge do the work.
It’s a simple, low-effort way to make something that tastes like you spent much more time on it.
Simple Pantry Ingredients
Everything in this recipe is easy to find and likely already in your kitchen.
Peanut butter, chocolate, sugar, and a few basics come together to create something special.
There’s no need for fancy ingredients or last-minute store runs.
If you bake or make treats even occasionally, you’re probably already set.
Quick Prep Time
This recipe moves fast from start to finish.
The base comes together in minutes, and the chocolate topping is just as quick.
Once it’s layered, all that’s left is chilling.
It’s perfect for those moments when you want a homemade treat without spending hours in the kitchen.
Perfect Balance of Sweet and Salty
The creamy peanut butter adds a soft, salty note that balances the chocolate’s sweetness.
Each bite feels rich but not overwhelming.
If you enjoy that classic sweet-and-salty combo, this recipe delivers it in the best way.
You can even add a small pinch of salt on top to bring out the flavors more.
Kid-Friendly and Crowd-Pleasing
These bars are easy to make and even easier to enjoy.
Kids can help mix and press the base, which makes it a fun kitchen activity.
And when it’s time to serve, they disappear quickly.
Whether it’s a family treat or something to share with friends, this recipe is always a hit.
Ingredient Tips & Substitutions
- Peanut Butter (1 cup / 250g)
- Use creamy peanut butter for a smooth, even base.
- Natural peanut butter works too, but stir it well first so the oil is fully mixed in. If it’s too runny, the bars may not set as firmly.
- Prefer texture? Swap half for crunchy peanut butter to add a light crunch.
- Graham Cracker Crumbs (2 cups / 200g)
- No graham crackers? Use the same amount of crushed digestive biscuits.
- You can also use crushed vanilla cookies or plain tea biscuits for a slightly sweeter base.
- Crush them finely so the base holds together well.
- Butter (½ cup / 115g, melted)
- For a dairy-free option, use the same amount of plant-based butter or margarine.
- Coconut oil (½ cup / 115g, melted) can also work, but it will add a light coconut flavor and a slightly firmer texture when chilled.
- Powdered Sugar (1½ cups / 180g)
- Helps bind the base and adds sweetness.
- If your peanut butter is already sweetened, you can slightly reduce this (by about 2–3 tablespoons) to balance the flavor.
- Chocolate Chips (1½ cups / 250g)
- Milk chocolate gives a sweeter, creamier topping.
- Dark chocolate (50–70% cocoa) adds a richer, less sweet contrast that pairs beautifully with peanut butter.
- For easier spreading, mix in 1–2 tablespoons of peanut butter when melting the chocolate.
- Vegan Option (Full Swap Guide)
- Use 1 cup (250g) dairy-free peanut butter
- ½ cup (115g) plant-based butter or coconut oil
- 1½ cups (180g) powdered sugar (check it’s vegan-friendly)
- 2 cups (200g) crushed biscuits (ensure they’re vegan)
- 1½ cups (250g) dairy-free chocolate chips
Small tip: If your mixture feels too soft while mixing, add a tablespoon of extra crumbs. If it feels too dry, add a spoonful of peanut butter. This helps you get the perfect pressable texture every time.
How to Make No-Bake Chocolate Peanut Butter Bars
Step 1 – Prepare the Peanut Butter Base
Start with a medium mixing bowl.
Add the peanut butter, melted butter, and powdered sugar, then stir until the mixture looks smooth and thick.
It should come together easily and feel slightly soft but not runny.
Now add the graham cracker crumbs.
Mix slowly at first so the crumbs don’t spill, then keep stirring until everything is fully combined.
The texture should feel like a soft dough that holds its shape when pressed.
If it feels too dry, add a small spoon of peanut butter.
If it’s too soft, sprinkle in a little more crumbs.
Step 2 – Press into Pan
Line your pan with parchment paper, leaving a bit of extra paper hanging over the sides.
This makes it much easier to lift the bars out later.
Spoon the mixture into the pan and spread it out gently.
Use the back of a spoon or your hands to press it down evenly.
Take your time here, as an even layer helps the bars set nicely and look neat when cut.
Press firmly so the base holds together.
Step 3 – Make Chocolate Topping
Place the chocolate chips in a heat-safe bowl.
Melt them gently using a microwave in short bursts (about 20–30 seconds at a time), stirring in between each round.
This keeps the chocolate smooth and prevents burning.
If you want a softer, easier-to-slice topping, stir in 1–2 tablespoons of peanut butter while the chocolate is warm.
It blends in quickly and gives the top a silky finish.
Step 4 – Spread & Chill
Pour the melted chocolate over the peanut butter base.
Tilt the pan slightly or use a spatula to spread it out into an even layer, reaching all the edges.
Place the pan in the fridge and let it chill until firm.
This usually takes about 1–2 hours.
The top should feel set to the touch, and the base should hold together when pressed lightly.
Step 5 – Slice & Serve
Once fully chilled, lift the bars out using the parchment paper.
Place them on a cutting board and use a sharp knife to cut into squares or bars.
For cleaner cuts, wipe the knife between slices or warm it slightly.
Serve them chilled for a firmer bite, or let them sit at room temperature for a few minutes if you prefer a softer texture.
Either way, they’re rich, smooth, and ready to enjoy.
Pro Tips for Perfect Bars
- Use parchment for easy removal – Line your pan with parchment paper so you can lift the bars out cleanly without sticking or breaking.
- Chill long enough for clean slices – Let the bars fully set in the fridge so they hold their shape and cut neatly.
- Use a warm knife to cut neatly – Slightly warm your knife to glide through the chocolate layer without cracking it.
- Balance sweetness with a pinch of salt – A small sprinkle of salt enhances the flavor and keeps the bars from tasting overly sweet.
Variations to Try
- Crunchy peanut butter version – Swap creamy peanut butter for crunchy to add a satisfying bite.
- Add chopped nuts or pretzels – Mix in for extra crunch and a slightly salty contrast.
- Swirl chocolate and peanut butter topping – Gently swirl melted peanut butter into the chocolate for a marbled finish.
- Add caramel drizzle – Drizzle caramel over the top for a richer, sweeter layer.
- Protein-packed version – Stir in a scoop of protein powder to make the bars more filling.
How to Store
To keep your bars fresh and tasting their best, store them in an airtight container in the fridge for up to one week.
This helps them stay firm and prevents the chocolate from softening too much.
If you plan to keep them longer, the freezer is a great option.
Place the bars in a single layer or separate stacked layers with parchment paper, then freeze for up to two months.
When you’re ready to enjoy them, let them sit at room temperature for a few minutes, so they soften slightly, and the texture becomes just right.
Choose a container that seals well, like a lidded plastic or glass container, to protect the bars from absorbing fridge odors and to keep them from drying out.
Serving Suggestions
- With coffee or milk – Enjoy a bar with a warm drink or a cold glass of milk for a simple, satisfying treat.
- As a party dessert – Cut into small squares and serve on a platter for an easy, crowd-pleasing dessert.
- Packed in lunchboxes – Add one to lunchboxes for a sweet homemade snack that travels well.
- Holiday treat ideas – Decorate with sprinkles or drizzle extra chocolate to make them festive for special occasions.
Common Mistakes to Avoid
- Using too much butter (greasy bars) – Stick to the measured amount, as extra butter can make the base too soft and oily instead of firm and sliceable.
- Not chilling long enough – Give the bars enough time in the fridge so they fully set; rushing this step can lead to messy, uneven slices.
- Overheating chocolate – Melt chocolate slowly in short intervals, stirring often, to keep it smooth and prevent it from burning or turning grainy.
- Incorrect ingredient ratios – Measure carefully, especially the crumbs and sugar, so the base holds together without becoming too dry or too soft.
Final Thoughts
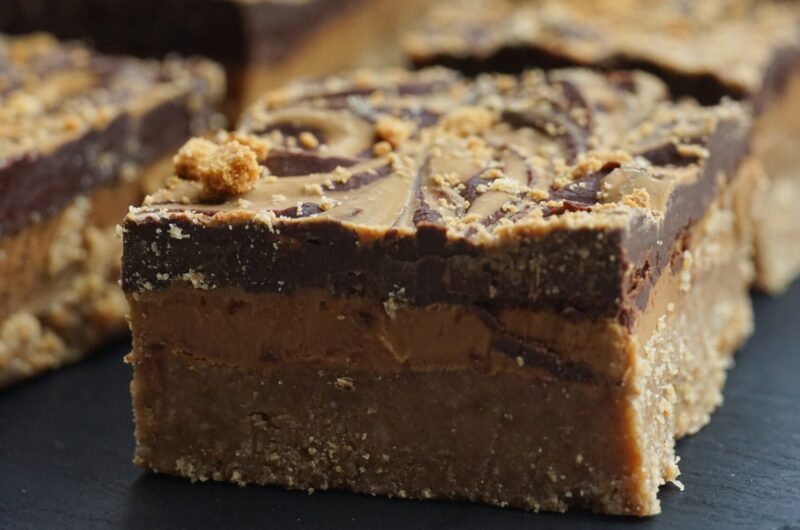
These no-bake chocolate peanut butter bars are simple, rich, and always satisfying.
You get a smooth, chocolatey top and a soft, peanut buttery base with very little effort.
Give them a try and make them your own.
Add your favorite mix-ins or adjust the sweetness to suit your taste.
FAQs
Yes, they need to chill to set properly.
Yes, but stir it well to prevent separation.
They typically need 1–2 hours in the fridge.
Yes, they freeze well for longer storage.
Yes, use crushed cookies or digestive biscuits instead.
No-Bake Chocolate Peanut Butter Bars (Easy & Irresistible)
Difficulty: Easy12
Bars15
minutes1
hour15
minutesRich, creamy chocolate peanut butter bars made with simple ingredients—no oven needed.
Ingredients
1 cup (250g) peanut butter
½ cup (115g) butter, melted
1½ cups (180g) powdered sugar
2 cups (200g) graham cracker crumbs
1½ cups (250g) chocolate chips
Optional: 1–2 tbsp peanut butter (for smoother chocolate topping)
Directions
- In a bowl, mix peanut butter, melted butter, and powdered sugar until smooth.
- Stir in graham cracker crumbs until a soft dough forms.
- Press the mixture evenly into a lined pan.
- Melt chocolate chips in short intervals, stirring until smooth.
- (Optional) Stir in peanut butter for a softer topping.
- Pour and spread chocolate over the base.
- Refrigerate for 1–2 hours until firm.
- Slice into bars and serve.
Notes
- Chill fully before slicing for clean edges.
- Use parchment paper for easy removal.
- Store in the fridge for up to 1 week or freeze for up to 2 months.

Hi, I’m Sorenna Blythe, the baker and writer behind Mix Whisk Bake. I share simple, reliable recipes and honest kitchen moments to help home bakers bake with confidence and joy. When I’m not testing new treats, you’ll find me sipping coffee and dreaming up my next bake.