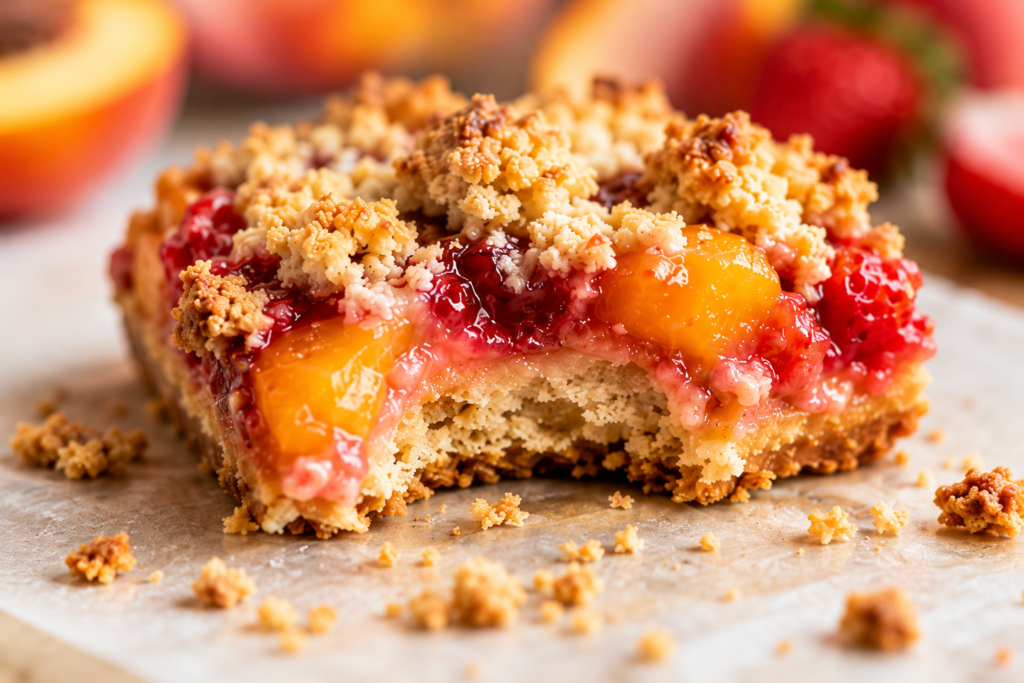
There’s something so good about the combination of sweet strawberries, juicy peaches, and a buttery crumble topping fresh from the oven.
These strawberry peach dessert bars are soft, fruity, and packed with bright summer flavor in every bite.
You’ll love how simple they are to make, even if you’re new to baking.
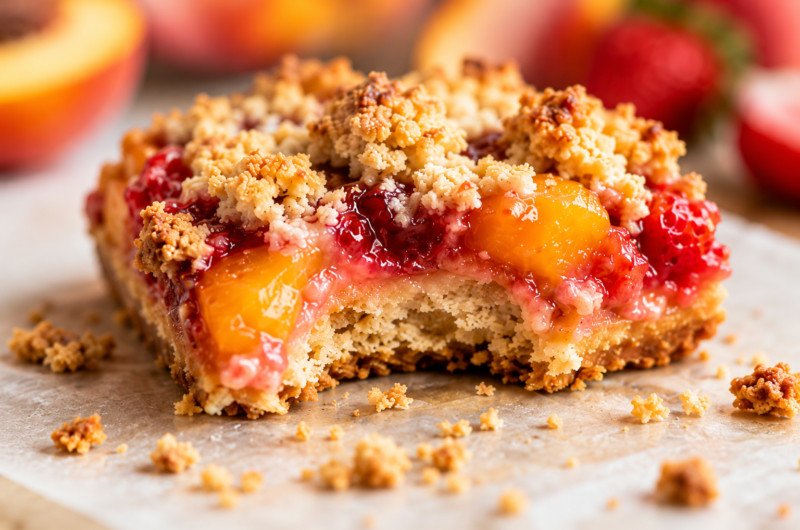
The fresh fruit filling sits on a rich buttery crust with a golden crumble on top that adds the perfect texture.
They’re great for summer parties, picnics, or an easy dessert to keep in the freezer for later.
If you need a dessert that looks impressive without a lot of work, these bars are always a good idea.
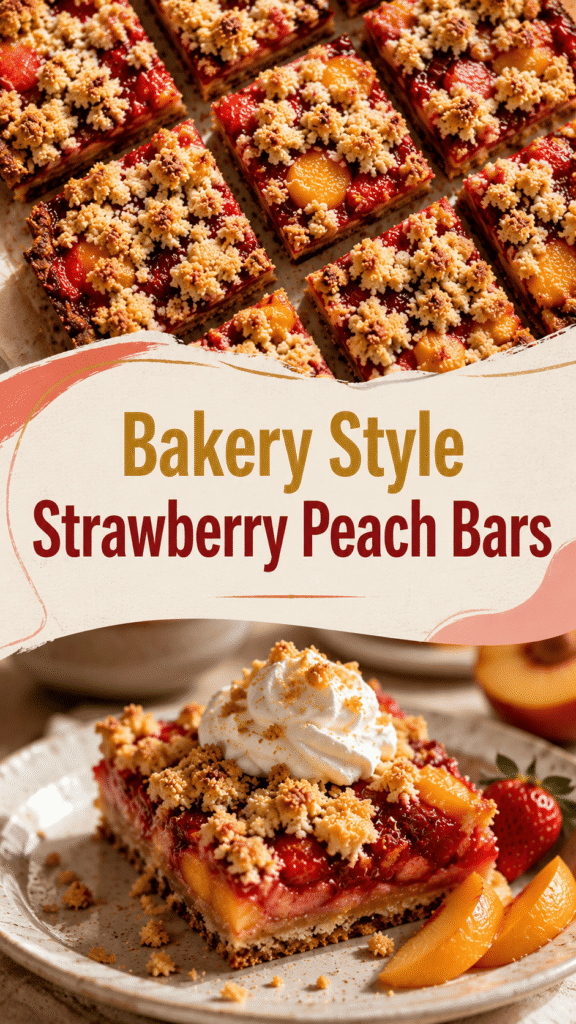
Why You’ll Love This Strawberry Peach Dessert Bars Recipe
Sweet and Fruity Summer Flavor
Fresh peaches and strawberries are one of those combinations that just work beautifully together.
The peaches bring a soft, juicy sweetness, while the strawberries add a bright and slightly tangy flavor that keeps every bite fresh and balanced.
As the bars bake, the fruit becomes tender and syrupy without losing its natural taste.
The result is a dessert that feels light, fresh, and perfect for warm-weather gatherings.
If you love simple fruit desserts that let the ingredients shine, these bars will quickly become a favorite.
They taste especially good during peach and strawberry season when the fruit is naturally sweet and full of flavor.
Easy to Make
This recipe uses simple pantry ingredients and doesn’t require any special baking skills.
You only need a few mixing bowls, fresh fruit, and basic ingredients you probably already have at home.
The crust and crumble topping are made from the same mixture, which saves time and keeps cleanup easy.
There’s no need to worry about making perfect layers or fancy decorations.
Even if you’re new to baking, these bars come together in a very manageable way.
The steps are simple to follow, and the oven does most of the work for you.
If your fruit looks a little rustic or uneven, that’s completely fine.
These dessert bars are meant to feel homemade and cozy.
Buttery Crumble Texture
The texture is one of the best parts of this recipe.
The bottom crust bakes up soft and buttery while still holding the fruit filling nicely.
On top, the crumble becomes golden and lightly crisp, adding just the right amount of crunch.
Every bite gives you a mix of juicy fruit, tender crust, and crumbly topping.
Using cold butter helps create that classic bakery-style crumble texture.
Don’t worry if the topping looks slightly uneven before baking.
That rough, crumbly texture is exactly what makes these bars look and taste so good.
Great for Any Occasion
These strawberry peach dessert bars fit almost any occasion without feeling too heavy or complicated.
They’re easy to pack up for summer BBQs, cookouts, and family picnics.
You can slice them into smaller squares for potlucks or party dessert trays.
They also make a simple afternoon treat with coffee, iced tea, or lemonade.
During the holidays, these bars are a nice change from heavier desserts while still feeling comforting and homemade.
Another bonus is how well they store and freeze.
You can make them ahead of time and keep a few bars ready whenever a dessert craving hits.
Ingredients You’ll Need
For the Crust and Crumble
- 2 cups all-purpose flour
- 1 cup old-fashioned rolled oats
- 1 cup light brown sugar, packed
- 1 cup unsalted butter, cold and cubed
- 1 teaspoon ground cinnamon
- 1/2 teaspoon salt
For the Strawberry Peach Filling
- 2 cups fresh peaches, peeled and diced
- 2 cups fresh strawberries, chopped
- 1/2 cup granulated sugar
- 2 tablespoons cornstarch
- 1 tablespoon fresh lemon juice
- 1 teaspoon vanilla extract
Best Peaches for Dessert Bars
Fresh vs Frozen Peaches
Fresh peaches are usually the best choice for these dessert bars because they give the filling a brighter flavor and a better texture.
When peaches are in season, they tend to be naturally sweeter and juicier, which makes the bars taste even fresher and more homemade.
Fresh peaches also hold their shape better while baking, so the filling stays soft without turning mushy.
That said, frozen peaches can still work very well when fresh peaches are out of season.
If you use frozen peaches, let them thaw first and drain away any extra liquid before mixing them into the filling.
Too much moisture can make the bars overly soft or watery.
Patting the peaches dry with paper towels is a simple extra step that helps a lot.
Frozen peaches are a great backup option when you want to enjoy these bars year-round without waiting for summer.
Freestone Peaches Work Best
Freestone peaches are the easiest type to use for baking because the pit separates cleanly from the fruit.
That means less mess and much faster prep in the kitchen.
You can slice and dice them quickly without struggling to cut around a stubborn pit.
They also tend to have a firm texture that holds up nicely during baking.
Clingstone peaches can still be used if needed, but they usually take more time to prepare.
If you’re shopping at a farmer’s market or grocery store, look for peaches labeled “freestone” whenever possible.
It makes the whole recipe feel simpler, especially for beginner bakers.
How to Ripen Peaches Quickly
If your peaches feel firm when you bring them home, don’t worry.
They can ripen nicely on the kitchen counter in just a day or two.
Place them stem-side down on a plate or towel and leave them at room temperature.
Avoid putting unripe peaches in the fridge because cold temperatures slow down the ripening process.
For even faster ripening, place the peaches in a paper bag loosely folded at the top.
The bag traps natural gases from the fruit, which helps soften the peaches more quickly.
Once the peaches smell sweet and feel slightly soft when gently pressed, they’re ready to use.
Try not to wait until they become overly soft, or they may break down too much while baking.
Kitchen Tools Needed
- 8×8 or 9×9 baking pan — Perfect size for thick, evenly baked dessert bars.
- Mixing bowls — Used for preparing the crumble mixture and fruit filling separately.
- Measuring cups and spoons — Helps keep ingredient amounts accurate for the best texture.
- Knife and cutting board — Needed for slicing the peaches and strawberries into small pieces.
- Parchment paper — Makes the bars easier to lift out and slice cleanly after baking.
How to Make Strawberry Peach Dessert Bars
Step 1: Prepare the Baking Pan
Start by preheating your oven to 350°F so it’s fully heated before the bars go in.
A properly preheated oven helps the crust bake evenly and gives the crumble topping a golden finish.
Line your baking pan with parchment paper, leaving a little extra hanging over the sides.
This makes it much easier to lift the bars out later without breaking them apart.
If you don’t have parchment paper, lightly greasing the pan will still work, but parchment gives cleaner slices.
Step 2: Make the Crust and Crumble
In a large mixing bowl, combine the flour, rolled oats, brown sugar, cinnamon, and salt.
Stir everything together until the dry ingredients are evenly mixed.
Add the cold cubed butter and work it into the mixture using your fingers, a pastry cutter, or a fork.
Keep mixing until the texture looks crumbly with small buttery pieces throughout.
The mixture should hold together slightly when pressed in your hand without feeling wet.
Set aside about one-third of the crumble mixture for the topping.
Press the remaining mixture firmly into the bottom of the prepared baking pan to form the crust.
Try to spread it into an even layer so the bars bake consistently from edge to center.
Step 3: Prepare the Fruit Filling
Dice the peaches and strawberries into small bite-sized pieces so they bake evenly.
If the fruit is overly juicy, gently pat it dry with paper towels before mixing the filling.
Place the fruit into a separate bowl and add the granulated sugar, cornstarch, lemon juice, and vanilla extract.
Stir gently until all the fruit is coated evenly.
The cornstarch helps thicken the filling as the bars bake, which keeps the layers from becoming too runny.
The lemon juice brightens the flavor and balances the sweetness of the fruit beautifully.
Step 4: Assemble the Bars
Pour the fruit filling evenly over the prepared crust.
Use a spoon or spatula to spread the fruit into an even layer so every bite gets plenty of filling.
Sprinkle the reserved crumble mixture evenly across the top.
Don’t worry about making the topping look perfect.
Those uneven crumbles create the best golden texture once baked.
Step 5: Bake Until Golden
Place the pan into the oven and bake until the fruit filling is bubbly and the crumble topping turns lightly golden brown.
Your kitchen will smell warm, buttery, and full of sweet fruit while the bars bake.
If the topping starts browning too quickly, loosely cover the pan with foil during the last few minutes of baking.
The bars may still look slightly soft in the center when they come out of the oven, and that’s completely normal.
They will continue to set as they cool.
Step 6: Cool and Slice
Let the bars cool completely in the pan before slicing.
This step is important because the filling thickens as it cools, giving you cleaner and neater bars.
If you slice them too early, the filling may spill out and become messy.
For extra clean slices, chill the bars in the refrigerator for about 30 minutes before cutting.
Use the parchment paper handles to lift the bars out of the pan easily.
Then slice, serve, and enjoy every buttery, fruity bite.
Tips for the Best Strawberry Peach Bars
Don’t Skip the Cornstarch
Cornstarch plays a very important role in this recipe because it helps thicken the fruit filling while the bars bake.
Peaches and strawberries naturally release a lot of juice in the oven.
Without a thickener, the filling can become too watery and make the crust soggy.
A small amount of cornstarch helps create a soft, jam-like texture that holds together much better when sliced.
Be sure to mix it evenly with the fruit so there are no dry clumps left behind.
If your fruit is extra ripe and juicy, adding a tiny bit more cornstarch can help keep the filling balanced.
Use Cold Butter
Cold butter is the secret to getting that delicious crumbly topping.
As the butter melts in the oven, it creates small pockets throughout the crumble that turn crisp and golden.
If the butter is too soft or melted before baking, the topping can become dense instead of light and crumbly.
Cut the butter into small cubes straight from the fridge for the best results.
Working quickly also helps keep the butter cold while mixing the crumble together.
Don’t worry if the mixture looks rough or uneven.
That imperfect texture is exactly what gives these bars their homemade bakery-style look.
Let the Bars Cool Completely
It can be tempting to slice into the bars while they’re still warm, especially when your kitchen smells amazing.
But letting them cool fully makes a huge difference in texture and appearance.
As the bars cool, the fruit filling thickens and sets properly.
This helps the slices stay neat instead of falling apart.
If you want especially clean bars, place them in the refrigerator for a short time before cutting.
Using a sharp knife and wiping it clean between slices also helps create smoother edges.
A little patience here really pays off.
Add Extra Crunch
If you enjoy a little extra texture, chopped nuts are a great addition to the crumble topping.
Pecans add a warm buttery flavor that pairs beautifully with peaches.
Almonds bring a light crunch and slightly sweet nutty taste that works really well with strawberries.
You only need a small handful mixed into the topping to add extra texture without overpowering the fruit.
This step is completely optional, but it’s an easy way to make the bars feel even more special.
For the best crunch, sprinkle the nuts evenly across the top before baking.
Delicious Variations
- Strawberry Peach Oatmeal Bars — Add extra rolled oats to the crumble mixture for a heartier and chewier texture.
- Strawberry Peach Cheesecake Bars — Spread a simple cream cheese layer between the crust and fruit filling for a rich and creamy twist.
- Gluten-Free Fruit Bars — Use a gluten-free flour blend and certified gluten-free oats to easily make these bars gluten-free.
- Mixed Berry Peach Bars — Add raspberries or blueberries for even more fresh berry flavor and color.
What to Serve with Strawberry Peach Dessert Bars
- Vanilla ice cream — The cold creamy texture pairs perfectly with the warm buttery crumble and juicy fruit filling.
- Whipped cream — A light fluffy topping that adds extra sweetness without feeling too heavy.
- Iced coffee — The bold coffee flavor balances the sweetness of the dessert beautifully.
- Peach iced tea — A refreshing summer drink that complements the fresh peach flavor in the bars.
- Fresh mint garnish — Adds a bright pop of color and a fresh finish to each serving.
How to Store Strawberry Peach Bars
At Room Temperature
If you plan to enjoy the bars within a day or two, storing them at room temperature works perfectly well.
Place the bars in an airtight container or cover the baking pan tightly with plastic wrap or foil.
This helps keep the crumble topping from drying out too quickly.
Store the container in a cool spot away from direct sunlight or heat.
The bars will stay fresh for up to 2 days while keeping their soft texture and fruity flavor.
If your kitchen is especially warm, moving them to the refrigerator is the better option.
In the Refrigerator
For longer freshness, store the bars in the refrigerator.
Place them in an airtight container or layer them between sheets of parchment paper to prevent sticking.
The chilled bars become slightly firmer, which many people actually enjoy because the slices hold together so well.
They stay fresh in the refrigerator for up to 5 days.
Before serving, you can enjoy them cold straight from the fridge or let them sit at room temperature for a few minutes to soften slightly.
They also taste delicious warmed briefly in the microwave if you prefer a softer texture.
Freezing Instructions
These strawberry peach bars freeze surprisingly well, which makes them great for preparing ahead of time.
Once the bars are fully cooled, slice them into individual portions.
Wrap each bar tightly in plastic wrap or parchment paper, then place them into a freezer-safe container or zip-top bag.
Wrapping them individually makes it easy to grab just one or two whenever you want a quick dessert.
The bars can be frozen for up to 3 months without losing much flavor or texture.
When you’re ready to enjoy them, let the bars thaw in the refrigerator or at room temperature.
For a fresh-from-the-oven feel, warm them gently before serving.
Final Thoughts
These strawberry peach dessert bars are the kind of easy homemade treat that always feels special without requiring a lot of work.
The sweet fruit filling, buttery crumble, and soft crust make them perfect for everything from summer parties to simple afternoon desserts at home.
You can keep the recipe classic or try one of the fun variations to make it your own.
Happy baking!
FAQs
Can I Use Frozen Fruit?
Yes, frozen peaches and strawberries work well.
Just thaw and drain them first to remove extra moisture before baking.
Do I Need to Peel the Peaches?
Peeling is optional, but it gives the filling a softer texture.
If you prefer, you can leave the skins on for a more rustic dessert.
Why Are My Dessert Bars Runny?
The bars may be runny if there is too much liquid in the fruit or not enough cornstarch.
Letting the bars cool completely also helps the filling set properly.
Can I Make These Ahead of Time?
Yes, these bars are great for making ahead.
You can store them in the refrigerator or freeze them for later.
What’s the Best Pan Size?
An 8×8 or 9×9 baking pan works best for thick, evenly baked dessert bars.
The Best Strawberry Peach Dessert Bars with Buttery Crust
Difficulty: Easy9
Bars15
minutes40
minutes55
minutesThese strawberry peach dessert bars are packed with juicy fruit, a buttery crust, and a golden crumble topping for the perfect easy summer dessert.
Ingredients
- For the Crust and Crumble
2 cups all-purpose flour
1 cup rolled oats
1 cup brown sugar
1 cup cold unsalted butter, cubed
1 teaspoon cinnamon
1/2 teaspoon salt
- For the Filling
2 cups diced peaches
2 cups chopped strawberries
1/2 cup granulated sugar
2 tablespoons cornstarch
1 tablespoon lemon juice
1 teaspoon vanilla extract
Directions
- Preheat oven to 350°F and line an 8×8 baking pan with parchment paper.
- Mix flour, oats, brown sugar, cinnamon, and salt in a bowl. Cut in cold butter until crumbly.
- Press two-thirds of the mixture into the prepared pan to form the crust.
- In another bowl, mix peaches, strawberries, sugar, cornstarch, lemon juice, and vanilla.
- Spread the fruit filling over the crust. Sprinkle the remaining crumble mixture on top.
- Bake for 35–40 minutes or until golden brown and bubbly.
- Cool completely before slicing into bars.
Notes
- Use ripe but firm peaches for the best texture.
- Let the bars cool fully for cleaner slices.
- Store leftovers in the refrigerator for up to 5 days.


Hi, I’m Sorenna Blythe, the baker and writer behind Mix Whisk Bake. I share simple, reliable recipes and honest kitchen moments to help home bakers bake with confidence and joy. When I’m not testing new treats, you’ll find me sipping coffee and dreaming up my next bake.