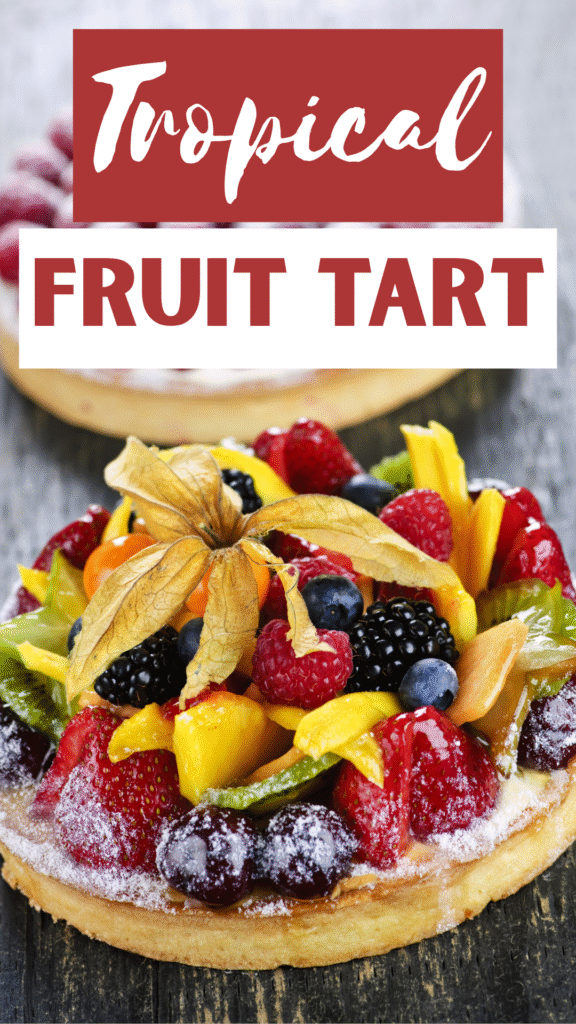
A tropical fruit tart is one of those desserts that looks impressive but is surprisingly simple to make. It starts with a crisp crust, a smooth, creamy filling, and is topped with fresh, juicy fruit.
Every bite is light, refreshing, and full of natural sweetness. The mix of bright colors and flavors makes it feel special without being heavy.
It’s perfect for warm days, family gatherings, or when you want a dessert that stands out on the table.
Don’t worry if you’re new to baking because this is a great recipe to build confidence, and I’ll guide you through each step.
What is a Tropical Fruit Tart?
A tropical fruit tart is a layered dessert made with three simple parts that come together beautifully: a crisp crust, a creamy filling, and a fresh fruit topping.
The crust is usually a shortcrust pastry or a crushed biscuit base, giving you that firm, slightly buttery bite that holds everything together.
The filling is smooth and rich, often a vanilla custard, pastry cream, or lightly sweetened cream cheese, and it adds a soft contrast to the crust.
On top, you’ll arrange fresh tropical fruits, which bring natural sweetness, bright color, and a juicy finish.
What makes this tart different from cakes or pies is its balance and texture. You get crisp, creamy, and fresh in every bite, without it feeling too heavy.
Unlike frosted cakes or baked fruit desserts, this tart keeps things light and lets the fruit shine. You’ll often see fruits like mango, pineapple, kiwi, passion fruit, and even papaya used here.
Why You’ll Love This Recipe
Easy to Make with Simple Ingredients
This recipe keeps things straightforward and approachable. You don’t need anything fancy. Just basic pantry ingredients and fresh fruit.
The steps are simple, and I’ll guide you through each one so you never feel stuck.
If you’ve never made a tart before, don’t worry. Take it one step at a time, and you’ll see how manageable it really is.
Customizable with Different Fruits
One of the best parts of this tart is how flexible it is. You can use whatever tropical fruits you enjoy or have on hand.
Mango, pineapple, kiwi, and passion fruit all work beautifully, but you can mix in berries or other fruits too.
You’ll notice how easy it is to swap ingredients without affecting the overall result, which makes this recipe perfect for using what’s in season.
Visually Stunning Presentation
This tart naturally looks impressive without needing extra effort. The bright colors of the fruit create a beautiful contrast against the creamy filling.
You can keep the design simple or take a few extra minutes to arrange the fruit neatly; it’s up to you. Either way, it will look like something from a bakery, and that’s always a nice feeling.
Balanced Flavors: Sweet, Tangy, Creamy
Every bite has a mix of textures and flavors that work together. The crust adds a light crunch, the filling is smooth and slightly sweet, and the fruit brings a fresh, tangy finish.
Nothing feels too heavy or overwhelming. You’ll get a dessert that tastes refreshing and satisfying at the same time, which is exactly what you want from a tropical treat.
Ingredients Needed
For the Tart Crust (Choose One Option)
Option 1: Shortcrust Pastry
- 1 ¼ cups (160g) all-purpose flour
- ½ cup (115g) cold unsalted butter, cubed
- ¼ cup (50g) granulated sugar
- 1 large egg yolk
- 2–3 tablespoons cold water
- Pinch of salt
Option 2: Biscuit Base (No-Bake Option)
- 2 cups (200g) crushed digestive biscuits or graham crackers
- ½ cup (115g) melted unsalted butter
- 2 tablespoons sugar (optional)
For the Filling (Choose One Option)
Option 1: Classic Pastry Cream (Custard)
- 2 cups (480ml) whole milk
- ½ cup (100g) granulated sugar
- 3 large egg yolks
- 2 tablespoons cornstarch
- 1 teaspoon vanilla extract
- 1 tablespoon unsalted butter
Option 2: Cream Cheese Filling (No-Cook)
- 225g (8 oz) cream cheese, softened
- ½ cup (60g) powdered sugar
- 1 teaspoon vanilla extract
- 1 cup (240ml) whipped cream
Optional Flavor Enhancements (for either filling)
- ½ teaspoon coconut extract or 2 tablespoons coconut cream
- 1 teaspoon lemon or lime zest
- 1 teaspoon orange zest
For the Topping
- 1 cup fresh mango, sliced
- 1 cup fresh pineapple, diced or sliced
- 2–3 kiwis, peeled and sliced
- 2–3 passion fruits, pulp scooped out
- ½ cup berries (strawberries, blueberries, or raspberries)
Optional Glaze (for Shine)
- ¼ cup apricot jam or honey
- 1–2 tablespoons water (to thin, if needed)
Equipment Needed
- Tart pan (preferably with a removable bottom)
This makes it much easier to lift the tart out cleanly without breaking the crust. If you don’t have one, a regular pie dish will still work. - Mixing bowls
You’ll need a few for different steps, like mixing the crust, preparing the filling, and handling the fruit. It helps keep everything organized and stress-free. - Whisk or hand mixer
A whisk works well for most steps, especially for custard. If you’re using a cream cheese filling, a hand mixer makes it smoother with less effort. - Saucepan
This is essential if you’re making a cooked filling like pastry cream. Use medium heat and stir gently to avoid lumps. - Rolling pin (if making pastry from scratch)
You’ll use this to roll out the dough evenly. Just aim for an even thickness so it bakes nicely.
Step-by-Step Instructions
Step 1: Prepare the Tart Crust
Let’s start with the base.
If you’re making a shortcrust pastry, mix the flour, sugar, and butter until the texture looks like coarse crumbs, then add the egg yolk and a little cold water to bring it together into a soft dough.
Don’t overwork it, though, just mix until it holds. If you’re using a biscuit base, simply combine the crushed biscuits with melted butter until evenly coated.
Press or roll your crust into the tart pan, making sure it’s even along the bottom and sides. Use your fingers to gently press it into the edges.
For pastry, prick the base lightly with a fork, then blind bake (this means baking it without filling) until lightly golden. Let it cool completely before adding anything, as this helps keep it crisp.
Step 2: Make the Filling
Now for the creamy layer. If you’re making custard or pastry cream, gently heat the milk while whisking the egg yolks, sugar, and cornstarch in a bowl.
Slowly add the warm milk to the mixture, then return it to the saucepan and cook on low heat, stirring constantly until it thickens.
You’ll notice it becomes smooth and creamy—that’s your cue, it’s ready.
Stir in vanilla and butter at the end. If you’re using a no-cook filling, simply beat the cream cheese, sugar, and vanilla until smooth, then fold in whipped cream.
Whichever option you choose, let the filling cool completely before using it so it sets nicely in the tart.
Step 3: Assemble the Tart
Once your crust and filling are fully cooled, it’s time to bring everything together. Spoon the filling into the crust and spread it evenly using a spatula or the back of a spoon.
Take your time here because you want a smooth, level surface so the fruit sits nicely on top.
Step 4: Add Tropical Fruit Topping
Slice your fruits into even pieces so they’re easy to arrange. Start placing them on top of the filling in any pattern you like, circles, rows, or a simple mix, all work well.
Try to balance colors as you go. You’ll notice how the bright yellows, greens, and reds make the tart look instantly more inviting.
Step 5: Apply Glaze (Optional)
For a glossy finish, gently warm your jam or glaze until it’s smooth, then lightly brush it over the fruit. This adds a nice shine and helps keep the fruit fresh.
Use a light hand so you don’t move the fruit around. Once done, chill the tart for a bit before serving to help everything set properly.
Tips for the Perfect Tropical Fruit Tart
Keep Crust Crisp (Avoid Sogginess)
A crisp crust makes a big difference in the final result. Make sure your crust is fully baked and cooled before adding the filling. If the crust is still warm, it can soften quickly once the filling goes in.
You can also brush a very thin layer of melted chocolate or egg white over the baked crust and let it set, as this creates a light barrier that helps keep moisture out.
Don’t worry if you skip this step; just assembling the tart close to serving time also helps keep the base firm.
Use Ripe but Firm Fruits
Choose fruits that are ripe for flavor but still firm enough to hold their shape. Overripe fruit can become too soft and release extra juice, which affects both texture and appearance.
When slicing, aim for even pieces so everything looks neat and sits well on the filling. You’ll notice that firmer fruit is much easier to arrange and gives a cleaner finish.
Chill Before Serving for Best Texture
Once your tart is assembled, place it in the fridge for at least 1–2 hours. This helps the filling set properly and makes slicing much easier.
The flavors also come together nicely as it chills. If you’re short on time, even 30 minutes will help, but a longer chill gives the best results.
Pat Fruits Dry Before Placing
Before adding fruit to the tart, gently pat it dry with a paper towel. This removes excess moisture that can make the filling watery or the crust soft.
It’s a small step, but it makes a noticeable difference. Don’t worry if the fruit still looks fresh and juicy because you’re just removing surface moisture, not drying it out.
Variations and Substitutions
No-Bake Version
If you’d rather skip the oven, you can easily turn this into a no-bake tart. Use the biscuit base and press it firmly into the pan, then chill it in the fridge for about 30–45 minutes until set.
For the filling, go with a no-cook option like cream cheese or whipped cream-based filling. It’s quick, simple, and still gives you a delicious result.
You’ll notice it’s especially helpful on warm days when you don’t want to bake.
Vegan or Dairy-Free Options
You can make this tart completely dairy-free with a few easy swaps. Use plant-based butter for the crust and choose a dairy-free cream cheese or coconut cream for the filling.
Coconut cream works especially well here because it adds a light tropical flavor that pairs nicely with the fruit.
Sweeten with powdered sugar or maple syrup, and you’re good to go.
Gluten-Free Crust Alternatives
For a gluten-free option, simply use gluten-free biscuits or cookies for the base. Mix them with melted butter (or a dairy-free alternative) just like you would with regular biscuits.
Press the mixture firmly into the pan, so it holds together nicely. You can also use a gluten-free flour blend if you prefer a baked crust. Either way, the texture stays crisp and works just as well.
Different Filling Ideas (Coconut Cream, Yogurt)
This tart is very flexible when it comes to fillings. Coconut cream creates a rich but light option with a subtle tropical taste.
If you want something lighter, try a thick yogurt filling. Greek yogurt works best because it holds its shape. You can sweeten it slightly and add a bit of vanilla or citrus zest for extra flavor.
The fruit on top will tie everything together beautifully.
Storage and Make-Ahead Tips
Once your tart is assembled, store it in the fridge, covered loosely with plastic wrap or in an airtight container to keep it fresh without damaging the fruit on top.
You’ll notice the texture stays best when it’s kept chilled, especially because of the creamy filling.
For the best taste and texture, try to enjoy it within 2 to 3 days—after that, the fruit can start to soften and release moisture, which may affect the crust.
If you want to get ahead, you can prepare each part in advance to make things easier. The crust can be baked a day or two earlier and stored at room temperature in an airtight container.
The filling can also be made ahead and kept in the fridge until you’re ready to use it. When it comes to assembling, it’s best to add the fruit closer to serving time so it stays fresh and vibrant.
If you’re planning for an event, just build the tart a few hours before, chill it, and it will be ready to serve with minimal stress.
Serving Suggestions
This tart is best served chilled, straight from the fridge, because the filling stays firm and the flavors feel more refreshing.
You’ll notice how much easier it is to slice clean pieces when it’s cold, which makes serving simple and neat.
For an extra touch, you can add a dollop of whipped cream or a scoop of vanilla ice cream on the side. It adds a creamy contrast without overpowering the fruit. Keep it light so the tart remains the star.
This dessert fits beautifully into almost any occasion, whether it’s a relaxed weekend brunch, a family gathering, or a festive holiday table.
Once it’s sliced and served, the bright fruit and creamy layers speak for themselves.
Final Thoughts
This tropical fruit tart is simple to make, looks beautiful, and tastes fresh and light in every bite.
It’s a great recipe to keep on hand when you want something that feels special without being complicated.
Feel free to mix and match your favorite fruits and make it your own!
FAQs
Yes, but thaw and drain it well first. Too much moisture can make the tart soggy.
Make sure the crust is fully baked and cooled before adding the filling. You can also add the fruit just before serving.
Yes. Prepare the crust and filling in advance, then assemble with fresh fruit a few hours before serving.
Apricot jam or honey works best. They add shine without overpowering the fruit.
Absolutely. It saves time and still gives you a great result.

Ultimate Tropical Fruit Tart: Fresh, Creamy & Irresistibly Delicious
Difficulty: Easy8
Slices25
minutes20
minutes45
minutesA crisp tart crust filled with creamy custard and topped with fresh tropical fruit for a light, refreshing dessert.
Ingredients
- Crust:
2 cups crushed biscuits
½ cup melted butter
- Filling:
2 cups milk
½ cup sugar
3 egg yolks
2 tbsp cornstarch
1 tsp vanilla extract
- Topping:
1 cup mango (sliced)
1 cup pineapple (diced)
2 kiwis (sliced)
½ cup berries
- Glaze (optional):
¼ cup apricot jam
Directions
- Mix crushed biscuits with melted butter, press into a tart pan, and chill for 20 minutes.
- Heat milk. In a bowl, whisk egg yolks, sugar, and cornstarch. Combine with milk and cook until thick. Stir in vanilla and cool.
- Spread cooled filling into the crust evenly.
- Arrange fresh fruit on top.
- Brush with warm apricot jam if using. Chill before serving.
Notes
- Make sure the filling is fully cooled before assembling.
- Pat fruit dry to avoid extra moisture.
- Best served chilled for clean slices and fresh flavor.

Hi, I’m Sorenna Blythe, the baker and writer behind Mix Whisk Bake. I share simple, reliable recipes and honest kitchen moments to help home bakers bake with confidence and joy. When I’m not testing new treats, you’ll find me sipping coffee and dreaming up my next bake.


