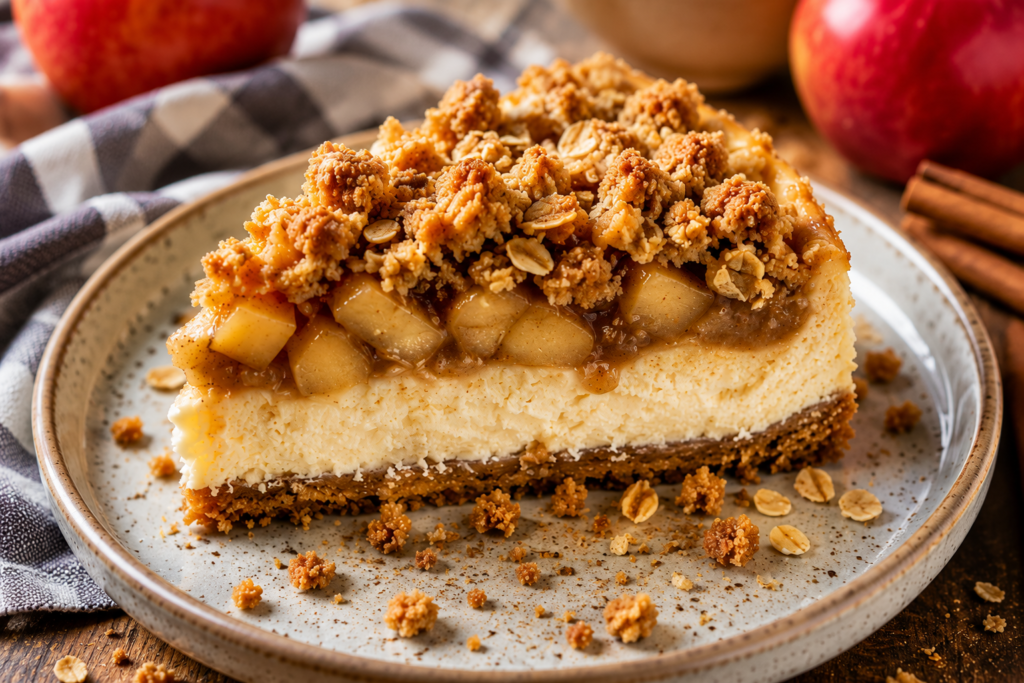
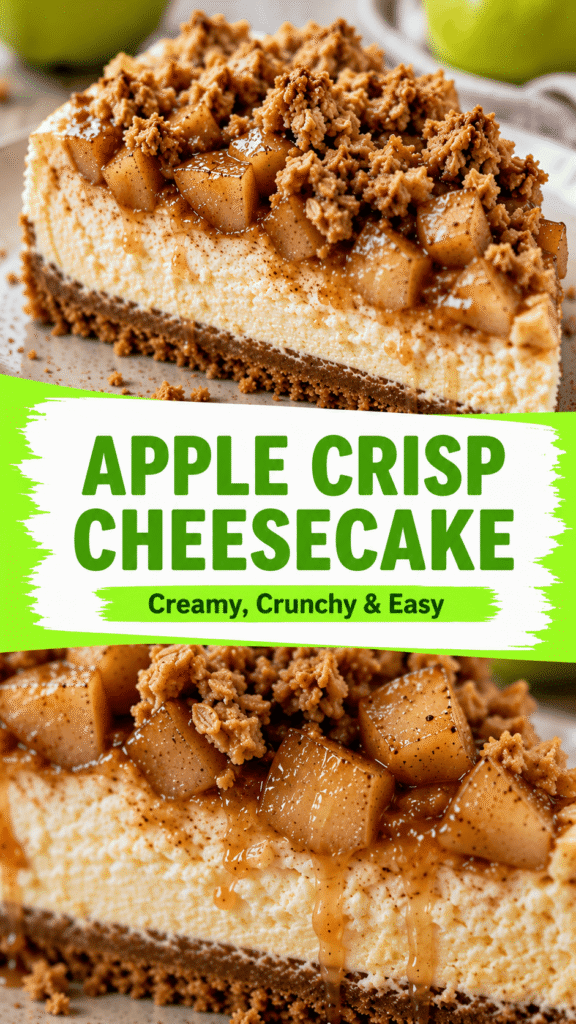
Apple Crisp Cheesecake brings together three comforting favorites in one unforgettable dessert.
You get a smooth, creamy cheesecake layer, tender cinnamon-spiced apples, and a buttery crisp topping that adds the perfect crunch in every bite.
It’s the kind of dessert that feels right at home on a holiday table, at a family gathering, or whenever you want to bake something a little extra special.
The combination of flavors and textures makes it a crowd-pleaser year after year.
In this recipe, you’ll learn how to create each layer from scratch, along with simple tips to help your cheesecake turn out rich, flavorful, and beautifully baked.
Why You’ll Love This Apple Crisp Cheesecake
- Rich and Creamy Cheesecake Filling – Smooth, velvety cheesecake creates a decadent base that perfectly complements the apple and crisp layers.
- Sweet Cinnamon-Spiced Apples – Tender apples coated in warm cinnamon add classic fall flavor to every bite.
- Crunchy Oat Crisp Topping – A buttery oat topping provides a delicious crunch that contrasts beautifully with the creamy filling.
- Great Make-Ahead Dessert – This cheesecake can be prepared in advance, making entertaining and holiday planning much easier.
- Crowd-Pleasing Holiday Favorite – Its comforting flavors and stunning presentation make it a dessert guests always look forward to enjoying.
What Is Apple Crisp Cheesecake?
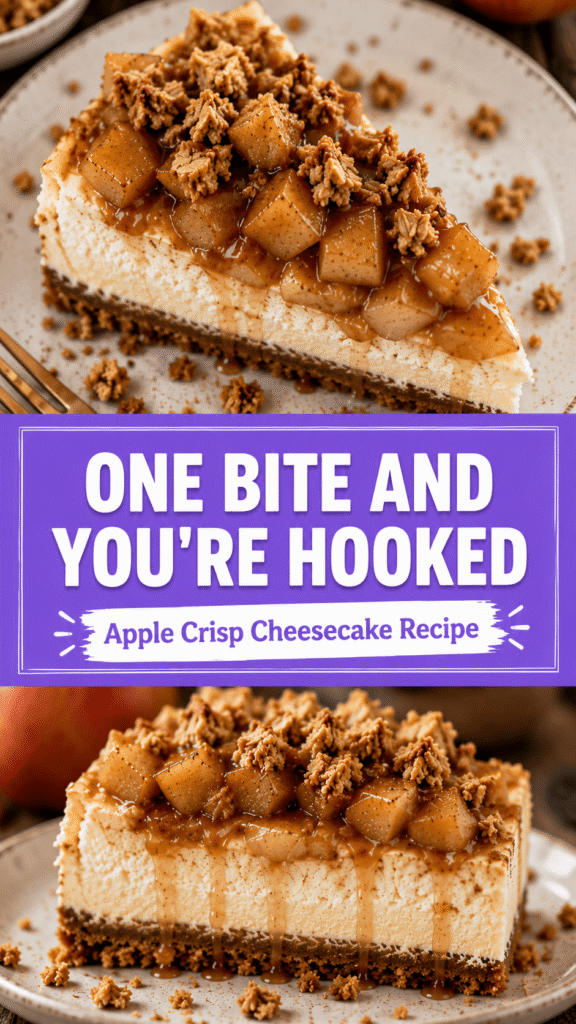
Apple crisp cheesecake is a layered dessert that combines the creamy richness of classic cheesecake with the warm flavors of apple crisp and the comforting appeal of apple pie.
While apple crisp typically consists of baked apples topped with a buttery oat crumble, it does not usually include a crust or a creamy filling.
Apple pie, on the other hand, features a pastry crust filled with spiced apples, creating a dessert that is flaky, fruity, and rich in traditional fall flavors.
Cheesecake is known for its smooth and velvety cream cheese filling, usually baked on a crumb crust and chilled before serving.
Apple crisp cheesecake takes the most loved elements from all three desserts and brings them together in a single slice.
The cheesecake layer provides a rich, creamy texture that serves as the foundation of the dessert and balances the sweetness of the apples.
A generous layer of cinnamon-spiced apples adds the familiar flavor of homemade apple pie while keeping every bite soft, juicy, and full of warmth.
The crisp topping is made with butter, oats, sugar, and spices, creating a golden, crunchy finish that contrasts beautifully with the creamy cheesecake underneath.
Instead of choosing between apple pie, apple crisp, or cheesecake, this recipe gives you the best parts of each dessert in every forkful.
The result is a dessert that feels both comforting and impressive, making it a wonderful choice for holidays, celebrations, or any time you’re craving something special.
Ingredients You’ll Need
For the Graham Cracker Crust
- 2 cups graham cracker crumbs
- ¼ cup granulated sugar
- ½ cup unsalted butter, melted
For the Cheesecake Filling
- 24 ounces (680g) cream cheese, softened
- ¾ cup granulated sugar
- 3 large eggs, room temperature
- 2 teaspoons vanilla extract
- 1 cup sour cream, room temperature
For the Apple Layer
- 3 medium apples, peeled, cored, and thinly sliced
- ¼ cup brown sugar
- 1 teaspoon ground cinnamon
- ¼ teaspoon ground nutmeg
- 1 tablespoon lemon juice
For the Crisp Topping
- ¾ cup old-fashioned oats
- ½ cup brown sugar
- ½ cup all-purpose flour
- 1 teaspoon ground cinnamon
- 6 tablespoons unsalted butter, cold and cubed
Best Apples for Apple Crisp Cheesecake
Honeycrisp
Honeycrisp apples are a favorite for baking because they have a naturally sweet flavor and a crisp texture.
They remain pleasantly firm in the oven, which helps prevent the apple layer from becoming mushy.
Their juicy texture and balanced sweetness pair beautifully with the rich cheesecake filling and buttery crisp topping.
If you enjoy a sweeter dessert without being overly sugary, Honeycrisp apples are an excellent choice.
Granny Smith
Granny Smith apples are known for their bright tart flavor and firm flesh.
Their natural acidity helps balance the richness of the cream cheese filling and the sweetness of the topping.
These apples hold their shape exceptionally well during baking, giving the cheesecake a satisfying texture in every bite.
Many bakers consider Granny Smith apples one of the most reliable options for apple-based desserts.
Fuji
Fuji apples are naturally sweet with a mild flavor that appeals to many people.
They become tender during baking while still maintaining enough structure to avoid turning mushy.
Their sweetness works especially well if you prefer a dessert with less tartness.
Fuji apples also pair nicely with warm spices like cinnamon and nutmeg, making them a great fit for this recipe.
Braeburn
Braeburn apples offer a wonderful balance of sweet and tart flavors.
Their firm texture helps them hold up well during baking, creating distinct apple slices throughout the cheesecake.
The slightly spicy notes in Braeburn apples complement the cinnamon and brown sugar used in the recipe.
They provide a deeper apple flavor that many people love in fall desserts.
Best Apple Combinations for Flavor and Texture
Using a combination of apple varieties often creates the most flavorful cheesecake.
Mixing sweet and tart apples adds more depth than using a single type on its own.
Honeycrisp and Granny Smith make one of the best combinations because the sweetness of the Honeycrisp balances the tart bite of the Granny Smith.
Fuji and Granny Smith are another excellent pairing that creates a delicious blend of sweet, juicy, and tangy flavors.
If you enjoy a more complex apple flavor, try combining Braeburn with Honeycrisp for a balance of sweetness, tartness, and firm texture.
Kitchen Tools You’ll Need
- 9-Inch Springform Pan – Makes it easy to remove the cheesecake cleanly without damaging the sides.
- Mixing Bowls – Useful for preparing the crust, cheesecake filling, apple layer, and crisp topping separately.
- Electric Mixer – Helps create a smooth, creamy cheesecake filling with minimal effort.
- Measuring Cups and Spoons – Ensures accurate ingredient measurements for consistent results.
- Spatula – Perfect for scraping down bowls and spreading layers evenly in the pan.
- Baking Sheet – Catches any drips from the springform pan and makes handling easier during baking.
How to Make Apple Crisp Cheesecake
Step 1: Prepare the Crust
Preheat your oven to 325°F (163°C) and lightly grease a 9-inch springform pan.
In a mixing bowl, combine the graham cracker crumbs, granulated sugar, and melted butter until the mixture resembles wet sand.
Stir until every crumb is evenly coated with butter, as this helps the crust hold together after baking.
Pour the mixture into the springform pan and press it firmly across the bottom using the back of a measuring cup or glass.
Take a moment to make the crust as even as possible so each slice has a sturdy base.
For extra structure and a slightly crunchier texture, bake the crust for 8 to 10 minutes.
Remove it from the oven and allow it to cool while you prepare the filling.
Step 2: Make the Cheesecake Filling
Place the softened cream cheese in a large mixing bowl and beat it with an electric mixer until completely smooth.
Starting with smooth cream cheese helps prevent lumps in the finished cheesecake.
Add the granulated sugar and continue mixing until fully incorporated.
Mix in the sour cream and vanilla extract until the batter becomes creamy and uniform.
Add the eggs one at a time, mixing on low speed after each addition.
Using a low speed helps create a smoother cheesecake and reduces the amount of air trapped in the batter.
Avoid overmixing once the eggs are added because too much air can cause cracks during baking.
Scrape down the sides of the bowl with a spatula to ensure everything is evenly combined.
Step 3: Prepare the Apple Topping
Peel, core, and thinly slice the apples into evenly sized pieces.
Thin slices bake more evenly and blend nicely with the creamy cheesecake layer.
Place the sliced apples in a bowl and add the brown sugar, cinnamon, nutmeg, and lemon juice.
Toss everything together until the apples are fully coated with the spice mixture.
The lemon juice helps brighten the flavor while preventing the apples from browning too quickly.
Set the apple mixture aside while you prepare the crisp topping.
Step 4: Make the Crisp Topping
In a medium bowl, combine the old-fashioned oats, brown sugar, flour, and cinnamon.
Mix the dry ingredients until they are evenly distributed.
Add the cold cubed butter to the bowl.
Use a pastry cutter, fork, or your fingertips to work the butter into the dry ingredients.
Continue until the mixture forms small crumbs and coarse clusters.
The butter should remain in tiny pieces, which helps create a crisp and crunchy topping during baking.
Place the topping in the refrigerator while assembling the cheesecake if your kitchen is warm.
Step 5: Assemble the Cheesecake
Pour the cheesecake filling over the prepared crust and spread it into an even layer.
Gently tap the pan on the counter a few times to release any large air bubbles.
Arrange the apple mixture evenly over the cheesecake filling.
Try to distribute the apples across the entire surface so every slice gets plenty of fruit.
Sprinkle the crisp topping evenly over the apples.
Cover the apples completely without pressing the topping down.
The loose crumb texture allows the topping to bake into a beautiful golden layer.
Step 6: Bake
Place the springform pan on a baking sheet to catch any potential drips.
Bake the cheesecake at 325°F (163°C) for approximately 65 to 75 minutes.
Baking times can vary slightly depending on your oven, so begin checking near the end of the baking time.
The edges should appear set while the center still has a slight wobble when gently shaken.
A small jiggle in the middle is normal and helps ensure the cheesecake stays creamy after cooling.
If the top begins browning too quickly, loosely cover it with foil during the final portion of baking.
Remove the cheesecake from the oven once it reaches the proper doneness.
Step 7: Cool and Chill
Allow the cheesecake to cool at room temperature for about one hour.
Gradual cooling helps reduce the chance of cracks forming on the surface.
Once cooled, transfer the cheesecake to the refrigerator.
Chilling is an important step because it allows the filling to fully set and develop its rich, creamy texture.
A properly chilled cheesecake is also much easier to slice cleanly.
For the best flavor and texture, refrigerate the cheesecake for at least 6 hours.
An overnight chill is even better and gives all the flavors time to blend together beautifully.
When you’re ready to serve, remove the cheesecake from the springform pan, slice, and enjoy every creamy, crunchy, apple-filled bite.
Tips for the Perfect Cheesecake
- Use Room-Temperature Ingredients – Softened cream cheese, eggs, and sour cream blend more easily, creating a smoother filling with fewer lumps.
- Don’t Overmix the Batter – Mixing too much incorporates excess air, which can cause the cheesecake to rise, crack, and sink as it cools.
- Avoid Overbaking – Remove the cheesecake when the edges are set, and the center still has a slight wobble to keep the texture creamy.
- Cool Gradually – Letting the cheesecake cool slowly at room temperature helps prevent sudden temperature changes that can lead to cracks.
- Chill Overnight for Best Results – An overnight chill allows the cheesecake to fully set and gives the flavors time to develop for the best taste and texture.
Common Mistakes to Avoid
Cracked Cheesecake
One of the most common cheesecake problems is a cracked surface after baking.
Cracks often happen when too much air is mixed into the batter or when the cheesecake cools too quickly.
To reduce the risk, use room-temperature ingredients and mix just until everything is combined.
Avoid mixing at high speed once the eggs are added, as this can trap excess air in the filling.
Allowing the cheesecake to cool gradually at room temperature before refrigerating can also help keep the surface smooth.
Even if a crack appears, remember that the apple layer and crisp topping cover most imperfections, so your dessert will still look beautiful and taste amazing.
Soggy Apple Layer
A soggy apple layer can make the cheesecake feel overly wet and affect the texture of each slice.
This usually happens when the apples release too much moisture during baking.
Choosing firm baking apples such as Honeycrisp, Granny Smith, or Braeburn can help prevent this issue.
Thin, evenly sliced apples cook more consistently and release moisture at a steadier rate.
Avoid using overly ripe apples because they tend to break down quickly and produce excess liquid.
If your apples seem especially juicy, let them sit with the sugar mixture for a few minutes and drain any excess liquid before assembling the cheesecake.
Burnt Crisp Topping
A crisp topping should be golden brown, crunchy, and full of flavor.
If it becomes too dark, it can develop a bitter taste that overpowers the dessert.
Keep an eye on the cheesecake during the final stages of baking, especially if your oven runs hot.
If the topping starts browning too quickly, loosely place a sheet of aluminum foil over the pan.
Using cold butter in the topping also helps the crumble bake more evenly and prevents it from overcooking too soon.
Runny Filling
A cheesecake filling should be rich, creamy, and fully set after chilling.
A runny texture is often caused by underbaking or not allowing enough chilling time.
The center of the cheesecake should still have a slight wobble when removed from the oven, but it should not look liquid.
Measuring ingredients accurately is important because too much liquid can affect the final texture.
Once baked, give the cheesecake plenty of time to chill in the refrigerator.
An overnight chill is often the easiest way to ensure the filling sets properly.
Undercooked Center
An undercooked center can make slicing difficult and leave the cheesecake with an unfinished texture.
Many bakers worry about overbaking and remove the cheesecake from the oven too early.
The edges should appear set while the center gently jiggles when the pan is lightly shaken.
If a large portion of the center still moves like batter, it needs more baking time.
Checking the cheesecake near the end of the recommended baking time helps prevent surprises.
A properly baked cheesecake will continue setting as it cools, resulting in a smooth and creamy texture once chilled.
Delicious Variations
Caramel Apple Crisp Cheesecake
For an extra layer of sweetness, drizzle caramel sauce over the apple layer before adding the crisp topping.
The caramel melts into the apples as the cheesecake bakes, creating a rich flavor that pairs beautifully with the warm spices.
You can also drizzle additional caramel sauce over each slice just before serving.
This version is especially popular during the fall and holiday season because it tastes like a combination of apple crisp and caramel apple pie.
Pecan Apple Crisp Cheesecake
If you enjoy a little crunch, add chopped pecans to the crisp topping.
The nuts toast as the cheesecake bakes and add a delicious buttery flavor to every bite.
Pecans pair naturally with apples, cinnamon, and brown sugar, making them an easy addition that feels right at home in this dessert.
For the best texture, stir about ½ cup of chopped pecans into the topping mixture before sprinkling it over the cheesecake.
Salted Caramel Version
A touch of salt can make sweet flavors stand out even more.
To create a salted caramel version, drizzle salted caramel sauce over the finished cheesecake before serving.
The balance between the sweet apples, creamy filling, and lightly salted caramel creates a more complex flavor without adding extra work.
A small sprinkle of flaky sea salt on top can make this variation feel especially special for holidays and celebrations.
Gluten-Free Apple Crisp Cheesecake
Making this cheesecake gluten-free is easier than many people expect.
Replace the graham cracker crumbs with your favorite gluten-free cookie or graham-style crumbs for the crust.
For the topping, use certified gluten-free oats and substitute the all-purpose flour with a gluten-free baking blend.
The finished cheesecake still delivers the same creamy filling, tender apples, and crunchy topping that make the original recipe so satisfying.
Mini Apple Crisp Cheesecake Cups
For parties, potlucks, or easy serving, turn the recipe into individual cheesecake cups.
Prepare the crust, filling, apple layer, and topping in a muffin pan lined with paper liners.
The smaller size bakes faster and creates perfectly portioned desserts that guests can grab and enjoy without slicing.
Mini cheesecakes are also a great option for holiday dessert trays because they look impressive and are easy to serve.
Don’t be afraid to experiment with your favorite flavors and toppings.
What to Serve with Apple Crisp Cheesecake
- Whipped Cream – A light and fluffy topping that complements the rich cheesecake without overpowering it.
- Caramel Sauce – Adds extra sweetness and enhances the warm apple and cinnamon flavors.
- Vanilla Ice Cream – Creates a delicious contrast between cold, creamy ice cream and the rich cheesecake.
- Hot Coffee – The bold flavor of coffee balances the sweetness of the dessert and makes a perfect pairing.
- Chai Tea – Warm spices in chai tea naturally complement the apples, cinnamon, and crisp topping.
How to Store Leftovers
Proper storage helps keep your apple crisp cheesecake fresh, creamy, and just as enjoyable the next day.
For refrigerator storage, allow the cheesecake to cool completely before covering it tightly with plastic wrap, aluminum foil, or placing it in an airtight container.
Keeping the cheesecake covered prevents it from absorbing odors from other foods and helps maintain its smooth texture.
Store the cheesecake in the refrigerator whenever it is not being served, as the cream cheese filling needs to stay chilled for food safety and quality.
If you would like to keep the cheesecake for a longer period, freezing is a great option.
To freeze individual slices, place them on a baking sheet until firm, then wrap each slice tightly in plastic wrap followed by a layer of aluminum foil.
For freezing the entire cheesecake, wrap it securely in several layers to protect it from freezer burn and preserve its flavor.
When you’re ready to enjoy it, transfer the cheesecake to the refrigerator and allow it to thaw overnight for the best texture.
Apple crisp cheesecake will typically stay fresh in the refrigerator for up to 5 days when properly stored.
In the freezer, it can maintain good quality for up to 2 months.
While the cheesecake will still be safe to eat beyond these timeframes if stored correctly, the texture of the apples and crisp topping may gradually change.
For the best flavor, texture, and overall experience, try to enjoy your leftovers within the recommended storage period.
How to Make Ahead
Apple crisp cheesecake is an excellent make-ahead dessert because its flavor and texture often improve after spending time in the refrigerator.
If you’d like to spread out the work, several components can be prepared in advance before the final assembly.
The graham cracker crust can be made and baked a day ahead, then covered and stored at room temperature until needed.
The crisp topping can also be mixed in advance and kept in an airtight container in the refrigerator for up to several days.
You can peel and slice the apples ahead of time, but toss them with lemon juice and store them in an airtight container in the refrigerator to help prevent browning.
For the easiest preparation, the entire cheesecake can be baked one day before serving.
This allows plenty of time for chilling and gives the flavors a chance to blend together beautifully.
If you need to prepare the dessert even further in advance, freezing is a convenient option.
Once the cheesecake has cooled completely and chilled, wrap it tightly in plastic wrap followed by a layer of aluminum foil.
Proper wrapping helps protect the cheesecake from freezer burn and preserves its creamy texture.
When you’re ready to serve, move the cheesecake to the refrigerator and allow it to thaw overnight.
Avoid thawing at room temperature, as slow thawing helps maintain the best consistency.
For holiday gatherings, consider baking the cheesecake two or three days before the event.
Having dessert prepared ahead of time frees up valuable oven space and reduces stress on busy cooking days.
You can add a final drizzle of caramel sauce or a dollop of whipped cream just before serving to give the cheesecake a freshly made appearance.
Final Thoughts
Apple Crisp Cheesecake brings together everything people love about cheesecake, apple desserts, and buttery crisp toppings in one delicious treat.
The combination of creamy filling, warm cinnamon apples, and crunchy topping makes it a standout dessert for holidays, family gatherings, and special occasions throughout the year.
Even if this is your first time making cheesecake, the simple steps and helpful tips in this recipe will guide you to success.
Give it a try, share it with the people you love, and enjoy every bite.
FAQs
Can I Make This Cheesecake Without a Water Bath?
Yes. This recipe can be baked without a water bath. Just avoid overmixing the batter and allow the cheesecake to cool gradually to help reduce the risk of cracks.
What Are the Best Apples to Use?
Honeycrisp, Granny Smith, Fuji, and Braeburn are excellent choices. They hold their shape well during baking and provide great flavor.
Can I Freeze Apple Crisp Cheesecake?
Yes. Wrap the cheesecake tightly and freeze for up to 2 months. Thaw it overnight in the refrigerator before serving.
Why Did My Cheesecake Crack?
Cracks are usually caused by overmixing, overbaking, or cooling the cheesecake too quickly. Using room-temperature ingredients and cooling slowly can help prevent this.
How Long Should Cheesecake Chill Before Serving?
Chill the cheesecake for at least 6 hours. For the best texture and flavor, refrigerate it overnight.
Can I Use Store-Bought Apple Pie Filling?
Yes. Store-bought apple pie filling can save time and works well as a substitute for the homemade apple layer. Drain any excess liquid if needed to avoid a soggy cheesecake.
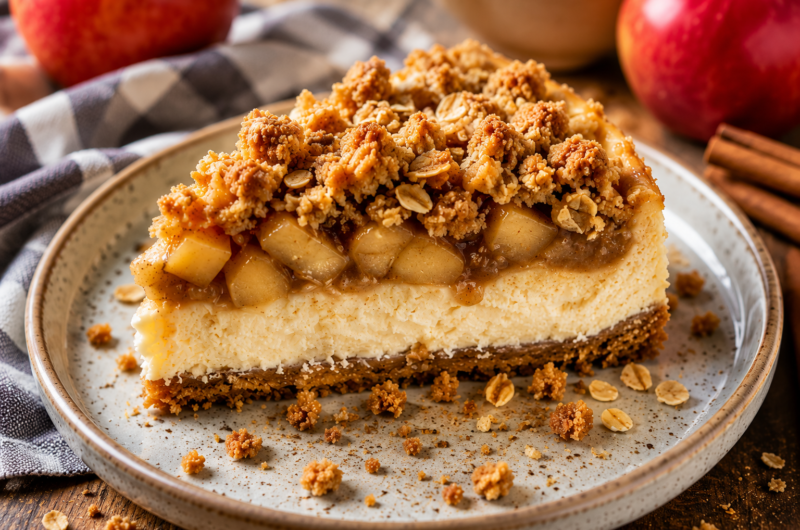
Creamy Apple Crisp Cheesecake with a Buttery Crunch Topping
Difficulty: Easy12
Slices30
minutes1
hour10
minutes7
hours40
minutesThis Apple Crisp Cheesecake combines a creamy cheesecake filling, cinnamon-spiced apples, and a buttery oat crumble topping for the perfect fall-inspired dessert.
Ingredients
- For the Crust
2 cups graham cracker crumbs
¼ cup granulated sugar
½ cup melted butter
- For the Cheesecake Filling
24 oz cream cheese, softened
¾ cup granulated sugar
3 large eggs
2 tsp vanilla extract
1 cup sour cream
- For the Apple Layer
3 medium apples, peeled and sliced
¼ cup brown sugar
1 tsp cinnamon
¼ tsp nutmeg
1 tbsp lemon juice
- For the Crisp Topping
¾ cup old-fashioned oats
½ cup brown sugar
½ cup all-purpose flour
1 tsp cinnamon
6 tbsp cold butter, cubed
Directions
- Preheat oven to 325°F (163°C) and grease a 9-inch springform pan.
- Mix crust ingredients, press into the pan, and bake for 10 minutes.
- Beat cream cheese until smooth, then mix in sugar, sour cream, vanilla, and eggs until combined.
- Toss apples with brown sugar, cinnamon, nutmeg, and lemon juice.
- Combine oats, flour, brown sugar, cinnamon, and butter until crumbly.
- Pour cheesecake filling over the crust, add the apple layer, and sprinkle with the crisp topping.
- Bake for 65–75 minutes or until the edges are set and the center slightly jiggles.
- Cool for 1 hour at room temperature, then refrigerate for at least 6 hours or overnight before serving.
Notes
- Use firm apples such as Honeycrisp or Granny Smith for the best texture.
- Do not overmix the batter after adding the eggs.
- For cleaner slices, chill the cheesecake overnight.
- Store leftovers covered in the refrigerator for up to 5 days.

Hi, I’m Sorenna Blythe, the baker and writer behind Mix Whisk Bake. I share simple, reliable recipes and honest kitchen moments to help home bakers bake with confidence and joy. When I’m not testing new treats, you’ll find me sipping coffee and dreaming up my next bake.