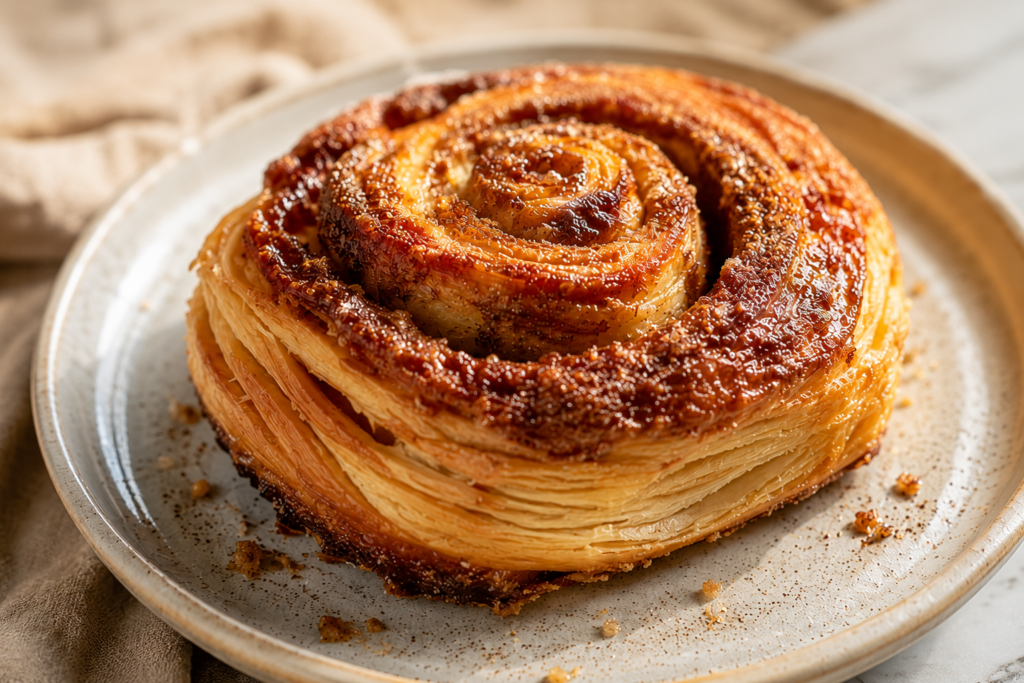
Morning buns are a bakery favorite known for their flaky, buttery layers and crisp cinnamon sugar coating.
Unlike cinnamon rolls, they aren’t topped with frosting. Instead, they bake until golden and caramelized, giving every bite a light, crisp texture with a rich buttery flavor.
The good news is you don’t have to visit an artisan bakery to enjoy them.
With a little patience and the right steps, you can make beautiful morning buns in your own kitchen.
They’re perfect for weekend breakfasts, brunches, or sharing with family and friends.
In this guide, you’ll learn exactly how to make bakery-style morning buns from scratch, including the ingredients you’ll need, how to create flaky layers, helpful baking tips, and simple tricks to make the process easier—even if it’s your first time working with laminated dough.
Why You’ll Love This Bakery-Style Morning Buns Recipe
- Ultra flaky laminated layers: Every bite is filled with light, delicate layers that bake up crisp on the outside and tender inside.
- Rich buttery flavor: Plenty of butter gives these buns the classic taste you’d expect from a high-quality bakery.
- Crisp caramelized cinnamon-sugar coating: The cinnamon sugar turns beautifully golden in the oven for a sweet, crunchy finish.
- Light citrus notes from orange zest: Fresh orange zest adds a subtle brightness that perfectly balances the buttery richness.
- Easier than homemade croissants: You get the same impressive flaky texture with a simpler shaping process.
- Perfect for breakfast, brunch, or coffee: These buns pair wonderfully with your favorite hot drink and are always a crowd-pleaser.

What Are Morning Buns?
Morning buns are a flaky, buttery pastry that first became popular in artisan bakeries, where bakers wanted to create something that combined the light layers of a croissant with the warm, comforting flavors of cinnamon and sugar.
Although their exact origin is debated, morning buns became especially well known in bakeries across California, where they quickly earned a reputation as a favorite breakfast pastry thanks to their crisp exterior, tender center, and sweet citrus aroma.
They are made from laminated dough, which simply means layers of butter are folded into the dough several times before it is rolled out, filled with cinnamon sugar, shaped into spirals, and baked until beautifully golden.
As the buns bake, the butter creates dozens of delicate layers while the sugar caramelizes around the edges, giving them their signature flaky texture and slightly crisp finish.
Many recipes also include fresh orange zest, which adds a light citrus flavor that brightens the rich butter and warm cinnamon without overpowering either one.
The inside stays soft, airy, and slightly chewy, while the outside develops a delicate crunch that makes every bite satisfying.
At first glance, morning buns may look similar to croissants because both are made with laminated dough, but they are shaped differently and have a completely different flavor profile.
Croissants are usually left plain or filled after baking, while morning buns are rolled with a cinnamon-sugar filling before baking and coated in even more cinnamon sugar as soon as they come out of the oven.
Morning buns are also often baked in a muffin pan, which helps them rise upward and creates beautifully caramelized edges that are difficult to achieve with flat pastries.
People sometimes confuse morning buns with cinnamon rolls, but the two pastries are quite different in both texture and preparation.
Cinnamon rolls are made with a soft enriched yeast dough that bakes into a fluffy, bread-like pastry and is usually finished with a thick layer of cream cheese or vanilla icing.
Morning buns, on the other hand, rely on thin buttery layers instead of a soft dough, so they come out lighter, crispier, and far flakier than traditional cinnamon rolls.
They also have a more balanced sweetness because the caramelized cinnamon sugar and fresh orange zest add plenty of flavor without needing a heavy frosting.
What makes morning buns so special is the combination of textures and flavors packed into a single pastry, from the crisp, golden outside to the tender layers hidden inside.
Every bite delivers buttery richness, warm cinnamon, crunchy caramelized sugar, and a hint of bright citrus, creating a pastry that feels both comforting and elegant.
Once you pull a tray of homemade morning buns from the oven and smell the butter, cinnamon, and orange filling your kitchen, it’s easy to understand why they remain one of the most loved treats found in artisan bakeries.
Ingredients You’ll Need
Dough
- 3½ cups (420g) bread flour: Provides the structure needed for strong, flaky layers.
- ¼ cup (50g) granulated sugar: Adds a touch of sweetness and helps the dough brown.
- 1 teaspoon (6g) fine salt: Enhances the flavor and strengthens the dough.
- 2¼ teaspoons (7g or 1 packet) instant yeast: Helps the dough rise and creates a light texture.
- ¾ cup (180ml) whole milk, lukewarm: Adds richness and keeps the dough tender.
- ¼ cup (60ml) lukewarm water: Activates the yeast and hydrates the dough.
- 2 tablespoons (28g) unsalted butter, softened: Adds flavor and softness to the dough.
Butter Block
- 1 cup (226g) high-quality unsalted butter, cold: Creates the flaky laminated layers. European-style butter works especially well because of its higher butterfat content.
Filling
- ½ cup (100g) packed light brown sugar: Adds a rich caramel-like sweetness.
- ¼ cup (50g) granulated sugar: Gives the filling extra sweetness and helps create a crisp finish.
- 2 teaspoons ground cinnamon: Brings warm, classic bakery flavor.
- 1 tablespoon finely grated orange zest (about 1 large orange): Adds fresh citrus notes that balance the buttery pastry.
- ¼ teaspoon fine salt: Enhances the cinnamon and sugar flavors.
Finishing
- 2 tablespoons (28g) unsalted butter, melted: Brushed over the warm buns so the topping sticks.
- ⅓ cup (65g) cinnamon sugar: For coating the buns while they’re still warm for a crisp, sweet finish.
- 1 teaspoon finely grated orange zest (optional): Sprinkle over the warm buns for an extra burst of fresh citrus flavor.
Equipment You’ll Need
- Stand mixer (optional): Makes kneading the dough easier, but you can knead it by hand if you prefer.
- Rolling pin: Helps roll the dough evenly for smooth, consistent layers.
- Bench scraper: Makes it easy to lift, fold, divide, and shape the dough without tearing it.
- Pastry brush: Used to brush melted butter onto the dough and finished buns.
- 12-cup muffin pan: Holds the buns in shape as they rise and bake, creating their signature tall, caramelized edges.
- Measuring cups and spoons: Ensure accurate measurements for consistent baking results.
- Digital kitchen scale: Provides the most accurate ingredient measurements, especially for flour and butter.
- Cooling rack: Allows the buns to cool evenly while keeping the bottoms crisp.
How to Make Bakery-Style Morning Buns
Step 1: Prepare the Dough
In a large mixing bowl or the bowl of a stand mixer, combine the bread flour, granulated sugar, salt, and instant yeast until everything is evenly mixed.
Pour in the lukewarm milk, lukewarm water, and softened butter, then mix until a shaggy dough begins to form.
Knead the dough for 8 to 10 minutes, or until it becomes smooth, soft, and slightly elastic.
If you’re kneading by hand, resist the urge to add too much extra flour, as a slightly tacky dough will produce lighter, flakier buns.
Shape the dough into a ball, place it in a lightly greased bowl, cover it, and let it rest at room temperature for about 1 hour, or until it has risen by roughly half its original size.
Step 2: Chill the Dough
Gently press the air out of the dough and shape it into a flat rectangle.
Wrap it tightly in plastic wrap or place it in an airtight container.
Refrigerate the dough for at least 1 hour, so it becomes firm and easy to roll without sticking.
Cold dough is much easier to laminate because it keeps the butter from melting into the dough too soon.
Step 3: Make the Butter Block
Place the cold butter between two sheets of parchment paper.
Use a rolling pin to gently pound and roll the butter into a rectangle about 6 x 8 inches (15 x 20 cm) and roughly ½ inch (1.25 cm) thick.
If the butter becomes too soft while shaping it, return it to the refrigerator for 10 to 15 minutes until it firms up again.
The butter should be cold but still flexible enough to bend without cracking.
Step 4: Laminate the Dough
Roll the chilled dough into a rectangle about twice the size of your butter block.
Place the butter block in the center of the dough and fold the sides over it like an envelope, making sure the butter is completely enclosed.
Press the seams together gently to prevent the butter from escaping during rolling.
First Fold
Roll the dough into a long rectangle approximately 8 x 24 inches (20 x 60 cm).
Brush away any excess flour as you work to help the layers stick together.
Fold the top third of the dough toward the center, then fold the bottom third over it, just like folding a business letter.
Wrap the dough and chill it for 30 minutes before continuing.
Second Fold
Place the chilled dough on a lightly floured surface with the folded edge facing you.
Roll it into another long rectangle of roughly the same size.
Repeat the same letter fold, wrap the dough again, and chill for another 30 minutes.
You’ll already begin to notice smoother, more defined layers forming inside the dough.
Third Fold
Repeat the rolling and folding process one final time.
Wrap the dough well and refrigerate it for at least 1 hour before shaping.
This final rest relaxes the gluten and keeps the butter cold, making the dough much easier to handle.
Step 5: Chill Again
After the last fold, leave the dough in the refrigerator until it feels firm throughout.
If your kitchen is warm, you can chill it slightly longer to help preserve the flaky layers.
Keeping everything cold is one of the biggest secrets to bakery-quality morning buns.
Step 6: Roll Out the Dough
On a lightly floured surface, roll the chilled dough into a large rectangle measuring about 12 x 18 inches (30 x 45 cm).
Try to keep the thickness as even as possible so the buns bake evenly.
Trim the edges with a bench scraper if you want perfectly neat spirals.
Step 7: Add the Cinnamon Sugar Filling
Brush the entire surface lightly with melted butter.
Evenly sprinkle the brown sugar, granulated sugar, cinnamon, orange zest, and salt mixture over the dough, leaving about a ½-inch (1.25 cm) border along one long edge.
Gently press the filling into the dough with your hands so it stays in place while rolling.
Step 8: Roll Into a Log
Starting with the long edge, roll the dough into a tight, even log.
Take your time and keep the roll snug without squeezing out the filling.
Pinch the seam closed once you reach the end so the log stays together.
Step 9: Slice the Buns
Use a sharp knife or unflavored dental floss to cut the log into 12 equal pieces.
Try not to press down too hard, as clean cuts help maintain the beautiful spiral shape.
If the dough softens while slicing, place it back in the refrigerator for 10 minutes before continuing.
Step 10: Arrange in Muffin Pan
Lightly grease a 12-cup muffin pan.
Place one bun into each cup with the spiral facing upward.
Leave enough room for the buns to expand as they proof and bake.
Step 11: Proof Until Puffy
Cover the muffin pan loosely with plastic wrap or a clean kitchen towel.
Let the buns rise in a warm spot for 45 to 60 minutes, or until they look noticeably puffier.
They should feel light and airy but still hold their shape when gently touched.
Avoid over-proofing, as this can reduce the flaky texture during baking.
Step 12: Bake Until Deep Golden
Preheat your oven to 375°F (190°C).
Bake the morning buns for 22 to 28 minutes, or until they are deep golden brown with beautifully caramelized edges.
The rich golden color is a good sign that the butter has created crisp, flaky layers.
Let the buns rest in the pan for about 5 minutes before carefully removing them.
Step 13: Coat in Cinnamon Sugar
While the buns are still warm, brush each one lightly with melted butter.
Roll or sprinkle them generously with cinnamon sugar so it sticks to every flaky layer.
Finish with a little fresh orange zest if you’d like an extra burst of citrus flavor.
Step 14: Cool Slightly and Serve
Transfer the buns to a cooling rack for about 10 minutes.
This short cooling time allows the layers to set while keeping the centers warm and tender.
Morning buns are at their very best when served fresh, with a hot cup of coffee, tea, or a glass of cold milk.
Tips for Perfect Morning Buns
- Keep the butter cold: Cold butter creates distinct flaky layers instead of melting into the dough.
- Don’t rush the chilling times: Chilling helps the dough relax and keeps the butter firm for successful lamination.
- Avoid over-proofing: Let the buns become puffy, but not overly risen, so they keep their flaky texture.
- Roll the dough evenly: An even thickness ensures all the buns bake and rise at the same rate.
- Use high-fat European-style butter: Butter with a higher butterfat content creates richer flavor and more defined layers.
- Bake until deeply caramelized: A deep golden-brown color gives the buns their crisp exterior and rich, buttery flavor.
- Weigh ingredients for consistent results: A digital kitchen scale provides the most accurate measurements for reliable baking every time.
Common Mistakes to Avoid
- Butter melting during lamination: If the butter becomes too soft, the layers can blend together instead of staying flaky, so chill the dough whenever needed.
- Dough tearing: Roll gently and avoid forcing the dough, as tears can cause the butter to leak during baking.
- Using too much flour while rolling: Excess flour can dry out the dough and prevent the layers from sticking together properly.
- Under-proofing: Buns that haven’t risen enough will be dense and won’t develop a light, airy texture.
- Over-proofing: Letting the dough rise for too long can cause the butter layers to lose definition, resulting in less flaky buns.
- Overfilling the dough: Too much filling can spill out during baking and make the buns messy or uneven.
- Removing buns too early from the oven: Bake until they’re deeply golden so the layers are fully cooked and the cinnamon sugar has caramelized.
Recipe Variations
Cardamom Morning Buns
If you enjoy warm, lightly spiced pastries, replace half of the ground cinnamon with 1 teaspoon of ground cardamom for a fragrant twist.
Cardamom adds a slightly sweet, floral flavor that pairs beautifully with the buttery layers and orange zest.
For even more flavor, sprinkle a little coarse sugar on top before baking for a delicate crunch.
Apple Cinnamon Morning Buns
For a fruity variation, scatter 1 cup of finely diced apple over the cinnamon sugar filling before rolling up the dough.
Choose a firm baking apple like Honeycrisp or Granny Smith so the pieces hold their shape during baking.
Pat the diced apples dry with a paper towel before adding them to the dough to prevent excess moisture from making the layers soggy.
Maple Pecan Morning Buns
Replace the brown sugar in the filling with ½ cup of maple sugar, or drizzle 2 tablespoons of pure maple syrup lightly over the cinnamon sugar mixture before rolling.
Sprinkle ¾ cup of chopped toasted pecans evenly across the filling for extra crunch and a rich, nutty flavor.
This version is especially delicious during the fall and holiday season when served warm with a cup of coffee.
Chocolate Orange Morning Buns
Add ¾ cup of finely chopped dark chocolate or mini chocolate chips over the cinnamon sugar filling before rolling the dough.
The chocolate melts into the flaky layers while the orange zest adds a bright citrus flavor that balances the richness.
For an extra special finish, dust the cooled buns lightly with powdered sugar.
Cranberry Orange Morning Buns
Sprinkle ¾ cup of dried cranberries evenly over the filling before rolling up the dough.
The cranberries add small bursts of sweet and tart flavor that complement the cinnamon and fresh orange zest.
This variation is perfect for holiday breakfasts or festive brunch gatherings.
Vanilla Bean Morning Buns
Mix the seeds from 1 vanilla bean, or 2 teaspoons of pure vanilla bean paste, into the filling before spreading it over the dough.
The vanilla adds a rich, bakery-style aroma that blends beautifully with the butter and cinnamon.
For an elegant finishing touch, brush the warm buns with melted butter and coat them in vanilla sugar instead of regular cinnamon sugar for a subtle but delicious change.
Make-Ahead Instructions
One of the best things about morning buns is that you can prepare them ahead of time, making it easy to enjoy fresh, bakery-style pastries without starting from scratch early in the morning.
If you’d like to refrigerate the buns overnight, prepare them through shaping and place them in the greased muffin pan.
Cover the pan tightly with plastic wrap or reusable food wrap and refrigerate for up to 12 hours.
The next morning, remove the buns from the refrigerator and let them sit at room temperature for 45 to 60 minutes, or until they look puffy and have expanded slightly.
Once they have finished proofing, bake them as directed until they are deeply golden and beautifully caramelized.
If you want to freeze the buns before baking, shape them, place them on a parchment-lined baking sheet, and freeze until firm.
Transfer the frozen buns to a freezer-safe bag or airtight container and store them for up to 2 months.
When you’re ready to bake, arrange the frozen buns in a greased muffin pan, cover them loosely, and let them thaw and proof at room temperature for 3 to 5 hours, or until they are soft and noticeably puffy.
Avoid rushing this step, as fully proofed dough will produce lighter, flakier buns.
You can also freeze the buns after baking if you have leftovers or want to prepare a batch well in advance.
Allow the baked buns to cool completely before wrapping each one tightly in plastic wrap or aluminum foil.
Place the wrapped buns in a freezer-safe bag or airtight container and freeze them for up to 2 months.
To enjoy them again, thaw the buns at room temperature for about an hour before reheating.
For the best texture, warm the buns in a 350°F (175°C) oven for 8 to 10 minutes, which helps restore their crisp exterior and flaky layers.
If you’re short on time, you can microwave a bun for 15 to 20 seconds, although the crust will be softer than when reheated in the oven.
An air fryer is another excellent option, and heating the buns at 325°F (160°C) for 3 to 5 minutes will bring back much of their fresh-from-the-oven crispness.
Storage Instructions
Room Temperature
Allow the morning buns to cool completely before storing them, as trapping warm steam inside a container can make the flaky layers soft.
Place the cooled buns in an airtight container or wrap them individually in plastic wrap or aluminum foil.
Store them at room temperature for up to 2 days.
For the best flavor and texture, enjoy them within the first 24 hours while the outside is still lightly crisp and the inside remains soft and buttery.
Refrigerator
If you need to keep the buns longer, place them in an airtight container and refrigerate them for up to 5 days.
Keep in mind that refrigeration can make the pastry firm because the butter inside the layers hardens when chilled.
A quick reheat before serving will help restore much of their fresh-baked texture and flavor.
Freezer
Morning buns freeze very well, making them a great option for preparing ahead.
Once the buns have cooled completely, wrap each one tightly in plastic wrap, then place them in a freezer-safe bag or airtight container.
Label the container with the date so you know when they were frozen.
Store the buns in the freezer for up to 2 months for the best quality.
When you’re ready to enjoy one, transfer it to the counter and let it thaw at room temperature for about an hour.
How to Reheat
For the closest-to-fresh-baked results, warm the buns in a 350°F (175°C) oven for 8 to 10 minutes until heated through and lightly crisp on the outside.
If you’re reheating a frozen bun, let it thaw first for more even warming.
For a quicker option, microwave a bun for 15 to 20 seconds, although the outside won’t be as crisp.
An air fryer also works wonderfully by reheating the buns at 325°F (160°C) for 3 to 5 minutes, bringing back much of their flaky texture.
If you’ve stored the buns at room temperature, even a few minutes in the oven or air fryer can make them taste freshly baked again.
What to Serve with Morning Buns
- Fresh fruit: Berries, grapes, or sliced melon add a refreshing contrast to the rich, buttery pastry.
- Greek yogurt: Creamy yogurt balances the sweetness and adds a boost of protein to your breakfast.
- Scrambled eggs: Soft, fluffy eggs make the meal more filling while pairing well with the flaky buns.
- Breakfast sausage: Savory sausage complements the sweet cinnamon sugar and buttery layers.
- Fresh orange juice: The bright citrus flavor pairs perfectly with the orange zest in the morning buns.
- Coffee: A hot cup of coffee is the classic companion, balancing the pastry’s sweetness with rich, bold flavor.
- Tea: Black tea, chai, or Earl Grey offer a warm, comforting drink that complements the cinnamon and butter.
- Hot chocolate: Rich, creamy hot chocolate makes these buns an extra cozy treat for breakfast or brunch.
Final Thoughts
Homemade morning buns take a little time, but the reward is well worth it.
The flaky buttery layers, crisp cinnamon sugar coating, and hint of orange create a bakery-quality pastry that’s hard to beat.
Whether you’re baking them for a weekend breakfast, a special brunch, or simply because you’re craving something delicious, this recipe will help you make beautiful morning buns with confidence.
Give it a try, and don’t worry if your first batch isn’t perfect because each one gets a little easier to make.
FAQs
What is the difference between a morning bun and a cinnamon roll?
Morning buns are made with laminated dough, giving them flaky, buttery layers. Cinnamon rolls are made with a soft enriched dough and are usually topped with frosting.
Can I use store-bought puff pastry?
Yes. While homemade laminated dough provides the best flavor and texture, store-bought puff pastry is a convenient shortcut that still produces delicious morning buns.
Why didn’t my morning buns become flaky?
The butter may have become too warm during lamination, the dough may not have been chilled enough between folds, or the buns may have been underbaked.
Can I make these the night before?
Absolutely. Shape the buns, refrigerate them overnight, then let them proof at room temperature before baking the next morning.
Can I freeze morning buns?
Yes. You can freeze them either before baking or after baking for up to 2 months when stored in an airtight container.
Do I need a stand mixer?
No. A stand mixer makes kneading easier, but the dough can be mixed and kneaded by hand with excellent results.
Why are my buns leaking butter?
Butter usually leaks if it becomes too warm during lamination, the dough tears while rolling, or the buns are over-proofed before baking.
Can I use active dry yeast instead of instant yeast?
Yes. Use the same amount, but dissolve it in the lukewarm milk and water first and let it sit for 5 to 10 minutes before mixing the dough.
Can I make these without orange zest?
Yes. The orange zest adds a light citrus flavor, but you can leave it out or replace it with lemon zest or a little vanilla for a different taste.
How do bakeries get morning buns so flaky?
Bakeries keep the butter cold, carefully laminate the dough with multiple folds, allow proper chilling between each fold, and bake the buns until they are deeply golden and caramelized.
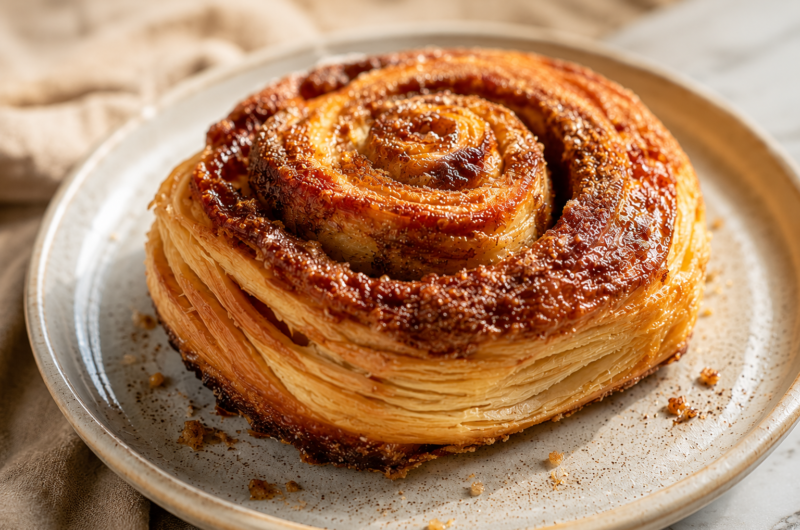
Flaky Bakery Style Morning Buns with Cinnamon and Orange
Difficulty: Medium12
Morning Buns45
minutes25
minutes5
hours10
minutesThese bakery-style morning buns are made with flaky laminated dough, a buttery cinnamon-sugar filling, and fresh orange zest for a crisp, caramelized pastry that’s perfect for breakfast or brunch.
Ingredients
3½ cups (420g) bread flour
¼ cup (50g) granulated sugar
1 tsp salt
2¼ tsp instant yeast
¾ cup (180ml) whole milk
¼ cup (60ml) water
2 tbsp (28g) softened unsalted butter
1 cup (226g) cold unsalted butter (for lamination)
½ cup (100g) brown sugar
¼ cup (50g) granulated sugar
2 tsp ground cinnamon
1 tbsp orange zest
¼ tsp salt
2 tbsp melted butter
⅓ cup cinnamon sugar (for coating)
Directions
- Prepare and knead the dough, then let it rise.
- Chill the dough and laminate it with the butter block using three folds, chilling between each fold.
- Roll out the dough, spread the cinnamon-sugar filling, and roll into a log.
- Slice into 12 buns and place them in a greased muffin pan.
- Proof until puffy, then bake at 375°F (190°C) for 22–28 minutes until deeply golden.
- Brush with melted butter, coat in cinnamon sugar, and cool slightly before serving.
Notes
- Keep the butter cold throughout lamination for the flakiest layers.
- Weigh ingredients for the most consistent results.
- Overnight refrigeration works well for fresh-baked morning buns the next morning.
- These buns are best served warm and can be frozen for up to 2 months.


Hi, I’m Sorenna Blythe, the baker and writer behind Mix Whisk Bake. I share simple, reliable recipes and honest kitchen moments to help home bakers bake with confidence and joy. When I’m not testing new treats, you’ll find me sipping coffee and dreaming up my next bake.


