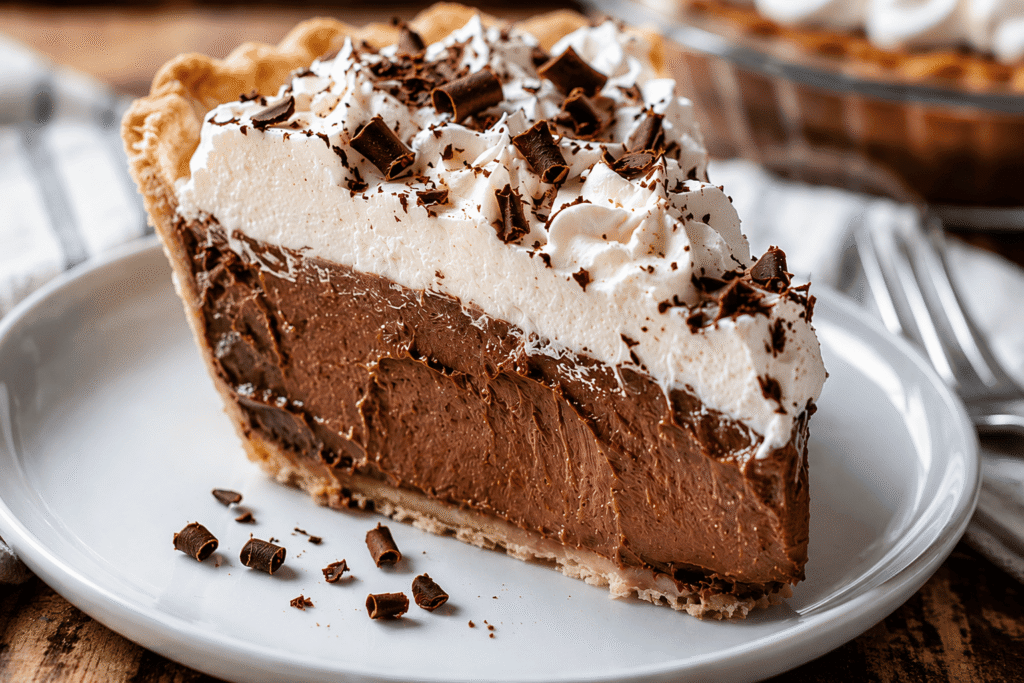
Chocolate cream pie has been a favorite dessert for generations, and it’s easy to see why.
With its rich chocolate filling, flaky crust, and fluffy whipped cream topping, every bite feels smooth, creamy, and satisfying.
This recipe keeps things simple while delivering bakery-worthy results.
The filling is packed with real chocolate flavor and uses easy-to-find ingredients, making it a great choice for both beginners and experienced bakers.
Follow along, and you’ll have a beautiful homemade dessert that looks impressive and tastes even better.
Why You’ll Love This Chocolate Cream Pie
- Rich chocolate flavor – Made with real chocolate for a deep, satisfying taste in every bite.
- Silky smooth filling – The creamy custard filling is velvety, luscious, and perfectly balanced.
- Easy-to-follow instructions – Simple steps make this recipe approachable for bakers of all skill levels.
- Make-ahead friendly – Prepare it in advance and let it chill until you’re ready to serve.
- Crowd-pleasing dessert – Its classic flavor and creamy texture make it a favorite at any gathering.

What Is Chocolate Cream Pie?
Chocolate cream pie is a classic dessert made with a baked pie crust filled with a rich chocolate custard and topped with a generous layer of whipped cream, creating a combination of flavors and textures that has remained popular for generations.
Cream pies first became popular in the United States during the 19th century, when home cooks began using simple pantry ingredients like milk, eggs, sugar, and flour to create smooth, pudding-like fillings that could be poured into pie crusts and chilled before serving.
Over time, bakers created many variations of cream pies, including coconut cream, banana cream, vanilla cream, and chocolate cream pie, which quickly became a favorite thanks to its rich flavor and comforting homemade appeal.
Although chocolate cream pie and chocolate silk pie may look similar at first glance, they are actually quite different desserts with distinct fillings and textures.
Chocolate cream pie uses a cooked custard filling made from milk, egg yolks, sugar, cornstarch, and chocolate, giving it a thick, creamy texture that slices neatly after chilling.
Chocolate silk pie, on the other hand, is typically made with whipped butter, chocolate, sugar, and eggs, resulting in a lighter, fluffier, mousse-like filling that feels more airy than traditional custard.
One of the defining features of a classic chocolate cream pie is its smooth chocolate filling, which should be rich without feeling overly heavy and firm enough to hold its shape when sliced.
A traditional chocolate cream pie also includes a flaky pastry crust or graham cracker crust that provides a pleasant contrast to the creamy filling.
The whipped cream topping is just as important, adding a light and fluffy finish that balances the richness of the chocolate beneath it.
Many bakers finish the pie with chocolate curls, chocolate shavings, or a light dusting of cocoa powder, adding a simple decorative touch without overpowering the dessert.
What makes chocolate cream pie so special is the way these simple components work together, creating a dessert that feels elegant enough for holidays and celebrations while still being easy enough to enjoy on an ordinary weeknight.
Ingredients You’ll Need
For the Pie Crust
- 1 prepared 9-inch graham cracker crust – Provides a sweet, buttery base that pairs perfectly with the creamy chocolate filling.
- OR 1 prepared 9-inch pastry pie crust – A classic option with a flaky texture and rich flavor.
- Store-bought or homemade – Either works well, so choose whichever is most convenient for you.
For the Chocolate Filling
- 2 cups (480 ml) whole milk – Creates a rich and creamy custard base.
- ½ cup (120 ml) heavy cream – Adds extra richness and a smooth texture.
- ⅔ cup (135 g) granulated sugar – Sweetens the filling without overpowering the chocolate.
- 4 large egg yolks – Help thicken the custard and give it a silky consistency.
- ¼ cup (32 g) cornstarch – Ensures the filling sets properly and slices cleanly.
- 6 ounces (170 g) dark or semi-sweet chocolate, finely chopped – Delivers deep chocolate flavor throughout the pie.
- 1 teaspoon vanilla extract – Enhances the overall taste and adds warmth.
- 2 tablespoons (28 g) unsalted butter – Creates a glossy finish and extra smooth texture.
For the Topping
- 1 cup (240 ml) heavy whipping cream – Whips into a light, fluffy topping.
- 2 tablespoons (15 g) powdered sugar – Lightly sweetens the whipped cream.
- ¼ cup (20 g) chocolate shavings or chocolate curls – Adds a beautiful finishing touch and extra chocolate flavor.
- 1 teaspoon unsweetened cocoa powder (optional) – Perfect for a light dusting before serving.
Kitchen Tools Required
- Medium saucepan – Used to cook the chocolate custard filling evenly and prevent scorching.
- Mixing bowls – Helpful for whisking ingredients together and preparing different components of the recipe.
- Whisk – Essential for creating a smooth, lump-free custard and blending ingredients thoroughly.
- Measuring cups and spoons – Ensure accurate measurements for consistent results every time.
- 9-inch pie dish – Needed if you’re making a homemade pie crust from scratch.
- Electric mixer (optional) – Makes whipping the cream topping quicker and easier, though a whisk can also be used.
How to Make Chocolate Cream Pie
Step 1: Prepare the Pie Crust
If you’re using a traditional pastry pie crust, bake it according to the package directions or your favorite recipe until it is lightly golden and fully cooked.
A fully baked crust is important because the filling will not be baked again once it is added.
If you’re using a graham cracker crust, make sure it is firmly pressed into the pie dish and ready to use.
Allow the crust to cool completely before adding the filling.
Adding warm filling to a hot crust can create excess moisture and affect the final texture of the pie.
Taking a few extra minutes to let the crust cool will help keep it crisp and sturdy.
Step 2: Make the Chocolate Custard Filling
In a medium saucepan, whisk together the granulated sugar and cornstarch until evenly combined.
Mixing the dry ingredients first helps prevent lumps from forming later.
Slowly whisk in the whole milk and heavy cream until the mixture is smooth.
Place the saucepan over medium heat and cook while whisking frequently.
In a separate bowl, whisk the egg yolks until they are smooth and well blended.
Once the milk mixture begins to warm, slowly pour a small amount into the egg yolks while whisking constantly.
This process is called tempering, which simply means gently warming the eggs so they do not scramble when added to the hot mixture.
Gradually add another small amount of the warm mixture, continuing to whisk as you go.
Pour the tempered egg mixture back into the saucepan.
Cook over medium heat, whisking constantly, until the custard becomes thick and begins to bubble gently.
The filling should be thick enough to coat the back of a spoon and hold its shape.
Remove the saucepan from the heat as soon as the custard reaches the proper consistency.
Add the chopped chocolate, butter, and vanilla extract.
Stir until the chocolate is completely melted and the filling looks smooth, glossy, and evenly combined.
At this stage, the filling should have a rich chocolate aroma and a silky texture.
Step 3: Fill the Pie Shell
Pour the warm chocolate filling into the cooled pie crust.
Use a spatula or the back of a spoon to spread the filling evenly from edge to edge.
Gently smooth the top to create a neat, even surface.
Taking a moment to level the filling will give the finished pie a cleaner appearance when sliced.
Step 4: Chill the Pie
Place a piece of plastic wrap directly on the surface of the chocolate filling.
Keeping the plastic wrap in contact with the filling helps prevent a skin from forming as it cools.
Transfer the pie to the refrigerator.
Allow it to chill for at least 4 hours, or until the filling is completely set.
If time allows, chilling overnight often produces the best texture and cleanest slices.
Be patient during this step, as proper chilling is what transforms the custard into a firm, creamy pie filling.
Step 5: Make the Whipped Cream Topping
Once the pie is fully chilled, prepare the whipped cream topping.
Pour the cold heavy whipping cream into a mixing bowl.
Beat the cream until soft peaks begin to form.
Soft peaks are achieved when the cream holds its shape but still gently folds over at the tip.
Add the powdered sugar and continue mixing until the cream becomes light, fluffy, and spreadable.
Be careful not to overmix, as whipped cream can quickly become grainy if beaten too long.
Spread the whipped cream evenly over the top of the pie or pipe it on for a more decorative finish.
Both methods look beautiful and taste equally delicious.
Step 6: Garnish and Serve
Sprinkle chocolate shavings or chocolate curls over the whipped cream topping.
For extra visual appeal, add a light dusting of cocoa powder if desired.
Use a sharp knife to slice the pie into even portions.
Wiping the knife clean between cuts can help create neater slices.
Serve chilled for the best flavor and texture.
Each bite delivers a perfect balance of crisp crust, creamy chocolate filling, and fluffy whipped cream, making this classic dessert well worth the effort.
Tips for the Best Chocolate Cream Pie
Use High-Quality Chocolate
The chocolate is the star of this recipe, so the quality you choose will have a big impact on the final flavor.
Using a good-quality dark or semi-sweet chocolate creates a richer, smoother filling with a deeper chocolate taste.
Chocolate bars usually melt more smoothly than chocolate chips, making them a great choice for cream pies.
If possible, choose chocolate that you enjoy eating on its own because those flavors will shine through in the finished dessert.
Avoid Overcooking the Custard
Custard thickens gradually, so there is no need to rush the process by turning up the heat.
Cooking over medium heat allows the filling to thicken evenly while reducing the risk of scorching the bottom of the pan.
Once the custard becomes thick and starts to bubble gently, remove it from the heat promptly.
Overcooking can cause the filling to become too thick, grainy, or less creamy after chilling.
Paying close attention during this step helps create the silky texture that makes chocolate cream pie so enjoyable.
Prevent Lumps With Constant Whisking
Whisking regularly is one of the easiest ways to ensure a smooth and creamy filling.
As the custard heats, the cornstarch and egg yolks begin thickening the mixture, and steady whisking helps everything blend evenly.
Be sure to reach the edges and corners of the saucepan where thickening often begins first.
If you notice small lumps forming, continue whisking until the mixture becomes smooth again.
A few extra minutes of attention while cooking can make a noticeable difference in the finished pie.
Chill Thoroughly Before Serving
Proper chilling is essential for achieving clean slices and a fully set filling.
Although the pie may look ready after a short time in the refrigerator, the filling needs several hours to firm up completely.
Allowing the pie to chill for at least four hours gives the custard enough time to develop its ideal texture.
For the best results, consider chilling it overnight if your schedule allows.
The longer resting time often creates a firmer filling and even better flavor.
Use Cold Cream for Better Whipping
Cold heavy cream whips faster and holds its shape much better than cream that has warmed up.
For extra success, place your mixing bowl and beaters in the refrigerator for a few minutes before whipping.
The colder equipment helps the cream develop volume more quickly and creates a lighter texture.
Stop mixing when soft or medium peaks form, as this produces a smooth and fluffy topping that spreads easily over the pie.
Common Mistakes to Avoid
- Filling not thickening properly – Cook the custard long enough for the cornstarch and egg yolks to fully thicken the mixture.
- Soggy crust – Always let the baked crust cool completely before adding the warm filling.
- Grainy custard – Avoid high heat and whisk constantly to keep the filling smooth and creamy.
- Pie not setting long enough – Chill the pie for at least 4 hours so the filling can fully firm up.
- Overwhipped cream – Stop mixing once soft to medium peaks form to maintain a light, fluffy texture.
Delicious Variations
Dark Chocolate Cream Pie
If you love bold chocolate flavor, this variation is a wonderful place to start.
Replace the semi-sweet chocolate with dark chocolate containing at least 60% to 70% cocoa for a richer and more intense filling.
The deeper chocolate notes create a more sophisticated flavor while still keeping the pie smooth and creamy.
A small pinch of sea salt can further enhance the chocolate and help balance the sweetness.
This version is especially popular with chocolate lovers who prefer desserts that are less sweet and more chocolate-forward.
Oreo Chocolate Cream Pie
For an easy twist on the classic recipe, swap the traditional pie crust for an Oreo cookie crust.
The chocolate cookie crumbs add extra crunch and an additional layer of chocolate flavor that pairs beautifully with the creamy filling.
You can use a store-bought Oreo crust for convenience or make your own by combining crushed Oreo cookies with melted butter.
The contrast between the crunchy cookie base and the silky chocolate custard creates a dessert that feels both familiar and exciting.
A few crushed Oreo cookies sprinkled over the whipped cream make a simple and delicious finishing touch.
Chocolate Peanut Butter Cream Pie
Chocolate and peanut butter are a classic combination that never goes out of style.
Before adding the chocolate filling, spread a thin layer of creamy peanut butter across the bottom of the prepared crust.
As the pie chills, the peanut butter layer creates a delicious surprise inside every slice.
The nutty flavor complements the rich chocolate custard without overpowering it.
For an even stronger peanut butter flavor, drizzle melted peanut butter over the whipped cream before serving.
Mocha Chocolate Cream Pie
Coffee has a wonderful way of bringing out the richness of chocolate.
Add 1 to 2 teaspoons of instant espresso powder to the milk mixture when preparing the custard filling.
The espresso does not make the pie taste strongly like coffee.
Instead, it deepens the chocolate flavor and adds extra complexity to every bite.
This variation is perfect for anyone who enjoys coffeehouse-inspired desserts with a slightly richer flavor profile.
No-Bake Chocolate Cream Pie
When you need a simpler dessert, a no-bake version can save both time and effort.
Use a prepared graham cracker crust or cookie crust to eliminate the need for baking.
Many bakers also choose an instant chocolate pudding-based filling for an even quicker preparation.
The pie still delivers a creamy texture and satisfying chocolate flavor while requiring fewer steps.
This variation is especially useful during warmer months when you want a homemade dessert without turning on the oven.
How to Store Chocolate Cream Pie
Chocolate cream pie should always be stored in the refrigerator because the filling contains dairy and egg yolks, which need to stay chilled to remain safe and fresh.
Once the pie has fully set, cover it loosely with plastic wrap, aluminum foil, or a pie storage lid to protect it from drying out and absorbing odors from other foods in the refrigerator.
If the pie has already been sliced, try to cover any exposed filling as much as possible to help maintain its smooth texture.
For the best flavor and texture, keep the pie refrigerated at all times except when serving.
Chocolate cream pie will generally stay fresh for up to 3 to 4 days when stored properly in the refrigerator.
The crust may begin to soften slightly after the first couple of days, but the pie will still be delicious and enjoyable to eat.
If your pie is topped with homemade whipped cream, it is usually at its best within the first 1 to 2 days, as whipped cream can gradually lose some of its volume over time.
A pie container with a fitted lid is one of the best storage options because it protects the pie without pressing against the whipped cream topping.
If you do not have a pie container, loosely tenting plastic wrap or foil over the pie works well and helps preserve its appearance.
Avoid using airtight containers that are too small, as they can squash decorative toppings and affect the presentation of the pie.
Can You Freeze Chocolate Cream Pie?
Yes, chocolate cream pie can be frozen if you need to prepare it well in advance or save leftovers for later.
For the best results, allow the pie to chill and set completely in the refrigerator before placing it in the freezer.
Once fully chilled, wrap the pie tightly with a layer of plastic wrap followed by a layer of aluminum foil to help protect it from freezer burn and unwanted odors.
If possible, freeze the pie without the whipped cream topping, as whipped cream tends to hold its texture better when added fresh after thawing.
Chocolate cream pie can generally be stored in the freezer for up to 1 month while maintaining its best quality.
When you’re ready to enjoy it, transfer the pie from the freezer to the refrigerator and allow it to thaw slowly overnight.
Avoid thawing the pie at room temperature, as this can cause the filling to soften unevenly and affect its texture.
A slow thaw in the refrigerator helps the filling retain its structure and keeps the pie tasting fresh.
Keep in mind that freezing may cause slight texture changes because custard-based fillings contain dairy and eggs.
The filling may become a little softer or less silky than a freshly made pie once thawed.
Even with these minor changes, the pie will still have plenty of rich chocolate flavor and remain enjoyable to serve.
If appearance is important, adding a fresh layer of whipped cream and a few chocolate shavings after thawing can help the pie look just as inviting as the day it was made.
What to Serve with Chocolate Cream Pie
- Fresh berries – Strawberries, raspberries, or blueberries add a bright, fruity contrast to the rich chocolate filling.
- Vanilla ice cream – Its creamy, mild flavor complements the pie without overpowering the chocolate.
- Coffee or espresso – A warm cup of coffee enhances the deep chocolate notes and balances the sweetness.
- Hot chocolate – Perfect for chocolate lovers who want an extra indulgent dessert experience.
Final Thoughts
This chocolate cream pie recipe works because it combines a crisp crust, a rich and creamy chocolate filling, and a light whipped topping into one simple yet impressive dessert.
The recipe is easy to customize, so don’t be afraid to experiment with variations like dark chocolate, Oreo crust, peanut butter, or mocha to make it your own.
FAQs
Why is my chocolate cream pie runny?
The filling may not have been cooked long enough or chilled long enough to fully set.
Can I make chocolate cream pie ahead of time?
Yes, you can make it up to 1 day in advance and keep it refrigerated until serving.
What type of chocolate works best?
Good-quality semi-sweet or dark chocolate provides the best flavor and texture.
Can I use a graham cracker crust?
Absolutely, a graham cracker crust pairs wonderfully with the creamy chocolate filling.
How long does chocolate cream pie last in the fridge?
When properly covered, it will stay fresh in the refrigerator for 3 to 4 days.
Can I make it without eggs?
Yes, you can use an egg-free chocolate pudding filling thickened with cornstarch instead.
Chocolate Cream Pie: Rich, Creamy, and Easy Homemade Dessert
Difficulty: Easy8
Slices20
minutes15
minutes4
hours35
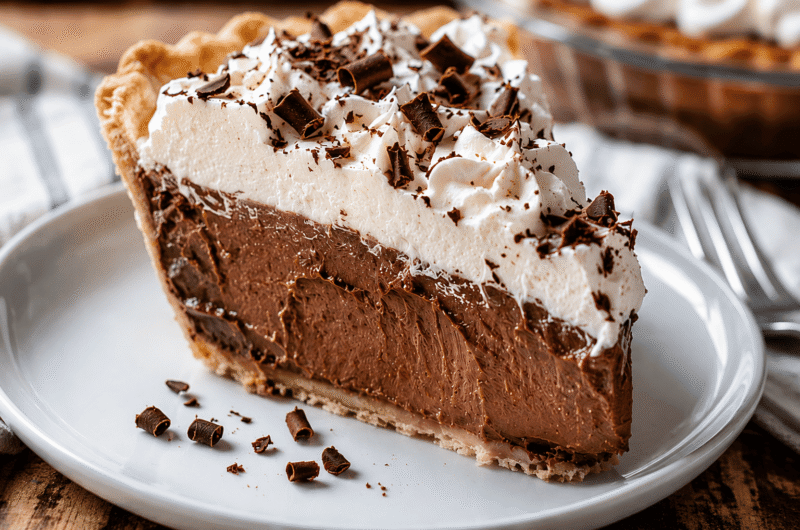
minutesA rich and creamy chocolate cream pie made with a flaky crust, silky chocolate custard filling, and fluffy whipped cream topping.
Ingredients
1 prepared 9-inch pie crust
2 cups whole milk
½ cup heavy cream
⅔ cup granulated sugar
¼ cup cornstarch
4 large egg yolks
6 oz semi-sweet chocolate, chopped
2 tbsp unsalted butter
1 tsp vanilla extract
1 cup heavy whipping cream
2 tbsp powdered sugar
Chocolate curls for garnish
Directions
- Bake the pie crust if needed and let it cool completely.
- Whisk sugar, cornstarch, milk, and cream in a saucepan. Cook over medium heat until warm.
- Temper the egg yolks with a little of the warm mixture, then return them to the saucepan.
- Cook while whisking until the custard thickens.
- Remove from heat and stir in chocolate, butter, and vanilla until smooth.
- Pour the filling into the cooled crust and smooth the top.
- Cover and refrigerate for at least 4 hours or until set.
- Whip the heavy cream and powdered sugar until soft peaks form.
- Spread or pipe the whipped cream over the pie and garnish with chocolate curls before serving.
Notes
- Use high-quality chocolate for the best flavor.
- Chill thoroughly for clean slices.
- Store covered in the refrigerator for up to 4 days.


Hi, I’m Sorenna Blythe, the baker and writer behind Mix Whisk Bake. I share simple, reliable recipes and honest kitchen moments to help home bakers bake with confidence and joy. When I’m not testing new treats, you’ll find me sipping coffee and dreaming up my next bake.