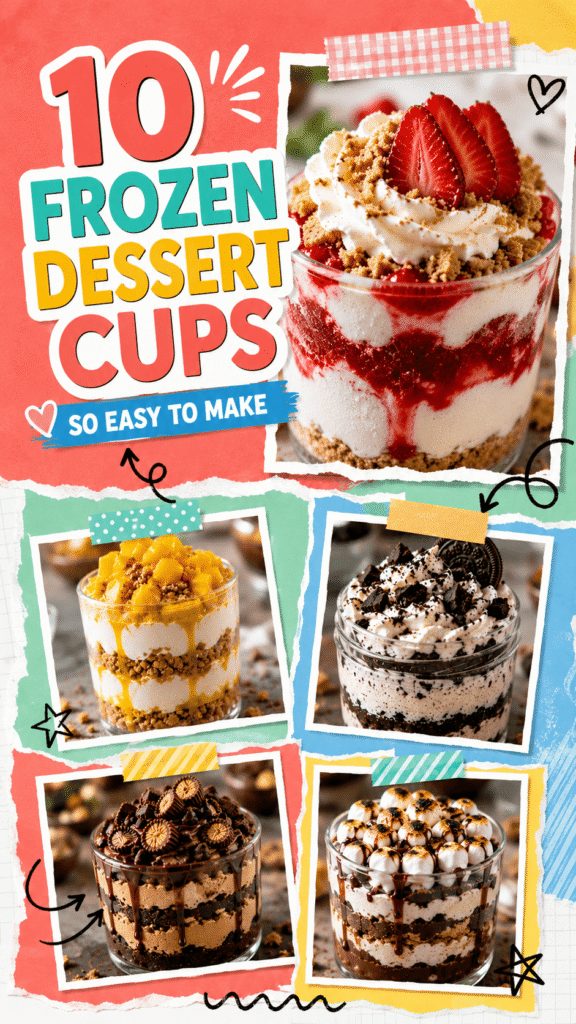
Frozen dessert cups are one of the easiest ways to make a fun and delicious treat without spending hours in the kitchen.
They’re creamy, refreshing, and perfect for warm days when you want something sweet and simple.
These easy desserts are great for summer parties, birthdays, family gatherings, or even a quick make-ahead treat for the freezer.
Most recipes use basic ingredients and simple steps so that beginners can make them with confidence.
In this list, you’ll find everything from rich chocolate and Oreo cups to fruity cheesecake and yogurt desserts.
Each recipe is easy to customize, easy to serve, and guaranteed to disappear quickly once it hits the table.
Why You’ll Love Frozen Dessert Cups
- Easy to make ahead for parties, holidays, and busy days
- No complicated baking or special equipment needed
- Perfect individual-sized desserts for easy serving
- Endless flavor combinations to match any craving
- Fun and simple treats that both kids and adults will enjoy
- Great for hot summer days when you want a cool dessert fast
- Easy to customize with your favorite toppings and mix-ins
Tips for Making the Best Frozen Dessert Cups
Frozen dessert cups are simple to make, but a few small tips can make a big difference in the final result.
The right texture, freezing time, and toppings can turn an easy dessert into something that looks and tastes extra special.
Use Sturdy Dessert Cups or Jars
Choosing the right container helps your dessert cups hold their shape and makes serving much easier.
Small glass jars, plastic dessert cups, or sturdy paper cups all work well.
Thin or flimsy containers can crack in the freezer or become difficult to hold once filled.
Clear cups are especially great because they show off all the delicious layers inside.
This makes the desserts look more colorful and appealing without any extra effort.
If you’re serving these at parties or birthdays, individual cups also make cleanup quicker and easier.
Try to leave a little space at the top of each cup for toppings.
It helps prevent spills and gives you room to add whipped cream, fruit, chocolate drizzle, or cookie crumbs before serving.
Let Desserts Soften Slightly Before Serving
Frozen desserts taste much creamier when they sit at room temperature for a few minutes before eating.
Straight from the freezer, some desserts can be very firm and harder to scoop with a spoon.
A quick 5 to 10 minutes on the counter is usually enough.
This small step helps the flavors stand out more and gives the dessert a softer, smoother texture.
If you’re serving dessert cups at a party, take them out of the freezer shortly before guests arrive.
They’ll be easier to enjoy and won’t feel overly icy.
Layer Textures for Better Flavor
One of the best parts of frozen dessert cups is the mix of textures in every bite.
Combining creamy layers with crunchy ingredients keeps the dessert interesting and flavorful.
Try pairing smooth fillings with crushed cookies, brownie pieces, graham crackers, toasted nuts, or chocolate chips.
Fruit layers also add freshness and balance to richer ingredients like chocolate or cheesecake filling.
Even simple recipes feel more special with a few different textures layered together. Don’t worry about making perfect layers either.
A rustic homemade look still tastes amazing.
Freeze for Enough Time to Fully Set
Giving your dessert cups enough time to freeze properly helps them hold their shape and keeps the texture creamy instead of messy.
Most frozen dessert cups need at least 3 to 4 hours in the freezer, though overnight is even better for firmer results.
Cover the cups lightly with lids, foil, or plastic wrap to help prevent ice crystals from forming on top.
This keeps the desserts tasting fresh and smooth.
If you’re making multiple flavors, labeling the cups can also help keep everything organized in the freezer.
Add Toppings Right Before Serving
Toppings always look and taste best when added just before serving.
This keeps crunchy ingredients crisp and prevents whipped cream or fruit from becoming watery during freezing.
Simple toppings can make dessert cups feel bakery-worthy in seconds.
Fresh berries, crushed cookies, caramel drizzle, mini chocolate chips, or colorful sprinkles all work beautifully.
You don’t need a lot to make them look impressive.
Sometimes, a small spoonful of whipped cream and a sprinkle of cookie crumbs is all it takes to finish the dessert perfectly.
1. Oreo Ice Cream Dessert Cups
These Oreo ice cream dessert cups are rich, creamy, and incredibly easy to make.
Every spoonful has layers of crushed cookies, fluffy whipped topping, and smooth cookies-and-cream filling.
They’re perfect for parties, summer gatherings, or quick make-ahead desserts.
Ingredients
- 20 Oreo cookies, crushed
- 2 cups vanilla ice cream, slightly softened
- 1 cup whipped topping
- 4 oz cream cheese, softened
- 2 tablespoons powdered sugar
- 1 teaspoon vanilla extract
- Extra crushed Oreos for topping
Instructions
- In a mixing bowl, beat the softened cream cheese, powdered sugar, and vanilla until smooth.
- Fold in the whipped topping gently until creamy and combined.
- Stir in half of the crushed Oreo cookies.
- Add the softened vanilla ice cream and mix until smooth.
- Spoon a layer of crushed Oreos into the bottom of each dessert cup.
- Add a layer of the creamy Oreo mixture. Repeat the layers until the cups are full.
- Freeze for at least 4 hours or until firm.
- Before serving, top with extra crushed Oreos or whipped cream.
Optional Topping Ideas
- Chocolate syrup
- Mini chocolate chips
- Whipped cream swirls
- Oreo halves
- Chocolate cookie crumbs
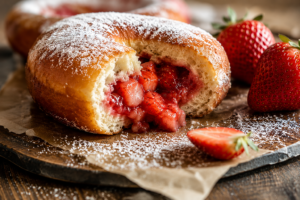
2. Strawberry Cheesecake Frozen Cups
These strawberry cheesecake frozen cups are cool, creamy, and packed with fresh strawberry flavor.
The graham cracker crumbs add a classic cheesecake texture while the frozen filling stays smooth and refreshing.
Ingredients
- 1 ½ cups fresh strawberries, diced
- 8 oz cream cheese, softened
- 1 cup whipped topping
- ¼ cup powdered sugar
- 1 teaspoon vanilla extract
- 1 cup graham cracker crumbs
- 2 tablespoons melted butter
Instructions
- Mix the graham cracker crumbs with melted butter in a small bowl.
- Spoon a little of the crumb mixture into the bottom of each dessert cup.
- In a separate bowl, beat the cream cheese, powdered sugar, and vanilla until smooth.
- Fold in the whipped topping until light and creamy.
- Gently stir in the diced strawberries.
- Spoon the cheesecake mixture over the graham cracker layer.
- Add another sprinkle of crumbs on top if desired.
- Freeze for 3 to 4 hours until set.
- Let the cups sit for a few minutes before serving for the best texture.
Storage Tips
- Store covered in the freezer for up to 1 week.
- Keep toppings separate until serving.
- Use airtight containers to help prevent freezer ice crystals.
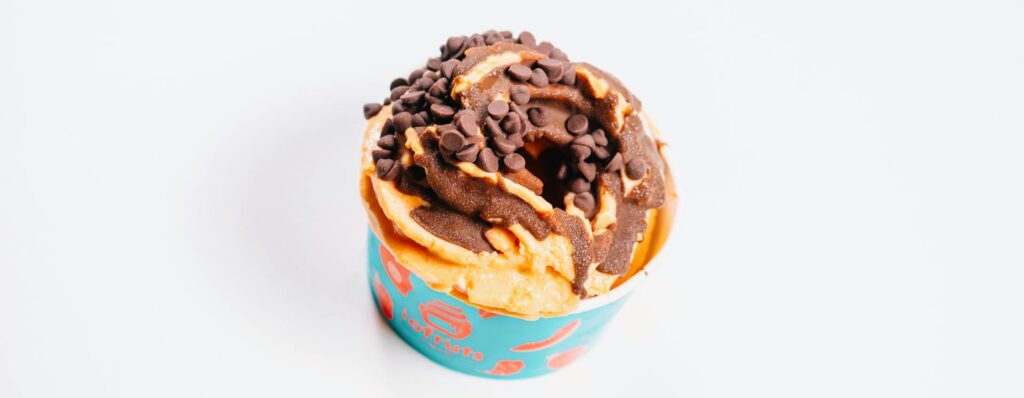
3. Chocolate Peanut Butter Frozen Dessert Cups
If you love chocolate and peanut butter together, these frozen dessert cups are hard to resist.
They’re creamy, rich, and layered with bold flavor in every bite.
Ingredients
- 1 cup chocolate pudding
- ½ cup creamy peanut butter
- 1 cup whipped topping
- 1 cup crushed chocolate cookies
- 1 cup vanilla ice cream, softened
- 2 tablespoons chocolate chips
Instructions
- In a bowl, mix the peanut butter with the softened vanilla ice cream until smooth.
- Fold in half of the whipped topping.
- Spoon crushed chocolate cookies into the bottom of each dessert cup.
- Add a layer of the peanut butter mixture.
- Spoon chocolate pudding over the top.
- Repeat the layers if your cups are deep enough.
- Sprinkle chocolate chips over the top.
- Freeze for at least 4 hours before serving.
Variations
- Use brownie crumbs instead of cookies.
- Add chopped peanut butter cups between layers.
- Swap vanilla ice cream for chocolate ice cream for an even richer dessert.
- Drizzle caramel sauce on top before serving.
4. Mango Yogurt Frozen Cups
These mango yogurt frozen cups are light, fruity, and refreshing.
They’re a great option when you want something sweet that still feels fresh and simple.
Ingredients
- 2 cups diced mango
- 1 ½ cups vanilla Greek yogurt
- 2 tablespoons honey
- ½ teaspoon vanilla extract
- ½ cup granola
- Fresh mango pieces for topping
Instructions
- Blend the diced mango until mostly smooth. Leave a few small chunks for texture if desired.
- In a bowl, combine the yogurt, honey, and vanilla extract.
- Spoon a little granola into the bottom of each dessert cup.
- Add a layer of yogurt mixture followed by mango puree.
- Repeat the layers until the cups are filled.
- Freeze for 2 to 3 hours for a soft frozen texture.
- Top with fresh mango pieces before serving.
Healthy Swaps
- Use low-fat Greek yogurt for a lighter version.
- Replace honey with maple syrup if preferred.
- Add chia seeds for extra texture and nutrition.
- Use homemade granola to control sweetness.
5. Mini Frozen S’mores Cups
These mini frozen s’mores cups combine everything people love about classic s’mores in a cool and creamy frozen dessert.
They’re fun, easy, and perfect for summer parties.
Ingredients
- 1 cup graham cracker crumbs
- 3 tablespoons melted butter
- 1 cup chocolate pudding
- 1 cup whipped topping
- 1 cup mini marshmallows
- ½ cup mini chocolate chips
Instructions
- Combine the graham cracker crumbs and melted butter in a bowl.
- Press a spoonful into the bottom of each mini dessert cup.
- Add a layer of chocolate pudding.
- Fold half of the mini marshmallows into the whipped topping.
- Spoon the whipped topping mixture over the pudding layer.
- Sprinkle mini chocolate chips on top.
- Freeze for 3 to 4 hours until firm.
- Let the cups soften slightly before serving.
Serving Suggestions
- Top with toasted marshmallows right before serving.
- Drizzle melted chocolate over the cups for extra richness.
- Serve with graham cracker sticks for dipping.
- Add crushed chocolate sandwich cookies for extra crunch.
Best Toppings for Frozen Dessert Cups
The right topping can make frozen dessert cups even more fun and flavorful.
Mixing creamy, crunchy, fruity, and sweet toppings adds extra texture and makes every dessert feel a little more special.
- Crushed cookies for extra crunch and flavor
- Chocolate drizzle for a rich finishing touch
- Fresh fruit like strawberries, blueberries, or mango pieces
- Colorful sprinkles for a fun party-style look
- Whipped cream to add a light and creamy topping
- Caramel sauce for extra sweetness and a smooth texture
- Chopped nuts for crunch and balance
- Mini chocolate chips for added chocolate flavor
- Crushed candy bars for a more indulgent dessert
- Toasted coconut flakes for a tropical twist
How to Store Frozen Dessert Cups
Proper storage helps frozen dessert cups stay creamy, fresh, and delicious for longer.
The good news is that most frozen dessert cups store very well, which makes them one of the easiest make-ahead treats to keep in the freezer.
How Long They Last in the Freezer
Most frozen dessert cups stay fresh for about 1 to 2 weeks when stored properly.
Desserts made with whipped topping, pudding, cream cheese, yogurt, or ice cream usually keep their best texture during this time.
While they may still be safe to eat after that, the texture can slowly become icy or less creamy.
Fresh fruit toppings can also lose their texture the longer they sit in the freezer.
For the best flavor, try to enjoy the dessert cups within the first week.
This is when they usually taste the freshest and creamiest.
If you’re making several batches ahead of time, adding a small label with the date can help you keep track of freshness without any guesswork.
Best Containers to Use
The right container helps protect the desserts and keeps them easy to serve.
Small glass jars, plastic dessert cups with lids, or freezer-safe containers all work well.
Containers with tight-fitting lids are especially helpful because they keep extra air out.
Less air means a smoother texture and better flavor after freezing.
If your dessert cups don’t have lids, you can cover them tightly with plastic wrap or foil.
Make sure the covering sits close to the surface of the dessert without pressing down too hard on toppings.
Clear containers are also a nice choice because the colorful layers stay visible and look beautiful straight from the freezer.
Tips to Prevent Freezer Burn
Freezer burn happens when air reaches the surface of frozen food, which can create icy spots and change the texture.
Thankfully, it’s easy to avoid with a few simple habits.
Try to keep dessert cups covered tightly at all times.
Even a small gap can let in extra air over time.
Storing the cups toward the back of the freezer also helps because the temperature stays more consistent there.
Avoid opening and closing the freezer too often right after placing the desserts inside.
Sudden temperature changes can sometimes create ice crystals on creamy desserts.
For the best results:
- Freeze dessert cups in a single layer until firm
- Keep lids or wrapping tightly sealed
- Add crunchy toppings only before serving
- Avoid storing near foods with strong odors
A little care during storage helps the desserts stay smooth, creamy, and ready whenever you want a quick frozen treat.
Fun Variations to Try
Frozen dessert cups are easy to customize, which makes them even more fun to make.
You can switch flavors, mix in new ingredients, or create seasonal versions with simple changes.
- Tropical fruit cups with mango, pineapple, coconut, and passion fruit
- Coffee-flavored frozen cups made with espresso, mocha pudding, or crushed coffee cookies
- Mint chocolate versions with mint ice cream, chocolate chips, and crushed sandwich cookies
- Birthday cake dessert cups with vanilla cake pieces, sprinkles, and funfetti flavor
- Dairy-free alternatives using coconut cream, almond milk yogurt, or plant-based whipped topping
- Peanut butter banana cups for a creamy and naturally sweet combination
- Lemon cheesecake cups for a bright and refreshing citrus flavor
- Salted caramel frozen cups with caramel sauce and crushed pretzels
- Berry yogurt cups packed with strawberries, blueberries, or raspberries
- Cookies and brownie combinations for extra-rich and chocolatey desserts
What to Serve With Frozen Dessert Cups
Frozen dessert cups pair perfectly with simple drinks and light snacks.
Adding a few extra treats can turn an easy dessert into a fun party spread or summer dessert table.
- Iced coffee for a smooth and refreshing drink pairing
- Creamy milkshakes for an extra fun dessert night
- Fresh fruit platters with berries, watermelon, pineapple, or grapes
- Summer party snacks like popcorn, pretzels, or snack mixes
- Lemonade or fruit punch for bright and refreshing flavors
- Chocolate-covered strawberries for an easy dessert pairing
- Mini cookies or brownies for guests who love extra sweets
- Frozen smoothies for a cool and fruity option
- Waffle cones or waffle chips for extra crunch alongside creamy desserts
- Light tea or cold brew coffee for a balanced finish to richer dessert cups
Final Thoughts
Frozen dessert cups are one of the easiest ways to make a fun, creamy, and refreshing treat at home.
They’re simple to prepare, easy to customize, and perfect for everything from summer parties to quick family desserts.
Don’t be afraid to mix flavors, try new toppings, or create your own favorite combination.
A few simple ingredients can turn into something everyone gets excited about.
If you try any of these frozen dessert cups, share your favorite flavor combination or topping idea.
There’s always room for another delicious dessert cup creation.
FAQs
Can frozen dessert cups be made ahead of time?
Yes, they are perfect for making ahead and storing in the freezer.
How long should frozen dessert cups freeze?
Most recipes need at least 3–4 hours to fully set.
Can I use store-bought whipped topping?
Yes, whipped topping works great for quick and easy preparation.
Are frozen dessert cups served fully frozen?
They are best served slightly softened for a creamier texture.
Can I make these desserts without dairy?
Yes, you can use dairy-free yogurt, coconut cream, or plant-based whipped topping.


Hi, I’m Sorenna Blythe, the baker and writer behind Mix Whisk Bake. I share simple, reliable recipes and honest kitchen moments to help home bakers bake with confidence and joy. When I’m not testing new treats, you’ll find me sipping coffee and dreaming up my next bake.