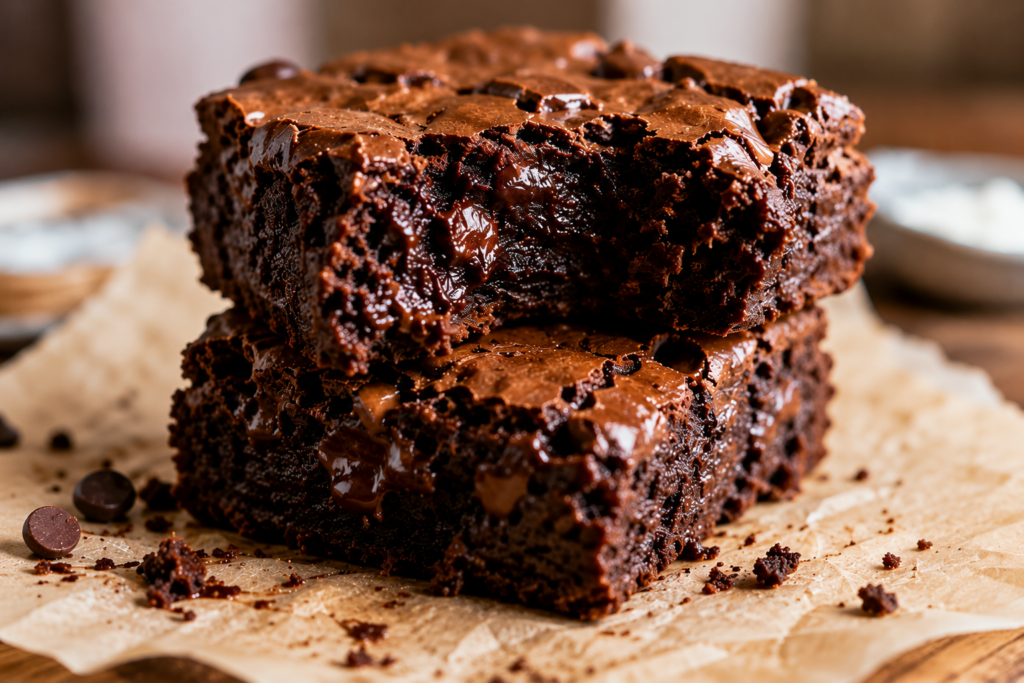
If you love rich, fudgy brownies but want a lighter twist, this Greek yogurt brownie recipe is one you’ll want to keep.
Greek yogurt adds extra moisture and a little protein while helping create a soft, chocolatey texture without relying on lots of butter or oil.
These brownies are easy to make with simple ingredients and taste just as satisfying as a classic batch.
They’re perfect for dessert, an afternoon snack, lunchboxes, or making ahead for the week.
In this recipe, you’ll learn exactly what ingredients to use, how to make perfectly fudgy brownies, and a few simple tips to help them turn out delicious every time.
Why You’ll Love This Greek Yogurt Brownies Recipe
- Extra moist and fudgy texture: Greek yogurt keeps every bite soft, rich, and perfectly chocolatey.
- Higher in protein than traditional brownies: Greek yogurt adds a protein boost while keeping the brownies delicious.
- Easy to make with simple pantry ingredients: You’ll only need a handful of everyday baking staples.
- Uses less butter or oil: Greek yogurt replaces some of the fat without sacrificing flavor or texture.
- Great for beginner bakers: The simple steps make this recipe easy and reliable, even if you’re new to baking.
- Freezer-friendly: Bake a batch now and freeze leftovers for an easy homemade treat later.
- Easy to customize with mix-ins: Add chocolate chips, nuts, peanut butter, or your favorite toppings to make them your own.
What Are Greek Yogurt Brownies?
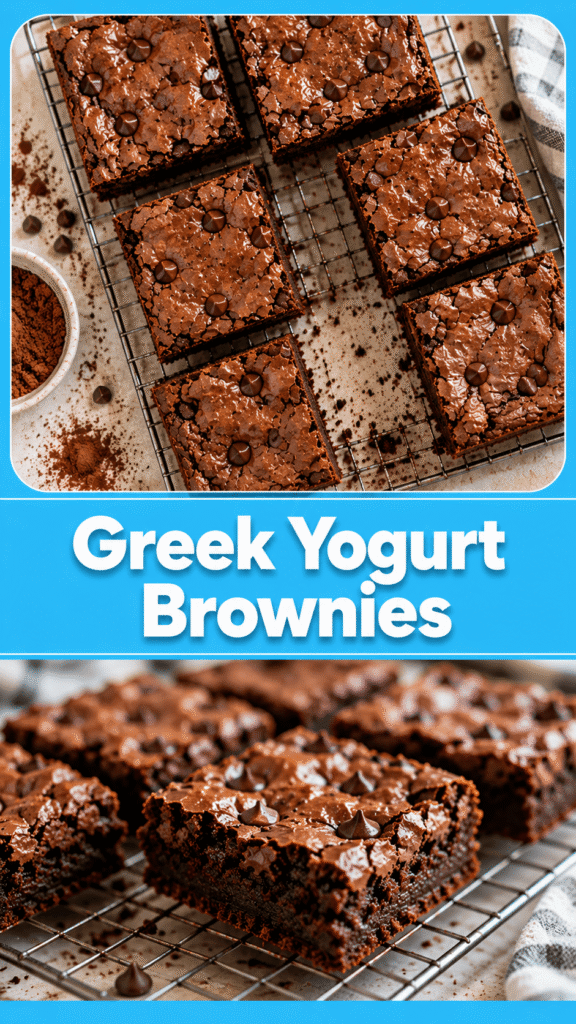
Greek yogurt brownies are classic chocolate brownies made with Greek yogurt as one of the main ingredients.
Instead of relying on large amounts of butter or oil, Greek yogurt adds moisture and richness while keeping the brownies soft and satisfying.
The result is a brownie with a tender crumb, a fudgy center, and plenty of chocolate flavor in every bite.
They’re a great choice if you want a homemade dessert that feels a little lighter without giving up the texture you love.
How Greek Yogurt Changes Brownie Texture
Greek yogurt is thick and creamy, which helps create a moist brownie that stays fresh for longer.
It adds moisture directly to the batter, so the brownies bake up soft instead of dry.
Because Greek yogurt contains less water than regular yogurt, it blends into the batter without making it runny.
Its slight tang also balances the sweetness and makes the chocolate flavor stand out even more.
For the best texture, use plain Greek yogurt rather than flavored varieties, since added sugars and flavors can change the final result.
If you enjoy extra fudgy brownies, avoid overbaking them and let them cool completely before slicing.
Benefits of Baking with Greek Yogurt
Greek yogurt is an easy ingredient that works well in many baked goods because it adds both moisture and structure.
It lets you reduce some of the butter or oil while still creating rich, delicious brownies.
Since Greek yogurt is naturally higher in protein than many other dairy ingredients, it gives the brownies a small nutritional boost.
It also helps create a soft texture that stays enjoyable for several days when stored properly.
Another advantage is that plain Greek yogurt is easy to find at most grocery stores, making this recipe convenient to bake whenever the craving strikes.
If you already keep Greek yogurt in your refrigerator, chances are you have everything you need to get started.
Are They Healthier Than Traditional Brownies?
Greek yogurt brownies can be a lighter option than traditional brownies because they often use less butter or oil.
They also provide a little more protein thanks to the Greek yogurt.
That said, they’re still a dessert, and they still contain ingredients like sugar and chocolate that give brownies their classic taste.
Think of them as a balanced treat rather than a health food.
If you’d like to make them even lighter, you can use dark chocolate, reduce the amount of chocolate chips, or serve smaller squares alongside fresh fruit.
Ingredients You’ll Need
Dry Ingredients
- 1 cup all-purpose flour: Gives the brownies structure while keeping them soft.
- ½ cup unsweetened cocoa powder: Adds deep, rich chocolate flavor.
- 1 teaspoon baking powder: Helps the brownies rise slightly without becoming cakey.
- ¼ teaspoon salt: Balances the sweetness and enhances the chocolate.
Wet Ingredients
- ¾ cup plain Greek yogurt: Adds moisture, richness, and a boost of protein.
- 2 large eggs: Bind the ingredients together and create a tender texture.
- ½ cup granulated sugar: Sweetens the brownies and helps create a shiny top.
- ½ cup packed light brown sugar: Adds moisture and a subtle caramel flavor.
- 1 teaspoon vanilla extract: Enhances the chocolate flavor.
- ¼ cup melted unsalted butter (or neutral oil): Adds richness and helps create a fudgy texture.
Optional Mix-Ins
- ½ cup semi-sweet chocolate chips: For extra pockets of melted chocolate.
- ½ cup chopped walnuts: Add a crunchy texture and nutty flavor.
- ½ cup chopped pecans: A buttery alternative to walnuts.
- 1 teaspoon espresso powder: Deepens the chocolate flavor without making the brownies taste like coffee.
- 1 teaspoon flaky sea salt: Sprinkle on top before or after baking for a sweet-and-salty finish.
Kitchen Equipment
- Mixing bowls: Use one for the dry ingredients and another for the wet ingredients before combining them.
- Whisk: Helps mix the batter smoothly and evenly.
- Rubber spatula: Perfect for folding the batter together and scraping every bit from the bowl.
- Measuring cups and spoons: Ensure accurate measurements for consistent results.
- 8×8-inch baking pan: Creates thick, fudgy brownies with even baking.
- Parchment paper: Makes it easy to lift the brownies out of the pan and simplifies cleanup.
- Wire cooling rack: Allows the brownies to cool evenly, helping them set before slicing.
How to Make Greek Yogurt Brownies
Step 1 – Prepare the Baking Pan
Preheat your oven to 350°F (175°C) so it’s fully heated before the batter goes in.
Line an 8×8-inch baking pan with parchment paper, leaving a little overhang on the sides to make lifting the brownies out easier.
If you don’t have parchment paper, lightly grease the pan with butter or cooking spray to prevent sticking.
Set the prepared pan aside while you make the batter.
Step 2 – Mix the Dry Ingredients
In a large mixing bowl, add the all-purpose flour, cocoa powder, baking powder, and salt.
Whisk everything together until the cocoa powder is evenly distributed and there are no visible lumps.
This quick step helps the brownies bake evenly and prevents pockets of dry ingredients in the finished batter.
Step 3 – Combine the Wet Ingredients
In a separate bowl, whisk together the Greek yogurt, eggs, granulated sugar, brown sugar, vanilla extract, and melted butter until smooth.
Continue mixing until the sugars are mostly dissolved and the mixture looks creamy.
If your melted butter is still very hot, let it cool for a minute before adding it so the eggs don’t begin to cook.
Step 4 – Fold Everything Together
Pour the wet mixture into the bowl of dry ingredients.
Use a rubber spatula to gently fold the ingredients together until you no longer see streaks of flour.
Avoid overmixing the batter, as this can make the brownies firmer instead of soft and fudgy.
A few small lumps are perfectly fine and won’t affect the finished brownies.
Step 5 – Add Chocolate Chips (Optional)
If you’re using chocolate chips, gently fold them into the batter until they’re evenly spread throughout.
You can also sprinkle a few extra chocolate chips over the top before baking for an even richer finish.
If you’re adding chopped nuts, this is the perfect time to stir them in as well.
Step 6 – Bake Until Just Set
Spread the batter evenly into the prepared baking pan using your spatula.
Bake for 25 to 30 minutes, or until the edges are set and a toothpick inserted near the center comes out with a few moist crumbs.
If the toothpick comes out with wet batter, bake for another 2 to 3 minutes and test again.
Be careful not to overbake, as the brownies will continue to firm up while they cool.
Step 7 – Cool Completely Before Slicing
Place the baking pan on a wire cooling rack and allow the brownies to cool completely.
This waiting time helps the brownies finish setting and makes them much easier to cut into clean squares.
Once cooled, lift the brownies out using the parchment paper and place them on a cutting board.
Use a sharp knife to slice them into even squares, wiping the blade clean between cuts for the neatest results.
Now they’re ready to enjoy right away or store for later if you can resist eating them all at once.
Tips for Perfect Greek Yogurt Brownies
Don’t Overmix the Batter
Once you combine the wet and dry ingredients, stir only until everything is incorporated.
Overmixing develops the gluten in the flour, which can make the brownies firmer and more cake-like.
Use a rubber spatula and fold the batter gently instead of beating it vigorously.
If you see a few small lumps, don’t worry because they’ll disappear as the brownies bake.
Measure Flour Correctly
Too much flour is one of the most common reasons brownies turn out dry.
For the most accurate results, spoon the flour into your measuring cup and level it off with a knife.
Avoid scooping the measuring cup directly into the flour bag, as this packs in extra flour without you realizing it.
A properly measured cup of flour helps create brownies with a soft, tender crumb.
Use Full-Fat Greek Yogurt
Full-fat plain Greek yogurt gives the brownies the richest flavor and the fudgiest texture.
Its thick consistency adds moisture without making the batter too thin.
If you only have low-fat Greek yogurt, the recipe will still work, but the brownies may be slightly less rich.
Choose plain Greek yogurt instead of flavored varieties to keep the chocolate flavor balanced.
Avoid Overbaking
Keep a close eye on the brownies during the last few minutes of baking.
They are ready when the edges are set, and a toothpick inserted near the center comes out with a few moist crumbs attached.
If the toothpick comes out completely clean, the brownies may already be slightly overbaked.
Remember that the brownies continue to cook a little from the leftover heat after they come out of the oven.
Let Brownies Cool Before Cutting
It can be tempting to slice into warm brownies, but giving them time to cool is worth the wait.
As they cool, the center becomes firmer, and the chocolate flavor has time to develop.
Cooling also makes it much easier to cut neat squares without the brownies falling apart.
For extra clean slices, chill the cooled brownies in the refrigerator for 20 to 30 minutes before cutting, and wipe the knife clean after each slice.
Easy Variations
Double Chocolate Greek Yogurt Brownies
If you can’t get enough chocolate, this version is for you.
Fold ½ to 1 cup of semi-sweet or dark chocolate chips into the batter before baking.
For even more chocolate flavor, sprinkle a handful of extra chocolate chips over the top just before the pan goes into the oven.
Every bite will have pockets of melted chocolate that make these brownies even richer.
Protein Greek Yogurt Brownies
For an extra protein boost, replace about ¼ cup of the flour with your favorite chocolate or vanilla protein powder.
Choose a protein powder that bakes well, as some absorb more moisture than others.
If the batter seems too thick after mixing, stir in 1 to 2 tablespoons of milk until it reaches a smooth, spreadable consistency.
Gluten-Free Version
It’s easy to make these brownies gluten-free with one simple swap.
Replace the all-purpose flour with an equal amount of a good-quality gluten-free 1-to-1 baking flour blend.
Choose a blend that already contains ingredients like xanthan gum, which helps create a texture similar to traditional brownies.
The finished brownies will still be soft, fudgy, and full of chocolate flavor.
Whole Wheat Brownies
For a heartier twist, replace the all-purpose flour with whole wheat flour.
Whole wheat flour has a slightly nutty flavor that pairs surprisingly well with chocolate.
The brownies may be a little denser, but they’ll still be moist thanks to the Greek yogurt.
If you prefer a lighter texture, use half whole wheat flour and half all-purpose flour.
Peanut Butter Swirl Brownies
Chocolate and peanut butter are always a delicious combination.
Warm about ¼ cup of creamy peanut butter until it’s easy to drizzle.
Drop small spoonfuls over the brownie batter and gently swirl them with a butter knife before baking.
The peanut butter creates beautiful ribbons throughout the brownies while adding extra richness.
Oreo Greek Yogurt Brownies
For a fun cookies-and-cream twist, gently fold about 8 roughly chopped Oreo cookies into the batter.
Save a few extra cookie pieces to sprinkle over the top before baking for a bakery-style look.
The cookies soften slightly in the oven while keeping a little crunch, adding another layer of texture to every bite.
This variation is always a crowd-pleaser for birthdays, parties, or whenever you’re craving an extra-indulgent treat.
What to Serve with Greek Yogurt Brownies
- Vanilla ice cream: The creamy, cold ice cream perfectly complements the warm, fudgy brownies.
- Fresh berries: Strawberries, raspberries, or blueberries add a fresh, slightly tart contrast to the rich chocolate.
- Whipped cream: A light dollop of whipped cream makes each brownie feel extra special without being too heavy.
- Chocolate sauce: Drizzle warm chocolate sauce over the brownies for an even richer chocolate dessert.
- Coffee or espresso: A hot cup of coffee or espresso balances the sweetness and enhances the chocolate flavor.
- Cold milk: A classic pairing that makes every bite even more satisfying and is loved by both kids and adults.
How to Store Greek Yogurt Brownies
Room Temperature Storage
Once the brownies have cooled completely, place them in an airtight container.
Store them at room temperature for up to 3 days.
If you’re stacking the brownies, place a sheet of parchment paper between the layers to prevent them from sticking together.
Keep the container in a cool, dry place away from direct sunlight or heat.
Refrigeration
If you’d like your brownies to stay fresh a little longer, store them in the refrigerator.
Place them in an airtight container and refrigerate for up to 1 week.
The brownies will become firmer when chilled, but they’ll still be rich and fudgy.
Let them sit at room temperature for 10 to 15 minutes before serving if you prefer a softer texture.
Freezing Instructions
Greek yogurt brownies freeze beautifully, making them a great make-ahead dessert.
Wrap each brownie individually in plastic wrap or parchment paper.
Place the wrapped brownies in a freezer-safe bag or airtight container.
Freeze for up to 3 months.
When you’re ready to enjoy one, thaw it overnight in the refrigerator or leave it at room temperature for about an hour.
Best Way to Reheat
If you enjoy warm brownies, reheating them takes just a few seconds.
Place a brownie on a microwave-safe plate and heat it for 10 to 15 seconds.
Warm brownies pair perfectly with a scoop of vanilla ice cream or a drizzle of chocolate sauce.
Avoid overheating, as this can dry out the brownie instead of making it soft and fudgy.
Common Mistakes to Avoid
- Using watery yogurt: Choose thick Greek yogurt, as regular or watery yogurt can make the batter too thin.
- Overbaking the brownies: Remove the brownies when a toothpick comes out with a few moist crumbs to keep them fudgy.
- Adding too much flour: Measure the flour carefully to avoid dry, dense brownies.
- Cutting before they cool: Let the brownies cool completely so they set properly and slice into neat squares.
- Skipping parchment paper: Line the baking pan with parchment paper to prevent sticking and make lifting the brownies out much easier.
Final Thoughts
Greek yogurt brownies are an easy way to enjoy a rich, fudgy dessert with a lighter twist, making them perfect for any day of the week.
Don’t be afraid to get creative by adding chocolate chips, nuts, peanut butter, or your favorite toppings to make the recipe your own.
FAQs
Can I use non-fat Greek yogurt?
Yes. The brownies will still turn out well, but full-fat Greek yogurt creates a richer, fudgier texture.
Can I substitute regular yogurt?
Yes, but Greek yogurt is thicker and gives better texture. If using regular yogurt, choose plain yogurt and reduce it slightly if it seems too thin.
Can I make these brownies without butter?
Yes. Replace the butter with an equal amount of a neutral oil, such as vegetable or canola oil.
How do I make them extra fudgy?
Avoid overbaking, use full-fat Greek yogurt, and add chocolate chips for an even richer texture.
Can I freeze Greek yogurt brownies?
Yes. Wrap the cooled brownies individually and freeze them in an airtight container for up to 3 months.
Why did my brownies turn out cakey?
Overmixing the batter, adding too much flour, or baking them too long can create a cakier texture.
Can I use Dutch-process cocoa powder?
Yes. Dutch-process cocoa powder will give the brownies a smoother, richer chocolate flavor.
How long do homemade brownies stay fresh?
They stay fresh for up to 3 days at room temperature or up to 1 week in the refrigerator when stored in an airtight container.
Greek Yogurt Brownies Recipe (Fudgy, Moist & Easy to Make)
Difficulty: Easy9
Brownies10
minutes25
minutes35
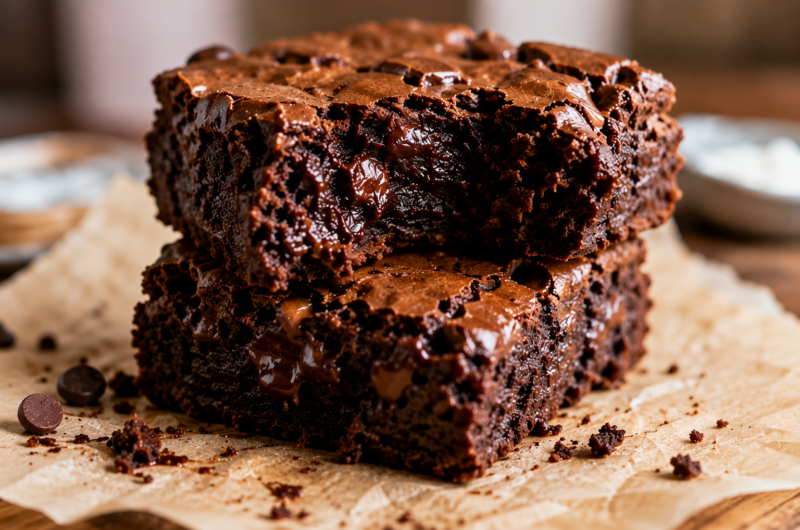
minutesThese Greek yogurt brownies are rich, fudgy, and packed with chocolate flavor. Made with simple ingredients, they’re a lighter twist on classic brownies without sacrificing taste or texture.
Ingredients
1 cup all-purpose flour
½ cup unsweetened cocoa powder
1 tsp baking powder
¼ tsp salt
¾ cup plain Greek yogurt
2 large eggs
½ cup granulated sugar
½ cup packed light brown sugar
1 tsp vanilla extract
¼ cup melted unsalted butter (or neutral oil)
½ cup semi-sweet chocolate chips (optional)
Directions
- Preheat the oven to 350°F (175°C) and line an 8×8-inch baking pan with parchment paper.
- Whisk together the flour, cocoa powder, baking powder, and salt.
- In a separate bowl, whisk the Greek yogurt, eggs, sugars, vanilla, and melted butter until smooth.
- Fold the wet ingredients into the dry ingredients until just combined, then stir in the chocolate chips if using.
- Spread the batter evenly into the prepared pan and bake for 25–30 minutes, or until a toothpick comes out with a few moist crumbs.
- Let the brownies cool completely before slicing and serving.
Notes
- Use full-fat Greek yogurt for the richest, fudgiest texture.
- Do not overmix the batter or overbake the brownies.
- Store leftovers in an airtight container for up to 3 days or freeze for up to 3 months.


Hi, I’m Sorenna Blythe, the baker and writer behind Mix Whisk Bake. I share simple, reliable recipes and honest kitchen moments to help home bakers bake with confidence and joy. When I’m not testing new treats, you’ll find me sipping coffee and dreaming up my next bake.