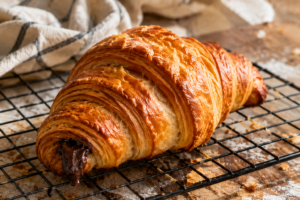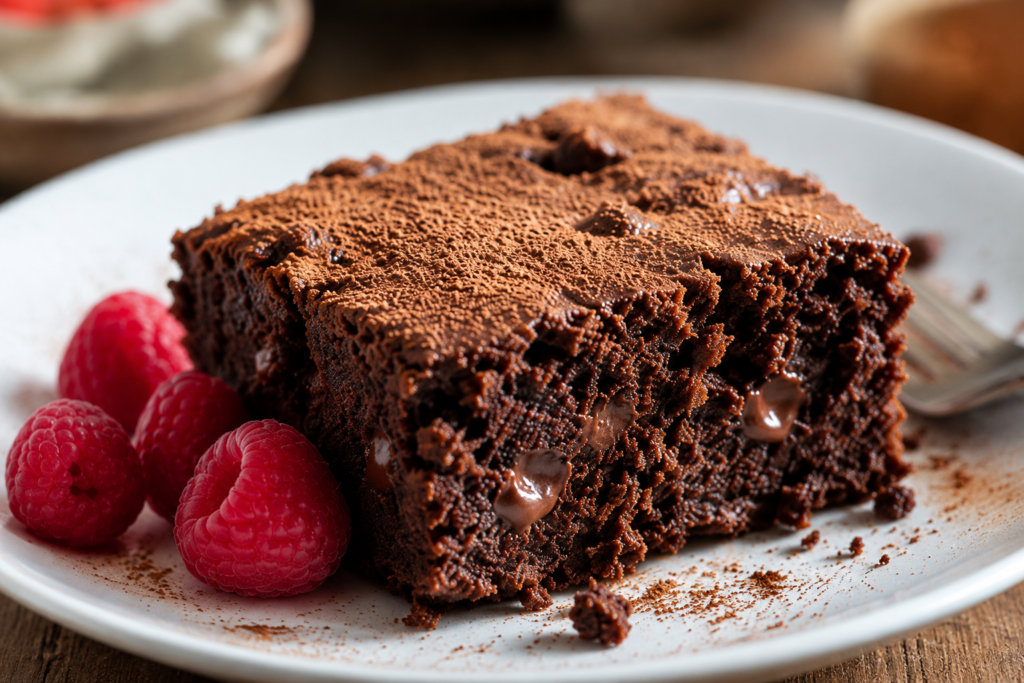
There’s nothing better than enjoying a rich, chocolatey cake that also fits your healthy eating goals.
Healthy chocolate snack cakes have become a favorite because they’re easy to make, satisfying, and perfect for everyday treats without feeling overly indulgent.
This recipe uses simple, wholesome ingredients, less refined sugar, and better-for-you alternatives to create a moist, delicious cake you’ll want to bake again and again.
It’s ideal for meal prep, lunchboxes, an afternoon snack, or a lighter dessert after dinner.
You’ll also find helpful tips, easy ingredient swaps, storage advice, and simple step-by-step instructions to help you bake a soft, flavorful chocolate snack cake with confidence—even if you’re new to baking.
Why You’ll Love This Healthy Chocolate Snack Cake
- Rich Chocolate Flavor Without the Guilt: Enjoy a deep chocolate taste made with wholesome ingredients and less refined sugar.
- Moist and Tender Texture: Greek yogurt and healthy fats help keep every bite soft and delicious.
- Quick and Easy to Make: Mix the batter in just a few minutes using simple pantry staples.
- Naturally Sweetened Options: Use honey, maple syrup, or coconut sugar to suit your preferences.
- Great for Kids and Adults: A tasty treat that’s perfect for the whole family to enjoy.
- Perfect for Meal Prep: Bake once and enjoy slices throughout the week for snacks or dessert.
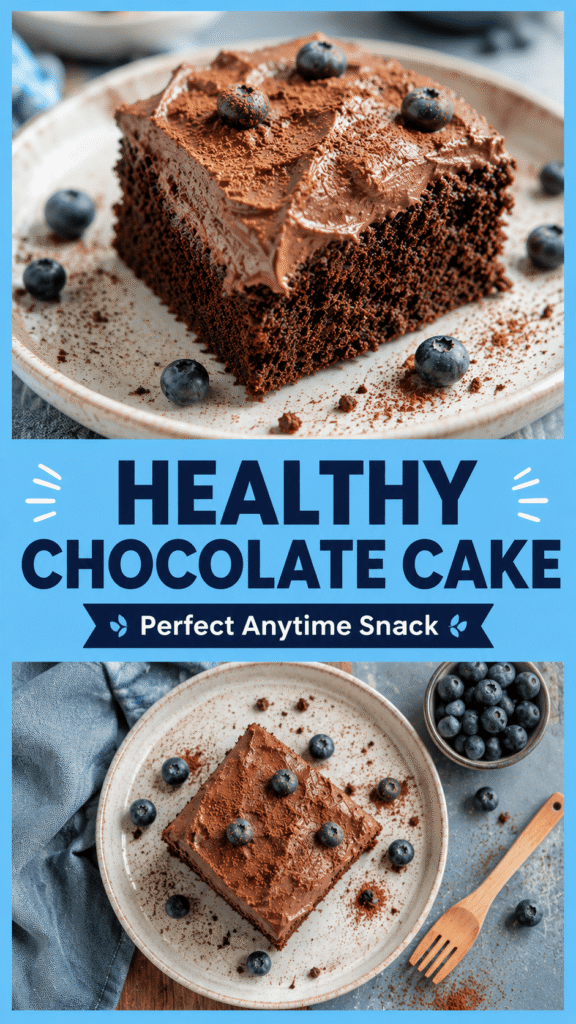
What Makes This Chocolate Snack Cake Healthy?
Uses Less Refined Sugar
- Honey: Adds natural sweetness while helping keep the cake moist.
- Maple Syrup: Provides a rich, natural sweetness with great flavor.
- Coconut Sugar: A less refined sweetener with a light caramel taste.
- Date Sugar: Made from dried dates for natural sweetness and extra fiber.
Better Flour Choices
- Whole Wheat Flour: Adds more fiber and nutrients than all-purpose flour.
- Oat Flour: Creates a soft texture while boosting fiber.
- White Whole Wheat Flour: Offers the benefits of whole grains with a milder flavor.
- Gluten-Free Flour Blend: A simple option for those avoiding gluten.
Healthy Fat Options
- Greek Yogurt: Adds moisture, creaminess, and extra protein with less fat.
- Unsweetened Applesauce: Replaces some of the oil while keeping the cake soft.
- Avocado Oil: A heart-friendly oil with a mild flavor that’s great for baking.
- Olive Oil: Adds healthy fats and keeps the cake moist and tender.
Protein Boost
- Greek Yogurt: Increases the protein content while creating a soft crumb.
- Cottage Cheese: Blends smoothly into the batter for extra protein and moisture.
- Protein Powder (Optional): An easy way to make the cake even more filling.
Ingredients You’ll Need
Dry Ingredients
- 1½ cups whole wheat flour – Provides structure and adds extra fiber.
- ⅓ cup unsweetened cocoa powder – Gives the cake its rich chocolate flavor.
- 1 teaspoon baking powder – Helps the cake rise.
- ½ teaspoon baking soda – Creates a light, tender texture.
- ¼ teaspoon salt – Balances the sweetness and enhances the chocolate.
Wet Ingredients
- 2 large eggs – Bind the ingredients and add richness.
- ½ cup plain Greek yogurt – Keeps the cake moist while adding protein.
- ¼ cup milk – Helps create a smooth, pourable batter.
- ½ cup honey or pure maple syrup – Naturally sweetens the cake.
- 1 teaspoon vanilla extract – Adds warmth and depth of flavor.
- ¼ cup avocado oil or light olive oil – Keeps the cake soft and tender.
Optional Mix-Ins
- ½ cup dark chocolate chips – For extra chocolate in every bite.
- ¼ cup chopped walnuts – Add crunch and healthy fats.
- ¼ cup chopped pecans – Provide a buttery, nutty flavor.
- ¼ cup chopped almonds – Add texture and a boost of protein.
- ¼ cup mini chocolate chips – Perfect for evenly distributed chocolate bursts.
- 1 teaspoon espresso powder – Intensifies the chocolate flavor without making the cake taste like coffee.
Kitchen Equipment
- Large mixing bowl – For combining all of the ingredients.
- Medium mixing bowl – To mix the dry ingredients separately.
- Whisk – Helps create a smooth, lump-free batter.
- Measuring cups and spoons – For accurate ingredient measurements.
- 8×8-inch baking pan – The perfect size for a thick, evenly baked snack cake.
- Parchment paper – Makes it easy to lift the cake out of the pan after baking.
- Cooling rack – Allows the cake to cool evenly before slicing.
How to Make a Healthy Chocolate Snack Cake
Step 1: Prepare the Baking Pan
Preheat your oven to 350°F (175°C) so it reaches the correct temperature before the batter is ready.
Line an 8×8-inch baking pan with parchment paper, leaving a little overhang on two sides to make lifting the cake out easier later.
If you aren’t using parchment paper, lightly grease the pan with a little oil or nonstick cooking spray to prevent sticking.
Set the prepared pan aside while you make the batter.
Step 2: Mix the Dry Ingredients
In a medium mixing bowl, whisk together the whole wheat flour, unsweetened cocoa powder, baking powder, baking soda, and salt.
Whisk for about 30 seconds until everything is evenly combined and there are no lumps of cocoa powder.
Mixing the dry ingredients first helps the baking powder and baking soda spread evenly throughout the batter, giving the cake a uniform rise.
Step 3: Combine the Wet Ingredients
In a large mixing bowl, add the eggs, Greek yogurt, milk, honey or maple syrup, vanilla extract, and avocado oil.
Whisk until the mixture is smooth and creamy with no streaks of yogurt remaining.
Take a moment to scrape down the sides of the bowl if needed so all the ingredients are fully mixed.
Step 4: Make the Batter
Gradually add the dry ingredients to the wet ingredients while gently stirring with a whisk or spatula.
Mix only until you no longer see dry flour.
The batter should look smooth, thick, and easy to spread.
Avoid overmixing, as this can make the finished cake less soft and tender.
Step 5: Fold in Optional Add-Ins
If you’re using chocolate chips, chopped nuts, or espresso powder, gently fold them into the batter with a spatula.
Use slow, careful strokes to keep the batter light.
Spread the batter evenly into the prepared baking pan and smooth the top with the back of a spoon or an offset spatula.
Step 6: Bake Until Set
Place the pan on the center oven rack and bake for 25 to 30 minutes.
The cake is done when the top looks set, and a toothpick inserted into the center comes out with a few moist crumbs but no wet batter.
If you added extra chocolate chips, you may notice a little melted chocolate on the toothpick, which is perfectly normal.
Try not to overbake the cake, as it will continue to cook slightly while it cools.
Step 7: Cool Before Slicing
Remove the cake from the oven and let it cool in the pan for about 10 to 15 minutes.
Use the parchment paper to carefully lift the cake onto a cooling rack.
Allow the cake to cool completely before slicing to help it hold its shape and develop the best texture.
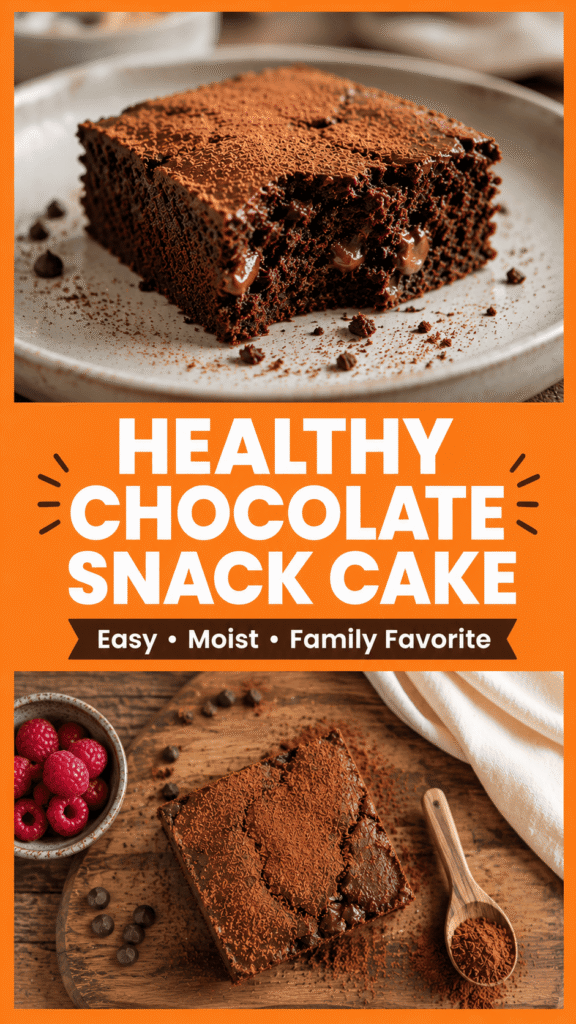
Enjoy it as it is, or add your favorite healthy frosting, a dusting of cocoa powder, or fresh berries for an extra special treat.
Healthy Chocolate Frosting Ideas
Greek Yogurt Chocolate Frosting
This is one of the easiest and healthiest frosting options.
Simply mix 1 cup plain Greek yogurt, 2 tablespoons unsweetened cocoa powder, 2 to 3 tablespoons honey or maple syrup, and 1 teaspoon vanilla extract until smooth.
For a thicker frosting, chill it in the refrigerator for 20 to 30 minutes before spreading it over the cooled cake.
The result is creamy, lightly sweet, and packed with extra protein.
Chocolate Cream Cheese Frosting
For a richer topping, beat 4 ounces softened reduced-fat cream cheese with 2 tablespoons unsweetened cocoa powder, 2 tablespoons honey or maple syrup, and 1 teaspoon vanilla extract until smooth.
If the frosting feels too thick, stir in 1 to 2 teaspoons of milk until it reaches your desired consistency.
This frosting has a smooth texture with a slight tang that pairs beautifully with chocolate cake.
Chocolate Peanut Butter Frosting
Chocolate and peanut butter are always a winning combination.
Mix ¼ cup natural peanut butter, 2 tablespoons cocoa powder, 2 tablespoons honey or maple syrup, 1 teaspoon vanilla extract, and 1 to 2 tablespoons milk until creamy.
Spread it over the cooled cake or drizzle it lightly across each slice for extra flavor.
Chocolate Avocado Frosting
Don’t let the avocado fool you.
When blended, it creates a silky, creamy frosting with a rich chocolate taste.
Blend 1 ripe avocado, ¼ cup cocoa powder, 3 tablespoons maple syrup or honey, 1 teaspoon vanilla extract, and 2 tablespoons milk until completely smooth.
Chill the frosting for about 20 minutes before using it to make it even thicker and easier to spread.
Simple Cocoa Dusting
If you want to keep things quick and light, skip the frosting altogether.
Once the cake has cooled completely, lightly dust the top with unsweetened cocoa powder using a fine mesh sieve.
You can also add a few fresh berries or a spoonful of Greek yogurt when serving for a simple finishing touch that looks beautiful and tastes fresh.
Delicious Variations
- Double Chocolate Snack Cake: Fold in dark chocolate chips for extra rich chocolate flavor.
- Chocolate Banana Snack Cake: Add mashed ripe banana for natural sweetness and a moist texture.
- Chocolate Zucchini Snack Cake: Stir in grated zucchini to make the cake extra soft while adding vegetables.
- Chocolate Peanut Butter Snack Cake: Swirl natural peanut butter into the batter before baking for a classic flavor combination.
- Chocolate Raspberry Snack Cake: Fold in fresh or frozen raspberries for a sweet and tangy twist.
- Mocha Chocolate Snack Cake: Mix in a teaspoon of espresso powder to enhance the chocolate flavor.
- Gluten-Free Version: Replace the whole wheat flour with a 1:1 gluten-free flour blend.
- Dairy-Free Version: Use dairy-free yogurt and your favorite plant-based milk.
- Vegan Version: Replace the eggs with flax eggs and use dairy-free yogurt, milk, and chocolate chips.
Expert Tips for the Best Chocolate Snack Cake
Don’t Overmix the Batter
Once you combine the wet and dry ingredients, stir only until you no longer see streaks of flour.
A few small lumps are perfectly fine and will disappear as the cake bakes.
Overmixing develops the gluten in the flour, which can make the cake dense instead of light and tender.
Using a spatula instead of an electric mixer also makes it easier to avoid overmixing.
Use High-Quality Cocoa Powder
Since chocolate is the star of this recipe, the cocoa powder has a big impact on the final flavor.
Choose a good-quality unsweetened cocoa powder with a rich chocolate taste.
Fresh cocoa powder will give you a deeper flavor than cocoa that has been sitting in the pantry for years.
If you enjoy a darker, bolder chocolate flavor, you can use Dutch-process cocoa powder if your baking powder and baking soda are balanced for it.
Measure Flour Correctly
Too much flour is one of the most common reasons homemade cakes turn out dry.
Fluff the flour with a spoon before measuring, then spoon it into the measuring cup instead of scooping directly from the bag.
Level the top with a straight edge without packing the flour down.
This simple step helps you get a soft, tender crumb every time.
Check for Doneness Early
Start checking the cake a few minutes before the suggested baking time ends.
Every oven bakes a little differently, so your cake may be ready sooner or need an extra minute or two.
Insert a toothpick into the center of the cake.
If it comes out with a few moist crumbs but no wet batter, the cake is ready to come out of the oven.
Taking it out at the right time helps keep every slice moist.
Allow the Cake to Cool Completely
It can be tempting to slice into the cake while it’s still warm, but giving it time to cool is worth the wait.
As the cake cools, it finishes setting and becomes easier to slice without falling apart.
If you plan to add frosting, always wait until the cake is completely cool.
A cool cake keeps the frosting smooth and prevents it from melting, giving you a cleaner, more polished finish.
Common Mistakes to Avoid
- Overbaking: Remove the cake as soon as a toothpick comes out with a few moist crumbs to keep it soft and moist.
- Using Too Much Flour: Measure the flour correctly to avoid a dry, dense cake.
- Skipping the Salt: A small amount of salt enhances the chocolate flavor and balances the sweetness.
- Opening the Oven Too Early: Keep the oven door closed during the first part of baking so the cake can rise properly.
- Adding Too Many Mix-Ins: Use mix-ins in moderation so the cake stays light and bakes evenly.
How to Serve Healthy Chocolate Snack Cake
- Fresh Berries: Add strawberries, raspberries, or blueberries for a fresh, naturally sweet topping.
- Greek Yogurt: A spoonful of Greek yogurt adds creaminess and extra protein.
- Whipped Coconut Cream: A light dairy-free topping that pairs perfectly with chocolate.
- Nut Butter Drizzle: Drizzle warm peanut, almond, or cashew butter over each slice for added richness.
- Vanilla Yogurt: Adds a sweet, creamy contrast to the rich chocolate flavor.
- Fresh Fruit: Serve with sliced bananas, pears, or oranges for a balanced snack or dessert.
- Coffee or Tea: Pair with your favorite hot coffee or tea for a cozy afternoon treat.
How to Store Leftovers
Room Temperature
If the cake is unfrosted or topped with a shelf-stable frosting, you can store it in an airtight container at room temperature for up to 2 days.
Keep the container in a cool, dry place away from direct sunlight and heat.
Placing a piece of parchment paper between stacked slices can help prevent them from sticking together.
Refrigerator
If your cake is frosted with Greek yogurt, cream cheese, or any other dairy-based topping, store it in the refrigerator.
Place the cake in an airtight container or cover it tightly with plastic wrap to prevent it from drying out.
It will stay fresh for up to 5 days.
For the best flavor and texture, let a slice sit at room temperature for 15 to 20 minutes before serving.
Freezer
This cake freezes beautifully, making it a great option for meal prep.
Wrap individual slices tightly in plastic wrap, then place them in a freezer-safe bag or airtight container.
Label the container with the date so you know when it was frozen.
The cake will keep well in the freezer for up to 3 months.
When you’re ready to enjoy a slice, thaw it overnight in the refrigerator or leave it on the counter for about 1 to 2 hours.
Best Reheating Methods
If you like your cake slightly warm, heat a slice in the microwave for 10 to 15 seconds.
Warm only what you plan to eat, as repeated reheating can dry out the cake.
If you’re reheating several slices, place them in a 300°F (150°C) oven for 5 to 8 minutes until just warmed through.
A warm slice served with fresh fruit or a spoonful of Greek yogurt makes a simple and satisfying snack any time of day.
Can You Make It Ahead?
Absolutely! This healthy chocolate snack cake is a great make-ahead recipe because it stays moist and flavorful for several days when stored properly.
You can bake the cake a day or two before you plan to serve it, then keep it covered at room temperature or in the refrigerator, depending on the frosting you choose.
If you’d like to prepare for busy weeks, wrap individual slices tightly and freeze them so you always have a homemade snack or dessert ready to enjoy.
You can also mix the dry ingredients a day or two ahead and store them in an airtight container, then combine them with the wet ingredients when you’re ready to bake for a quicker start.
If you prefer, prepare the batter a few hours in advance and keep it covered in the refrigerator until it’s time to bake, giving it a gentle stir before pouring it into the pan.
For easy meal prep, slice the cooled cake into individual portions and store them in airtight containers so they’re ready to grab for breakfast, lunchboxes, afternoon snacks, or a healthier dessert after dinner.
Having a few slices ready to go makes it much easier to enjoy a homemade treat without reaching for packaged snacks, and it’s a simple way to make healthy choices feel convenient and satisfying.
Healthy Ingredient Substitutions
| Instead Of | Try |
|---|---|
| White flour | Oat flour |
| Butter | Greek yogurt |
| Vegetable oil | Avocado oil |
| White sugar | Maple syrup |
| Sour cream | Greek yogurt |
| Milk chocolate | Dark chocolate |
Nutrition Highlights
- Higher Protein Than Traditional Snack Cake: Greek yogurt and eggs add protein to help make each slice more satisfying.
- Lower in Refined Sugar: Natural sweeteners like honey or maple syrup reduce the need for refined white sugar.
- Good Source of Calcium: Greek yogurt provides calcium, which supports strong bones and teeth.
- Contains Antioxidants from Cocoa Powder: Unsweetened cocoa powder is rich in plant compounds that help protect your cells.
- Can Be Made Higher in Fiber with Whole-Grain Flour: Whole wheat or oat flour adds extra fiber to support healthy digestion and keep you feeling full longer.
Final Thoughts
This healthy chocolate snack cake proves that you don’t have to choose between wholesome ingredients and great flavor.
It’s easy to make, wonderfully moist, and perfect for everything from afternoon snacks to simple desserts.
Have fun making it your own by trying different mix-ins, frostings, or toppings to create a version your family loves. Every batch is a chance to discover a new favorite combination.
FAQs
Is a healthy chocolate snack cake actually healthy?
Yes. It uses wholesome ingredients, less refined sugar, and healthier fats while still delivering rich chocolate flavor.
Can I make this recipe gluten-free?
Yes. Simply replace the whole wheat flour with a 1:1 gluten-free flour blend.
Can I use oat flour?
Yes. Oat flour works well and gives the cake a soft texture with extra fiber.
Can I use almond flour?
Yes, but it’s best to combine it with another flour or use a recipe designed specifically for almond flour.
Can I make it without eggs?
Yes. Replace each egg with a flax egg or your favorite egg substitute.
Can I use protein powder?
Yes. Replace a small portion of the flour with protein powder to boost the protein content without changing the texture too much.
How do I keep the cake moist?
Avoid overbaking, measure the flour correctly, and use ingredients like Greek yogurt or applesauce for extra moisture.
Can I freeze a chocolate snack cake?
Yes. Wrap individual slices tightly and freeze them for up to 3 months.
What’s the best cocoa powder to use?
A high-quality unsweetened cocoa powder provides the richest chocolate flavor.
How long does it stay fresh?
The cake stays fresh for up to 2 days at room temperature, 5 days in the refrigerator, or 3 months in the freezer.
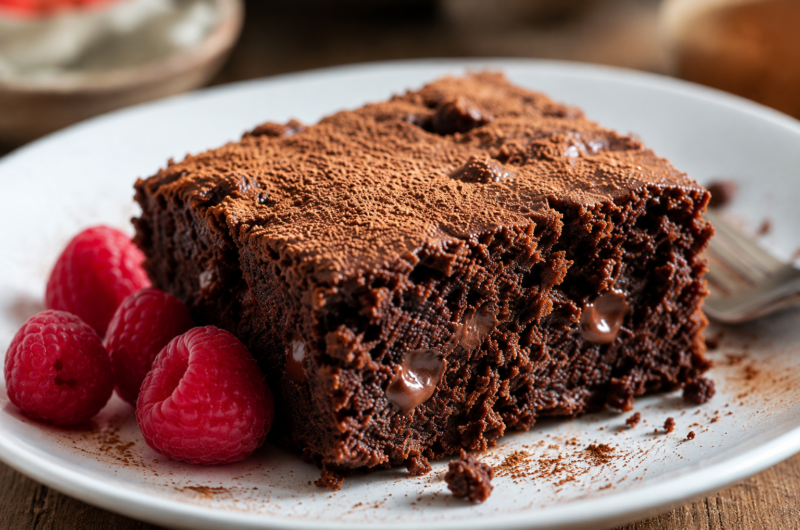
Healthy Chocolate Snack Cake (So Moist, Rich & Easy to Make)
Difficulty: Easy9
Squares10
minutes30
minutes40
minutesA moist, rich, and healthier chocolate snack cake made with wholesome ingredients. Perfect for an afternoon snack, meal prep, or a lighter dessert.
Ingredients
1½ cups whole wheat flour
⅓ cup unsweetened cocoa powder
1 tsp baking powder
½ tsp baking soda
¼ tsp salt
2 large eggs
½ cup plain Greek yogurt
¼ cup milk
½ cup honey or maple syrup
1 tsp vanilla extract
¼ cup avocado oil
½ cup dark chocolate chips (optional)
Directions
- Preheat the oven to 350°F (175°C) and line an 8×8-inch baking pan with parchment paper.
- Whisk together the flour, cocoa powder, baking powder, baking soda, and salt.
- In a separate bowl, whisk the eggs, Greek yogurt, milk, honey, vanilla, and oil until smooth.
- Stir the wet ingredients into the dry ingredients until just combined, then fold in the chocolate chips if using.
- Spread the batter evenly into the prepared pan.
- Bake for 25–30 minutes, or until a toothpick inserted into the center comes out with a few moist crumbs.
- Cool completely before slicing and serving.
Notes
- Don’t overmix the batter to keep the cake soft and tender.
- Store leftovers in an airtight container for up to 5 days in the refrigerator.
- Freeze individual slices for up to 3 months for an easy grab-and-go snack.

Hi, I’m Sorenna Blythe, the baker and writer behind Mix Whisk Bake. I share simple, reliable recipes and honest kitchen moments to help home bakers bake with confidence and joy. When I’m not testing new treats, you’ll find me sipping coffee and dreaming up my next bake.